 24.03.2001
[MAX914]
-- About
-- Mechanical
-- Electrical
-- Computer
-- Old News
-- Software
-- RTOS
-- Todo List
-- Work Log
[AZ914]
-- T. Hannum
-- Brad's '70
--
[LINKS]
-- rennlist.org
-- all914.com
-- pelicanparts.com
-- paulweir.com
-- linuxdoc.org
-- epanorama.net
-- AZ PCA
![]()
Exhaust/Muffler Repair
-- 5.03.2001 Exhaust Repair - Saving a muffler with a little former
aircraft experience.
This was a repair I am kinda proud of. I didn't think I would end up using
my sheet metal experience again till I got my second teener. When I had
my first I wasn't too into repair it myself as it was not only my daily
driver, but my only car as well. And back then we didn't have rennlist
;-) At least I don't think we did 8 years ago... anyway, check out the
repair if you like and drop me a line if you have any questions. It is
holding up VERY well, and I don't expect it to change anytime soon either.
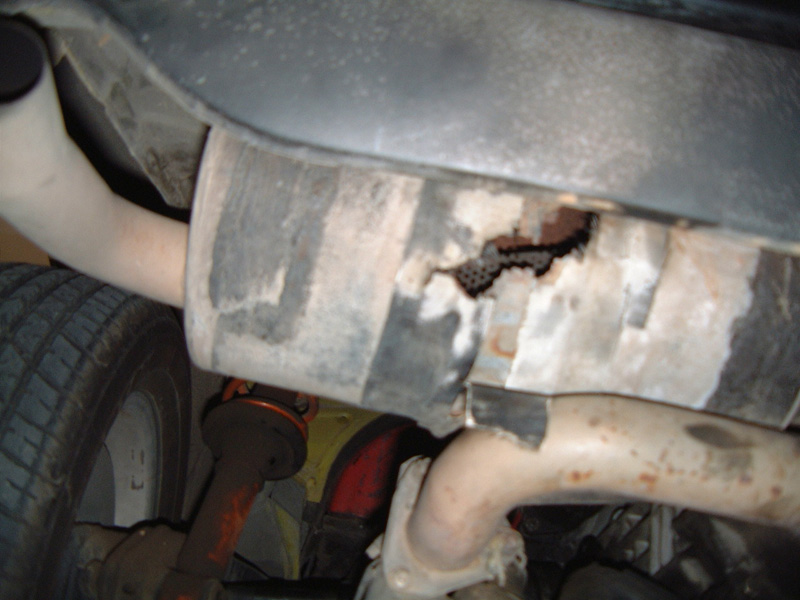
Here is a picture of the damage I repaired. You can see the remenance
of the old muffler tape fix which failed. As you will see our fix will
hold for quite a while if not permanently.

Here is the finished product, you can see it is now nicley covered and painted with that high temp paint. I just took this photo (before I start the CV/Shifter repair). Here are the photo's showing the damage more clearly. Here in this picture you can see that the muffler was rotted from two sides.
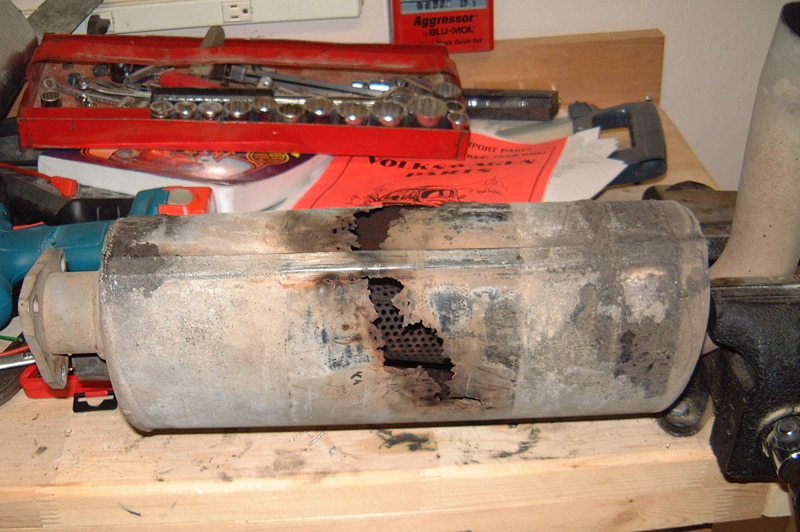
I made several mistakes in hind sight that I think I would have changed if I did this again. First off I didn't clean the muffler up enough. If I really wanted to stop the spread, I should have ground out all the rust etc. But at the time of doing this, I have a new exhaust in the back of my mind, so that might be why I did this in a short order.

Here is a picture of the patch. Trimmed up piece of sheet metal. Now again, in hind sight, if you want this to really be a permanent fix, you need to concider metal compositions, because we are about to put in this case tin around who knows what type of metal, and then when we rivit it in place you would want to be concerned about the type of metal rivets you use as well. Each of these items can be a new point for corrosoion to start. But again, in this case, I was trying to save $150 for a few months, and as it turned out, it will probably last much longer.
I had a whole series of pictures, but somehow they seemed to have ended up in /dev/null. Anyway, here it is all done. If you look at the completed picture, the stuff oosing out from under the patch is the good old muffler weld. I covered the holes with mesh and then covered them with the exhaust weld goop. Once I had it nicely covered, I put the metal patch around the muffler to permanently cover the wholes, and used pop rivets to mount the patch. Between the rivets for holding and the exhaust weld for sealing, it turned out to sound beautiful, and only cost me $26 to repair including buying the pop rivet gun.
I think this patch will probably make it through the year if not longer, but hopefully by then I can get my new exhaust.