Back again for another installment... er... installation. During the Devek Days 2004 Fun Drive I made some observations that led me to believe that my cooling system wasn't functioning properly, and it was more than an airflow issue. The temperatures were in the high 90's over much of the trip, perhaps more near the end at the winery. The temp gauge would stay in it's accustomed straight up position at cruise, but creep upward in slow traffic or when driving hard. Switching from driving hard to cruising at freeway speed, the temp fell much too slowly for my taste.
Prior to this I had noticed a tendency for it to get warm in traffic. I generally don't get stuck in traffic at all, but it happened a couple of times and I was concerned that my fans weren't doing the job at slow speed. The 95°C fan switch would engage just as the temp needle began to touch the red area at the right of the gauge. I had done checks with a thermocouple and found that the radiator bottom hose was running about 97°C when the switch engaged. My initial thought had been to put the 75°C switch in and a stronger fan.
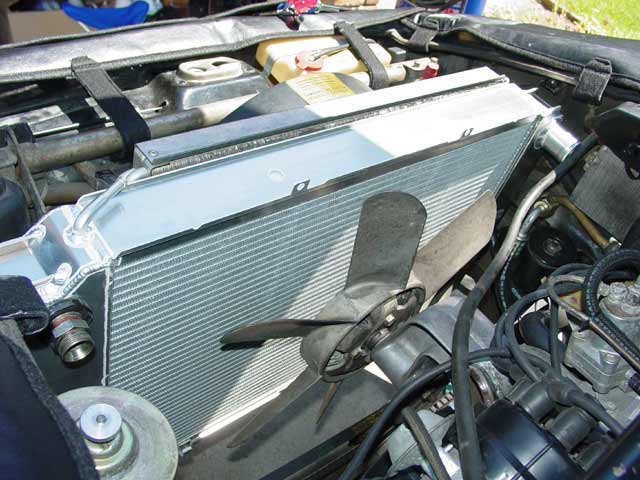
After this drive though, my first time running the car hard for an extended period of time on a hot day, I came to the conclusion that something else was wrong... the system was simply not shedding heat at an acceptable rate. Slow speed is one thing, but the damn thing ought to cool down pretty quickly at 70-80MPH! I took it back to Devek a few days later and watched as Marc went over the system with a pyrometer. There was less than a 10 degree delta between the top and bottom hoses... bad news. Plus, only about the top 1/4 of the radiator was really at operating temperature. The lower tubes on the radiator were relatively cold, around 112°F despite the fact that the system was very warm, in fact heat-soaked with the dash gauge climbing due to the extended idling. I revved the engine a bit to get the mechanical fan moving air, but it didn't do much to the temps. The obvious conclusion... clogged radiator! The obvious solution... a Devek radiator!
 Actually it's a real strong statement about the cooling system design, that it worked as well as it did, considering that it was operating at such a small percentage of it's designed capacity.
So here she is, my shark all prepped for surgery... the "before" pic.
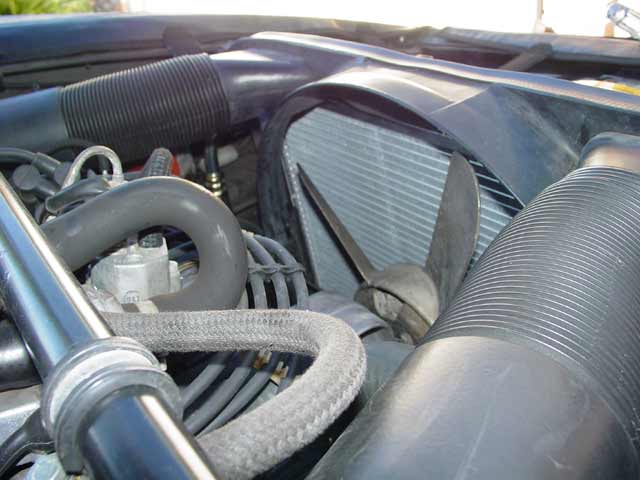
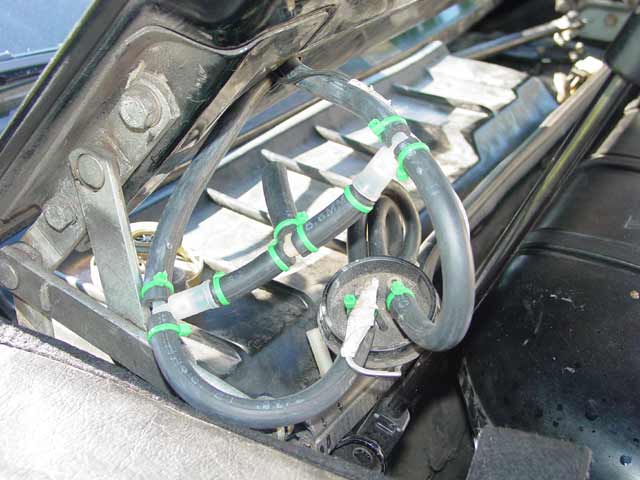
A WYAIT item if I ever saw one... the oil cooling lines were seeping and I decided that there was no time like the present to address the issue. At this point I have the fan shroud off. The fan shroud came off with 4 bolts, two at the top between the intakes and two on the bottom edge of the radiator.
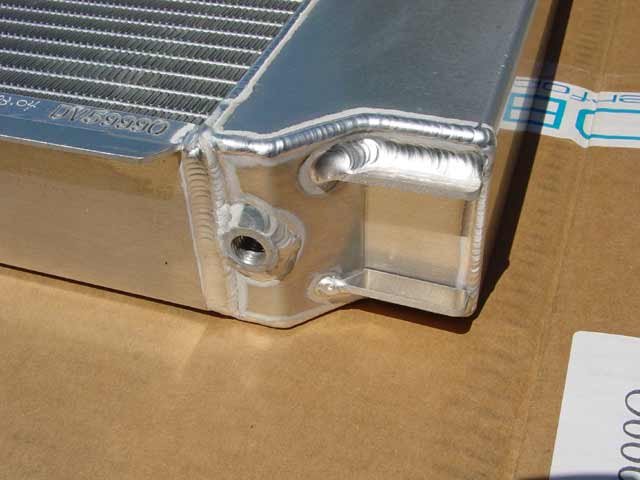
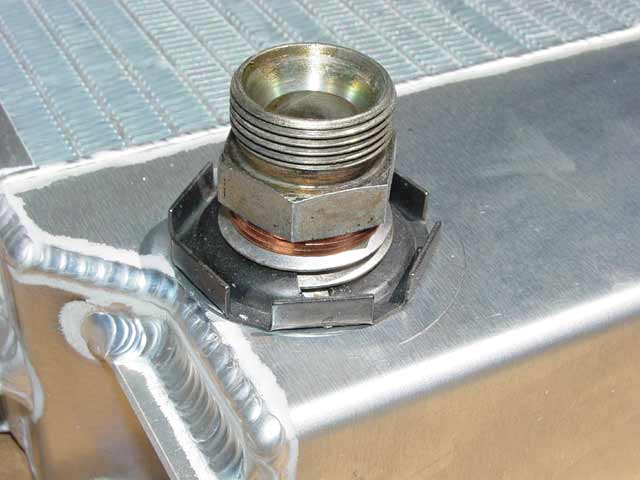
The drain plug is located on the passenger side(US) tank of the radiator. I re-used this socket-head drain plug rather than use the cheap plated hex-head bolt that came with the radiator.
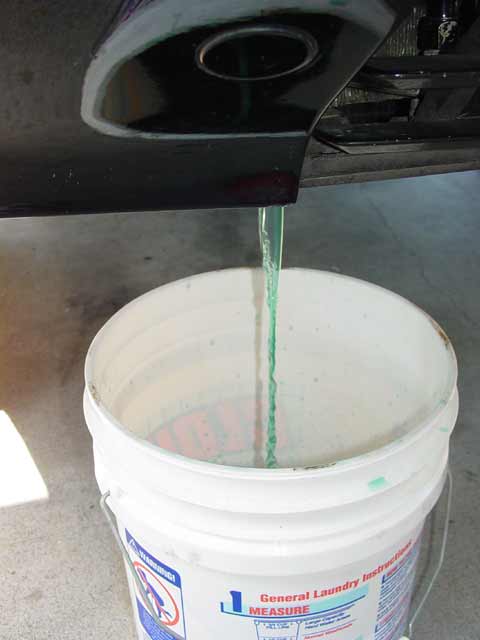
I removed the drain plug to start the coolant draining. I left the reservoir cap on at first, to keep the coolant from rushing out and splashing all over initially. Once the plug was out I removed the reservoir cap so my shark could do it's "like a racehorse" thing... While the coolant was draining I started work on replacing my washer nozzles and plumbing(below). Not pictured, I also removed both drain plugs from the block because I was changing from one type of coolant to another.
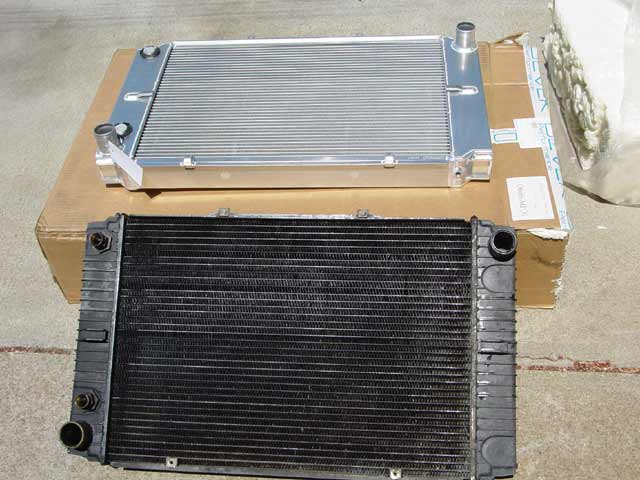
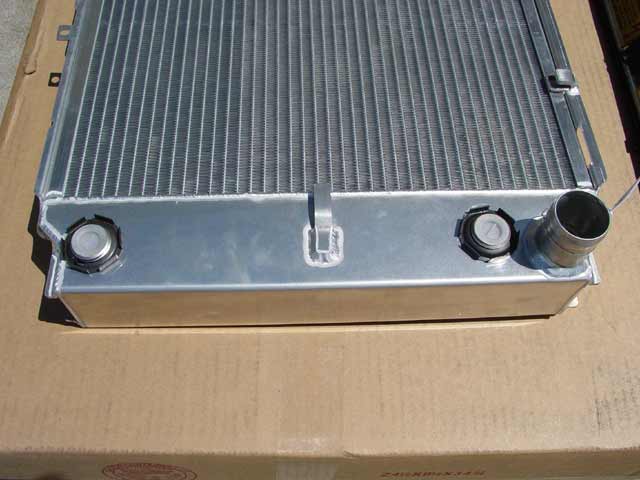
I didn't specifically photograph the steps of removing the oil cooling lines, but the parts are visible elsewhere on this site where I replaced the power steering hoses. Essentially, I dropped the alternator to gain access. After that it takes only a couple of minutes to get the oil lines out. If you are not replacing your oil lines, you need only disconnect them from the radiator end, and you can leave the alternator alone. I used a 11/4" end wrench on the oil lines, counter-holding the fittings with a 11/8" end wrench. Next I removed the large radiator hoses and the small top "bleed" hose. After that, I removed the two Allen bolts, one at each end, which hold the brackets and rubber mounts. At this point the radiator just lifts out. In the pic below I have pulled the Devek radiator out of the box and I am eyeballing the old against the new.
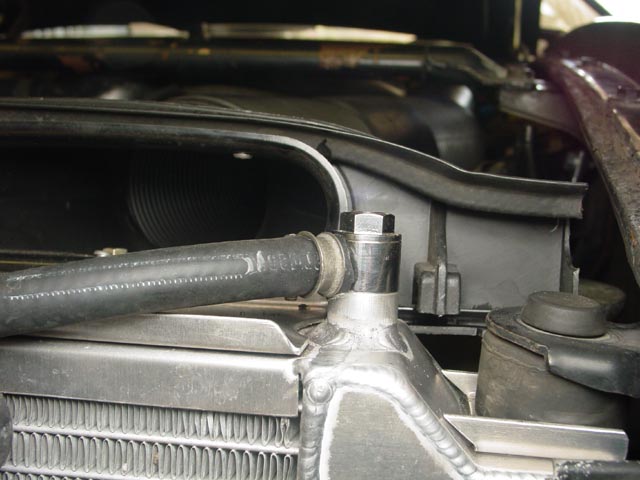
The welding on this radiator is simply gorgeous. Here is a look at the drain plug:
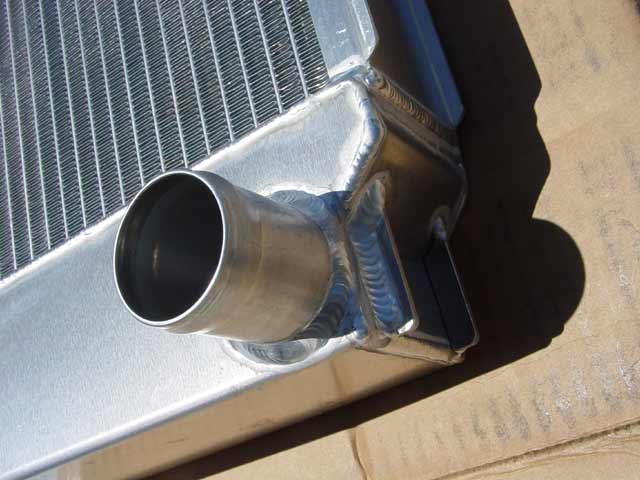
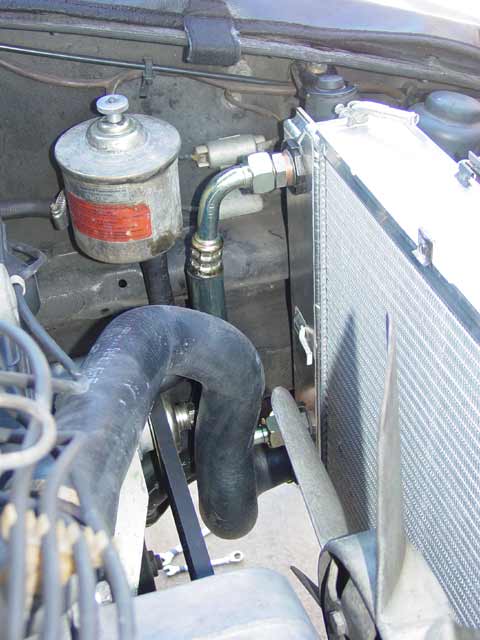
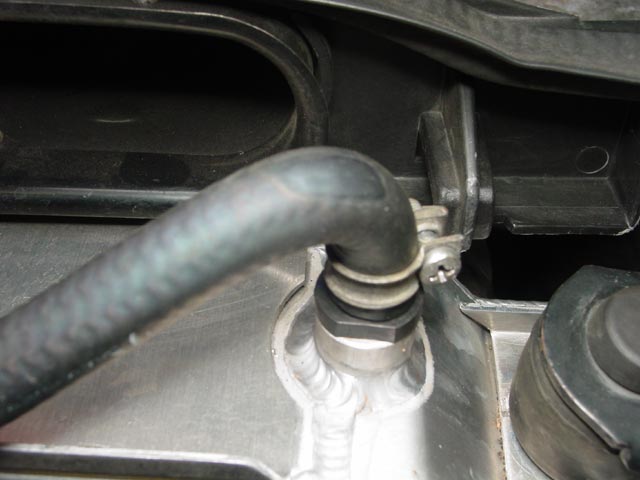
This is the lower hose fitting. These fittings are a slightly different diameter from the original, so a set of hoses is required to do the job right.
These are the oil cooler lines that are mentioned in the literature that accompanies the radiator. It is very important that you NOT counter-hold the stamped steel nuts on these fittings when you install the oil line fittings, as doing so will cause them to loosen their hold on the heat exchanger. These nuts compress an o-ring against the inside wall of the tank, and looseness here will allow coolant to leak out around the fitting.
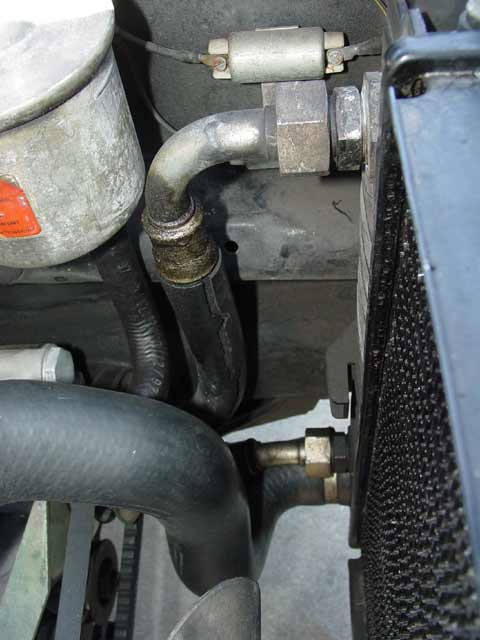
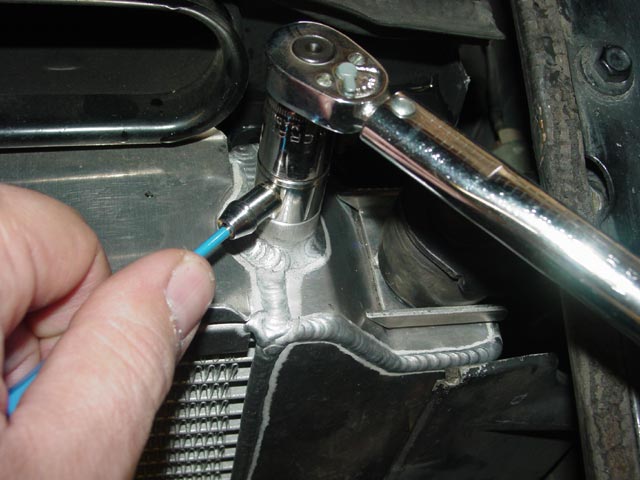
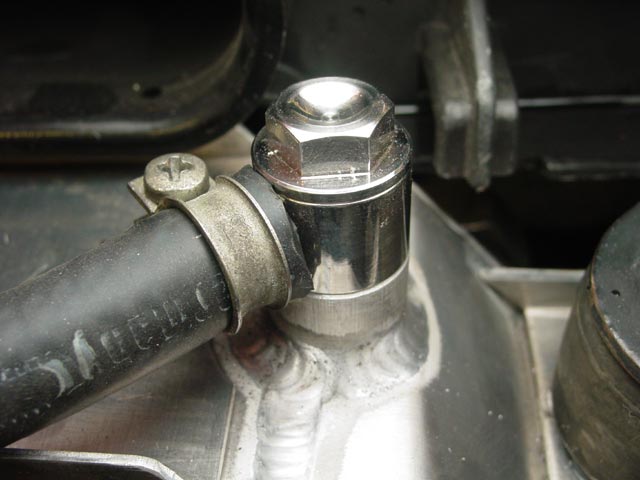
Here is one of my original oil cooler fittings, cleaned up and installed on the new radiator. Be very careful with these fittings... Susan says they are made of unobtanium. I was a bit puzzled at first by Devek's recommendation to stack the sealing washers under this fitting, but now that I've BTDT I understand. Installing with one sealing washer would allow the fitting to bottom out inside the heat exchanger, preventing proper compression of the washer... and resulting in an oil leak. Grinding down the fitting to eliminate this problem should work too, but since they are NLA I decided to play it safe and follow their recommendation. I tightened to the recommended ~20 ft/lbs, then I gave the steel retaining nut a twist with channellocks for good measure to make sure the o-ring was pulled up tight against the inside of the tank. They didn't move much, less than 1/4 turn, but it made me feel better.
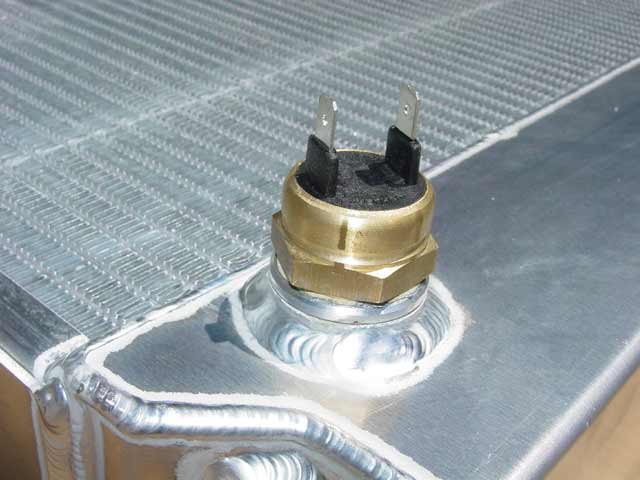
I also installed a new temp switch. The original was 95°C, this one is 75°C/70°C. Having the fan come on sooner should help keep things cooler longer and help the AC when stuck in traffic.
With those pieces installed, it's time to drop the radiator into place. Note how the driver side is sticking up a bit:
What I had to do was crawl underneath and make sure the rubber bumpers were sliding down into the recess on the bottom of the radiator. Once they were engaged properly, the radiator sat level in the correct position:
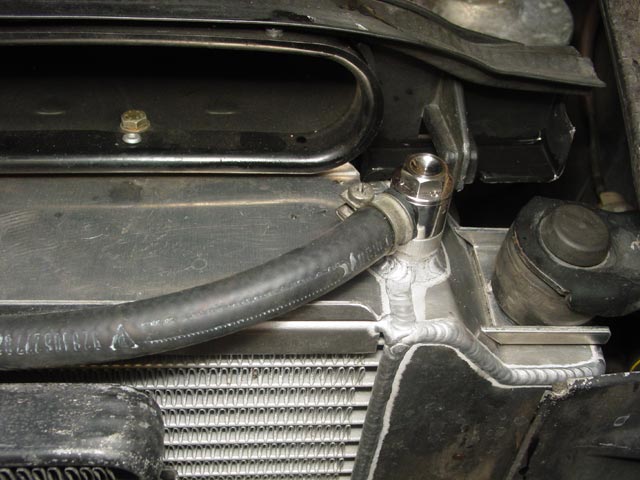
I installed the top clamps and rubber bumpers to hold the radiator in place and began hooking up the new hoses. The oil cooling lines were just a bit longer than the originals, so I had to angle them down slightly where they attach to the block in order to allow them to loop around without kinking.
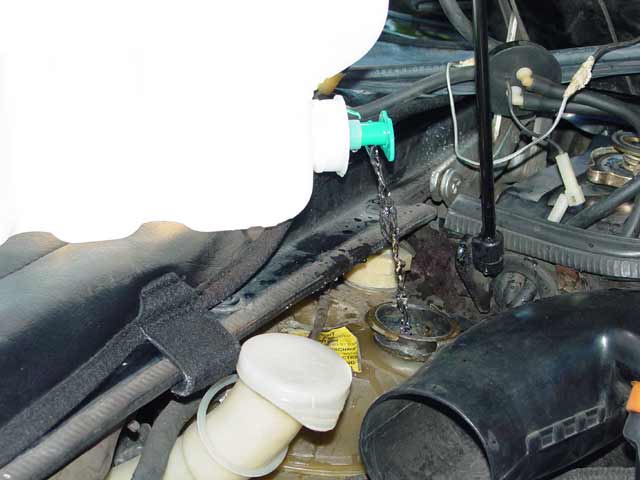
With all of the plumbing in place, I proceeded to flush the system. I installed the radiator plug and the block plugs finger-tight and filled the system with tap water from the hose. I let it get hot enough so that water was circulating through the radiator and the heater core. I then let it cool and drained it completely, including the block. I then filled it completely again, this time with distilled water, again ran it long enough to circulate, let it cool, and drained it again.
At this point, I installed the block plugs at the specified torque. Same with the radiator plug. I then poured in a gallon of DexCool and filled it the rest of the way with distilled water. BTW, every time I filled it, I pumped out the air via the small top bleed hose fitting on the radiator. I would squeeze the large top hose on the radiator, then block the bleed hose fitting while releasing the large hose. Kind of like bleeding brakes... but I had to do this to keep the water from overflowing at the reservoir since I had a continuous trickle coming from the water jug. I could hear the water gurgle its way into the system as I did this, which I continued until I started getting water at the bleed hose.
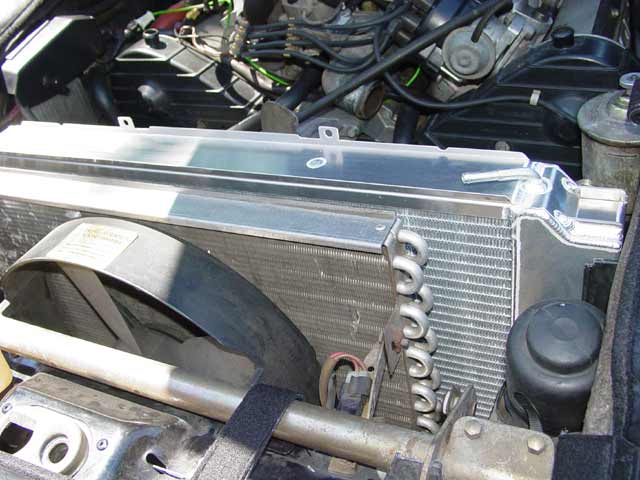
In between all this filling and burping of the system, I put the fan shroud on and the air tubes. You can see the very important ground wire attached to the passenger side fan shroud bolt here. This is to help prevent electrolysis which can be caused by an electrical potential between the radiator and ground. The lower two bolts on the fan shroud are not needed, as the radiator has clips on the bottom and side that hold the shroud in place.
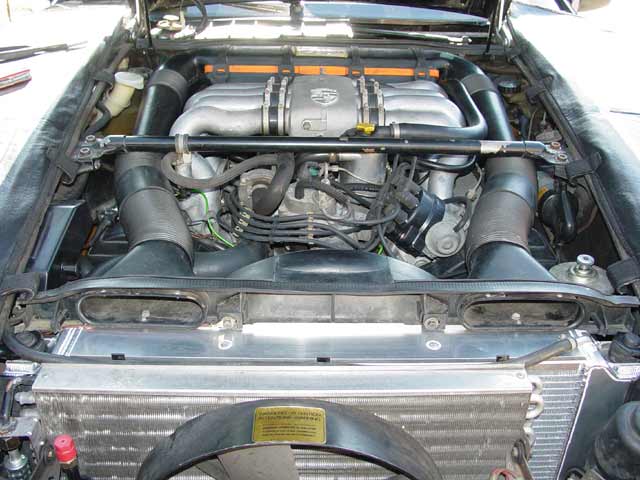
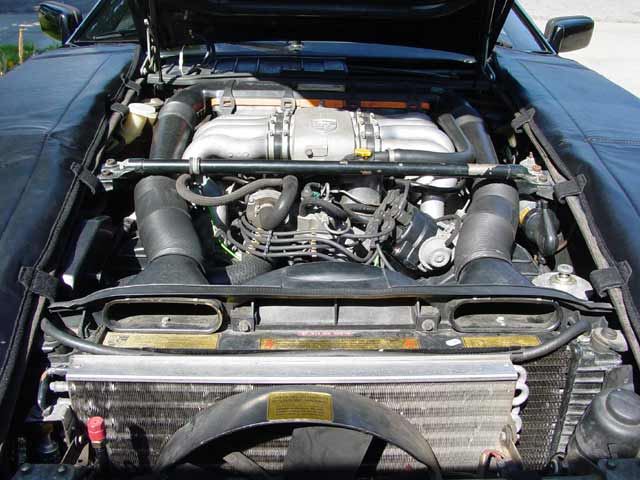
Here is a rear view. The only problem I have with this radiator is it's so damn shiny it makes me want to go in there and shine up some of the other things in the engine compartment.
It took a couple of days driving to and from work to get the last of the air out of the system, and to have the coolant level in the reservoir stabilize. So far the results have been very good. If I let the car sit and idle, eventually the electric fan comes on, but it does not move enough air to suit me. It moves enough air to stabilize the engine temperature on a 95°F day, but not enough to pull the temp down and cycle the fan. Yet, if I let the engine get hot enough to activate the fan, then drive around the block at 15MPH, the temperature comes down immediately to its normal straight-up position. Clearly the issue is airflow now. I am in the process of pulling together the parts I will need to upgrade my fan, and will update when I get to that.
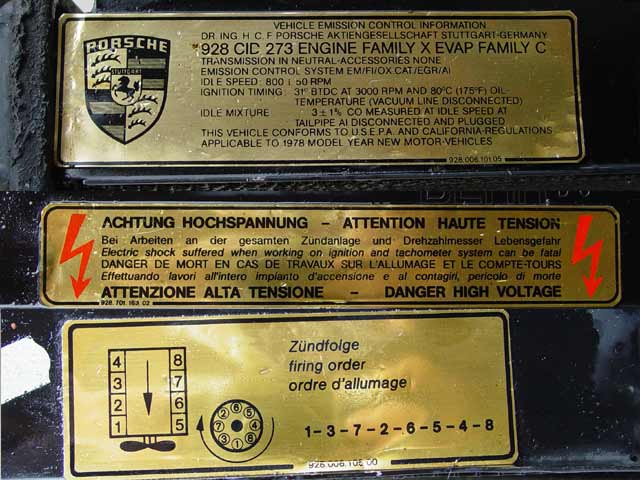
Also, I understand that these stickers that are on my old radiator are no longer available, so I will be trying to get them off the old radiator without damaging them so they can be re-used on the new one.
As I alluded to above, I fiddled with my washer nozzles during various phases of the radiator project; while I was waiting for coolant to drain, for the engine to cool off, etc. I decided to replace the nozzles and the check valves using the factory scheme. I have seen simplified schematics for setting up the washers with two check valves instead of the original 4, but I decided that IMHO it made more sense to do it with 4. For one thing, having the short distance between the check valve and nozzle reduces the amount of fluid that can pee out of the nozzle when I'm finished using it. It also reduces the amount of mixing between the two fluids. Currently I only run distilled water in the system, as I am still trying to clean up the works. But I may ultimately need to have two fluids available. For example, I plan to move further north, perhaps into Washington in the next two years or so. My impression is that most of what comes out of the sky is water, but I may someday find a need to run a de-icer in the intensive washer tank and a conventional cleaner in the main washer tank. Anyway, here's how I did it. All 4 check valves and the nozzles cost around $14USD IIRC.
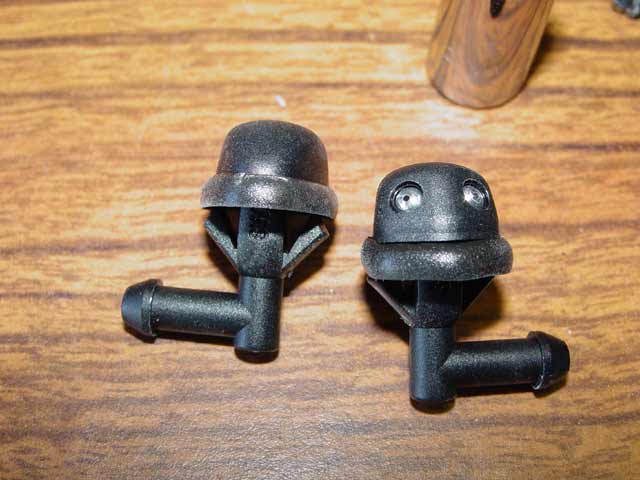
First, I popped off the driver's side cap on the inside of the hood and cut the hose barb off the old nozzle. I then squeezed and pushed the old nozzle out of the hood. You can see on the close-up of the nozzles below(down a few pics) how the clips retain the nozzle, and what needs to be squeezed. It's a lot easier to squeeze the retainers once the barb is cut off. Anyway, I then zip-tied the new hose to the old, as you see below:
I then popped the feed-through off of the passenger side, nipped the barb off the nozzle, and removed it.

With a little fiddling, I had the passenger side check valves free.
At this point I simply pulled the hose through from the passenger side. In this pic you can just see the new hoses appearing, but I pulled it through until there was about 4" of hose left protruding on the driver side and all of the slack was on the passenger side.
So here are the nozzles, front and back. It may not be completely obvious when they are installed(wasn't to me) but there are thick rubber gaskets that need to be compressed quite a bit to install them properly. You just need to push 'em in good! I took this opportunity to polish away all the old wax build-up around the old nozzles.
I clipped off enough excess hose from the passenger side to make up the driver side bridge with the two check valves and tee. I used the small tie-wraps for a bit of insurance... I don't mind the extra weight.

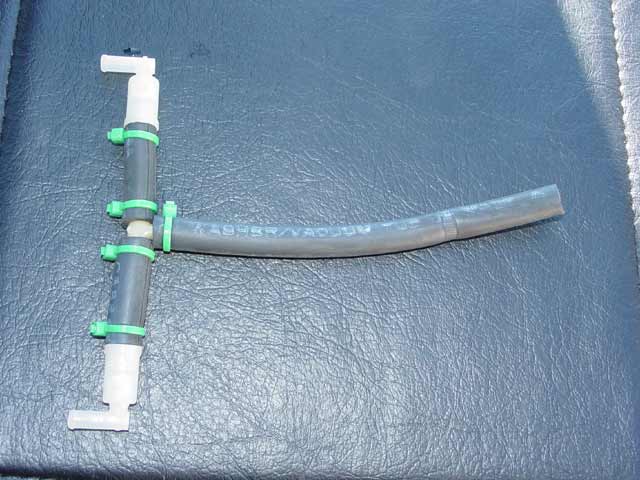
I then attached the bridge to the hoses and carefully worked it into the hood. Just before the last piece of hose that attaches to the nozzle went in I cut it down to about 2" length. I tie-wrapped it to the nozzle too.
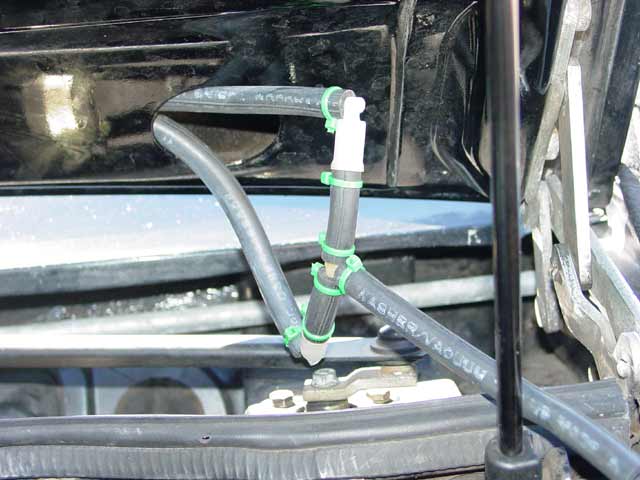
With the driver side all buttoned up, I pushed a few inches of slack hose into the hood, then made up the bridge for the passenger side as shown. It went in pretty easily, the worst part being fiddling with the orientation of various parts so nothing is pushing upward on the washer nozzle. Overall, it wasn't a tough job at all. I went through a tank full of water adjusting the nozzle aim, trying to find a position that worked at 0 mph as well as working at 100mph. Mission accomplished with this part of the job, but I discovered that the washer tank that I replaced has a leak. I was a bit skeptical about the grommet for the headlight washer pump, and now it seems I should have listened to my gut. Ah well, I'll get to it Real Soon Now.
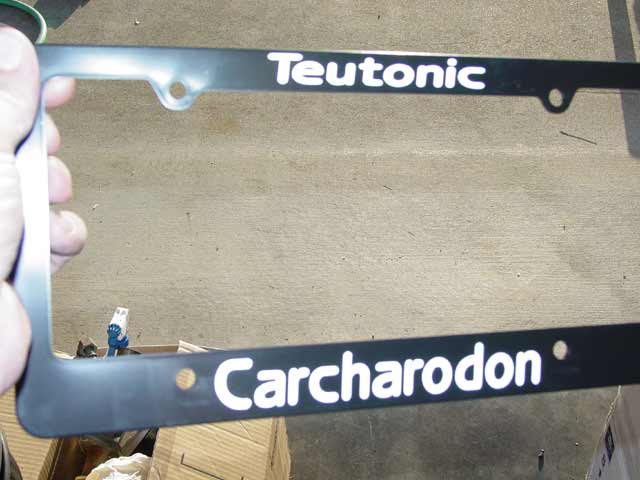
Also, while I was fooling around I put my new license plate frames on. Should help to clarify what the car is, eh?
Coming Soon:
- Belly Pan(Done)
- Higher output cooling fan(Done)
- Radiator sticker recovery
- Other fiddly bits(Visors Done)
When the glue failed and the radiator started leaking(I finally discovered the actual cause of the leak while I had the shroud off during my TB/WP job), it took me a while to localize the problem because there were some drips below the upper radiator hose that led me in the wrong direction. The leak was very small initially, just a thin line of coolant dripping at the bottom of the radiator -- it took weeks to notice a drop in level at the reservoir. I was getting a thin fog of coolant around the engine bay that I couldn't localize. I tried tightening, then replacing the hose, replacing the clamp(The upper nipple on the radiator was not the same size as the original radiator and I suspected it was a simple fitment issue) over a period of a couple months. When I came back with the serial number, she looked it up on a piece of paper and without hesitation told me it was in fact epoxied. It's this kind of experience that makes people vow to never spend money with a vendor again.
In talking to others I gather that my experience was not unique. Even after I pointed out that I had notified her of a potential issue with the radiator before the year warranty was up(and I wasted time by following their recommendations to check/replace the hoses, etc.), and pointed out as kindly as I could manage that she had misrepresented the product at the time of sale, the best she would offer was a replacement at cost + 10%. I decided then and there that I did not want any more of their half-assed products on my car and would seek a replacement elsewhere. It may well be that most of the products that they developed are worthwhile(Note that I have a Devek short shifter that I had for years, finally installing it in Dec '08) but after this experience with a vital part that was supposedly "designed, manufactured and tested to be of the highest quality" I have zero faith in their ability to deliver quality products of any greater complexity than that short shifter that I mentioned, and zero faith in their integrity when it comes to backing the products that they sell.
I solved the problem by purchasing a C&R radiator from 928 International. It is a very high quality product, All-aluminum welded and brazed, and both C&R and 928 International have solid reputations and second-to-none integrity and customer service. Below is a pic of the radiator installed. Some have noted that the radiator sits high in the mounts, but I found that I just needed to get the bottom rubber bumpers properly engaged in the tabs and while a bit tight(meaning it just fit with no room to spare) it fit fine IMHO. The bleed hose on the top driver side of the radiator had been cut off when I installed the Devek radiator, and I picked up a formed heater hose at the local auto parts store and spliced it in to clear the hood. As of this writing, two years after installation, the radiator is holding water just fine. Apparently that is NOT too much to ask -- you just have to go to a vendor that offers a quality product.
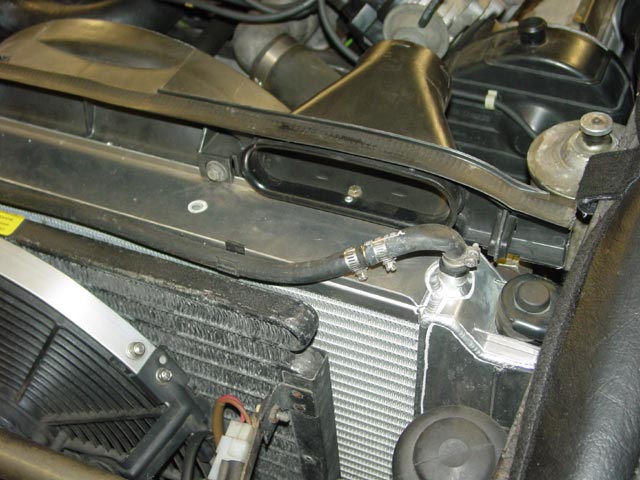
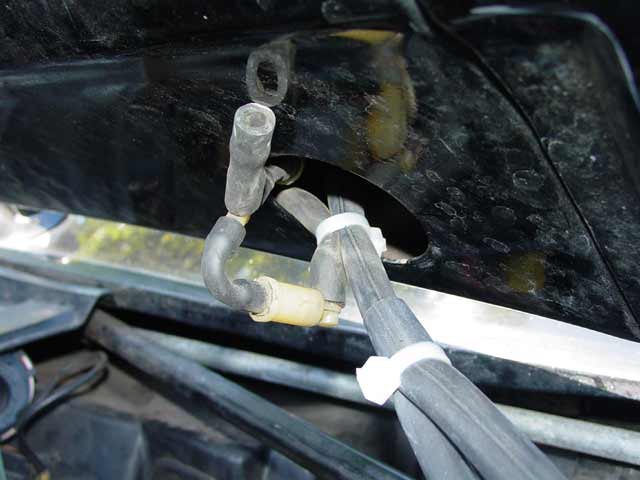
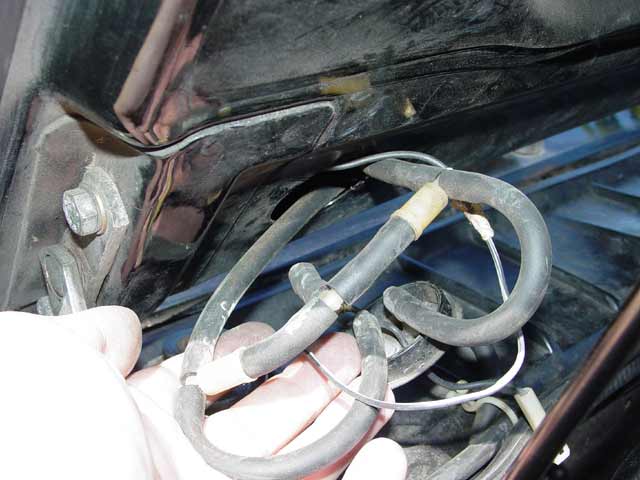
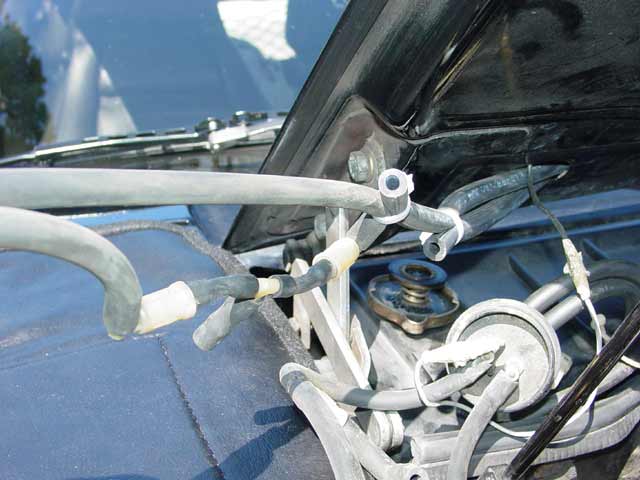
When I installed my C&R radiator, I had to deal with the bleed line that had been shortened to fit the nipple on the Devek radidator. The fix, visible in the pic above, was to go to a local auto parts store and select a hose that was the correct diameter and had the tightest possible pre-formed bend from their "Wall-O-Hoses", and graft it in with a barb. later, I found that while the '78 bleed hose was NLA, a bleed hose from a later car should work fine. Below is the new bleed hose alongside the old -- I installed it while replacing my coolant reservoir.
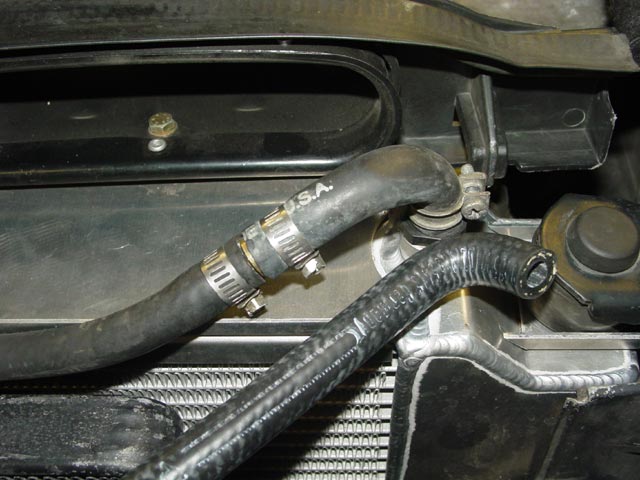
After a fairly short time it became apparent that the replacement hose was still rubbing on the hood. I felt that something had to be done.
I contacted C&R and had them ship me one of the bungs that they weld onto the 928 radiators. I then sent that along with a new bleed nipple to my brother with a request to see if he could come up with a solution, perhaps a modified banjo fitting. This is what he came up with, shown assembled to the bung here.

Here are the parts disassembled. Both parts are stainless steel. The banjo fitting has o-rings on both sides. Obviously the sealing surfaceon the bung has to be free of scratches or dings for this to work. The bolt was machined from solid bar stock. The nipple is a near-exact replica of the plastic nipple.

Based on the material and the thread diameter/pitch I decided to torque the bolt to 18 ft/lbs, preventing the banjo fitting from twisting with a pin drift inserted in the barb.
With the fitting in place it was just a matter of trimming the hose to length and installing it with the original clamp.
This makes for nice, clean routing of the hose.
Looking at it from a low angle, it's clear that there is a lot more clearance than needed. I put a piece of putty on top of the bolt and closed the hood, and found that there is a good 1/2" of clearance. It's a small thing, but I feel better about not having the hose rubbing on the hood.