While I was working on my HVAC Blower and HoodPad I noticed that my coolant reservoir had gone beyond the state of simply "ugly" and had started to show signs of seepage at the spout and cracking around the seam. Seems the shark has not had enough attention lately...

Previously, my only gripe with it had been the fact that I could not see my coolant level without removing the cap. A very minor inconvenience, but now with the prospect of having the reservoir rupture and strand me, worse yet screw up my nice new hoodpad, I decided it was time to address this. Not surprisingly, the job carried its share of challenges. Oh, all right I'll say it -- it was a major pain in the ass. I don't think I struggled as hard with any single part of my Drivetrain Overhaul.
I took the lazy way out as far as draining and disposing of old coolant. There is an "Office Lube" company that comes to my place of work on Fridays with a trailer equipped as a sort of mobile Jiffy Lube. Customer cars are driven up into the trailer which has a service pit. One of their services is a radiator flush, and they were willing to work with my odd request. I had them drain the old coolant and flush twice with distilled water. I then drove the 4 miles home and drained the distilled water straight onto the driveway, then reinstalled the block drains and pulled the car into the garage. This saved me the trouble of spilling coolant on the ground(opening the block drains always seems to make a mess) and the trouble of disposing of the coolant. It was well worth the $30 they charged me. Side note -- I don't have any services done with this sort of outfit as a rule. I monitored them closely, made sure they used a torque wrench on the plugs, etc.
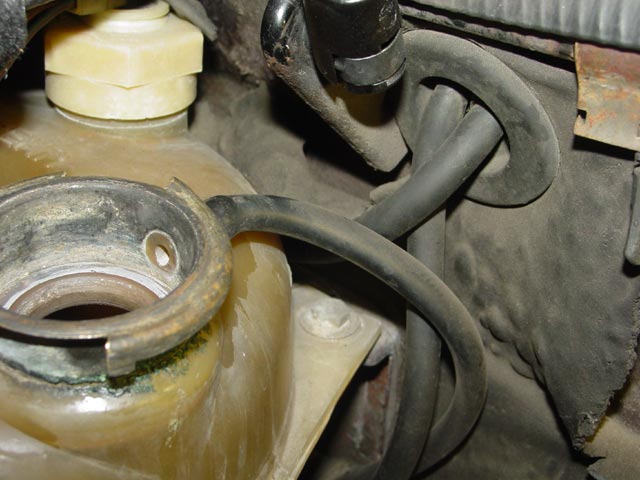
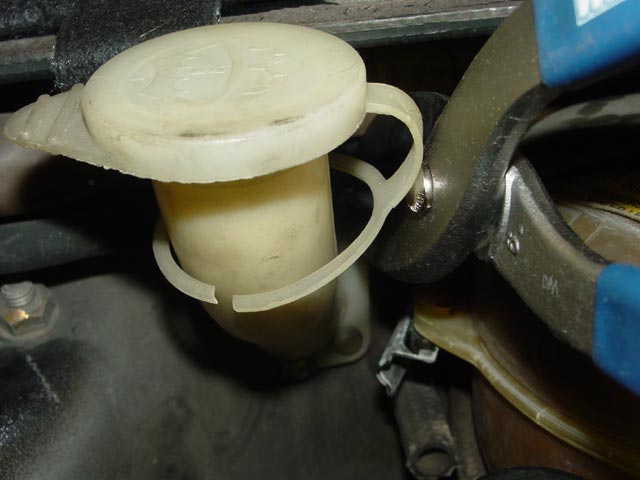
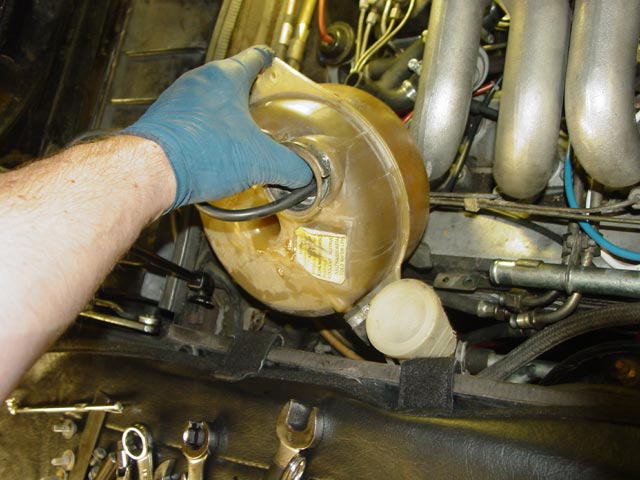
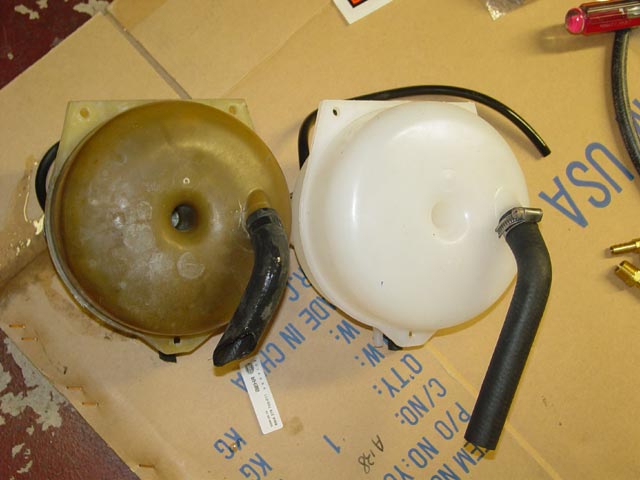
So here is the old reservoir, the epitome of fugliness. That didn't bother me so much, but the cracks and leak around the spout were not going to fix themselves.

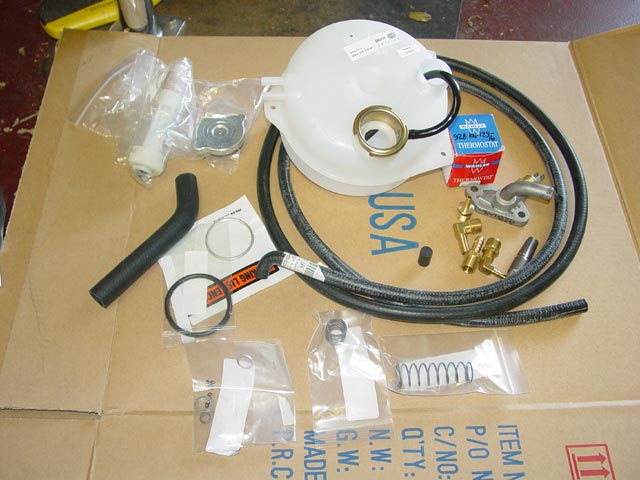
Here are the parts I gathered up prior to the job. I intended to change the thermostat and also change the springs in the oil thermostat, but in the end I decided to leave the coolant thermostat in(It's been working fine) and deal with the oil thermostat another time(ran out of time). Also I had intended to add a temp switch to the water jacket on the driver side -- that's the strange fitting and brass parts on the right -- but I decided against it because the fitting is the wrong shape for the plate on that side and the CIS hardlines don't leave enough clearance there anyway.
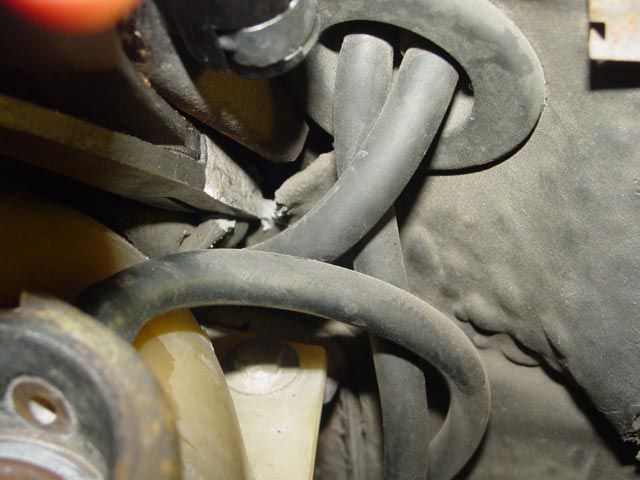
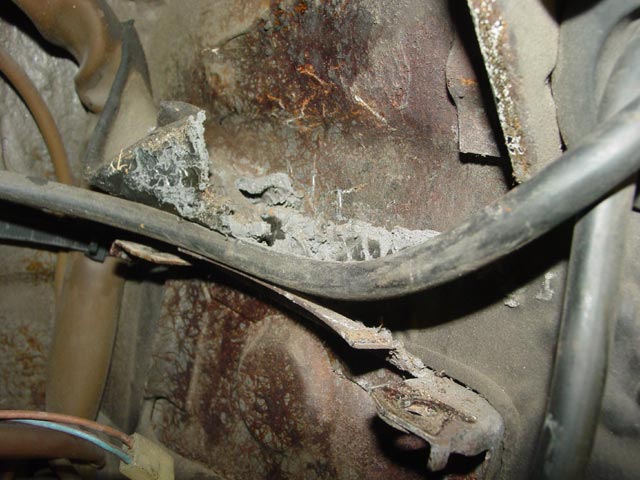
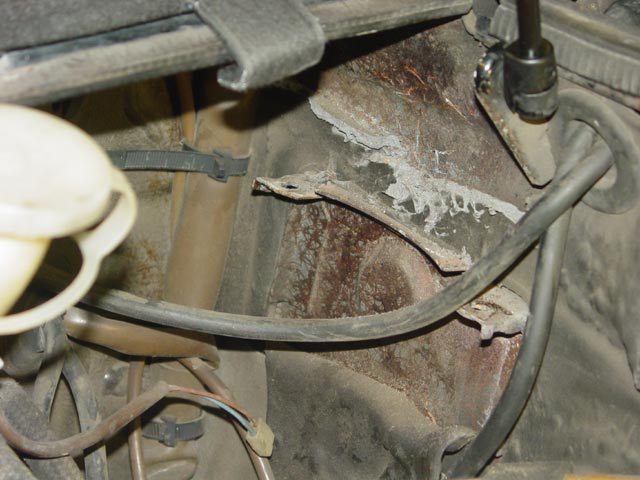
The first problem I encountered was the rubber pad that had melted off of the firewall and vulcanized itself to the reservoir. I couldn't even see the third bolt back in the corner, much less reach it.
I started tearing the rubber out with a pair of duckbill pliers, also cutting and separating it from the reservoir with a long gasket scraper.
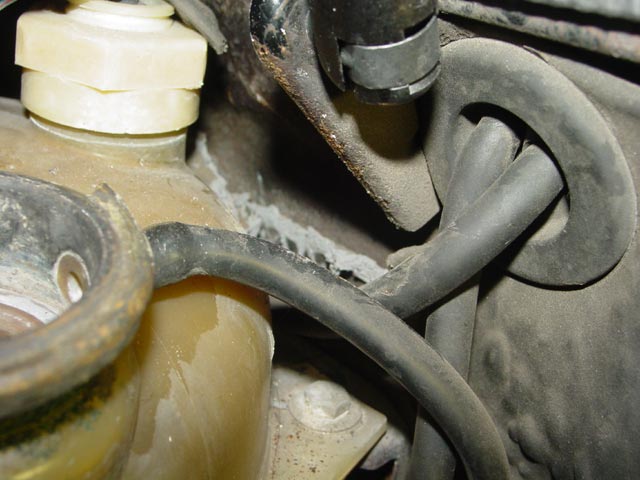
At this point I had removed enough of the rubber that I could see there was no third screw holding the reservoir in.
Moving forward, I removed the two mounting bolts and cut the bottom hose...
And cut the bleed hose at the top(watch out for the harness if you try this).
At this point the reservoir was free, but it would not come out past the diverter valve.
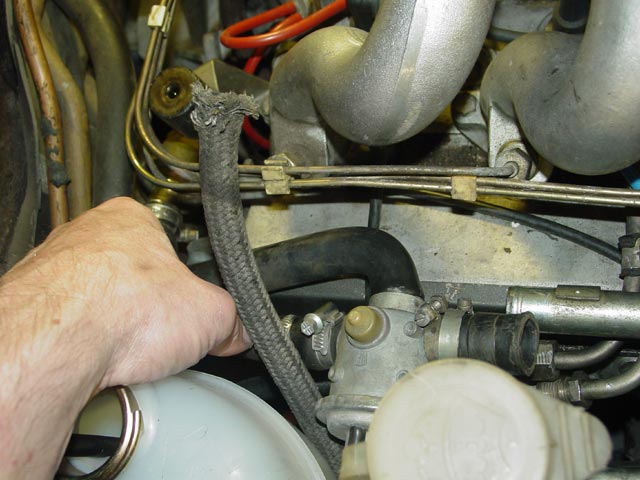
 I proceeded to remove the air hoses at the air pipe and at the check valve, and quickly realized that the fuel lines were blocking access to the bolts that mount the valve to the air pipe bracket. It's possible that I could have removed those bolts without removing the fuel line, but it's very tight in there and I didn't want to fight that hard. Also I already had the fuel line rebuild kit from Roger at 928s R Us so I decided, no time like the present... Details of the process of rebuilding the fuel lines, including those at the rear of the car, on the Fuel Lines Page.
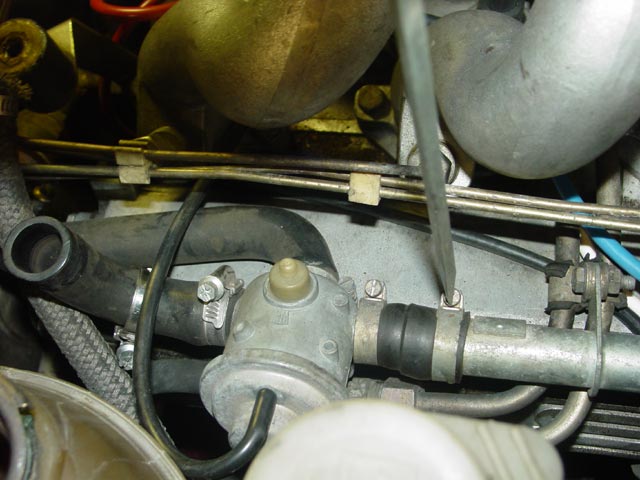
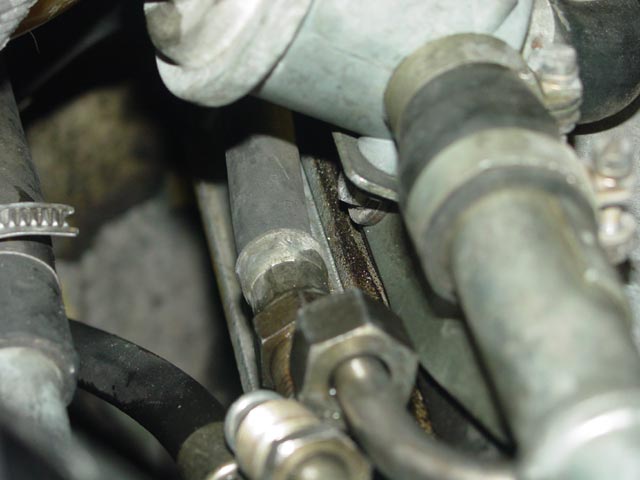
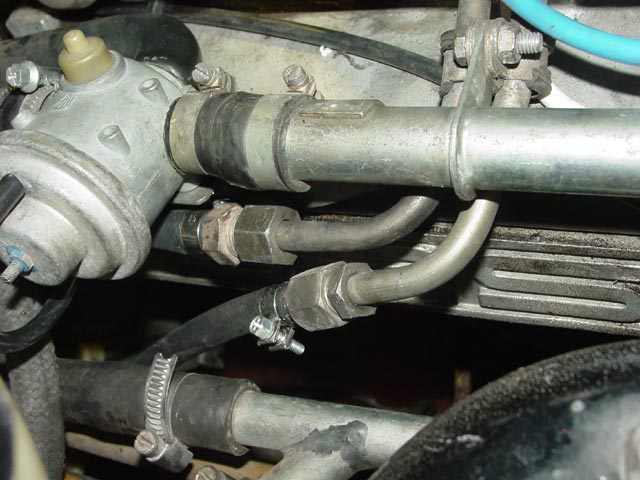
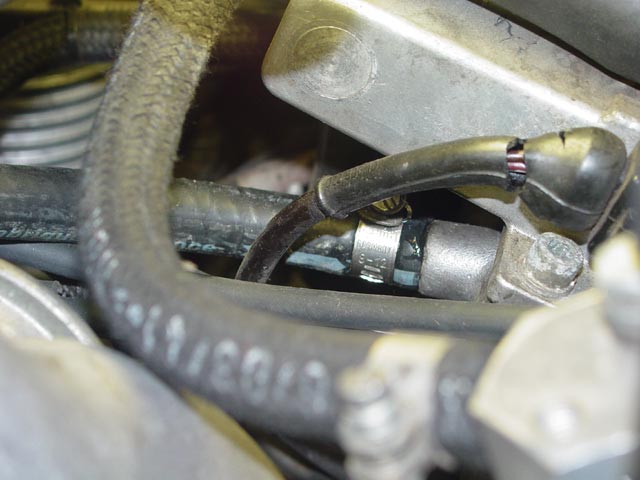
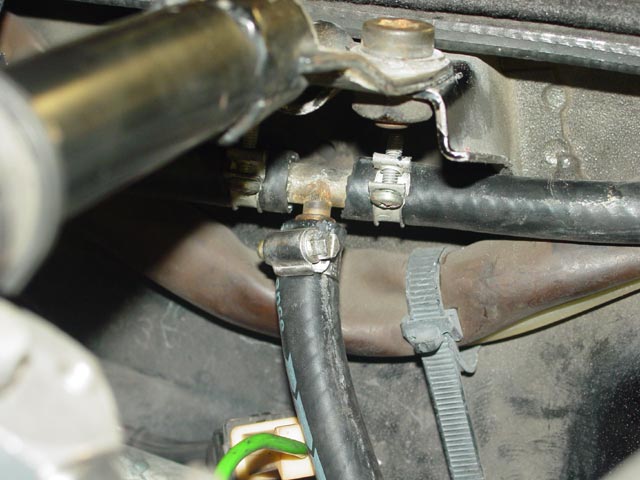
I ran the car briefly, and pulled the fuel pump relay while it was running to relieve fuel pressure on the lines. I proceeded to break the fuel lines loose, counterholding of course. Damn those suckers were tight! In this pic you can get an inkling of how close the line was to the bracket.
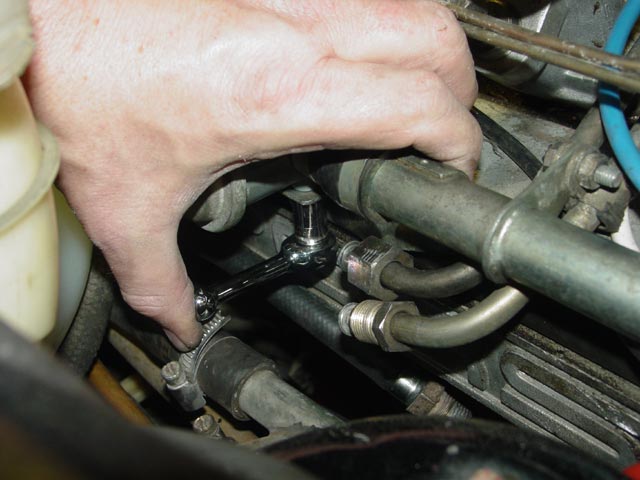
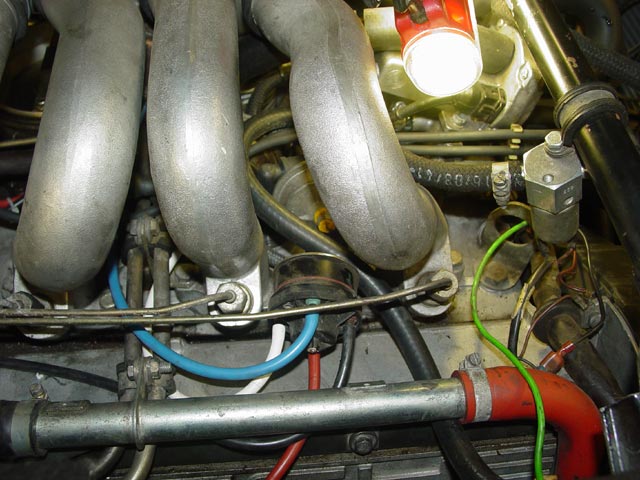
With the lines removed, the diverter valve mounting bolts are accessible. The very edge of one of the bolts is just visible in this pic. I'm not referring to the bolt that goes into the cam tower; there are two bolts at right angles to that one that thread into the diverter valve body.
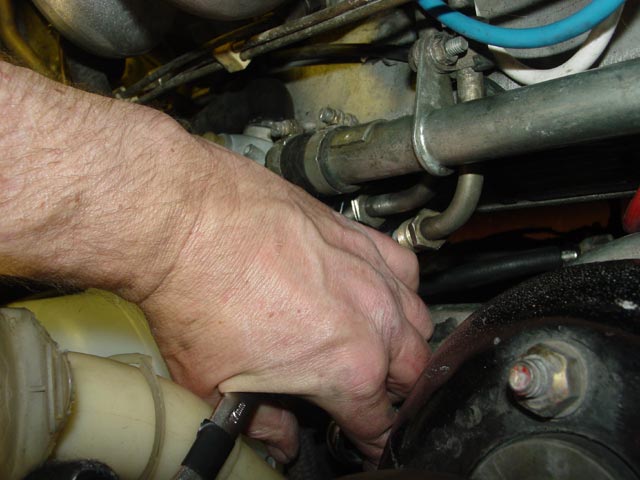
Once it was loose, I laid the diverter valve back out of the way.

At this point the reservoir pretty much lifted right out; it was still stuck to rubber melted off of the firewall but the last bit freed up easily with a gasket scraper. As I moved it out I was able to disconnect the level sensor easily.
The reservoir mounting bracket on the firewall has a lip that retains the reservoir, so it seems clear that the two screws are enough. Both the bottom hose and the bleed hose had 1978 dates printed on them, so I believe the reservoir has never been removed. My theory is that some overly optimistic engineer designed it to have three bolts holding it in, but in practice it was too difficult to get the third bolt installed -- so they left them out. Remember, these cars were designed with pencil and paper. If your reservoir has three bolts holding it in, then it was probably assembled by someone with tiny hands. If that's the case, hopefully you have tiny hands as well, or you may end up cutting/breaking the reservoir to get it out.
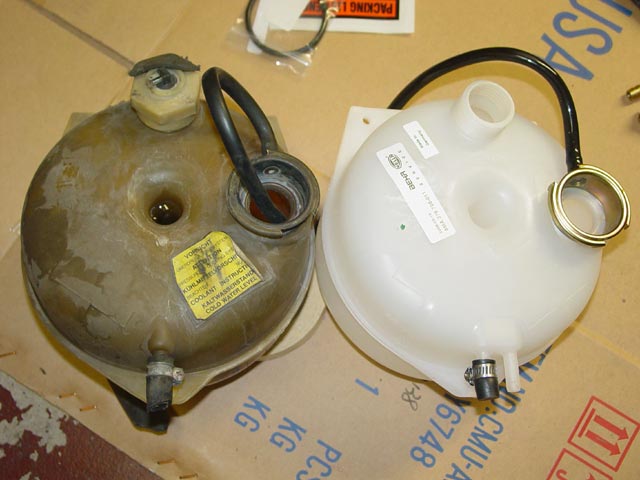
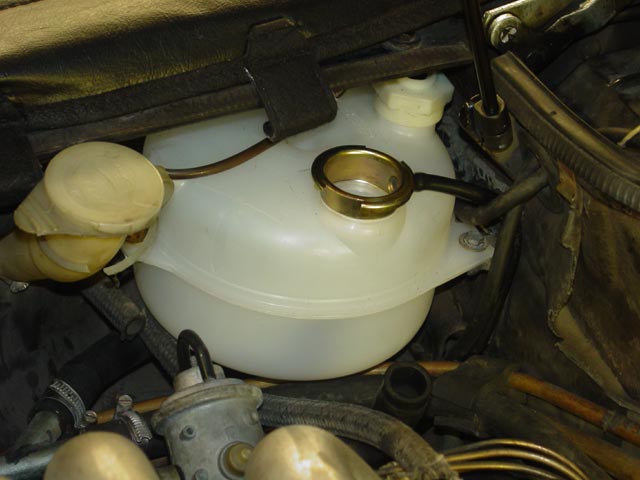
The original part has obviously been superseded, the new reservoir has two small fittings on it where the original only had one. You may need a cap for the extra fitting; this one is Porsche part number 930.110.256.02.
I installed the bottom hose in the same orientation as the original. If you replace no other hoses in the process, replace this one. You will not want to try replacing it later, with the reservoir in place.
Before installing the new reservoir, I cleared away the melted rubber from the firewall.
I installed the new level sender and the sender wire before installing the reservoir. My old sender was working fine, but I figured I'd replace it since the reservoir has to come out to access it, and I didn't want to have to get back in here any time soon. Murphy's law dictates that, had I not done so, the old sender would fail in a week or two. It could probably be changed by loosening the reservoir and pulling it into the engine bay with coolant still inside and hoses intact, but I generally like to fix things in a way that makes it unlikely I'll have to go back in. I made sure that the washer line and sender wire would route properly once it was in place, but I held both of them out in the engine bay during assembly to make sure they didn't get pinched.
I jockeyed the reservoir into a position where I could get the hose started. I used a little spit inside the hose to help get it started. Even so, it was a real PITA since there is so little room to get a good grip and pull it onto the pipe. I had to use some extra-long needle-nose pliers to grab the hose on the reservoir side of the clamp and pull it into place.
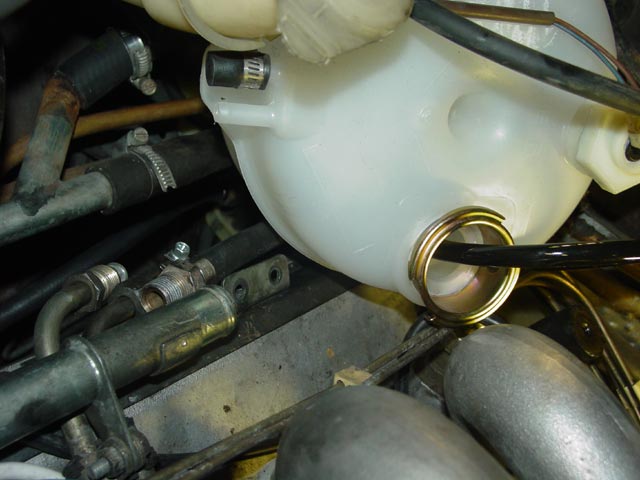
It took some wrestling to get the reservoir engaged under the lip on the rear bracket, and getting the front bolt started was a bit fiddly because the bracket had flexed forward. Just be persistent, it will fall into place eventually. Once it was mounted I tucked the washer line back behind the reservoir.

Next, I reconnected the diverter valve air hoses. The s-shaped hose to the check valve was split on the check valve end. Roger found the last one in the world for me. After he finishes measuring it so he can provide a suitable alternative for other customers, he will send it on to me and I will install it. It's a non-critical part IMHO, at least it's not so critical that I can't drive it this way for a week or two.
Next, I reattached the diverter valve to the bracket.
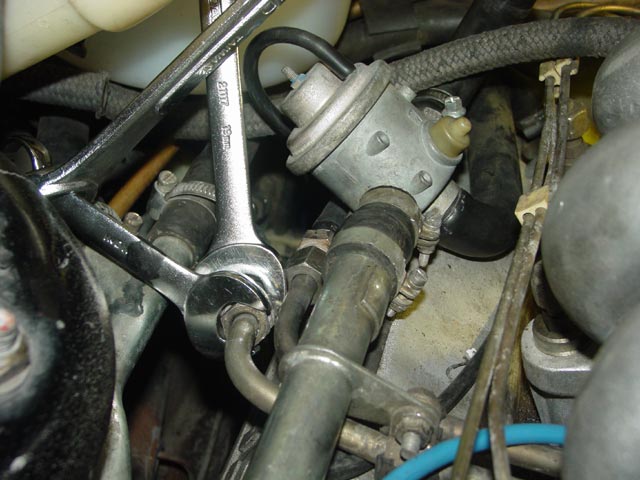
Then I reattached the upper fuel line, tightening the fitting with the "two-wrench squeeze" method. You can see in the above pic, and a couple of pics back, I put a thin film of anti-seize on the threads for the fuel line fittings after wire-brushing the threads. If and when I have to loosen these fittings again, it should be much easier.
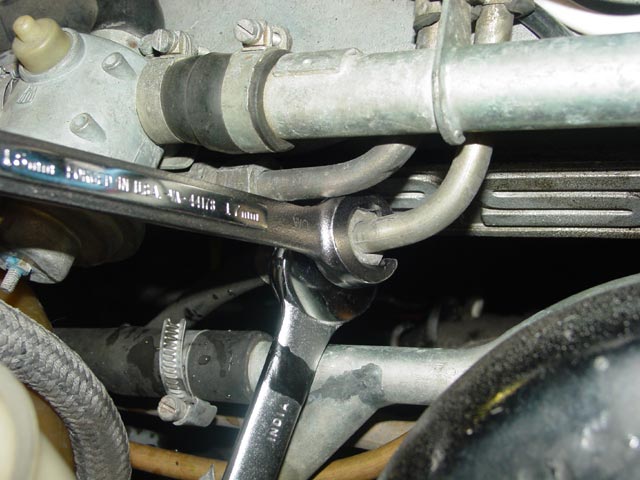
The lower fuel line was a bit of a bear to tighten, since I could not get the two wrenches close enough together to use the "squeeze" method. Instead, I counter-held with one wrench while using a large wrench to extend the stubby wrench.
Fuel lines in place. I jumpered the fuel pump relay to check for leaks, and only proceeded when I was confident that they were not seeping any fuel whatsoever.
I tucked the overflow tube back where it belongs, pointing down along the bulkhead.
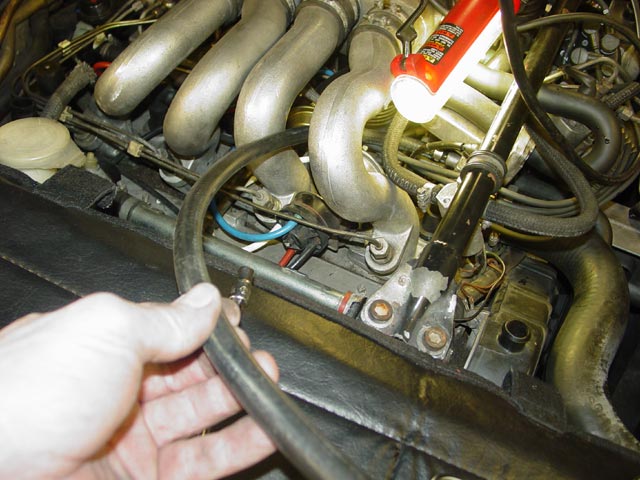
Roger found the correct formed hose for the bleed circuit on the top of the radiator. I had been told this hose was NLA. Now I could get rid of my cobbled-together solution. I intended to replace all of the small coolant hoses on the passenger side of the engine bay.
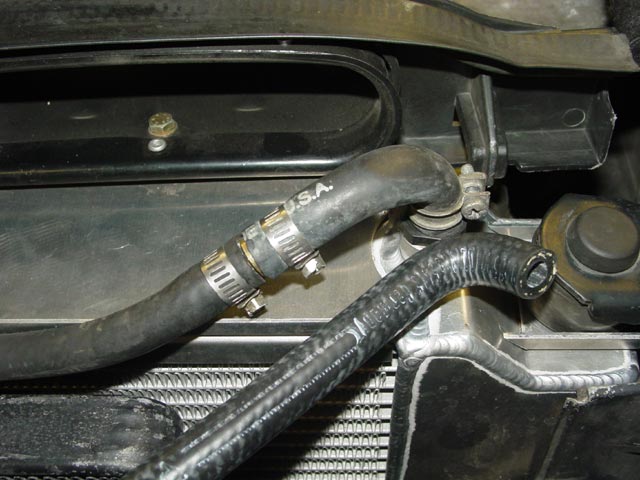
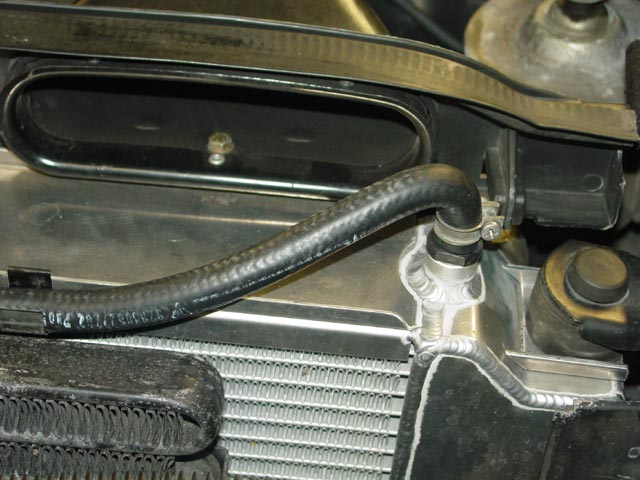
New bleed line installed. Much cleaner!
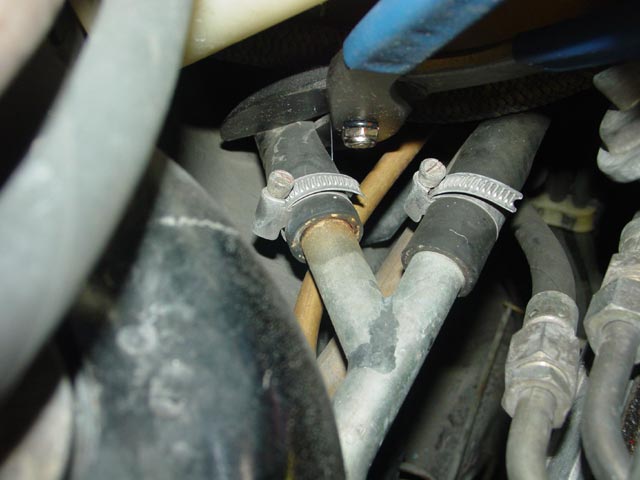
Someone had replaced the line from the auxiliary air valve to the bleed hose with fuel hose.
As I mentioned before, the other lines looked original.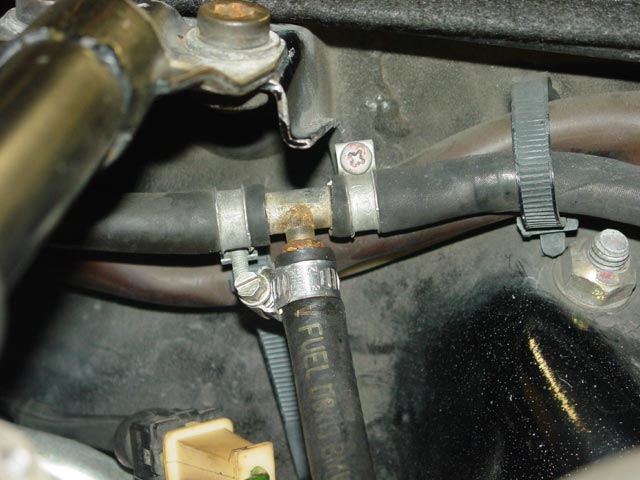
New, correct coolant hose connected to outlet under AAV.
Routing an estimating length for hose from AAV.
Final routing. This hose was originally routed over the air pipe, but I routed it under the air pipe to ease installation/removal of intake tubes.
New hoses at the cleaned-up tee, hose clamps arranged for easy access.
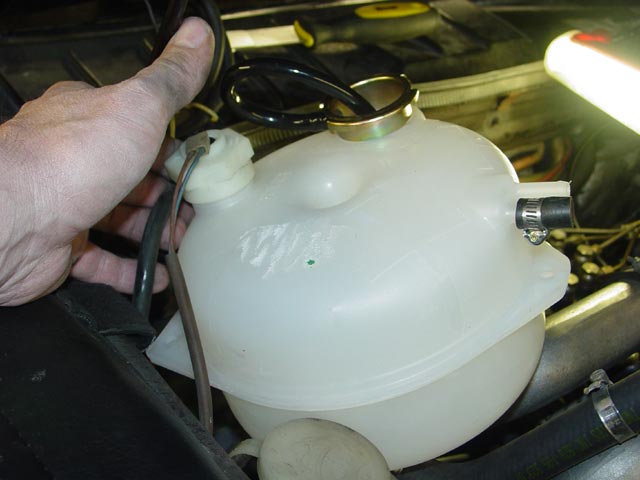
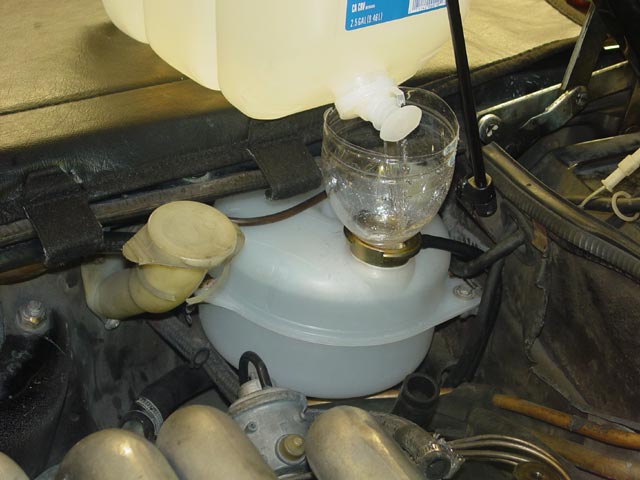
With everything buttoned up, it was time to add coolant. First, a bottle of water wetter.
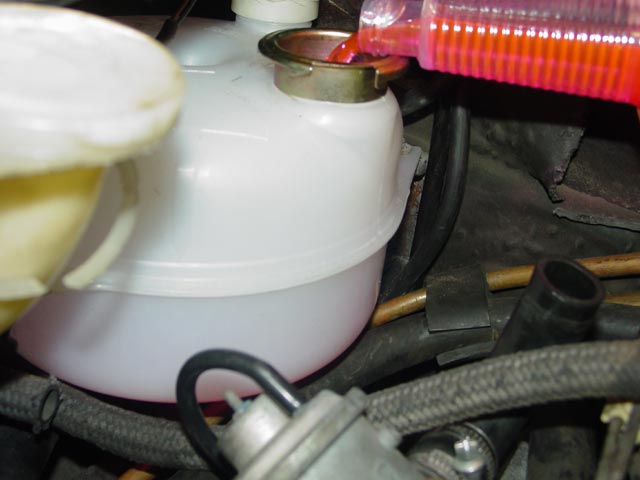
Next, a gallon of Dexcool.
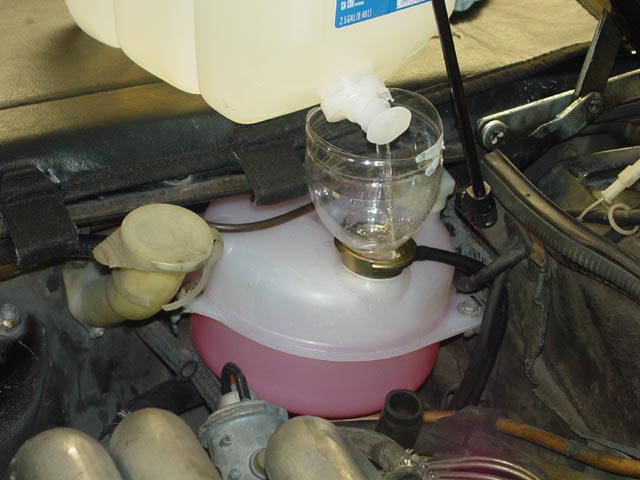
Finally, I topped up the system with distilled water.
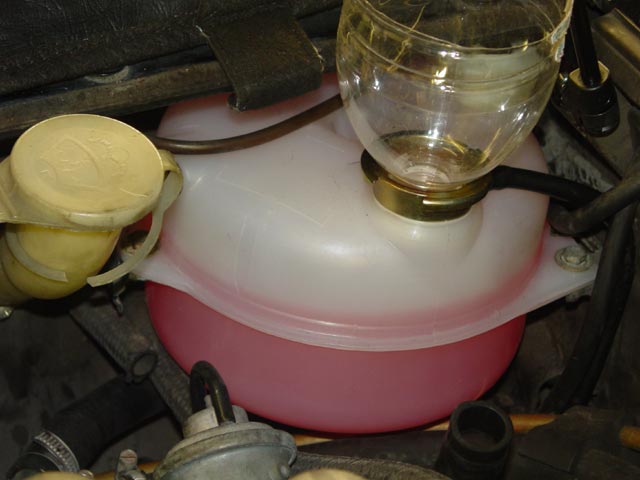
By the time I had put about 3 gallons in, there was no coolant visible in the reservoir.
Seconds after startup, the coolant and water had mixed in the reservoir. There is considerable flow through the bleed line! Note that the level of coolant had dropped. As the car warmed up and air bubbles made their way to the reservoir, I had to keep adding water.
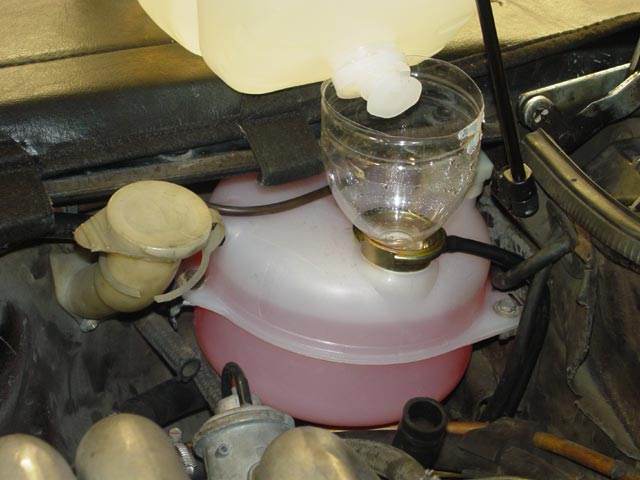
By the time the car had fully warmed up, the level had stabilized. I took the car out for a nice flog, and when I returned to the garage the level had dropped about 1-1/2" so I topped it up again. Since then the level has been stable.
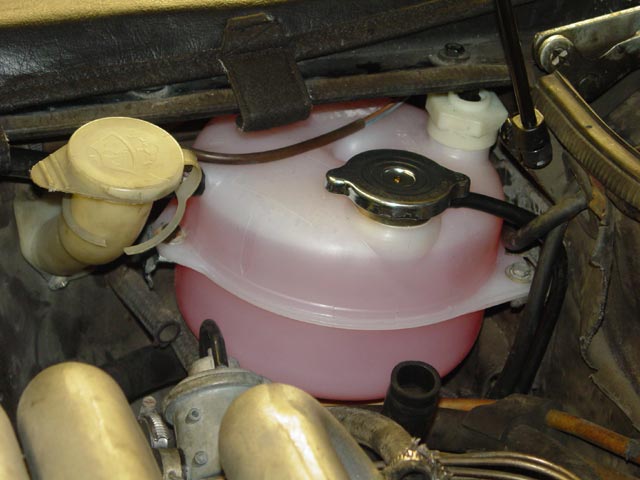
It's very nice being able to see the fluid level now without having to wait for the car to cool off and open the cap. Of course this made no difference in the way the car drives, the behavior of the temp gauge, or anything else, but the peace of mind that comes from knowing that my coolant reservoir is no longer on the verge of exploding is priceless.
