This story starts off with a puddle at the post office. I came back to my car after mailing a package, and noticed a small puddle under the front of the car. I had backed in and while I was trying to remember whether that puddle had been there earlier, another drop came out of the engine bay and landed in the center of the puddle.

I opened up the hood and found coolant on top of the oil pan but the hoses were all dry. Water pump.

So, I couldn't get a decent pic of the next step. I drove it home and popped the driver side belt cover off and looked down inside with a strong light. I was able to confirm water seepage from the weep hole on the side of the water pump. We all know what that means. Time for surgery. I could also tell that the WP bearing had not failed to the extent that the WP pulley was cocked; it was still keeping the belt in line. This, together with the discovery that I had lost hardly any water and the knowledge that TB failure is not catastrophic on the non-interference 16V engines gave me a little confidence that it wasn't in imminent danger of blowing up.
Note that this writeup is not intended to detail every fastener, every detail, or give you the torque specs(I may add a torque specs section in the next upate, or not...). This is just intended to be an overview of the project.
This actually happened on the 13th of December and it took me a few days to gather up the parts, and I was too busy to deal with it in the next couple of weeks due to holiday season. Since I was only using the car to commute 4 miles each way on surface streets, I found that I could just run it with the radiator cap loosened to avoid building pressure and the water level only dropped ~1/2" in the reservoir the half dozen times I commuted to work with it over this period. Not an ideal situation but I checked the water before every startup and I felt the risk was low.
I ordered essentially all of the parts for a TB/WP job, belt, tensioner boot, all bearings and rollers, 12x17 crush rings for the block drains, and a few replacement water pump bolts. The 928-specific vendors are very understanding about these projects and will allow you to return any unused parts. I had also pulled the passenger side belt cover off after confirming the leak source and the cam sprockets looked fine so I decided to re-use them. Once all of the holiday ruckus had died down and I had the time to get to the car, I backed it into the garage, put it on stands and pulled the air intake tubes and fan shroud off.
A little time-saver trick here -- I removed the fan from the front of the engine, not bothering to loosen the air pump. The air pump had to come off eventually, but it's something you can keep in mind any time you want to quickly get the fan out of the way.
The next step was to turn the engine to TDC, compression stroke for #1 cylinder. (NOTE: the procedure for 32V cars is different on this point --
 ) I verified that I was at the end of the compression stroke rather than the end of the exhaust stroke by briefly popping off the distributor cap and verifying that the rotor was pointing to the notch in the distributor.
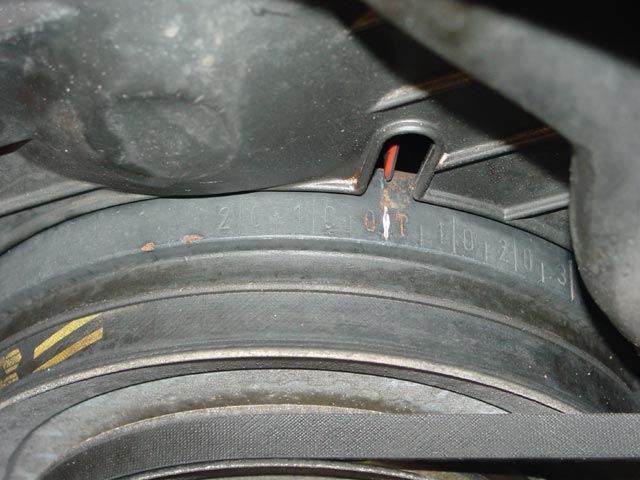
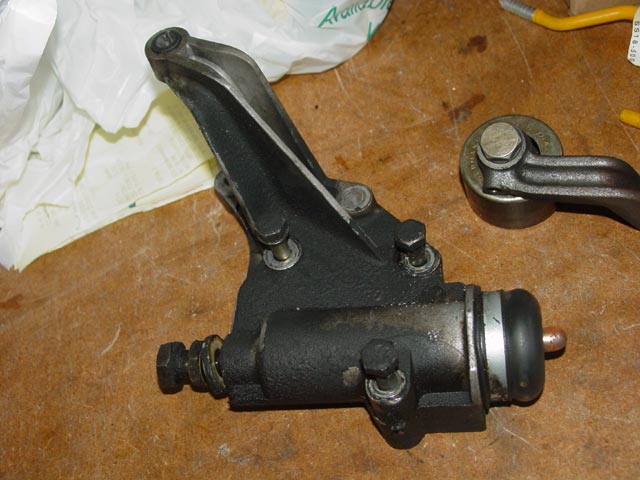
Next the flywheel lock is installed in place of the clutch slave cylinder.
As I proceeded, I drained the coolant, first from the drain in the radiator...
...then from the block drains on the passenger side...
...and the driver side. I've had these off before so it was no big deal. If yours have never been off, be prepared to work at it, and make sure your wrench is solidly engaged so you don't bust any knuckles. These can be incredibly tight if they've never been broken free.

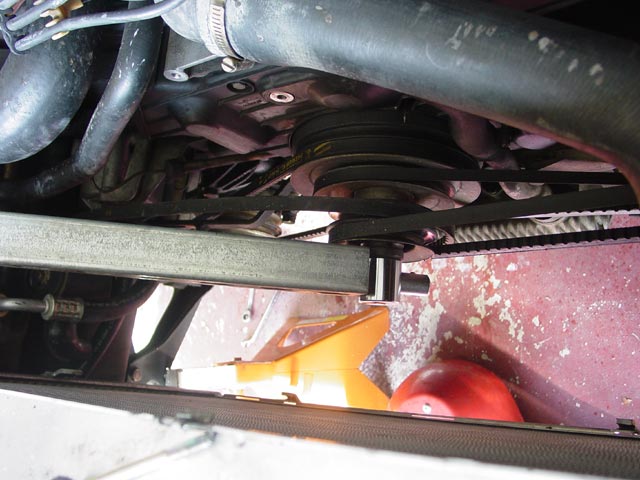
Next step was to break the flywheel bolt free. This proved to be very easy with a piece of unistrut(steel pipe, etc works fine too)...
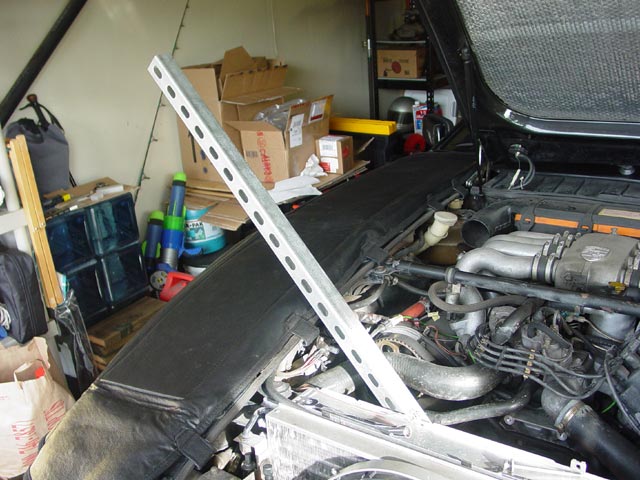
...and a 3/4" breaker bar with a 27mm socket.
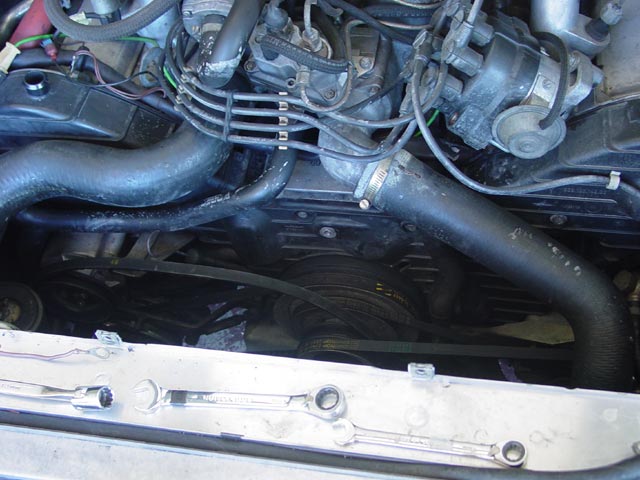
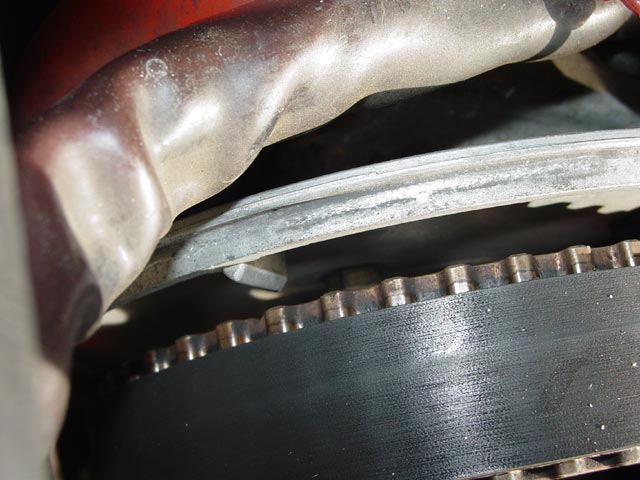
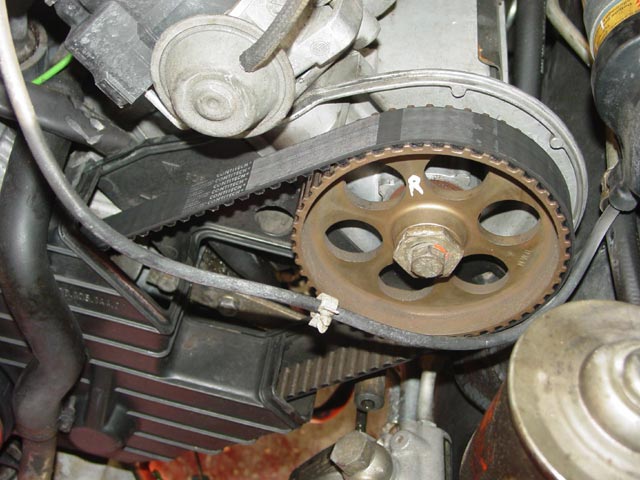
As a point of reference, I checked the cam marks to ensure that they were lined up and no teeth had been skipped. This is the 1-4 cam
Here is the 5-8 cam. I couldn't get the cover off yet...
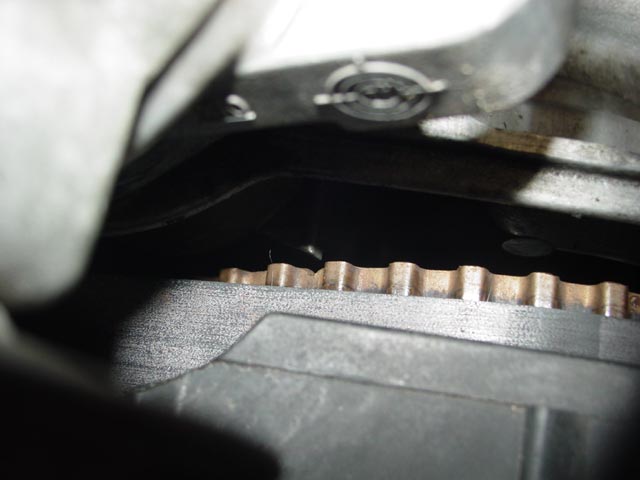
...the PS pump banjo fitting to the reservoir was in the way. I still didn't have the proper crush rings for this fitting, and I had drained the PS system enough times in the past 3 months. I decided to work around it.
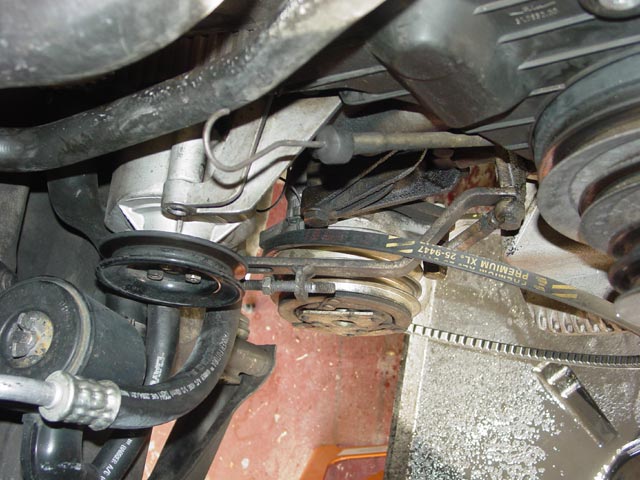
So the next step was to pull the rest of the accessory belts off. The AC belt is captured by the air pump bracket, so I left it. The air pump pivot bolt is out in this pic -- no need to remove the air pump tension arm. At the end of the project it all went back together with no need to retension the belt.
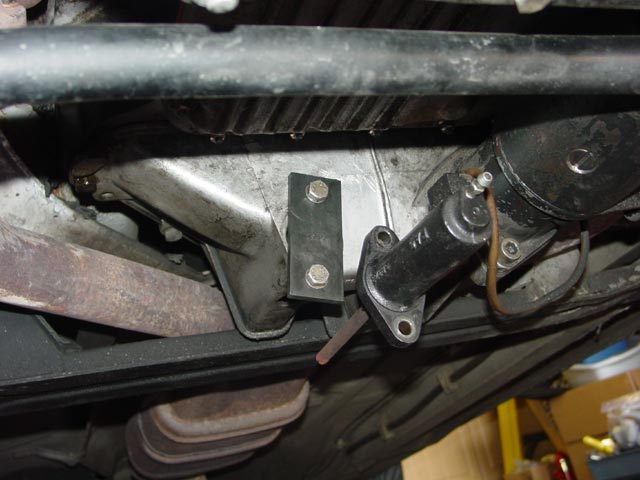
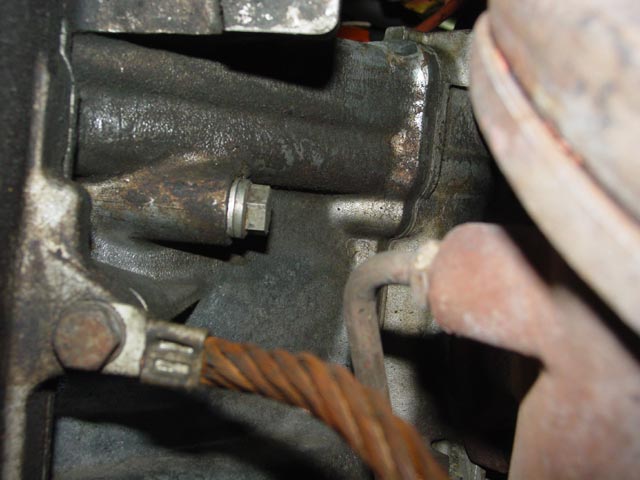
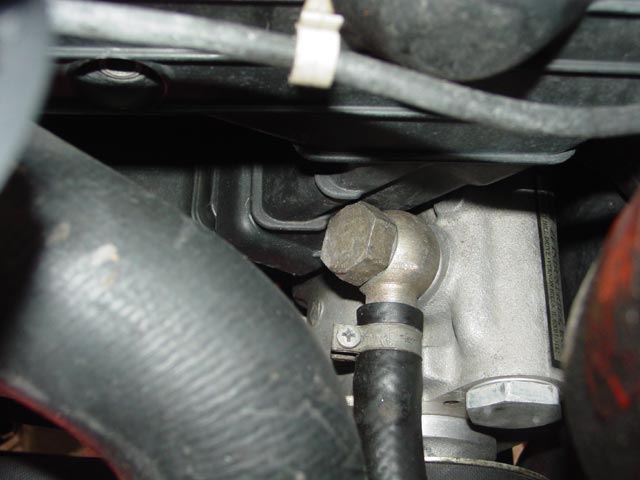
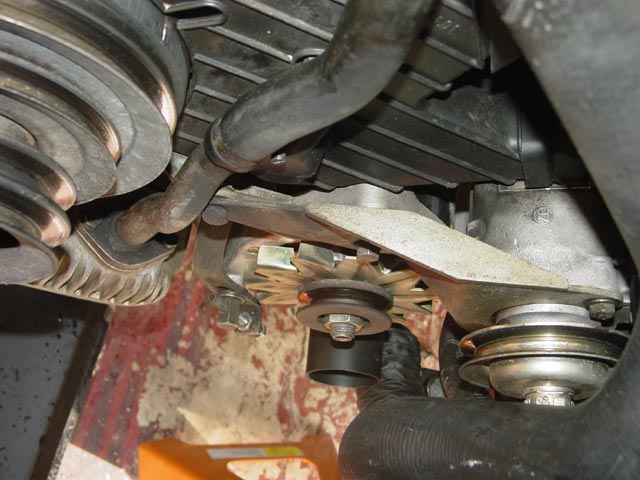
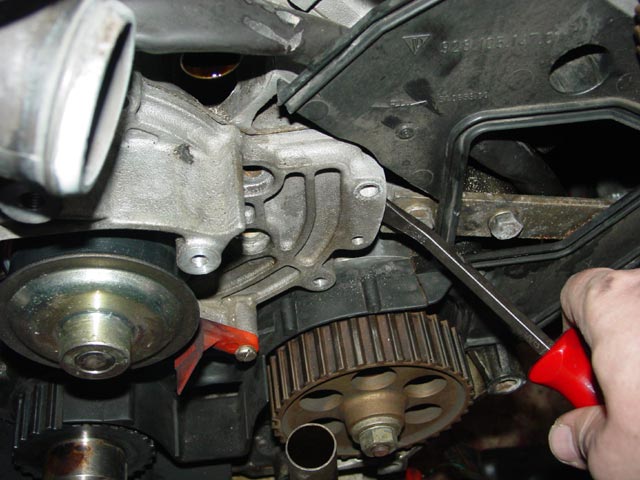
In order to move the PS pump out of the way, I had to drop the alternator and wired it to the undercarriage so it wouldn't hang on the wires. The PS pump bracket is held in place by the bolt just to the right of the oil pipe and the bolt that appears to be just above the alternator pulley in this shot. The latter bolt is the one that the alternator pivots on for belt adjustment.
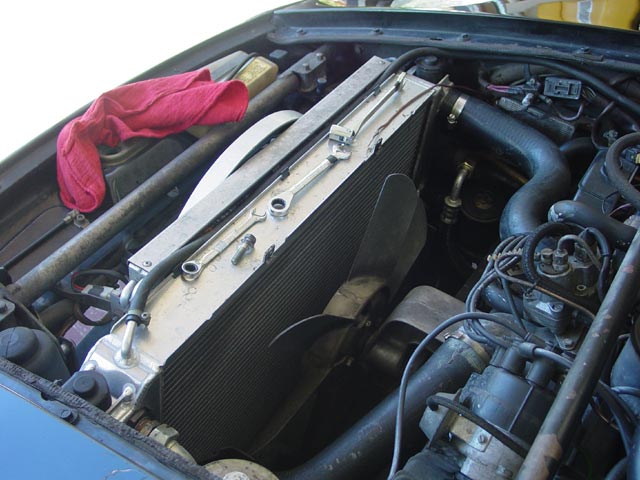
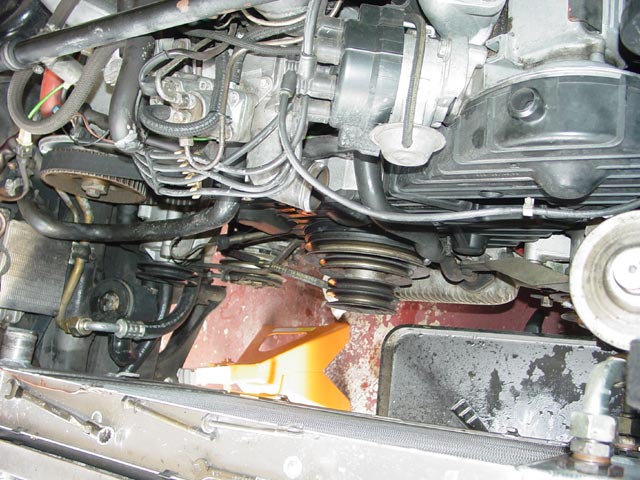
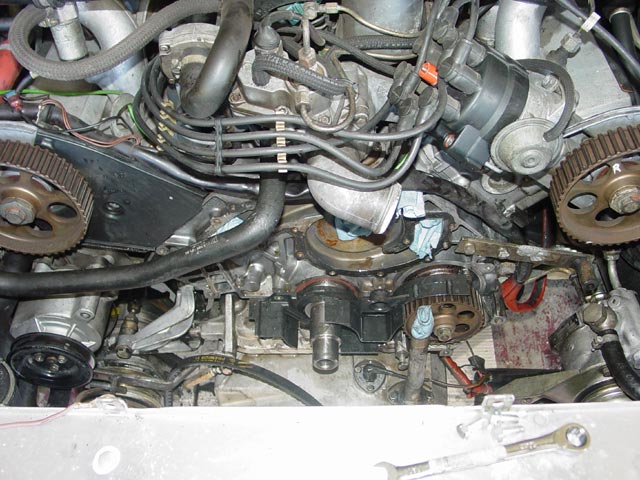
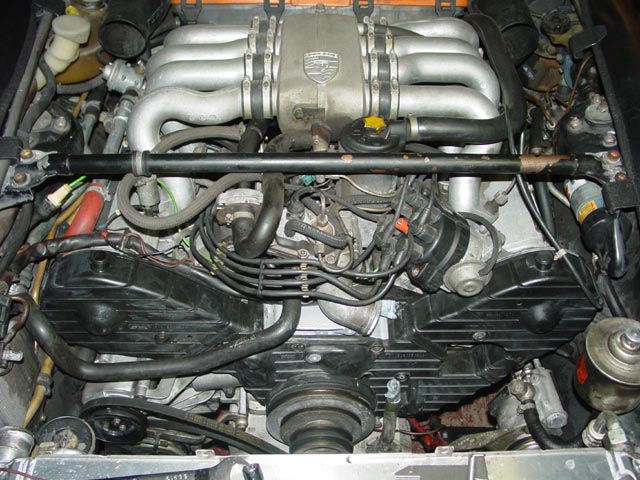
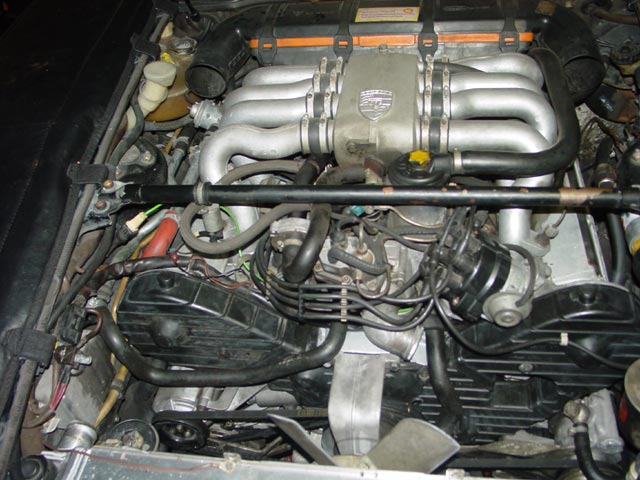
Here is an overview of the area after removing the radiator hoses -- amazing how much room there is to work in there at this point.
With the PS pump hanging from the reservoir hose and the high pressure hose there is plenty of room to get the driver side cover off.
Cover off, belt actually looks OK...
The next step is to remove the rubber hose that connects the upper and lower sections of the oil tube. I had to pop the distributor cap off to reach the upper clamp with a screwdriver.
Next I unscrewed the flywheel bolt. The pulley stack essentially falls off at this point. The harmonic damper was not so cooperative, but with some patient back-and-forth wiggling it came off without too much drama. Note: even if you can get a puller on the damper, DON'T. If you're having trouble use lots of penetrant like PB Blaster or Kroil(don't waste your time with WD-40 or liquid wrench) and wiggle it slowly and patiently. You can damage the rubber that bonds the inner and outer portion of the damper together if you try to force it.
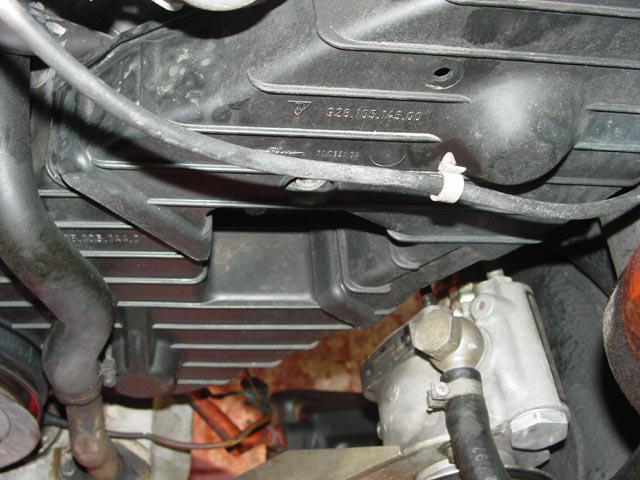
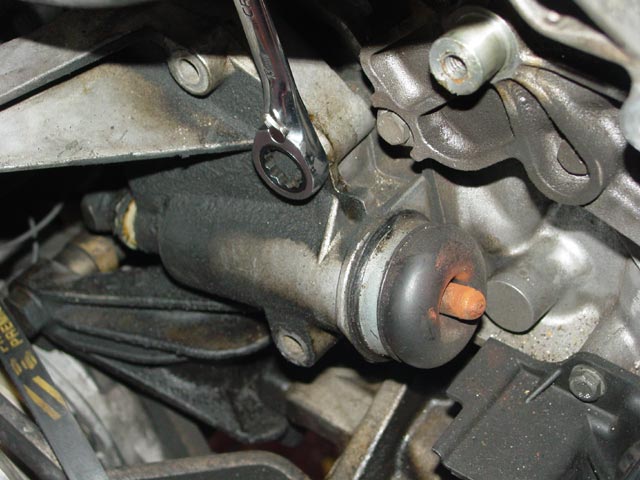
This pic shows the belt cover already off, but the dipstick had to be removed to accomplish that. The rack centering bolt was the perfect size to drop into the hole and keep debris from falling n.

With the balancer off it was a simple matter to remove the dipstick and the few bolts holding the cover on and maneuver it free. If the bypass hose, visible here between the cam sprocket and the air pump is not flexible enough to allow you to bend it out of the way easily, replace it now while the coolant is drained.
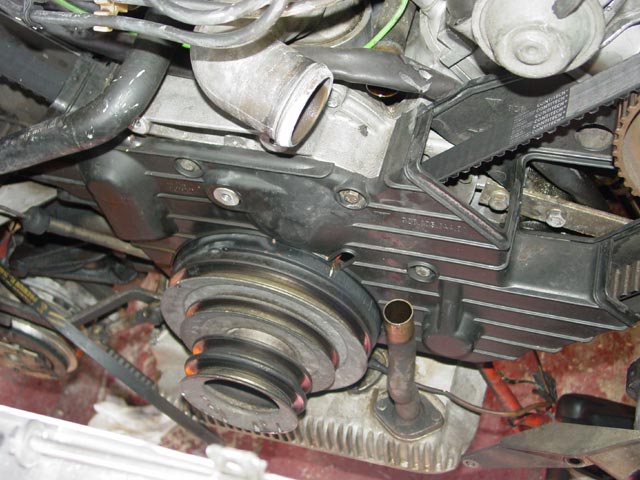
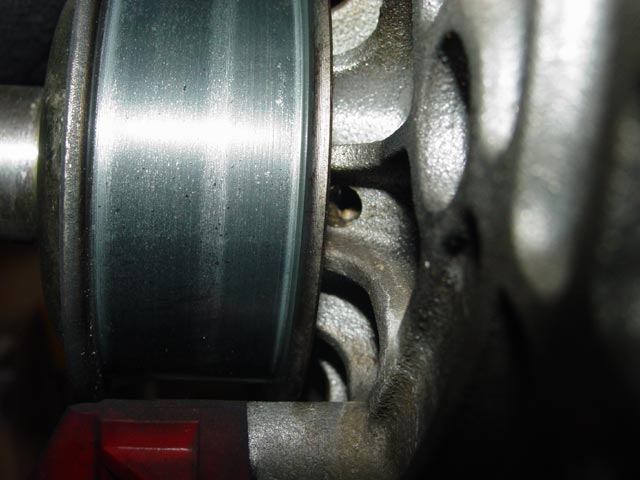
Here is my first good look at where the water pump was leaking. There is also evidence of coolant coming from above -- in fact, I did have a leak at one point where the lower radiator hose attaches.
Here is a better look. Pic was taken later, with water pump off. It was readily apparent when I first inspected this area with the covers on that everything was dry above the weep hole and that the leak was there. I want to make a point of this because if you make a hasty diagnosis after everything has dried it is possible to mistake a leak from above for a WP leak.
The next step was to loosen the tensioner and remove the belt. As good as it looks, with 20K miles on it I felt it made little sense to put it back in. Replacements are cheap.

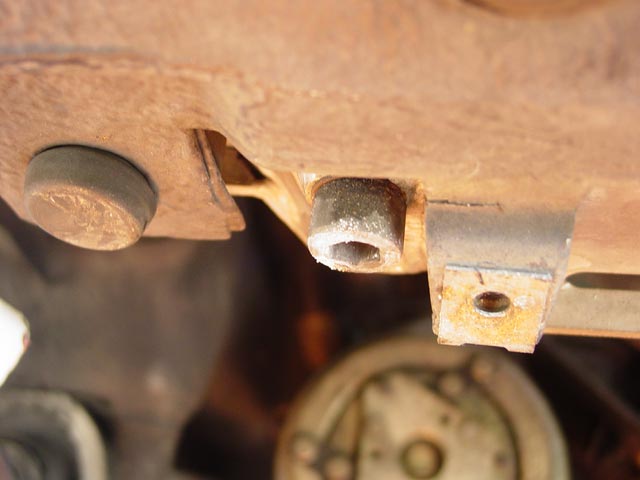
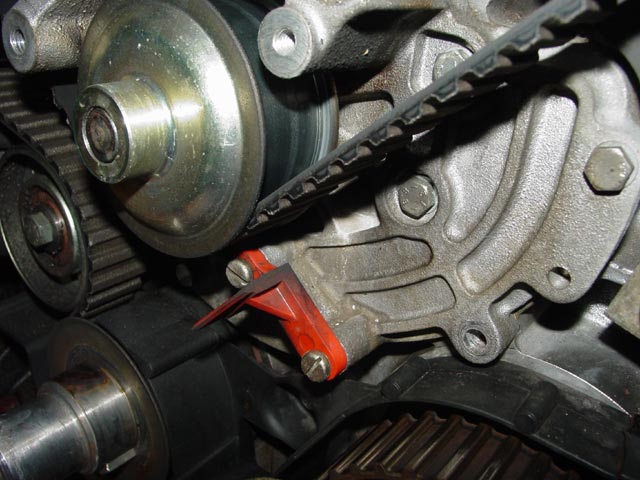
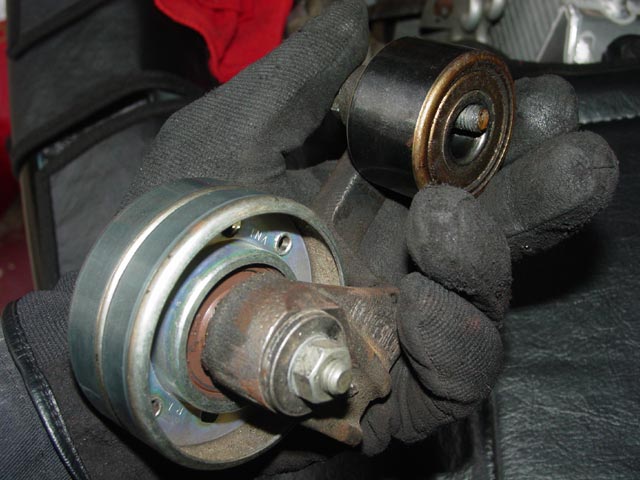
On the early setup, the tension arm is attached to the water pump by the single bolt that I have my thumb on. Note the rust on the tip of the bolt - it is normally in contact with the coolant. It gets a coat of Hylomar upon reassembly to avoid having a coolant leak here. Both of these rollers were in perfect shape, having been replaced ~20K miles previously, so I re-used them.
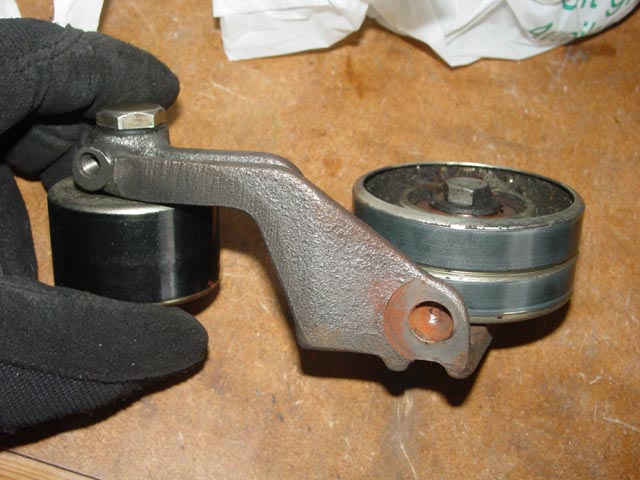
Here is a look at the pocket where the tensioner bears on the tension arm. Note that it is not aligned with the centerline of the roller. This is one of the reasons why it is so critical that all hardware and bushings are in perfect condition. If the bushing is loose, this off-center force will cause the rollers to be out of alignment, leading to belt walking and premature failure. Even though I re-used these rollers, I replaced the plastic bushing that this arm pivots on, and gave it a coat of moly grease.
Next step, swing the air pump out of the way and remove the tensioner.
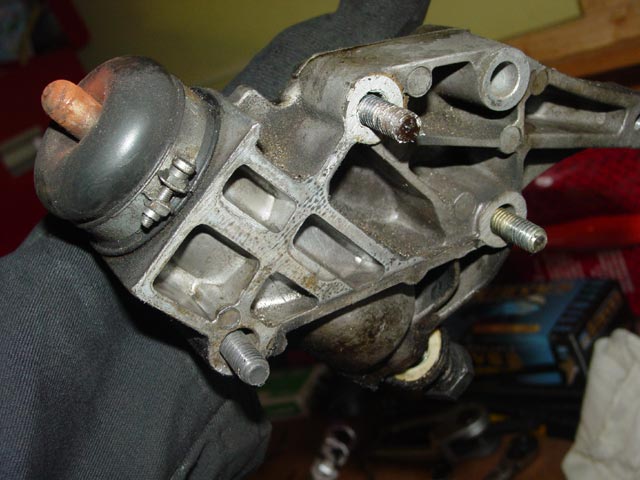
Here it is, on the bench and in need of cleaning. All that was needed was to remove and toss the old boot, take it apart, hose it down with brake cleaner, blow out with compressed air and dry. Reassembled, filled with oil, and installed new boot.
Note that one bolt protrudes into an oil galley. This bolt will get some silicone sealant(hylomar) upon reassembly.
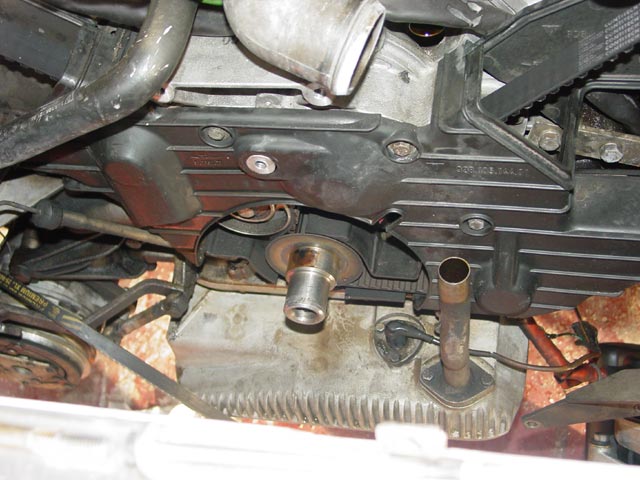
Make sure you have all of the water pump bolts out before attempting this. The WP should pry off the gasket with very little force. If it doesn't move easily, double-check that you have removed all of the bolts. Note that the hole just below the prybar is for a dowel pin that is pressed into the block.
At this point I am done removing parts. Not sure why the block seems stained in the vicinity of the impeller, but it's just a stain -- it wasn't anything to be concerned about. My best guess is that at some point in the car's life it was run with straight water and these are rust stains from the impeller.
Prior to scraping the old gasket off and cleaning up the front of the engine, AC bracket, etc I plugged all of the openings in the block and the oil pipe with paper towels. This pic was taken after hosing off most of the muck with parts cleaner.
Be sure to put down some cardboard or similar to catch all of the crap that gets hosed off.
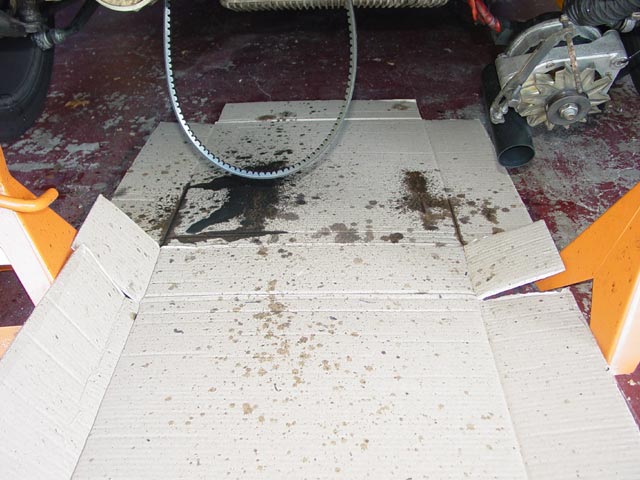
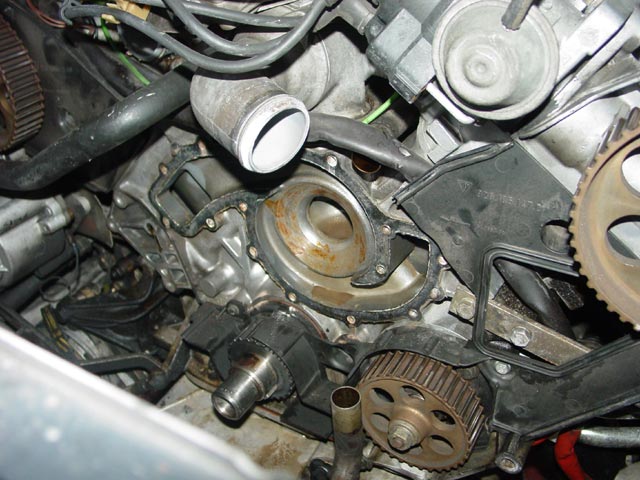
Here it is after cleaning up the sealing surface, paper towels removed from the water passages, ready for the WP. At this stage Bill Ball had come over to help out -- that's him holding the bypass hose out of the way for the pic.

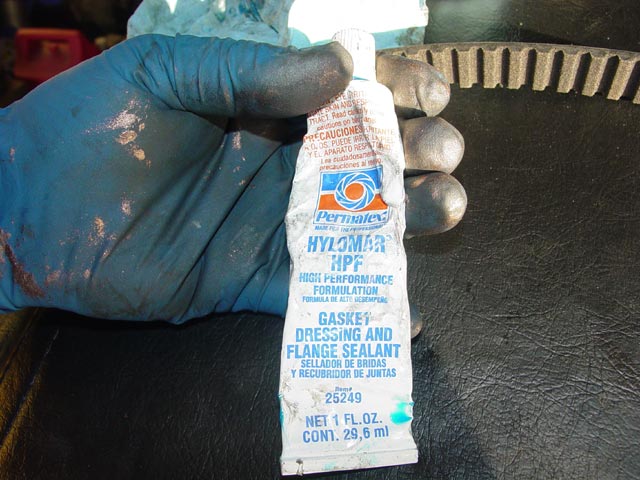
Bill brought over a tube of "Secret Sauce" -- He has used this Permatex Hylomar HPF on many WP gaskets and swears by the stuff. Add one more to the list of satisfied customers... we put a thin smear of this stuff on each side of the gasket. There was just enough that a thin(~1mm) bead squeezed out upon tightening the WP bolts. I replaced the most-corroded WP bolts and cleaned up the others. At this stage it is very critical to have an appropriate torque wrench, as the required torque is very low and it is all too easy to strip the threads in the block or snap the bolts. When you see how little torque is actually applied it's easy to think that it's not enough torque... but it is. Note also that I put copper anti-seize on all of the threads, except for the bolt that penetrates to the water passage which received a coat of hylomar instead.. All excess anti-seize ends up on the gloves and on everything else that you touch, so be careful!

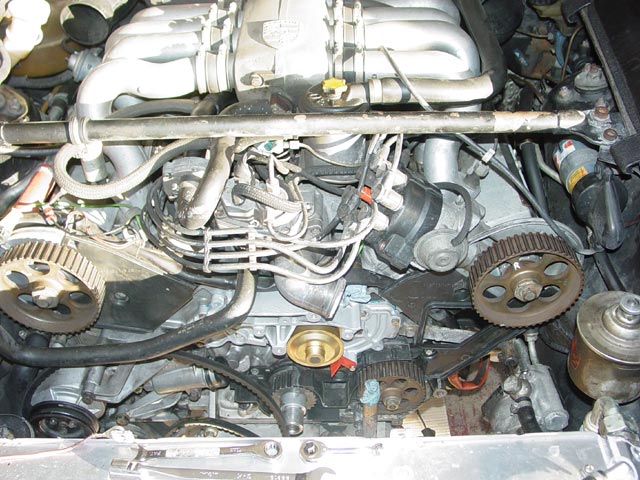
Water pump installed and torqued, tensioner installed and air pump hung, ready to install idlers and thread the belt.
Here is a shot of Bill in his second-favorite position, elbow-deep in a 928.
His favorite position, AFAIK, is behind the wheel with a cloud of tire smoke in the rearview.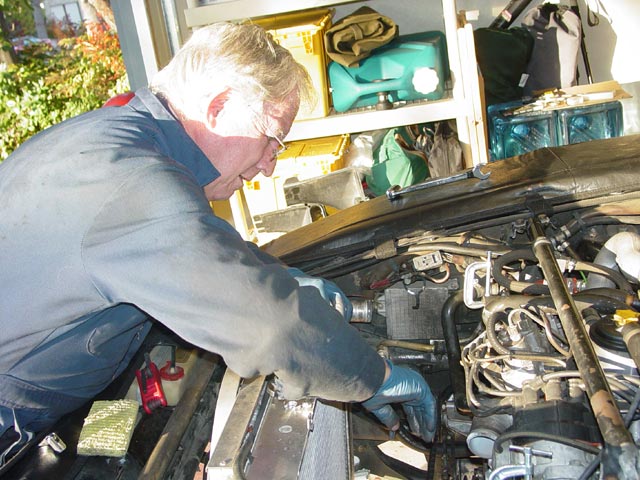
Threading the belt was a minor PITA, we needed five hands and only had four. I brainstormed the idea of securing it to the sprockets with C-clamps. Not too tight, just enough to keep them from unwrapping. At this point, we temporarily installed the harmonic damper (note the anti-seize on the crank -- I also cleaned up the crank and the bore of the damper with some scotchbrite). We removed the flywheel lock, replaced the clutch slave, and cranked the engine round and round, checking tension at TDC #1 with the Porsche 9201 tool.

Once satisfied with the belt tension, we removed the damper, reinstalled the covers, then reinstalled the damper and pulley stack. At this point it was easy to torque the crank bolt to spec with the car in gear and a foot on the brakes. It takes a lot less force to torque it down than it does to break it free after it's been on there for a while. I did put some anti-seize on the threads -- it had been assembled dry by the shop that did the job previously. Hopefully next time it will come apart easier.
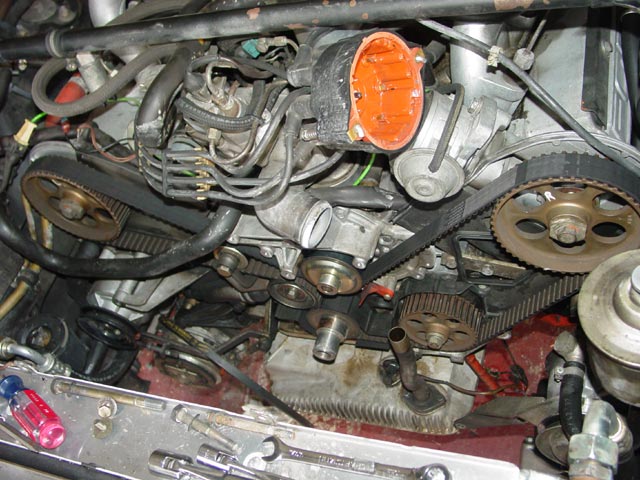
Fan, PS pump, alternator and all belts reinstalled, just need to put the rad hoses on, fill and test.
After all of this work -- the car did not run any different -- not that I expected it to. But, no more WP leak. As always, the test drive after having the car limping for a while then laid up for a while was extra-sweet.

Thanks for your help, Bill! Always a pleasure, I really appreciate you taking the time to help out. And, thanks for the secret sauce. I need to pick up a tube for next time...
A side note -- with the shroud off, I found that my Devek Radiator was leaking where the core was epoxied to the side tank.
Update here, bottom of page.