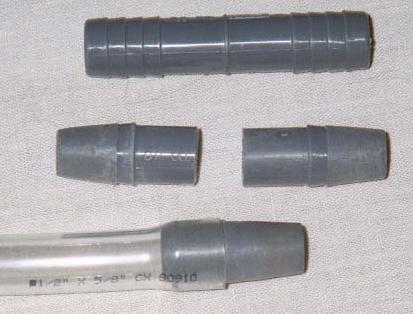
Tap raw material, 2 finished taps, and a tap inserted into the vinyl tube
1996 not available
1999 not available
I have been making maple syrup for the last several years. I have a small "operation" - I normally tap 6 good sized maple trees in my yard and produce somewhere around 2 gallons of syrup each year. I enjoy getting out each spring, collecting sap from the trees every day and boiling it down into syrup. It is the first crop harvested for the year and makes it seem like winter is already over and spring is here, even if there is still snow on the ground. Every year, I can't wait for the maple syruping season to begin. During the season, it keeps me quite busy and by the time it is over, I am tired and glad it is done. Before long, I am thinking of what changes I want to make for the next year.
Maple syrup is made from the sap of the Maple tree. The sap is mostly water, but it also contains a small percentage of sugar and "other natural flavoring". If you put a drop of sap on your tongue, you can just barely taste some sweetness. Maple syrup is produced by boiling away most of the water, leaving the sugars. It takes somewhere around 40 to 60 gallons of sap to produce one gallon of maple syrup.
The start of the maple syruping season varies from location to location and from year to year. In the spring, when the daytime temperatures get above freezing (the freezing point of water, 32 degrees F) and the nighttime temperatures are below freezing, the sap will begin to flow through the trunk of the tree as it begins to wake up and prepare for spring. The mechanism is not understood very well, but if the high temperatures remain below freezing, or the low temperatures remain above freezing, the sap will stop flowing. How much syrup is produced in a season depends on the number of trees tapped and the weather. On a good day, a tap in a good tree can produce over two gallons of sap.
Professionals have large operations with lots of money invested and they work practically 24 hours a day during the syrup season.
I approach maple syrup making more as a hobby. I want to do it fairly inexpensively and in my spare time. I still have devote 30 to 45 minutes each day to collecting and storing sap and 6 to 8 hours each weekend to boiling the sap down. A season can last anywhere from 2 to 5 weeks here in southern Minnesota.
A tap is just a hole in the tree into which a tube is inserted. The tube channels the sap into a collection pail or jug. While you can buy taps and pails or jugs specifically made for maple syruping, I chose to make my own from materials available at the hardware store. The tap is made from a piece of plastic pipe coupling commonly used to join underground sprinkler system pipe. It is called a "1/2 inch PVC insert coupling" and has barbs on each end. I cut the pipe in half and taper the barbed end down using a grinding wheel and a file. The taper allows the tap to fit tightly into a round hole drilled into the tree, holding the tap in place and preventing the sap from leaking out around the edges. One end of a piece of 1/2 inch inside diameter clear vinyl tubing about 3 feet long is pushed over the non-tapered end of the tap. The other end of the tap is put into the top of a milk or bottled water jug. I drill a 5/8 inch hole in the top of the jug or cap. The vinyl tubing has an outside diameter of 5/8 inch and fits snug in to the hole. This helps keep any rain or bugs out of the collected sap. (You might be suprised at how early bugs start to appear in the spring.)

Tap raw material, 2 finished taps, and a tap inserted into the vinyl tube
When the sap starts flowing, some of it comes up the trunk of the tree and into the hole drilled into the tree. It then flows out of the tap, down the hose and into the collection jug. The sap flows slowly, and will drip into the jug at about a drop every couple of seconds. Over the course of a day this can add up to a couple of gallons.
|
|
|
|
|
|
|
|
|
|
|
|
|
|
|
In general, it is better to put one tap per tree and tap more trees than to put in multiple taps, but sometimes the number of trees available is limited.
Don't put the tap directly above or below a tap hole from a previous year. I tend to spiral my taps around the tree from year to year. This years tap is about 4 inches over and 4 inches up or down from last year's tap. If you are using a collection tube, make sure the tap is low enough for the tube to reach from the tap to the collection jug on the ground.
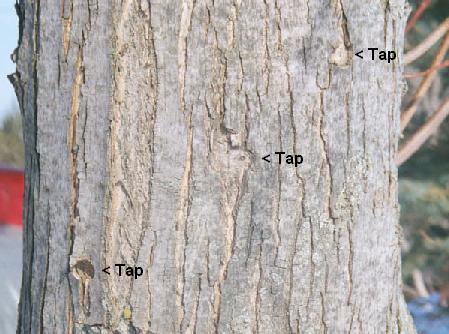
Tap holes from the three previous years can be seen in the trunk of this tree.
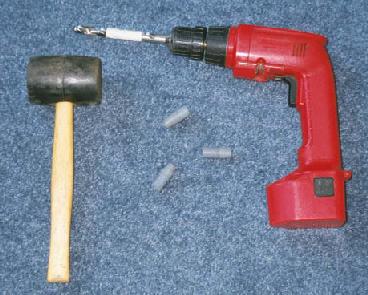
Tools for drilling and setting a tap
Drill into the tree at a slight upward angle so the sap will flow down and out of the hole. Drill a hole about 2 inches deep. If the sap is already running, the wood shavings may come out wet and sap may run down the drill bit. If it isn't running yet, it won't hurt the tree to have drilled too early.
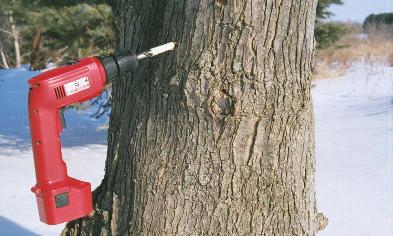
Drilling the hole
Try to blow most of the shavings out of the hole, but don't be too picky about getting every last one. You may have to fish a shaving or two out of the sap later.
Take your tap and put the tapered end into the hole you just drilled. Gently tap it to seat it in the hole and to seal the joint between the tap and the bark. Don't force the tap in too far or you will split the bark and then the sap will run out of the split instead of the tap. I use a rubber mallet and give the tap a couple of soft "bumps". As long as it doesn't fall out when the tubing is in place you should be OK. I've had taps come loose after a week or two of handling and I just tap them back in.
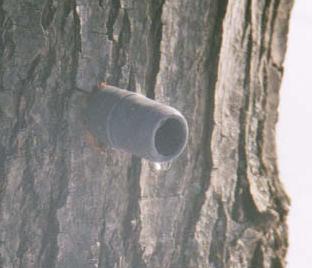
A tap set in place
Don't worry that drilling holes in your maples will cause them great harm. I took a series of pictures, one at the beginning of each month, showing how the tree heals itself.
Once the sap starts to flow, the sap needs to be collected and stored until it can be boiled down. I use a combination of one gallon milk jugs and 2.5 gallon bottled water jugs from the grocery store. At the end of the day, I walk around and collect the sap, transferring it to a storage container. If the previous night was warm, sometimes I need to collect in the morning as well.
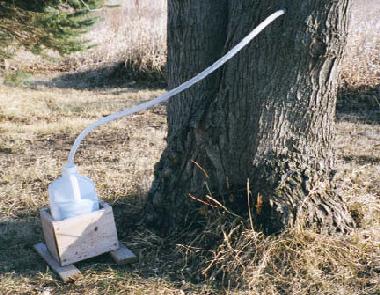
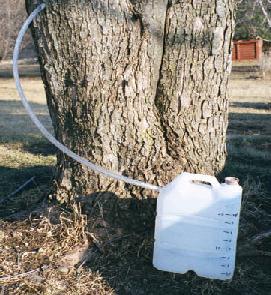
One gallon milk jug and 2.5 gallon water jugs used to collect the sap
I built some wooden boxes to set the jugs into. This keeps them from tipping over if the ground is uneven or if it is windy. I also put marks on the jugs to easily read how many quarts of sap have been collected.
The collection jugs should be rinsed out with water every couple of days (more often if the weather is very warm) to prevent bacteria growth. The sap will be thoroughly sterilized when it is boiled down, but keeping the collection jugs clean helps prevent the sap from spoiling.
I have used a number of different containers to store the sap: extra milk jugs, a 5 gallon water container, 5 gallon pails, a large cooler, and a 30 gallon trash can (new of course).
It is important to keep the sap cold until it can be boiled to prevent spoilage. Sap kept in the refrigerator (40 degrees) can spoil in a few days. It is best if you can keep it as close to freezing as possible. Sap can be frozen, but it can be a pain to thaw it out in order to get it out of the container when you are ready to boil. I keep my sap on the north side of the house (in the shade).
Normally, the weather will keep the sap cold enough (below freezing at night and not too warm during the day). If the temperature warms to 50 or 60 degrees during the day and does not get below freezing at night, you can try keeping your sap in a large cooler and help keep it cool by freezing a pint or two of sap in the freezer and adding the frozen sap to the cooler. Add fresh block of frozen sap every day.
Collect the sap until you have enough to boil down, say at least 5 or 10 gallons. Remember that at a 40 to 1 ratio, 10 gallons of sap will boil down to only 1 quart of syrup.
You might be tempted to boil your sap on the kitchen stove, but don't. You will end up evaporating 5 or 10 gallons of water into the air, and you risk humidity problems such as condensation on the walls and windows and may even loosen the wallpaper from the kitchen walls.
The rate at which the sap evaporates depends on the size of the fire underneath the boiling pan and the surface area of the pan. Pans with more surface area have more area from which the water can evaporate. A larger pan can hold more sap, but will require a larger fire to keep the sap boiling.
My propane-fired cooker has two 30,000 BTU burners. On one burner, I use a rectangular pan 11.75 by 18.75 inches. On the other burner, I use a round, galvanized steel hog pan that I got from a local farm supply store. Sometimes these are sold as oil changing pans at auto parts stores.
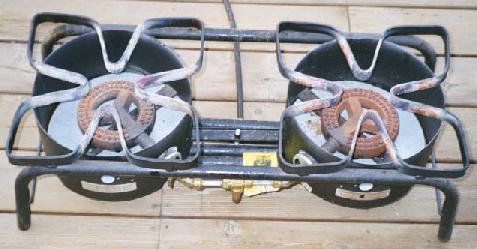
A 2 burner propane cooker
With each pan, the sap boils in the center above the fire, but steam comes off the entire surface of the sap. I could probably use a larger burner.

Sap boiling in the pans
When boiling, start with at least 2 inches of sap in the pan and add sap as needed to keep at least an inch in the pan. Don't let it get too low, or you risk boiling it past the syrup stage and will end up with a charred sticky mess.
As the sap boils, a white foam will form on the surface of the liquid. Scoop this foam off with a slotted spoon, as it reduces the area from which the water can evaporate.
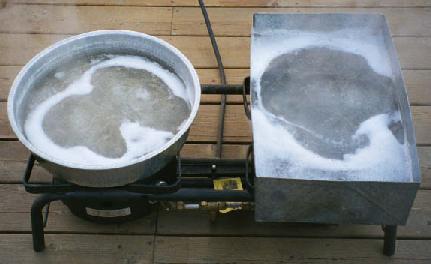
Foam forms on the surface and should be scooped out
As more sap is added to the pans and the water boils away, the sugar density of the liquid slowly increases and it starts to take on a color like apple juice. This is the pre-syrup stage. It is beginning to look like syrup and you can taste the maple flavor, but the syrup is too thin and runny.
Once all of your sap has been added to the pan, additional boiling will increase the sugar density until the syrup stage is reached. At this finishing stage, I combine the sap from my two pans into one pan, since the level in each pan is starting to get too low. It is easier to watch just one pan as well.
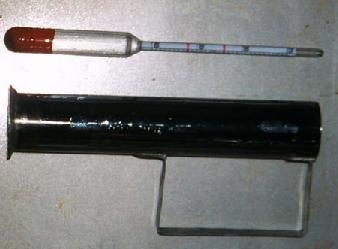
Tester and Testing Cup
There are a few different types of specific gravity testers which have different scales. The one I use has a scale ranging from 25 to 40. The syrup is ready when the tester floats at 32, with the syrup at 211 degrees F. That point is indicated by the highest red mark on the tester. The lower red mark indicates the test point for syrup that is at 60 degrees F.
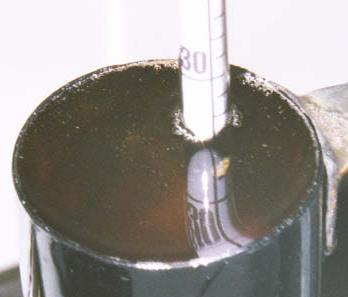
Testing the Syrup
The syrup is ready when the tester floats at 32. In the picture above, the tester is floating at about 31.5.
If you don't have a tester, there are other ways to tell when the syrup is ready. One is to use a candy thermometer to measure the boiling point of the syrup. The syrup is ready when it boils at 7 degrees above the boiling point of water. I have tried this, but it is hard to get an accurate reading when the syrup level is so shallow.
A second method is to look for an effect called "aproning". If you dip a spoon or spatula into the syrup and then remove it, the syrup will run off the end. When the sryup is too thin, it will run off in one thin stream. When the syrup is ready, it will start to run off in a wider stream called an "apron" of syrup. I have had trouble using this technique as well.
The sugar sand and other impurities are removed by pouring the syrup through a filter. I use a piece of orlon filter purchased from a maple syrup maker's supply store along with a piece of flannel as a pre-filter to catch the larger impurities. The flannel keeps the orlon filter from clogging up as fast. I use clothspins to secure the filter to the top of a large stock pot. The filter is attached so that it forms a bowl in to which the syrup is poured. The flannel is just placed on top of the orlon filter.
The key to filtering is to pour the syrup through while it is still hot. The filter is thick enough that cold syrup will not run through. The syrup should be above 150 degrees F. Once my syrup is finished, I take the syrup directly from the cooker to the filter and pour it through, catching it in the stock pot. To keep the syrup as warm as possible while it filters through, I place the enitre filter and stockpot in a large insulated cooler. As soon as I pour the syrup into the filter, I close the lid and allow the syrup to filter through.
At this point it is usually late in the day and I just leave the syrup and cooler until the next day. I clean up my pans and tester and put away the propane cooker.
The finished syrup can be stored in what ever type of jar or can you may have available. Canning jars work well, but it can be hard to pour syrup from them without spilling.
I have found that glass fruit juice bottles, such as Snapple or Everfresh, work well. The twist off lids can be reused once or twice. I peel the paper labels off and clean the label glue off with a product called "Goo-Gone". After that, I wash the bottles and caps in the dishwasher.
The syrup is then poured into the bottles, leaving about an inch of space below the top of the bottle. Then, I heat the syrup and bottle in a microwave oven until the syrup reaches a temperature of 180 to 190 degrees F. I heat the syrup one minute at a time and stir it after each minute to make sure the syrup is a uniform temperature. (If I don't stir, the syrup at the top of the jar gets hot first and starts to boil.) I use a meat thermometer to stir the syrup and test it's temperature a the same time. It takes about 4 minutes in the microwave to heat a 16 ounce bottle of syrup to about 180 degrees.
Once the syrup is hot, I put the cap on tightly and tip the bottle over to allow the hot syrup to sterilize the cap. Then I set the bottle aside to cool.
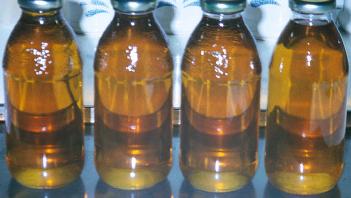
The final product, canned and ready to enjoy!
Last updated on 03/26/2002