|
The Maintenance Files |
|||||||
|
|||||||
|
Amplifiers & Head Unit Installation |
|||||||
|
With the door speakers
installed, the next phase was electronics. I had 2 amplifiers to
find a home for. The first thought is the traditional under the
seat location. But since I have 2 amps, they wouldn't
fit. The other big drawback to this location, is cabling.
You have to route all of the power cables, speaker cables, remote
trigger & any control cables under the carpet to the amp's
position. Not a real problem except for the power cable. A
power amp produces voltage & current to drive the voice coils in
your drivers. The better the amp, the more it produces. And
the more it needs to feed its own power supply. The longer the
cables to the amp, the larger they have to be. It's roughly 3
meters from battery positive to an under-the-seat location. For
the Focal 1.800 that means a 2 AWG power cable. Now that's a
pretty hefty cable to try to route through a car. Even the smaller
Focal 2.75 needed 5 AWG for that length. For 1 meter, I could use
4 AWG & 8 AWG respectively. These sizes are easy to find &
it also meant I didn't have to pull them through the bulkhead. So,
close to the battery was the ticket. |
|||||||
|
|
|||||||
|
|
|||||||
|
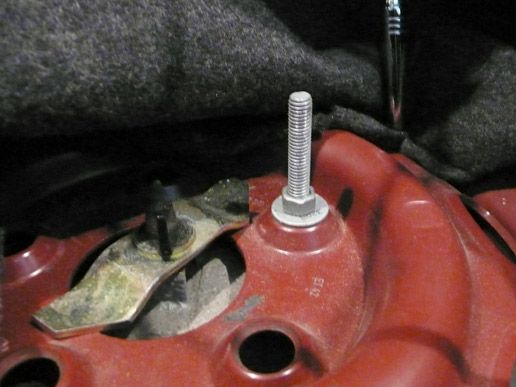
Of course, I painted the board a metallic
rattle can grey & the bolts were all given a coat of black to make
it all look purty. Then it was time to do the cabling. I visited a dealer who's a friend of . . . it doesn't matter. I bought some 4 AWG cable for the sub amp hot & ground. 8 AWG for the component amp. I also got some big butt ring terminals for the battery connection & some fuse holders that accept big fuses & big cables - 30A for the 2.75 & 70A for the 1.800. The 1.800 is technically a 90A load but they don't seem to make glass fuses that size to fit the fuse holders, so I'll have to see if it works long term. The only other option is a separate fuse block & I don't want to go that route if I can avoid it. The amps should be fused within 40 cm of the battery. First up was the ground. I located it on the metal reinforcement channel on the passenger side. It was easy to drill since it's not thick & you can easily access it & you don't have to drill a hole in the tub. Hole drilled, a quick Dremel got it down to bare metal. All wires were tinned & then crimped & soldered in ring terminals. And it's not easy soldering a 4 AWG cable but persevere to make a solid vibration-proof connection. A lag bolt with washers finished it. |
|||||||
|
|
|||||||
|
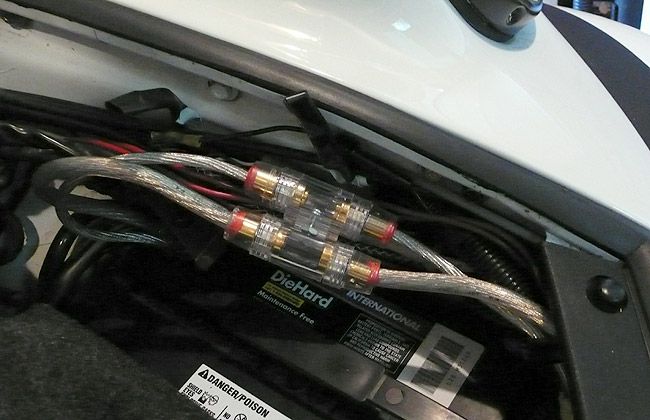
With the battery disconnected, the rest of
the power connections were straight forward. Ring terminals at the
battery connection, fuse holders wired about 8" away & soldered
bare wire into the amp. Did I mention what a pain it is to solder
4 AWG cable?
|
|||||||
|
|
|||||||
|
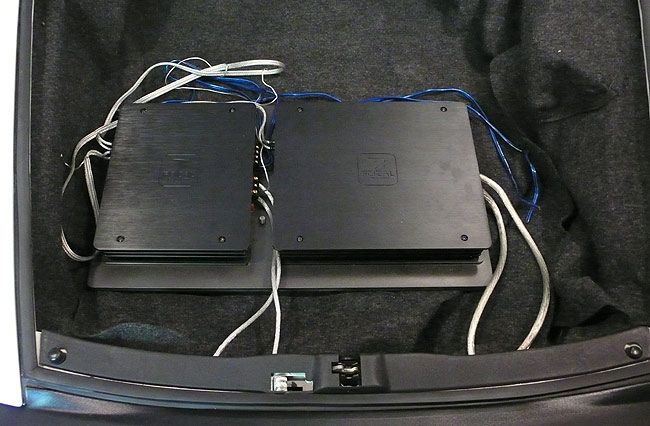
Now it was time to get the cables through the
bulkhead. After some investigation, I concluded that the painless
route was through the opening for the heater hose on the passenger
side. The gasket is pliable & everything went through
easily. Everything consisted of: right & left 14 AWG
speaker cable pairs for the door components, another 2 for the subs (one
pair per driver), a RCA line level interconnect with trigger wire to the
head unit & the remote sub control wire. I only needed one pair
of line level cables & one trigger wire because you can daisy chain
the 2 amps with these. Pictured below is the amps installed & wired but I haven't dressed the cables yet (or connected the sub amp speaker wires) which I'll do at the final stage. |
|||||||
|
|
|||||||
|
Mounting the head unit proved to be a 20
minute job. I have a Blaupunkt Orlando. Just for fun, I tried
it driving the door components without a power amp before I mounted the
amps. It sounded pretty lame. Using a cut up coat hanger as
keys, the Blau was removed. There were 3 connectors plugged in the
back plus the attenna lead. One connector was speaker leads, one was
the feed for an accessory remote CD changer & the last was the power
connections. I soldered the new wires from my Dual unit's harness to
the battery, ignition & trigger wires & plugged in the amp line
level lead & the antenna cable. The antenna cable also has a
little power lead to power its amplifier. I pulled out the Blau's adaptor housing & fitted the Dual's. They looked almost identical. The Dual slid in without pain or fuss. Easy, easy install. |
|||||||
|
|
|||||||
|
At this point, I have sound. The subs
are not installed, so I'm running the main amp full range into just the door
components. And it sounds very good. The Dual ain't half bad
for a cheap deck. It's not splashy at all but the bass is a bit
muddy as I suspected it would be but surprisingly deep. Vocalists
are clear without shouting. I guess the door build is doing its
job. I could probably live with it as is but now I want more.
The subs should do the trick when I get them installed. |