After completing my work on the HVAC blower, hood pad, and expansion valve, I took the car for a short test drive. When I was pulling the car up the driveway into the garage, the clutch pedal went to the floor.

I lifted it with my toe and managed to get the car safely into the garage, but after all of the work I had done on the drivetrain this was a bit disheartening. The slave cylinder had looked a bit long in the tooth, but serviceable. WTF? All of these thoughts and more ran through my head as I parked the car in the garage and shut it down.
I looked underneath and saw brake fluid dripping down from about where the bend is in the clutch hose(It bends downward in the middle, just under the steering shaft coupling below the column -- very different layout from later cars). Mystery solved, it was the clutch hose. However, I wanted to replace the entire clutch hydraulic system just to avoid having to mess with it again any time soon.
I remember a phone conversation with Stan Kolen where he described a method of R&Ring all of the clutch hydraulics as an assembly. I went on Rennlist to see if I could find any pictures of the firewall with the brake booster removed, so I could get an idea what I was in for, where the slave sat in relation to the booster, etc. It can't be seen from above, or even from underneath. I remember seeing many discussions about rebuilding the master in-situ, but I don't like that idea since it's not unusual for hydraulic systems of this age to have corrosion in the bores. I wanted all new parts. Also, I have heard that it is a cast-iron bitch to get to the blue hose without removing the master, and I wanted to replace that. Add to that, the idea of brake fluid dripping in and around the sound-deadening material in the footwell was especially distasteful.
During my search I ran across Stan's thread on clutch hydraulics, which I had not seen when it was first posted. Looking at Rob Edward's pics on that thread, I knew my system was routed differently but I resolved to give it a try anyway.
The first step(after lifting the car) was to drain the system. I connected up my empty power bleeder and pressurized the system to about 5 psi, then opened the bleeder until I was getting nothing but air. This drained the reservoir at the same time. It didn't get all of the fluid out of the slave, but I wasn't concerned about that.
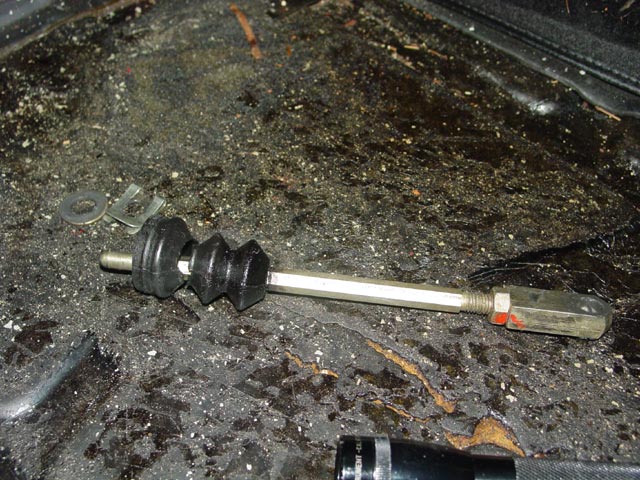
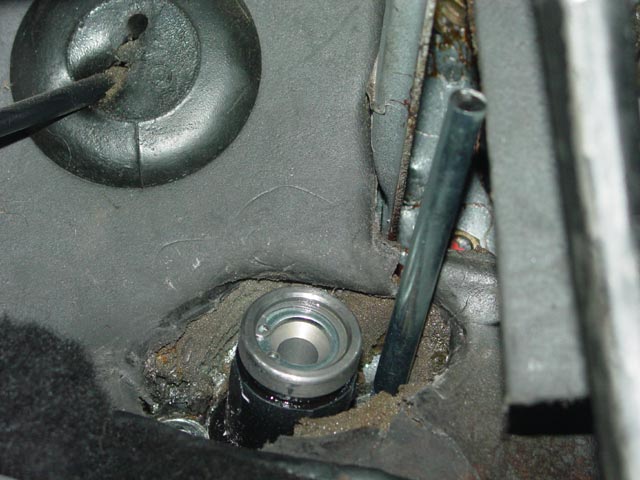
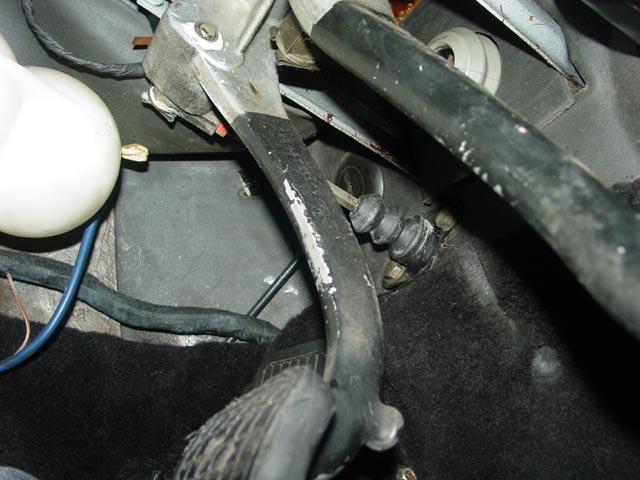
Next stop, the actuator rod. No tools are necessary to get this out, there is just a clip(like the one visible here on the brake rod) holding it to the pin on the clutch pedal. Once disengaged from the pin it just lifts out.
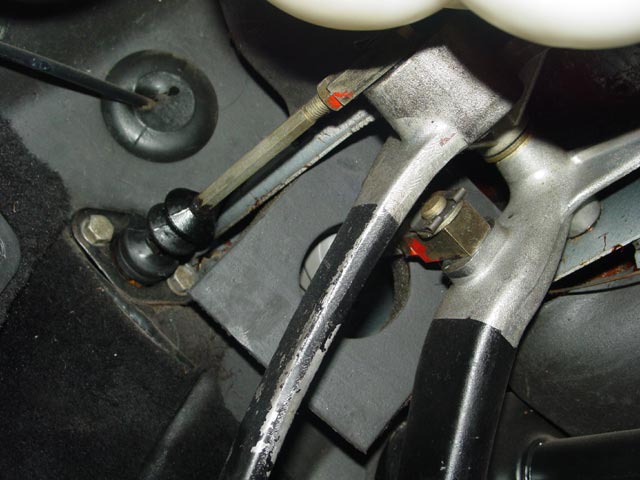
The boot had deteriorated, and there were a few drops of brake fluid in the pocket on the master. It seems my decision to replace the master was validated...
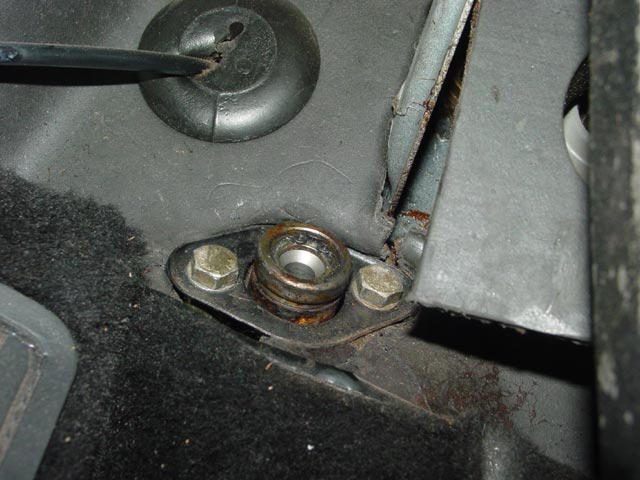
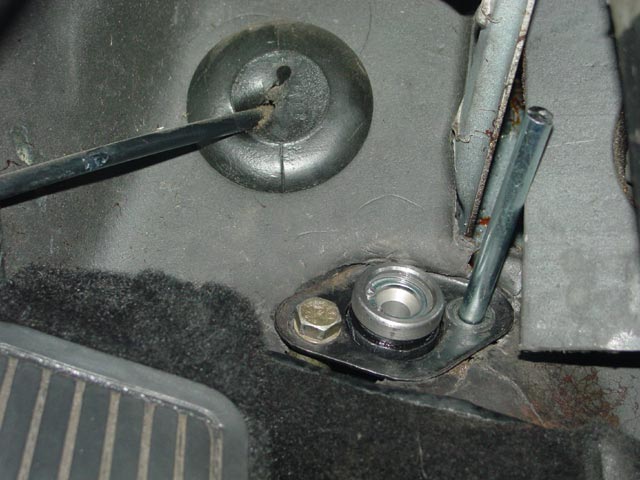
Here, the master is exposed. The two bolts bear on the plate that you see here, and are bottomed on two spacers that bear against the firewall. I almost dropped one of the spacers behind the insulation. Fair warning, be careful to catch all of the parts. If you lift both bolts and the plate out at the same time, instead of removing one of the bolts all the way, it will be easier to avoid dropping the spacers.
I disconnected the blue hose, capped the barb on the reservoir and plugged the hose with a 10mm bolt.
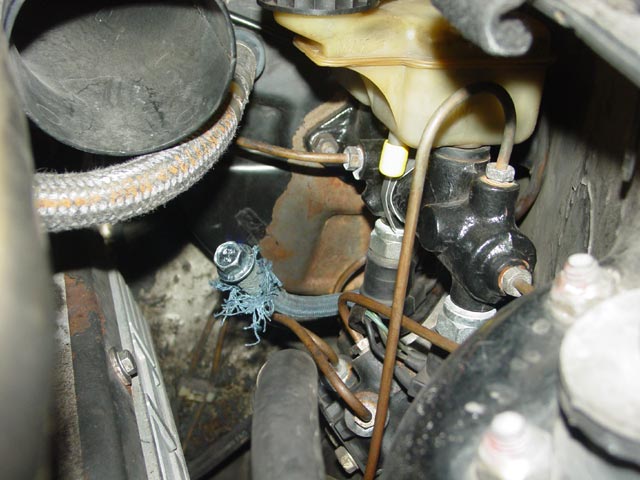
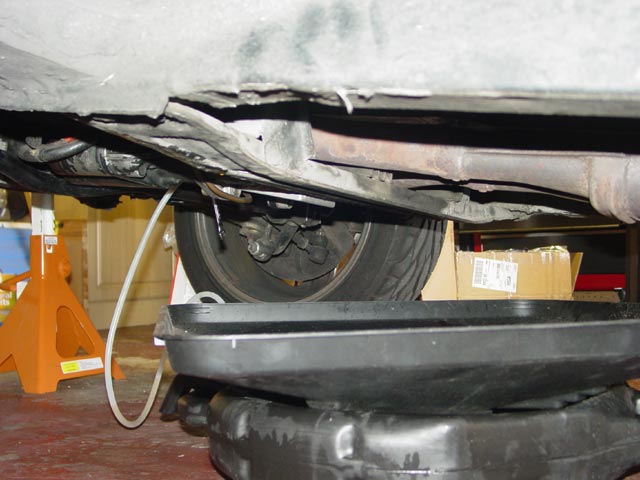
Now for the fun part. This is where the flexible hose connects to the hardline that snakes its way down to the slave. View is looking upward between the lower bellhousing and the driver side exhaust manifold. If I had a tool that I could get up in there to remove the clip, the hose would have dropped right out, but I tried every trick in the toolbox. I just couldn't get up in there and get a grip on it to pull it out. I stopped when I realized that it wouldn't be any more fun trying to put it back if I DID get it out. It would have been a piece of cake if I had done this while the cat was removed. Oh well, hindsight is 20-20.
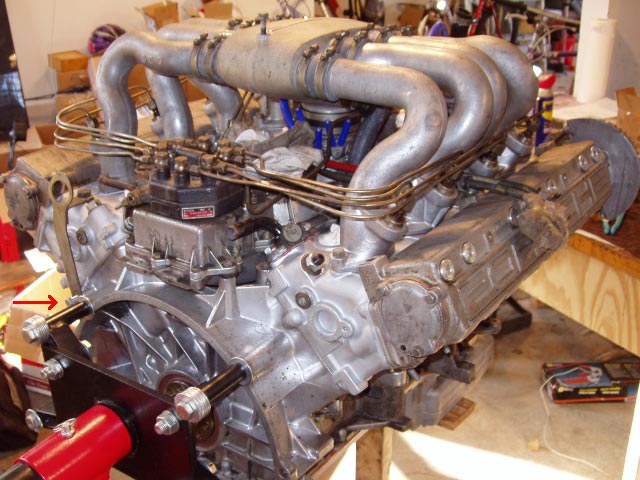
I did consider removing the cat, but decided to remove the bracket instead. It is held in place with one bolt, sandwiched between the lifting loop on that side and the block. Below is a pic that I lifted from Dan Perez's "Old Bugger Engine Coming Out" thread. The bolt I am referring to is indicated by the red arrow on the left side of the pic.
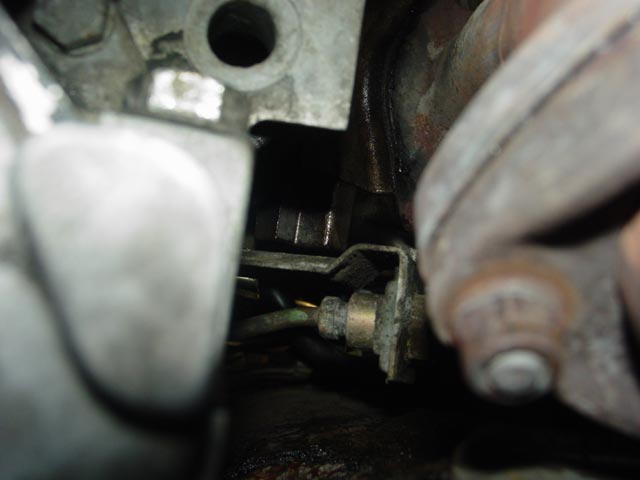
Since I wasn't fortunate enough to have such easy access, I accessed it from the top with a gear wrench. It's not as bad as it looks, I was able to get my hand in there and feel for the bolt head.

With the bracket removed I dove back under the car, removed the slave cylinder, and proceeded to thread the assembly out through the gap between the exhaust manifold and engine. It was a bit fiddly, but overall not too bad.

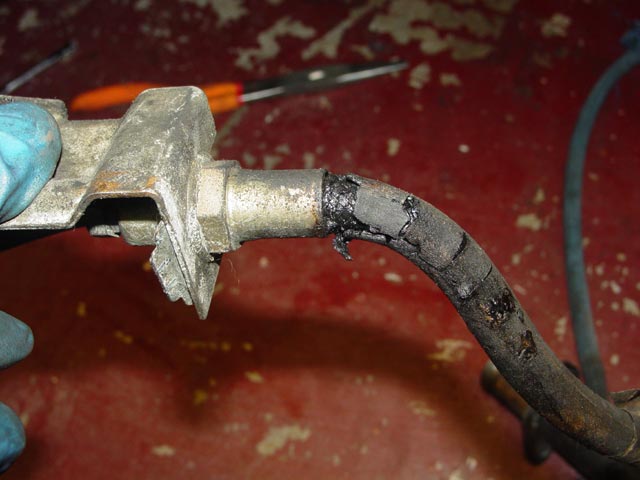
Here is a closer pic of the bracket. It has a notch in it to clear the web over the boss that the bolt threads into. The hose is trashed.
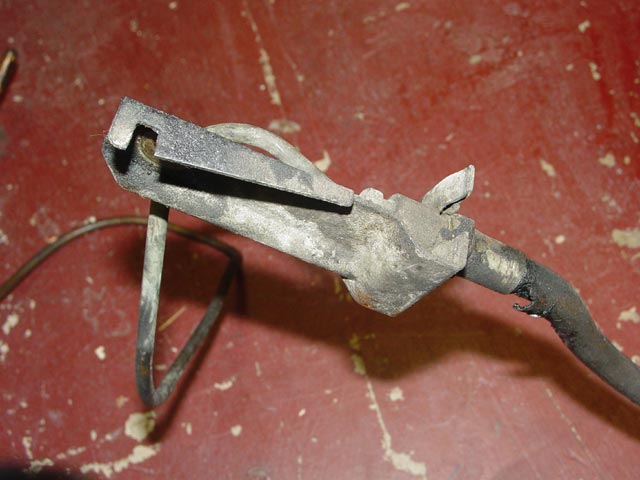
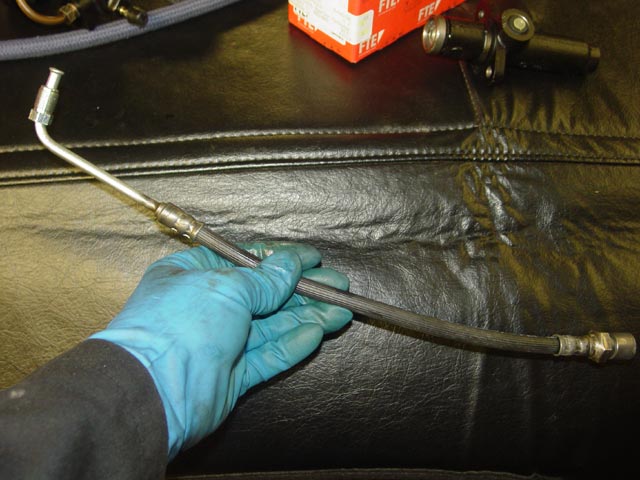
Here's a better look at how bad the hose was. Obviously I didn't look closely at it while I had the clutch apart. That'll teach me!

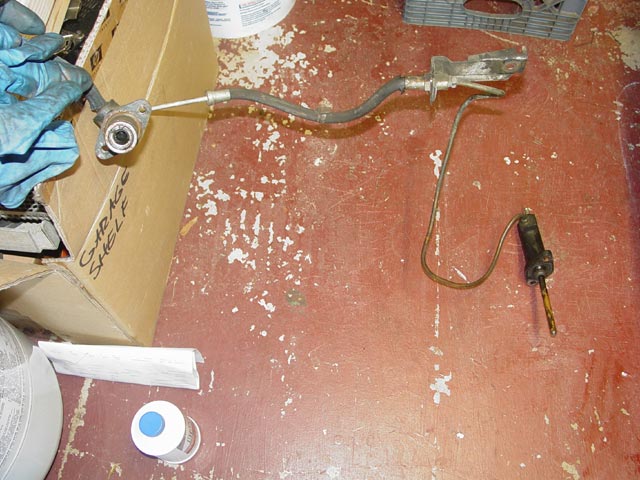
Here is a reference pic that I took showing how it all sits in the car. The clutch hose loops under the steering shaft.
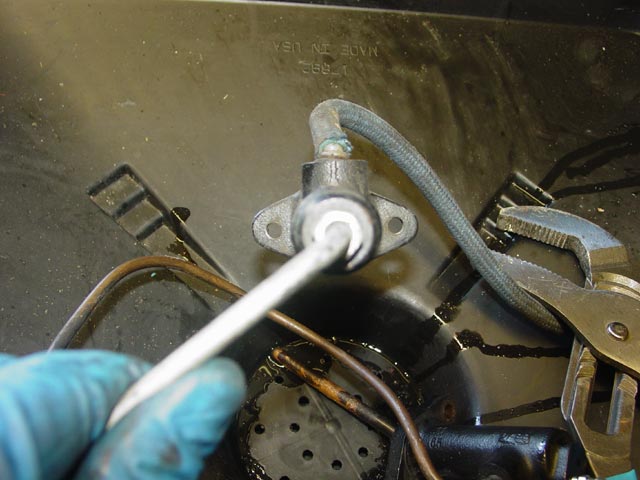
Another reference pic showing the orientation of the pressure hose on the master cylinder.
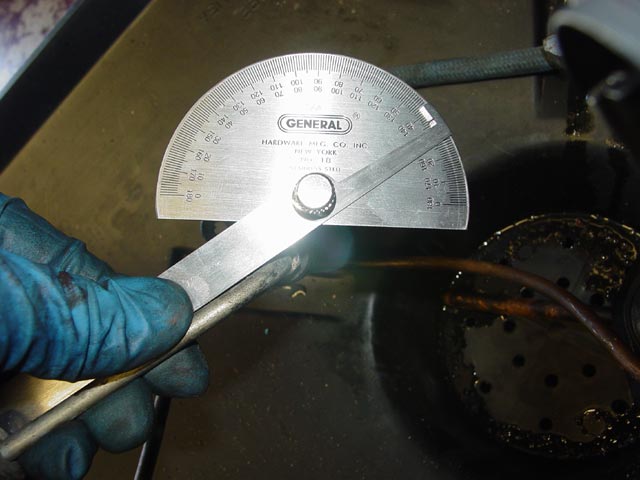
I took another reference pic with a protractor since I wanted to be sure to get it back together in the right orientation.
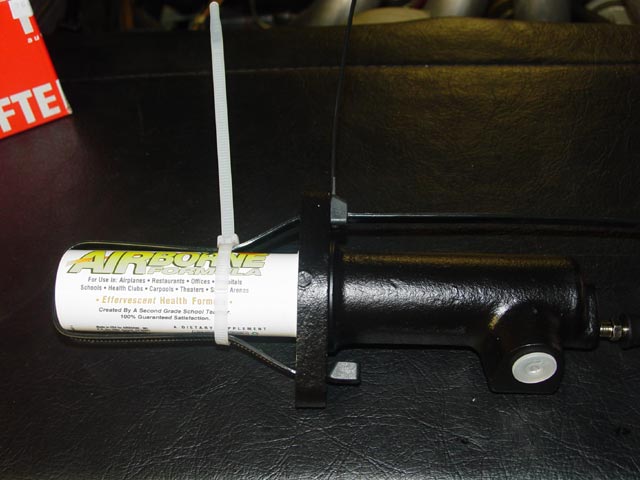
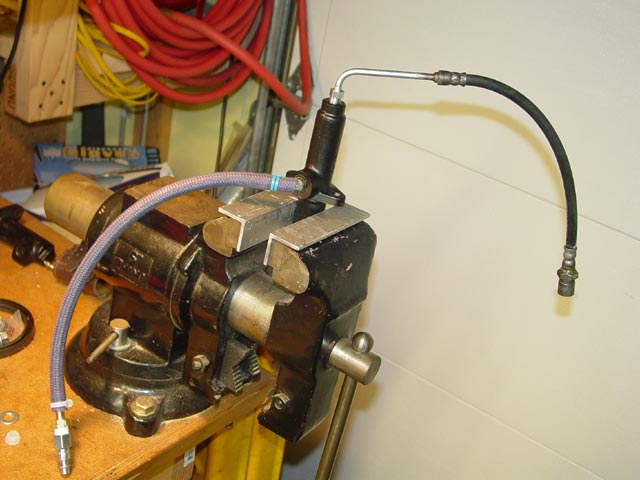
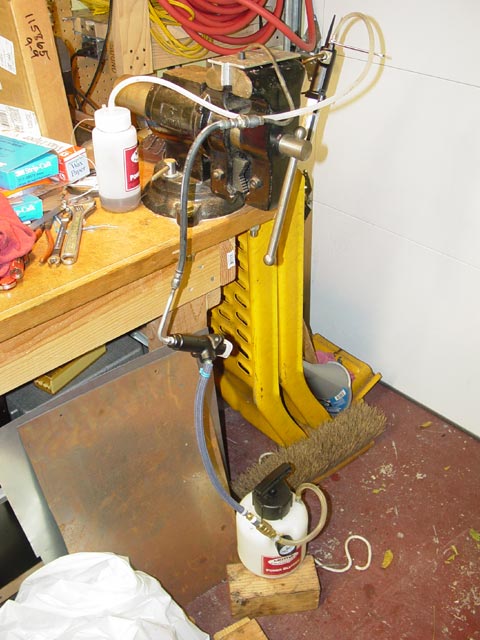
Since I intended to perform the bench bleeding under pressure, I felt that I needed a way to hold the slave rod in during the process. I used this old plastic Airborne container. I think the mini-M&Ms container is about the same size.
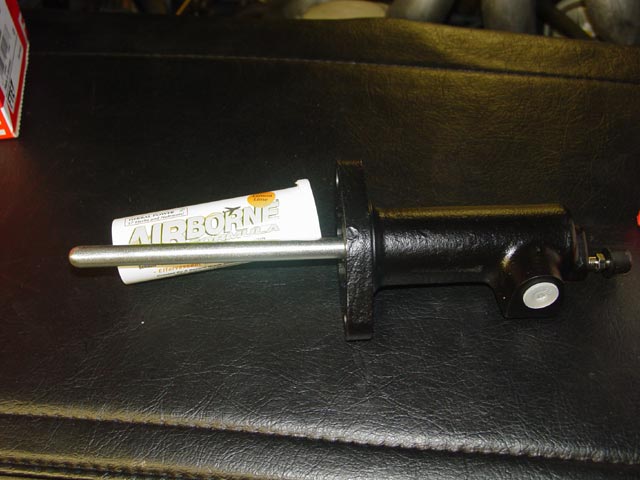
I tie-wrapped the container over the slave rod, compressing it slightly.
I have fitted my power bleeder with quick-disconnect fittings, so I used another quick-disconnect fitting and a hose barb to connect the blue hose to the power bleeder.
To get the hardline on the slave in the correct orientation, I first clamped the old one in the vise, lining the barrel up with the edge of the vise and noting the position of the hardline relative to the vise.
I then installed the hardline to the new slave, using the same reference points to get it very close to the original orientation.
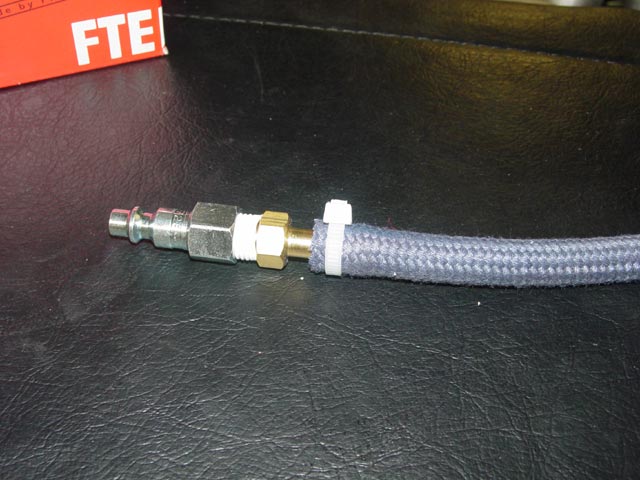
I had the clutch hose rebuilt at Royal Brass in San Jose. It cost $40 and took a couple hours since they needed to braze fittings on both ends to mate to SAE hose, and when I went in around lunchtime a lot of the techs were at lunch. They had a fitting in stock that very nearly matched the fitting at the right of the pic, but the retaining ring groove was only about 2/3 the width of the original. It may have worked, but the clip was such a PITA to remove that I didn't want to take a chance on making the assembly tighter, so I had them re-use the old fitting.
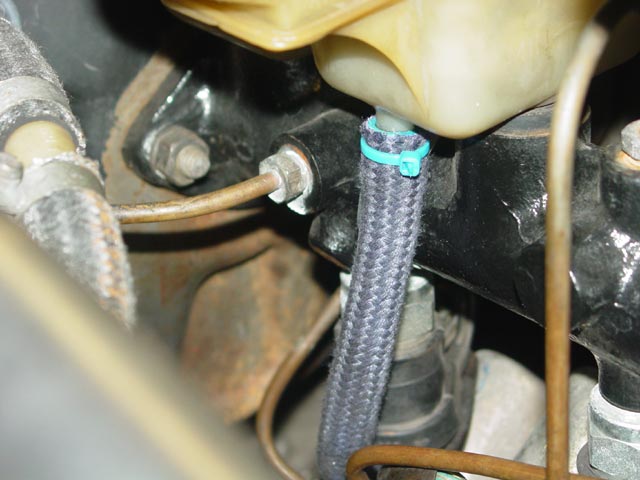
One question that I had about the master cylinder was whether the grommet for the plastic nipple where the blue hose connects came with the MC. The vendor could not answer the question because it was being drop-shipped, but we assumed that since the grommet was not called out separately in PET it must be part of the MC assembly. This turned out to be a correct assumption, fortunately. The parts arrived on December 30, and if there were an issue it would have been tricky getting parts so close to New Years. Note the tie-wraps on the MC end of the blue hose. These are intended to instill a bit of extra confidence when power-bleeding, now and in the future. It's still possible to pop the plastic nipple out of the grommet with too much pressure, but 10psi seems plenty safe -- many people have bled their systems at this pressure with no issues.
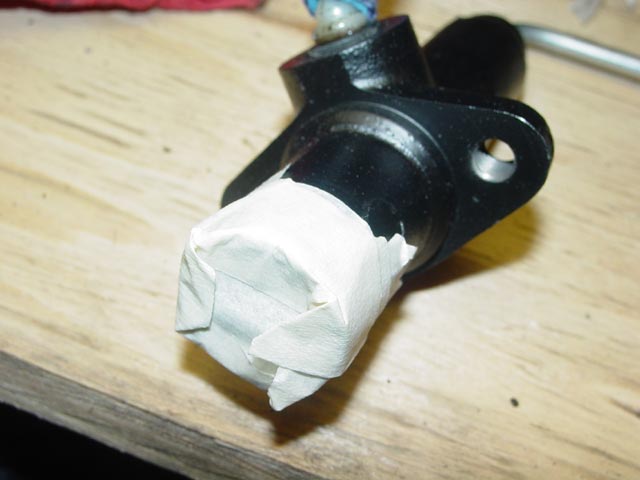
I covered the business end of the master cylinder with masking tape to avoid getting dirt into the end while reassembling.
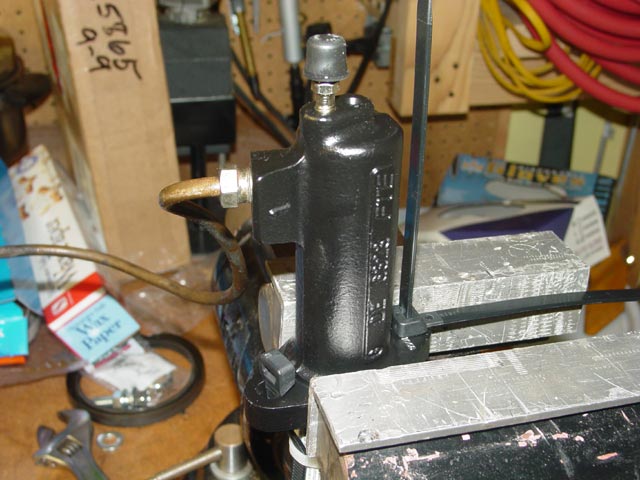
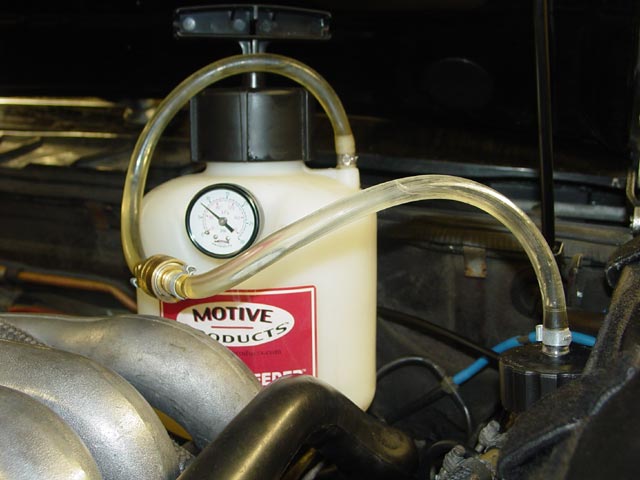
Here is the setup that I used for "bench bleeding", which, interestingly enough, actually involved the use of a bench.
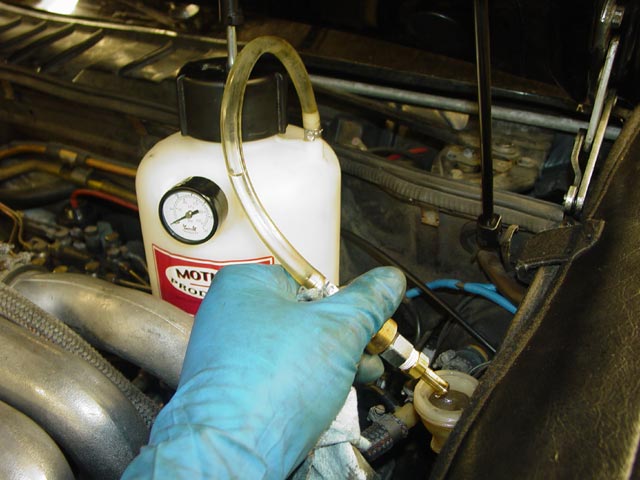
 I pumped the bleeder up to about 5psi and cracked open the bleed screw on the slave. As soon as I saw fluid at the plastic nipple holding the blue hose to the master, I held the master with the pressure port facing up and tapped on it with a wrench to help loosen any bubbles until I started seeing fluid at the bleed hose. At that point I held the slave up so that all of the hose was running uphill and tapped on the hose to loosen any bubbles. When I saw that no more bubbles were coming out I re-oriented the slave cylinder so the bleed screw was at the top and tapped it with a wrench to get rid of the last few bubbles. I let it run for a while, moving the MC, hose and slave around some more until I felt sure that all of the bubbles were out.
At this point I tightened the bleed screw and re-oriented things so the quick-disconnect at the blue hose was at the top, relieved pressure on the power bleeder, and disconnected it. I then carefully removed the fitting from the blue hose and replaced it with a bolt secured with a tie-wrap.
I reattached the hardline bracket to the hose with the clip, referring back to my pictures to get the orientation right. I then went back under with the assembly and threaded it back into position. I focused on getting the master cylinder into position first, paying attention to the general routing of the blue hose. The plastic nipple for the blue hose points to the left(outboard) to clear the brake booster. Routing may vary by year depending on brake line and proportioning valve layout. You just have to pay attention to the initial routing during disassembly and replicate it.
Since I almost dropped the mounting spacers on disassembly, I picked up some long M8x1.25 bolts to aid reassembly. It took some jockeying to get the first hole to line up, but eventually I caught the MC with the first bolt and pulled the MC up into position. I then went back underneath and verified that the nipple for the blue hose was not binding against the bottom of the brake booster.

I then cut the head off of one of the long bolts and threaded it into the other side of the MC. It would have been easier to start on this side with the cut bolt, but I was playing it by ear and it wasn't until I thought about it for a minute, reflecting on what I could reach with which hand, that I decided that this was how I wanted to start. Once I had this bolt in place I removed the tape over the MC.
I slipped the first spacer over the long bolt, then with the plate, mounting bolt, and second spacer held together I slipped them over the bolt. If I had a helper to hold the MC against the firewall I could have probably done without the long bolt entirely, but I had to make do.
I snugged the mounting bolt down. At this point I held the plate tight against the right-hand spacer so it wouldn't move while I removed the long bolt and replaced it with the mounting bolt. I then tightened both mounting bolts to spec.
I cleaned the pin that the clutch rod attaches to on the pedal, the clip, the washer, the rod and the bushing with mineral spirits. Then I installed the MC boot on the clutch rod, installed the bushing with some Lubriplate, and put a dab of Lubriplate on the end of the rod. I could have used any grease for the end of the rod, but white grease will show contamination with brake fluid better than moly grease would. I also lubed the pivot pin and installed it in the pedal.
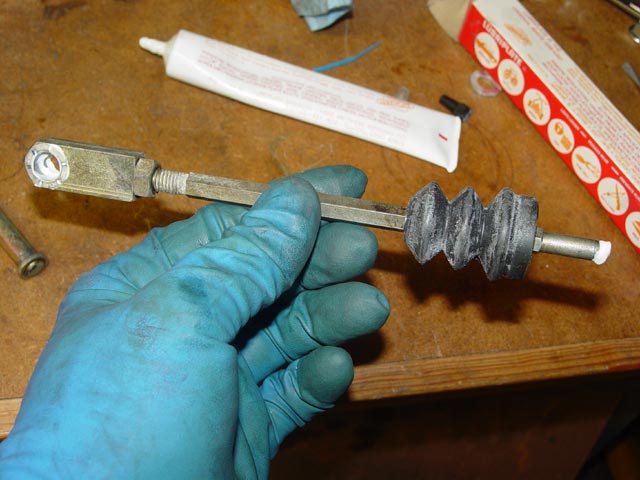
Here is the rod installed and adjusted to the correct length. It was a bit tight, depressing the MC somewhat so I adjusted it to give ~1mm of play.
I went back under and moved the hardline mounting bracket into position and bolted it to the block. This proved to be a bit of a pain. I spent a good 15 minutes fiddling with it until I managed to get the bolt started. Once I had the bolt finger tight I had to go from the top to underneath a couple of times to make sure the notch on the bracket was properly engaged over the web on the block.
I finished routing the blue hose and secured it to the reservoir with a tie-wrap.
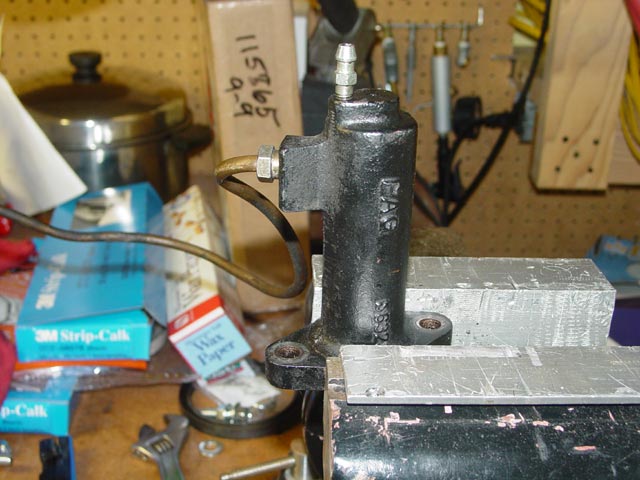
At this point I filled the reservoir with enough fluid to ensure that I would not suck air into the system when I removed the plastic retainer from the slave cylinder. The fitting that I had been using for bench bleeding proved to be very handy for this. Another issue is that mounting the slave cylinder before mounting the blue hose to the reservoir might have built enough pressure to pop the plastic fitting between the blue hose and the MC out, which is why I connected the blue hose before installing the slave cylinder. I then mounted up the slave cylinder, taking care to engage it properly in the release arm. There was still fresh Optimoly in the cup on the release arm so I didn't bother to add more. I then torqued the slave cylinder to spec.
The next step was to run the power bleeder as normal. I only saw one tiny bubble come out, even though I flushed with several ounces of fluid. When I was satisfied, I relieved pressure on the power bleeder, used my hose barb attachment to top up the reservoir, and buttoned it up. I set the car down on the ground and tested the clutch before reinstalling the airbox and air tubes -- it worked perfectly. Success!
Once I had the whole job buttoned up I went out for a long test drive. The clutch worked perfectly, another job well done.