With a road trip to Washington State pending, I decided it was time for a GPS unit. I wanted one that would fulfill a range of needs, from simple navigation with the ability to speak out street and highway names rather than just "Left turn, right turn", etc. as well as the ability to track my mountain bike trail excursions and hiking trips without being too bulky or requiring a separate power source. It's very easy to find units that do either -- in fact, there are so many out there it becomes hard to choose. There are so few that do both though, that it really came down to one choice, the Magellan Crossover GPS. It was $230 on Amazon with a coupon for the traffic adapter and one year traffic service.
I quickly discovered that there was no good place to mount the GPS. I didn't want to mount it to the windshield, not just because it's illegal in California but because I've heard time and time again that you don't want to hang anything heavier than a radar detector on a 928 windshield - they are prone to crack if you do so.
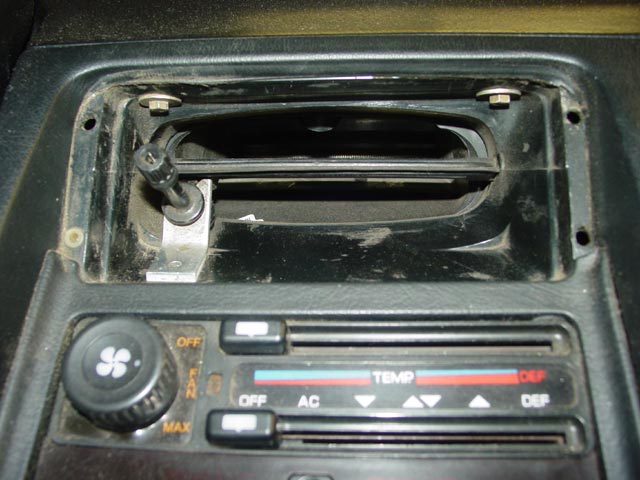
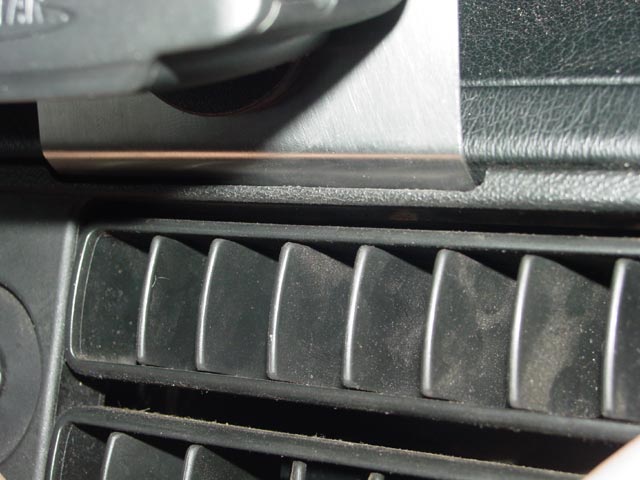
I had a lot of wacky ideas, just for example my second choice(and one that I considered for a while) was to get a gooseneck mount of some kind and mount it to the ashtray insert, perhaps potting it in place with some epoxy. The only thing I ever use the ashtray for is temporary gas receipts, and the power is right there... Then one day I was picking over the console examining every square inch, looking for inspiration. I had seen some GPS mounts that clamp to the vents, which I never seriously considered. But I kept staring at the center vent until I remembered, there are two 6mm bolts in there that attach the console to the dash. Eureka!
I decided that I would use these two mounting bolts to secure a piece of sheetmetal that would extend upward above the vent to mount the GPS unit. This completely solved the problem of mounting the GPS so it is not in the way of the radio, HVAC controls, vents, or the shifter.

So, the first thing I did was take a hard look at the area behind the vent. Sure enough, the bolts were easy to access and would retain a sheetmetal plate very easily. I immediately picked up a replacement vent at the breaker's to do all of my cutting on.
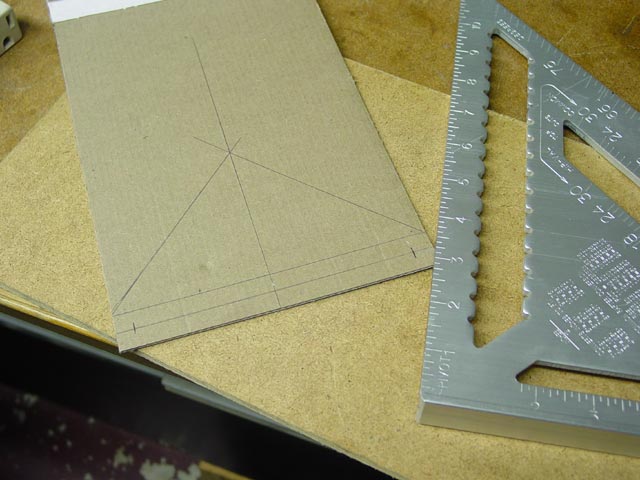
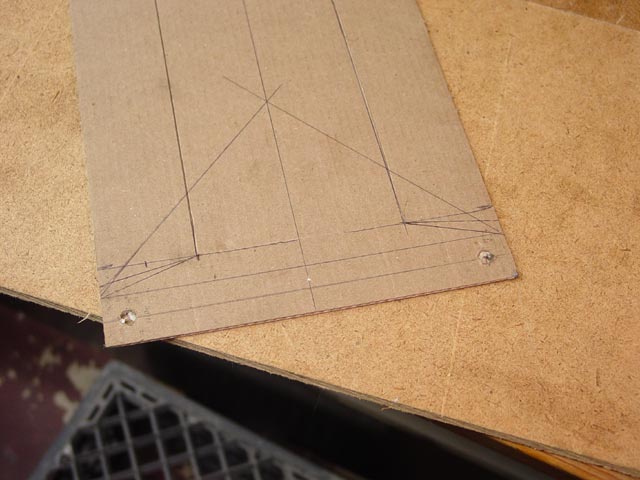
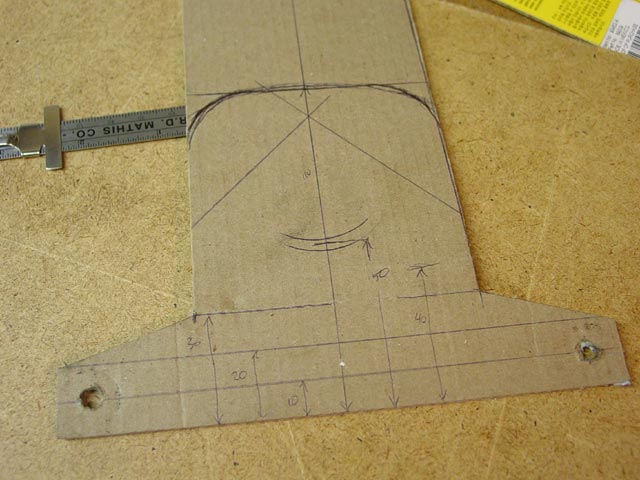
I started my pattern with a piece of cardboard with the bolt centers marked off(130mm bolt centers) and 10mm of material left, right, fore and aft of the bolt centers. I drew some angles on the cardboard to give me a rough idea what I wanted -- which quickly evolved.
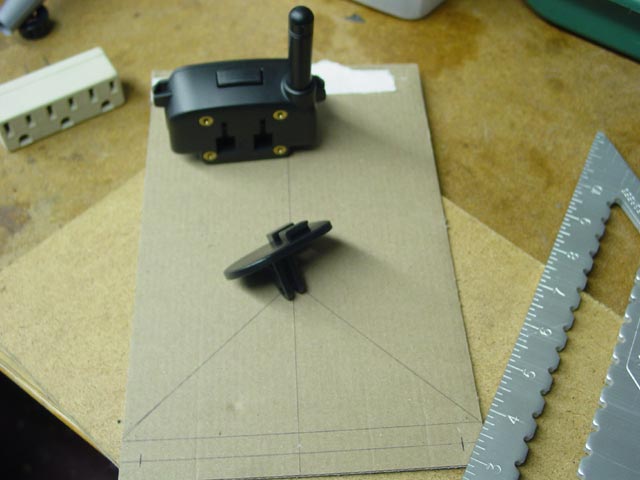
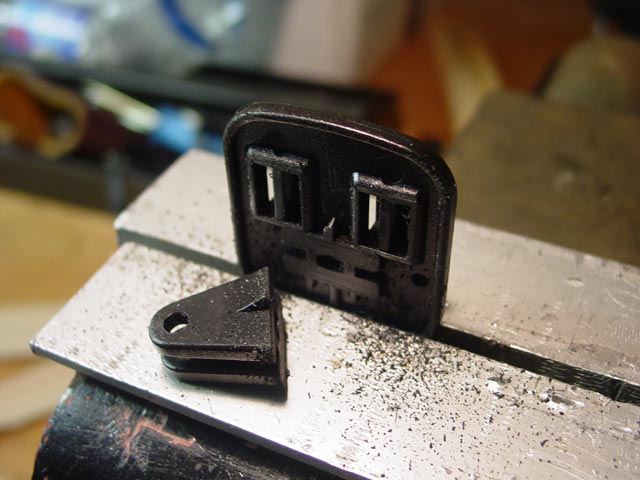
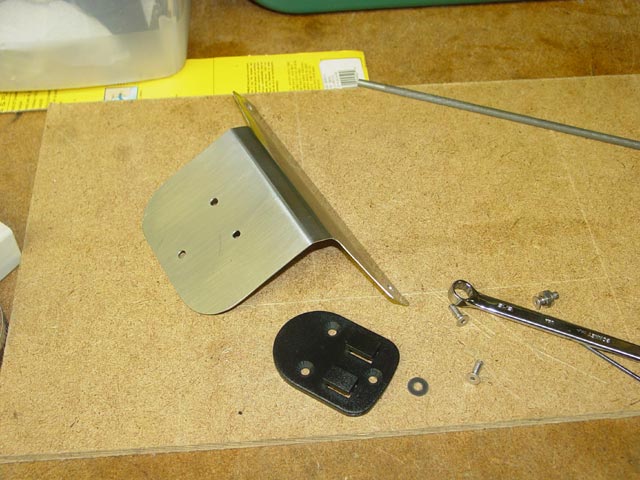
This is the hardware that I wanted to mount. The traffic adapter has its own set of 4 mounting holes on the back, and that would make for a clean setup, but they are not replicated on the GPS unit itself. The small bracket in the foreground, OTOH, can be used either to mount the traffic adapter, which the GPS then mounts to, or the GPS can attach directly to it without the traffic adapter. Since I was not at all sure I would be keeping the traffic service after the free subscription ran out, I went with the more versatile bracket.
With my plan firming up, I mounted the pattern up and began to mark off where the bends would need to be to clear the vent piece.
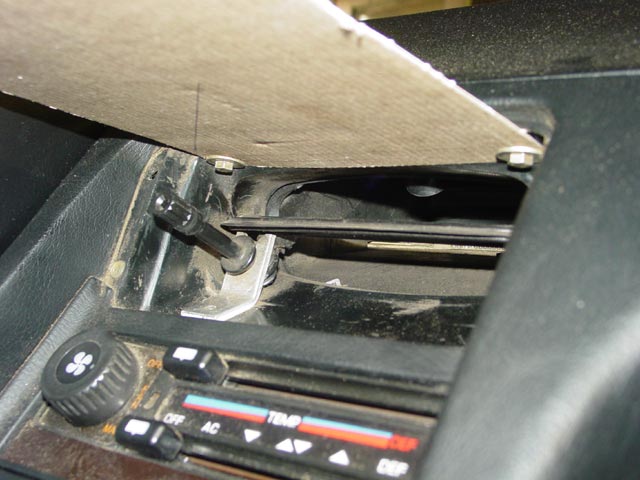
Here you can see that the first bend needs to be on the line 10mm from the hole center. At this point I had marked where I wanted the second bend, coincidentally 10mm from the first bend.
I decided that I wanted the part that protrudes outside of the vent to be 75mm wide, just about the width of the traffic adapter but a bit narrower than the GPS unit itself. I also played with various angles for the transition from the area where the mount attaches to the car to the area where the GPS attaches to the mount.
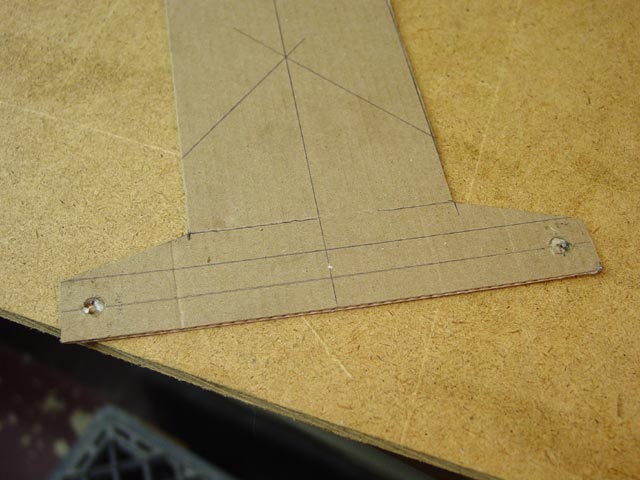
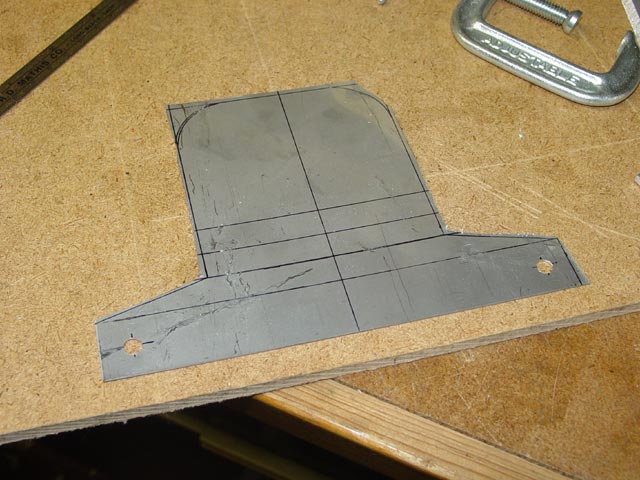
This is the final shape I decided on. The piece is much too long at this point, intentionally.
The next step was to convert the bracket, which was designed to attach to the suction mount, into a flush mount bracket. I used my trusty X-acto razor saw.
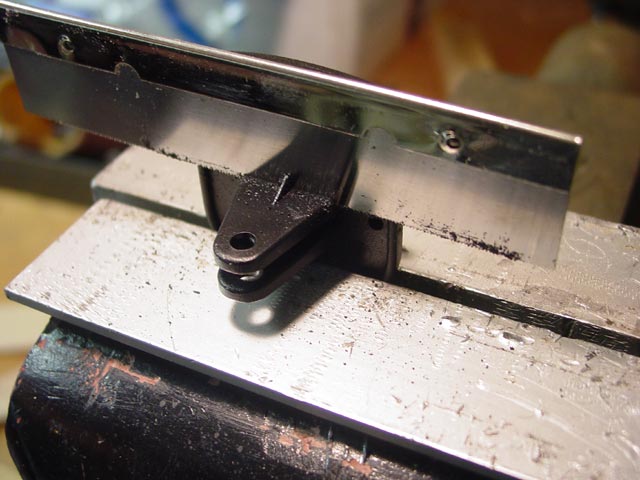
The razor saw makes a very clean cut. There was almost no cleanup required after cutting.
I attached the bracket to the traffic unit and the pattern to the console, bent it into position and eyeballed the location of the bracket, marking its vertical position. In keeping with the other dimensions, I decided a nice round number of 50mm from the edge would do the trick. I also determined the total length of the mount and roughly drew in its outline. Below are the rest of the dimensions that have not already been mentioned above.
With my dimensions in hand, I marked them out on a piece of 16 gauge stainless steel and center-punched the hole locations. I made a test cut and immediately decided against using my aviation shears for fear of distorting the material too much.
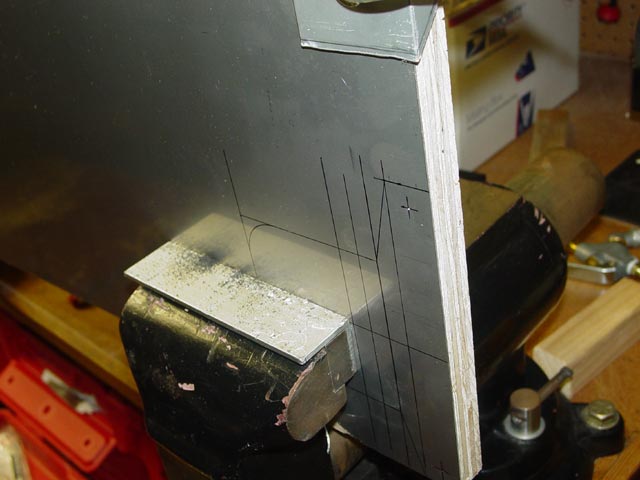
Instead I clamped the sheetmetal to a piece of plywood and used a fine blade in my sawzall to rough-cut the outline.
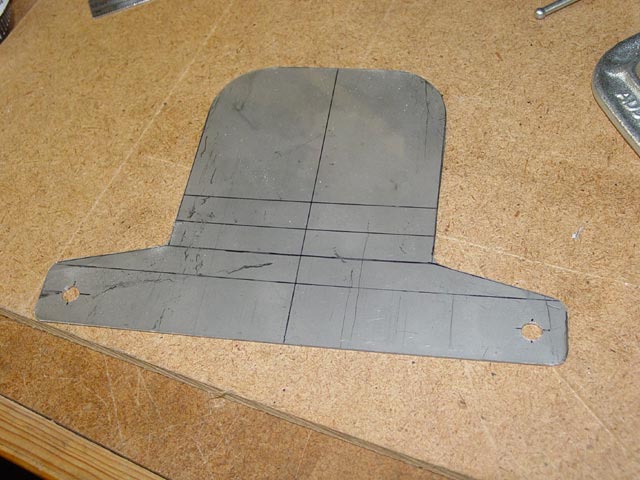
Here is the rough-cut piece ready for finishing. It came out great, no distortion.
I ground it to final shape with a 4-1/2" angle grinder followed by draw-filing with a very fine file.
I drilled the holes for the plastic bracket with it clamped to the sheetmetal to ensure the holes lined up. Then I cleaned up the surface with some scotchbrite, and then bent the mount up in the vise, using soft aluminum jaws and going back and forth, testing the fit and bending a little, testing etc. When I was finished bending I went over it one last time with scotchbrite.
The next step was to mount the plastic bracket. I used flathead stainless allen screws...
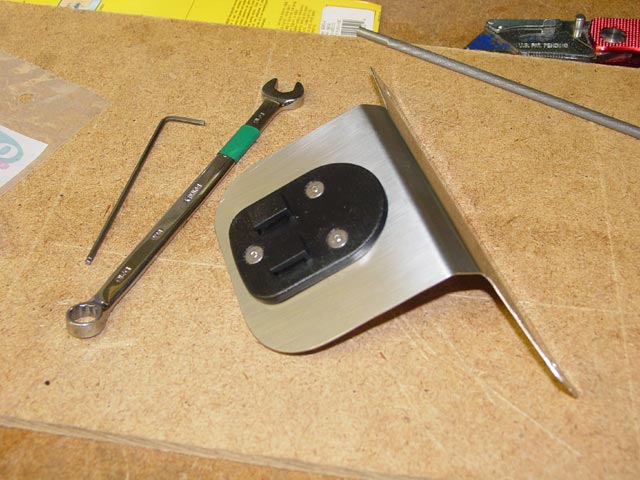
...with nylock nuts on the back.
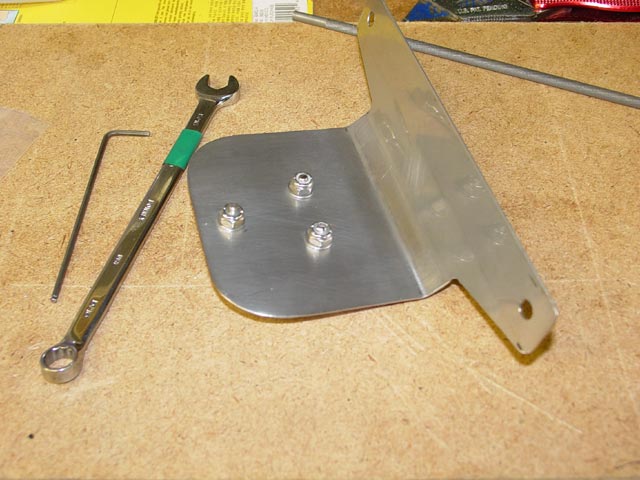
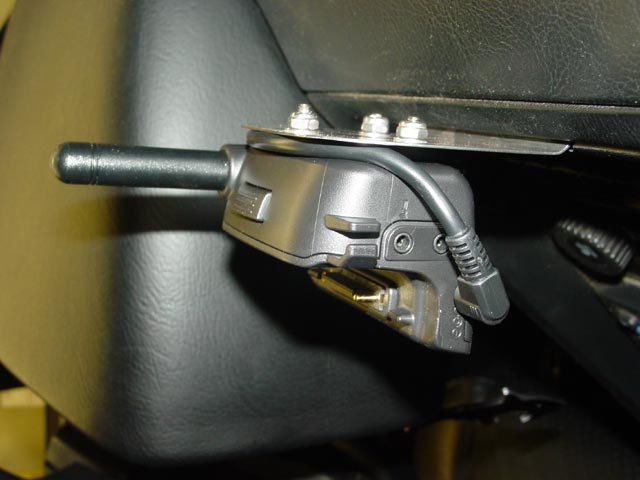
Here it is mounted in place...
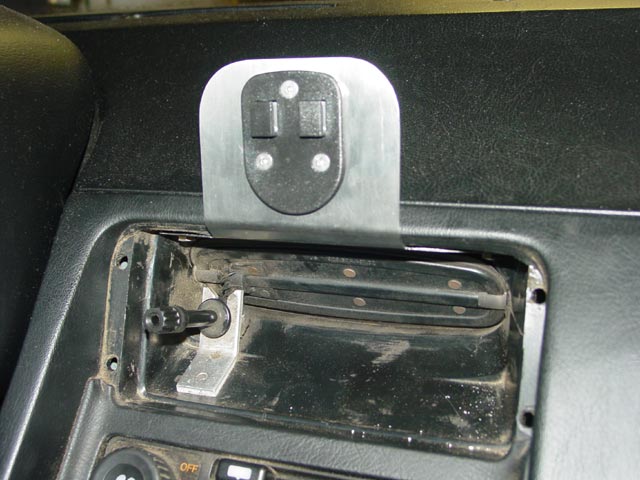
And with the traffic adapter attached.

The next step was to trim my replacement vent bezel to clear the new sheetmetal mount. It didn't take much, I just had to trim the lip a little.
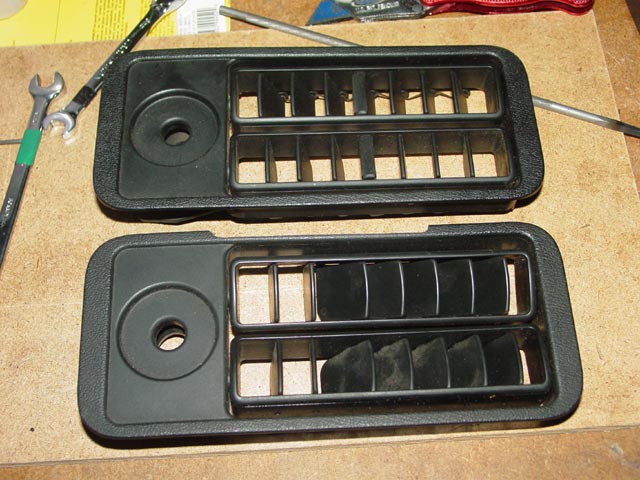
The next step was to transfer my good vents(above) to the replacement bezel(below). This step was very easy, it's obvious when you look closely at the parts how it needs to be done. Just pay attention to which of the pivots has a spring washer. It's best to change the vents one at a time so you always have a reference to see how it goes together.
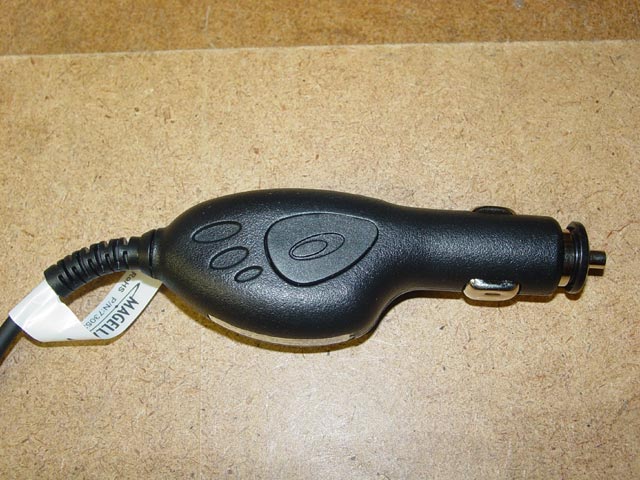
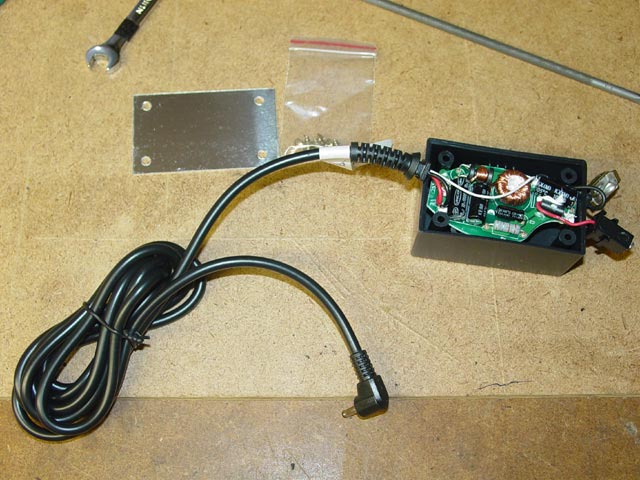
Next up, this is the 12v adapter for the GPS. I didn't want to have to have this sticking out of the ashtray and the cord dangling over the console, so I wanted to convert this to a "hardwire" adapter. It has a fuse in the tip that is accessed by unscrewing the tip. I wanted to preserve that fuse for safety, even though it will be connected to a fused circuit alongside my radar detector.
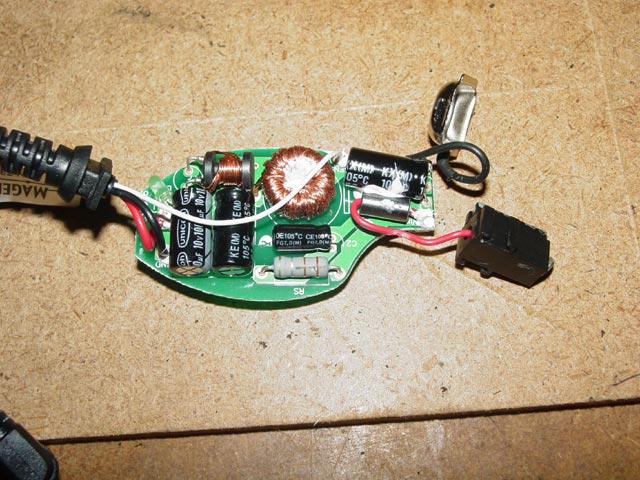
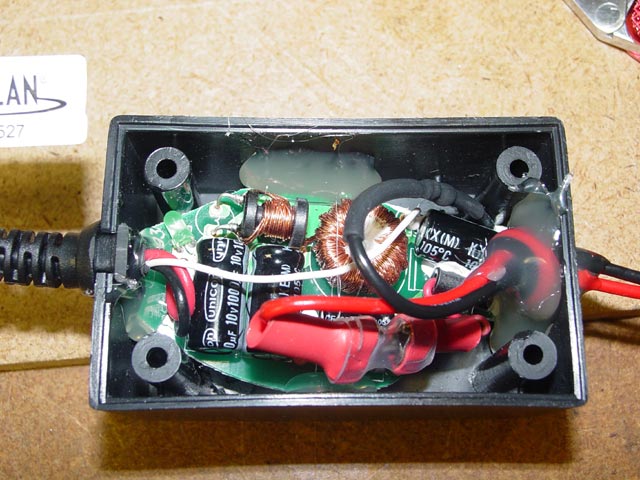
After discarding the plastic case, this is what I was left with.
I took the guts down to my favorite electronic hobbyist supply and found the smallest project box that would hold the PCB. I cut a groove in one end to accept the strain relief from the original cable and drilled a hole in the other end for the 12v input wires.
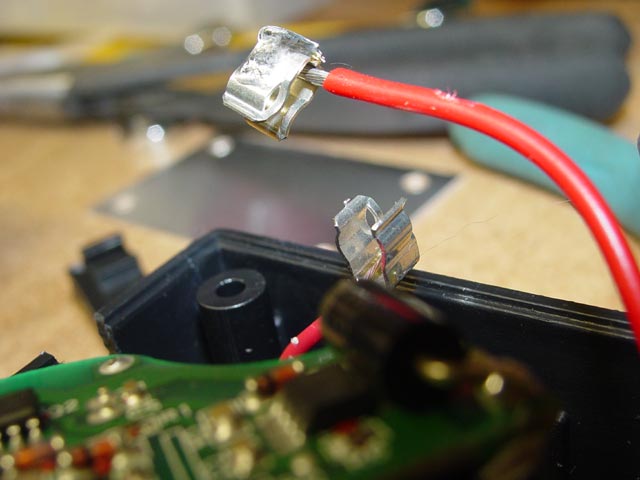
I also picked up these fuse holders. I wrapped the wire around so I could solder them on 2 sides. I haven't soldered the lower one yet in this pic -- good thing, it's oriented backwards!
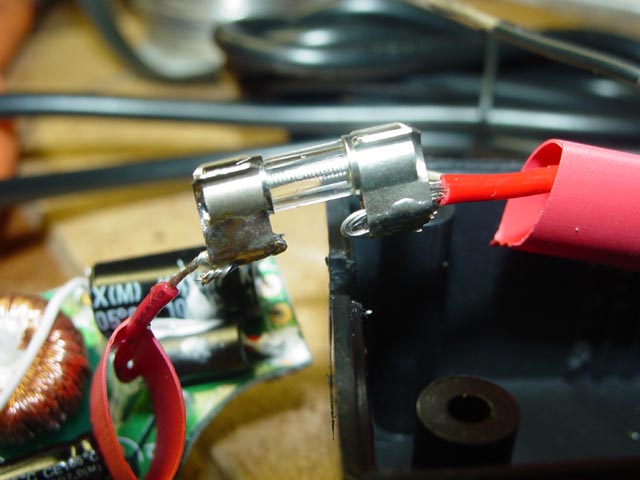
Here is the fuse assembled with the fuse holder ends, heat shrink ready to go.
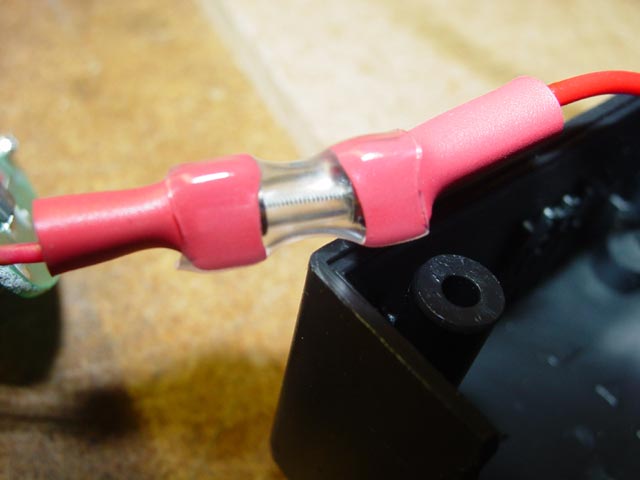
After applying the heat shrink over the ends, I put some clear heat shrink over the assembly to help keep it from vibrating loose.
I tied a knot in the input wires to prevent them from pulling out, leaving enough slack inside the box that I can replace the fuse without too much cussing. I then anchored the PCB and the input wire with some hot glue, which also sealed the hole where the wires penetrate. The strain relief fit tightly enough that I didn't see the need to seal it.
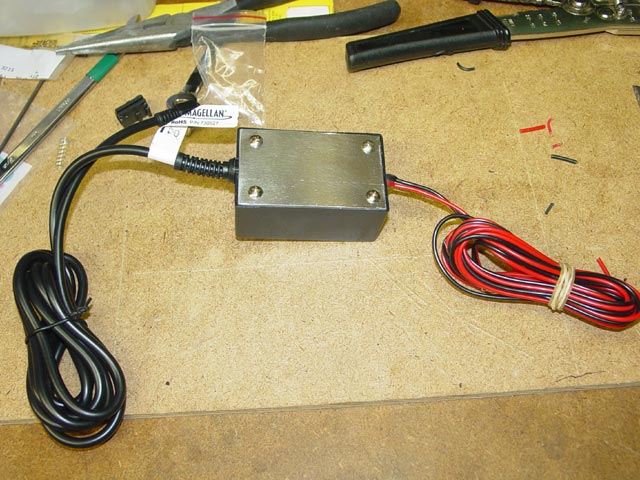
So, here it is... one hardwire adapter, made to order.

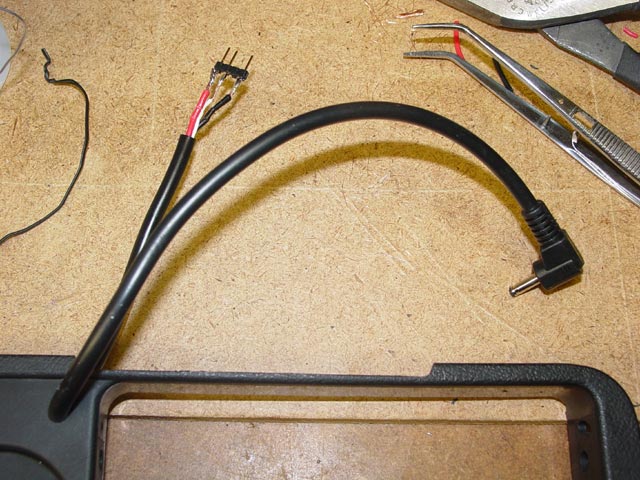
The next step was to cut the end off of the wire so I could thread it through the hole drilled in the vent faceplate. I decided to add a connector inline so that in the future I can remove the vent faceplate without it being captured by the wire. I used a standard PCB header and connector from the computer parts bin. I'm not sure why there were 3 wires, the connector on the end only has two contacts -- I decided not to take a chance and connected up all 3 wires.
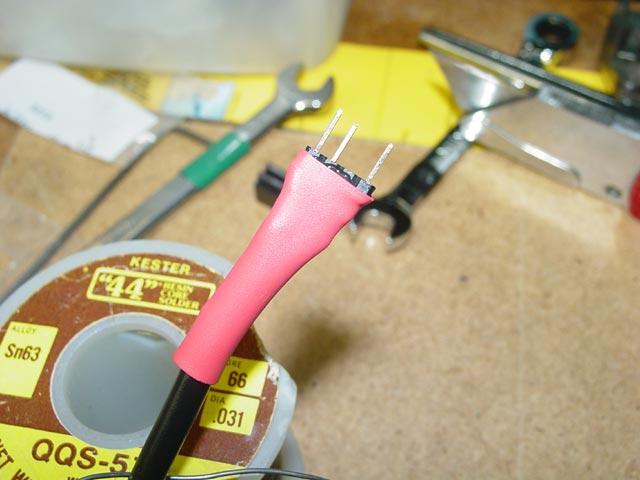
My first attempt at adding a heat-shrink boot to the connector. I cut it off and re-did it since it looked like it was going to fall off.
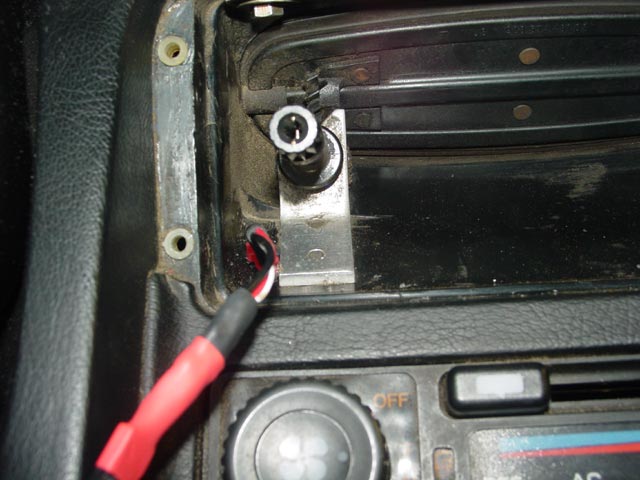
The other end of the wire threaded through an existing hole in the vent just to the left of the control knob. I have no idea what that hole was intended for... unless the folks in Stuttgart were just planning ahead for me.
 The red tie-wrap is there to prevent the wire from pulling back through in the event I am working under the console and inadvertently pull on it.
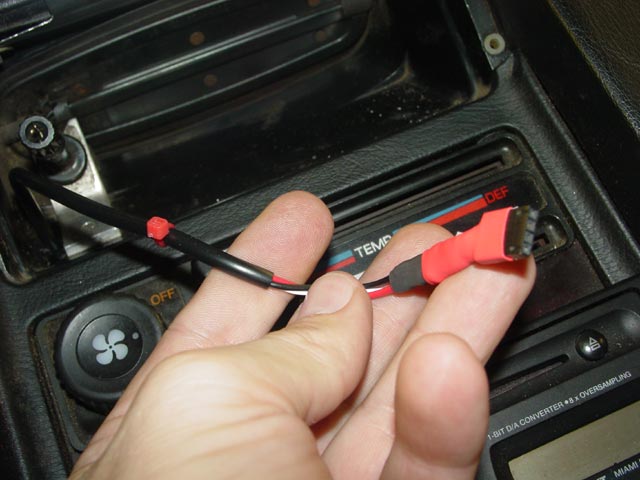
And here is the wire in its final resting place, ready for the vent faceplate to be reinstalled(After I clean some of the crud out of the vent)
With everything assembled, the wire routes very cleanly.
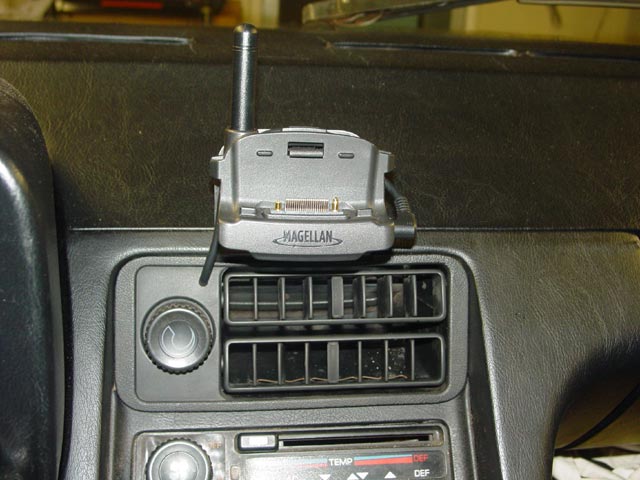
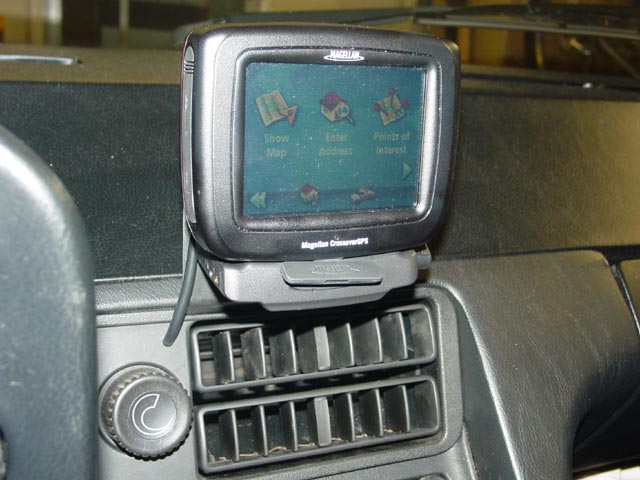
From the front, it almost looks like it belongs there...
Here is the view from the driver seat...
...and from the passenger seat. Now, it's time to do some dusting...
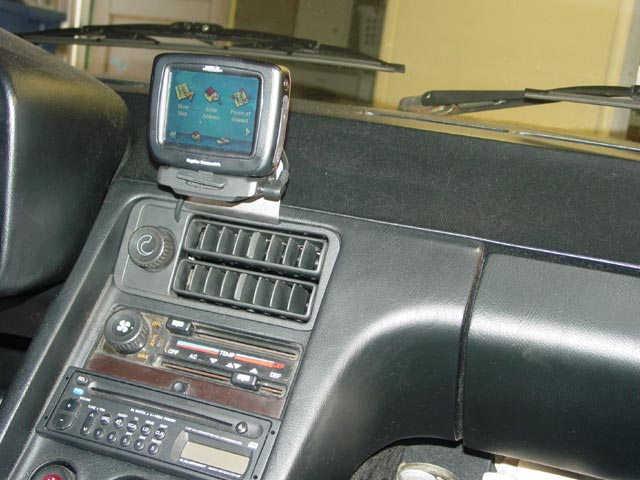
I am very happy with the results. The sheetmetal mount flexes just a bit over bumps, far less than the suction-mount does when it is installed on the windshield of the Saturn. This unit turns on when the key is turned, and I set the timeout so that it turns itself off 10 minutes after I turn off the key. I generally turn it off manually though, and remove it from the traffic adapter if I am parking the car for more than a couple minutes. No need to attract thieves. It worked very well on the ~2,000 mile road trip, helping to find gas stations well in advance and on a couple occasions detouring me handily around traffic slowdowns. It also came in very handy as expected on a couple of exploratory detours, making it very easy to get back on track. All in all, a very worthwhile addition.