If you've been reading along at home, you'll know that I discovered that I had a problem with my PS pump while having my car aligned -- I had just finished my Rack, Oil Pan & Motor Mount project.

The part number of the rebuild kit that worked for me was 928.347.921.00. Double-check to be sure you have the right kit for your pump. This kit had some extra parts, PET shows it applicable to 78-86. It did not contain the crush washers for the large banjo bolt or the cap over the pressure regulator, so I decided to leave those alone. The pump had been working perfectly as far as I could tell, I just wanted to address the leak out the rear seal and refresh the front seal.
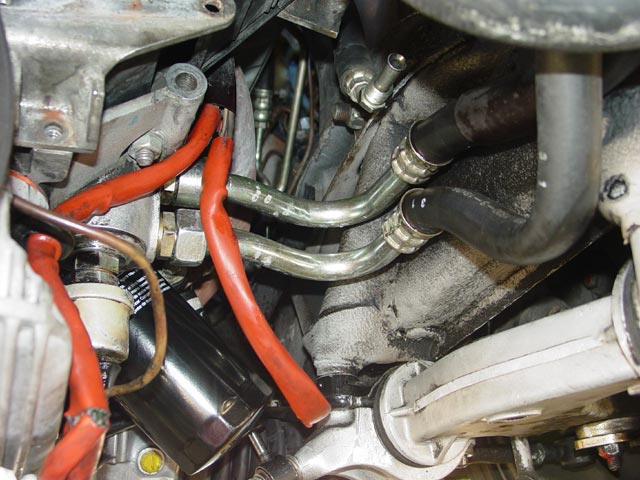
The first steps were to get the car raised, then remove the belly pan and drop the alternator. This is necessary to access the high-pressure line on the rear of the pump. I prefer to use ramps when the wheels don't have to come off, since there is no subsequent settling of the suspension.
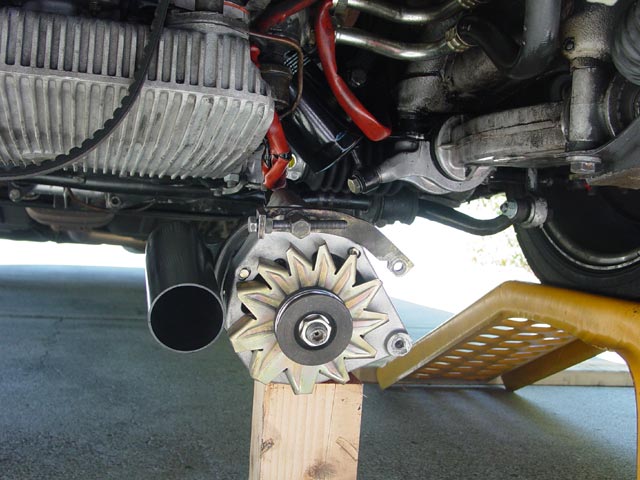
Having the car raised makes it easier to drain the PS fluid too. This is accomplished by loosening the return line. Make sure you have a couple of crush washers on hand for reassembly!
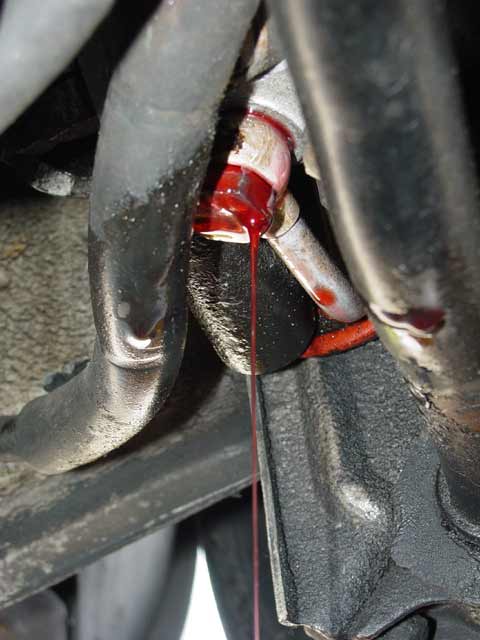
Now it's pretty easy to reach the high pressure hose with a flare wrench. About this time I loosened and removed the PS belt.
It's a conventional flare fitting. It will puke out enough fluid to leave a stain in your driveway, so have a pan or at least a rag handy.
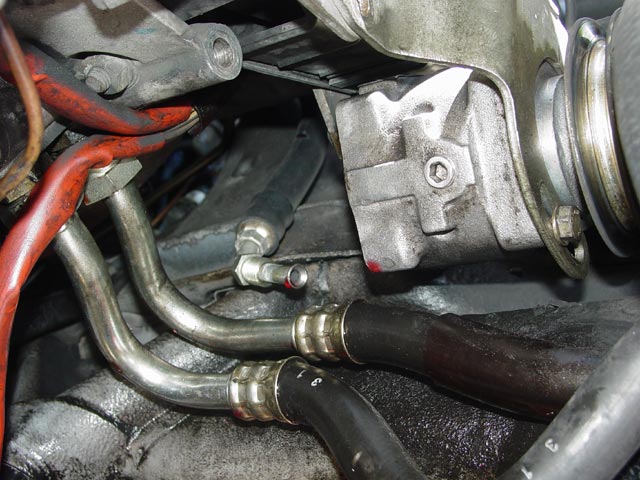
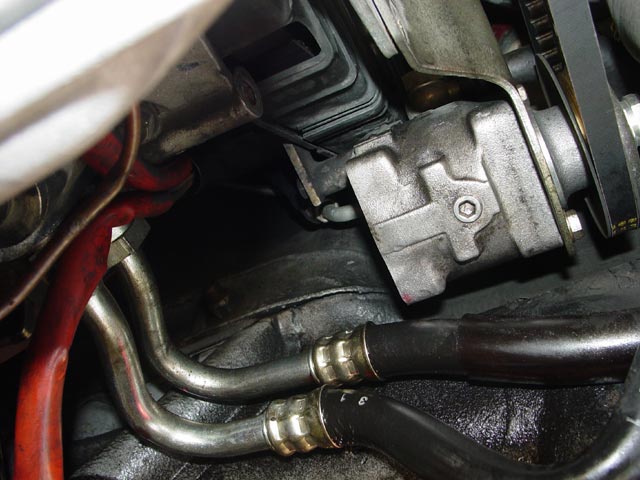
One of the two bolts holding the PS bracket in place is the top bolt for the alternator. Remove the second bolt from the left side of the bracket and maneuver the pump out.
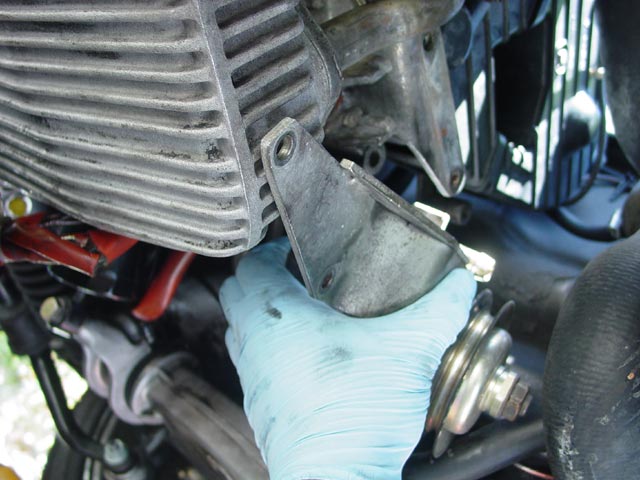
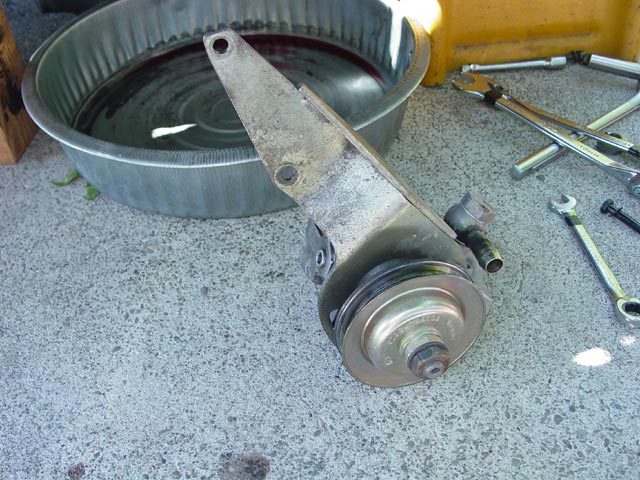
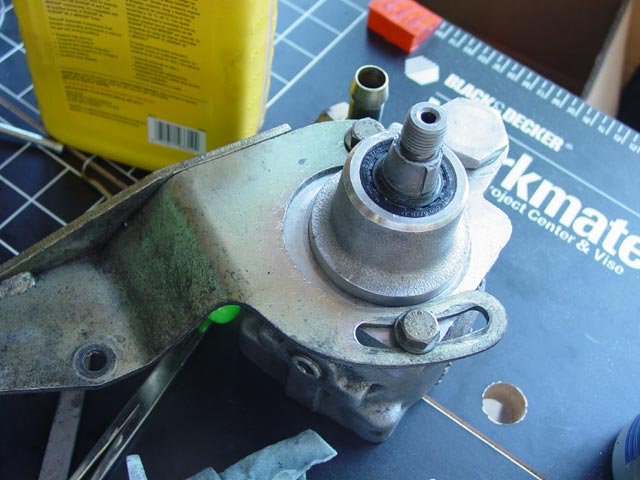
Here is the pump/bracket assembly, out on the ground.
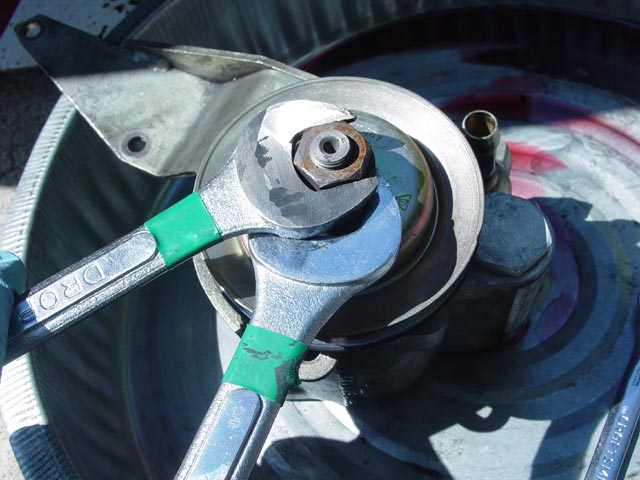
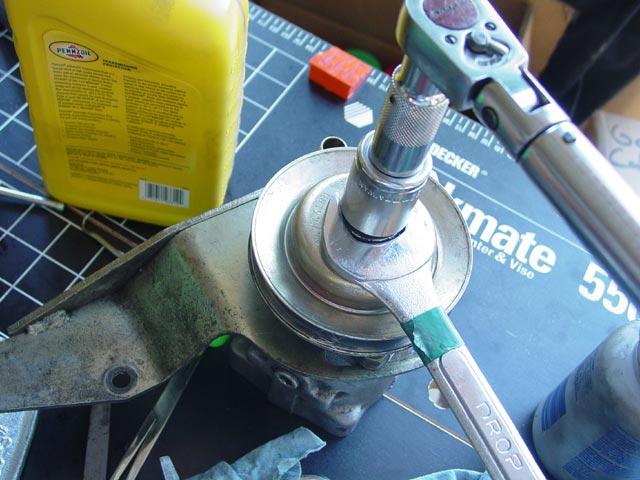
Place the pump in a pan for this step -- moving the pulley around will cause it to spit fluid. The hub of the pulley has flats for a counter-hold wrench and a 7/8" wrench will take the nut off. Don't attempt to counter-hold except on those flats! When I bought the car, the PS pulley had a bad wobble, probably from some knucklehead putting this rebuilt in without counter-holding properly! FYI, that's why the pulley looks so new...

Now that the pulley is off, you can remove the bolts that attach the pump to the bracket. Note the ZF reman sticker on the side of the pump. Pull the woodruff key out now and set it where you won't lose it. Mine was a bit chewed up so I just cleaned the small burrs off with a fine file.
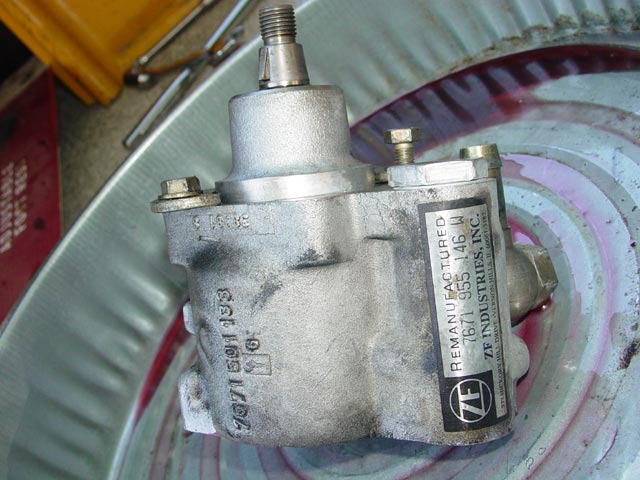
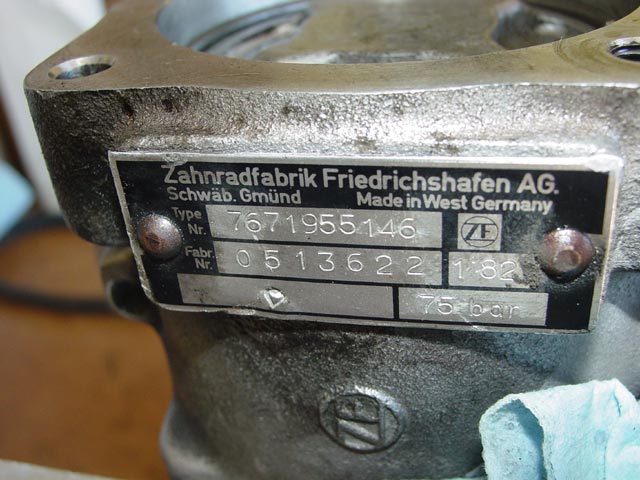
Here is the pump's original nameplate -- it's a standard 75 bar pump.
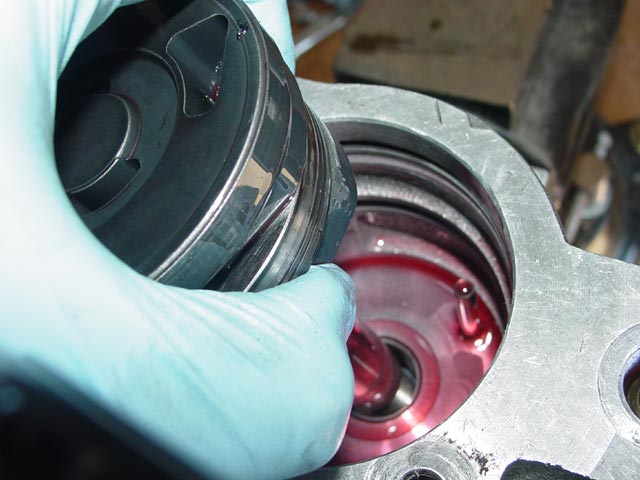
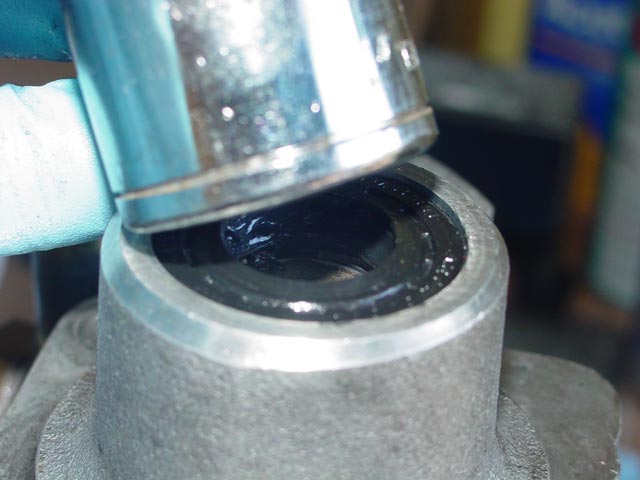
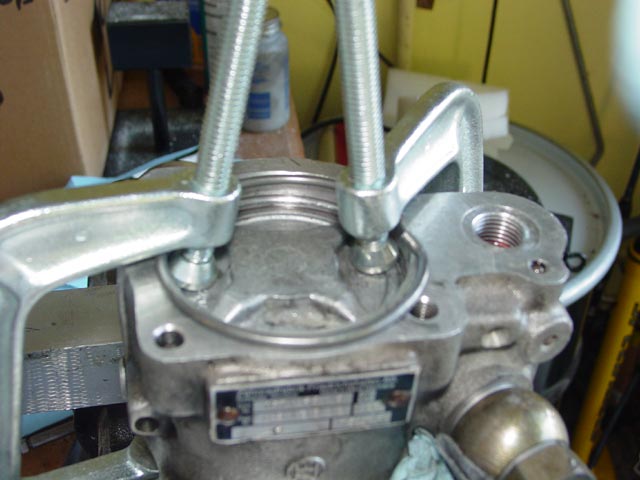
The first step in the re-seal is to clamp the pump body in a vise just firmly enough to hold it steady. Now press firmly inward on the rear cover to release tension on the snap ring, and remove the snap ring. You need to get a good grip on it, I used needle nose vice grips. Pull the bent end of the ring toward the center and walk it out of the groove.
With the snap ring out of the way, the rear cover lifts off. The orientation of the rear cover to the pump is not important, so don't worry about it.
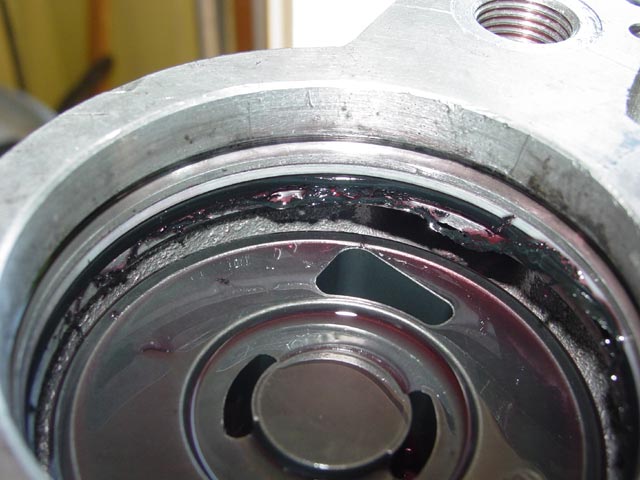
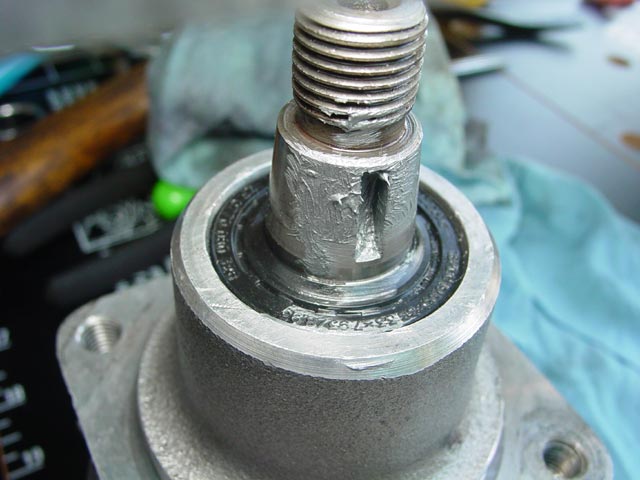
Un-be-freakin-lievable. Here is why the pump was leaking. All evidence points to this pump having been rebuilt by ZF. You would think the folks at ZF would know how to install an o-ring sealed rear plate without pinching the bejeezus out of the o-ring. Well, think again. The o-ring was not in the least bit rotten -- it was just pinched off. Probably from being installed dry.

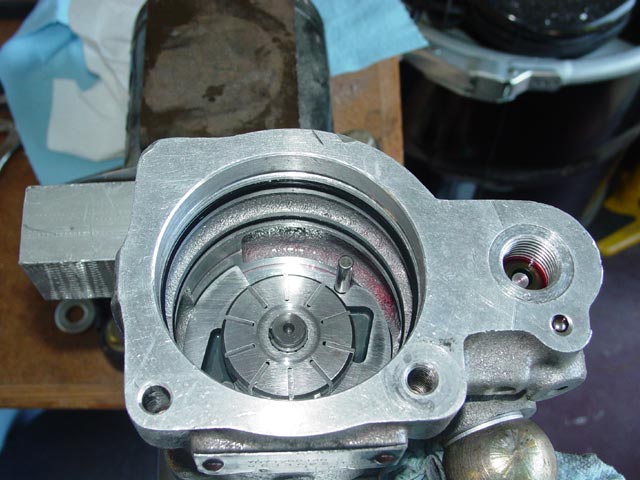
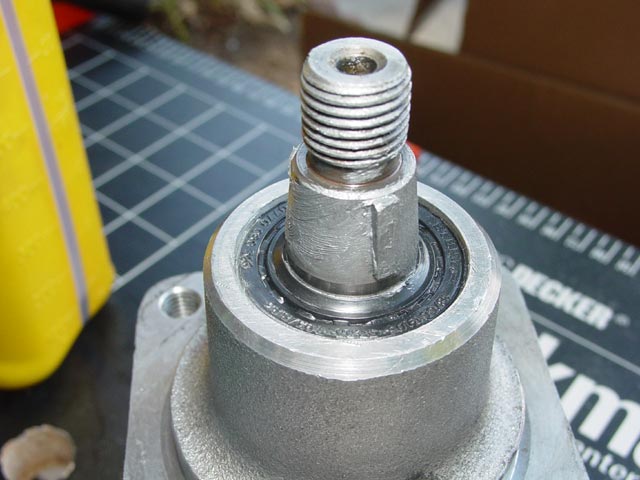
Push the end of the shaft upward with a thin dowel, center punch, etc. and the internals rise up to where you can grab the whole pump unit and lift it from the housing.
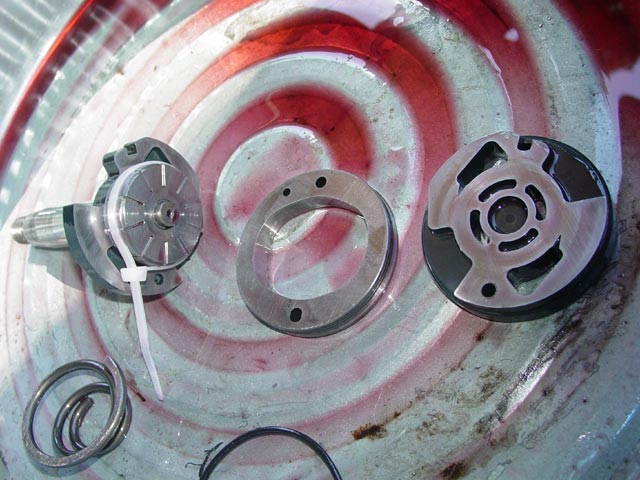
Carefully note the relative positions of each piece as you take it apart. In this case, The rear(far right in pic) plate was removed from the assembly and laid with the front face upward. The same for the center plate. Not shown -- I removed the center plate while I was holding the assembly with the shaft vertical. The vanes will want to fall out if you tilt the assembly, so don't tilt it! It's best if you have a tie-wrap already prepared to secure the vanes before you take the middle plate off. The vanes have developed a wear pattern in the impeller and in the mid plate; any mix-up here will result in surfaces that don't match perfectly and it could result in reduced performance until the parts wear in again.
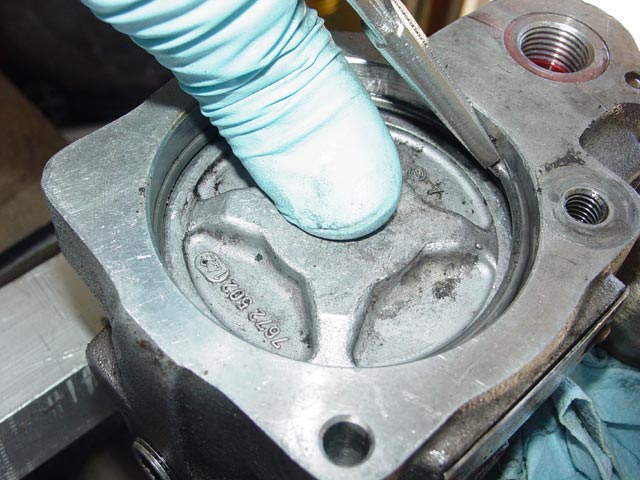
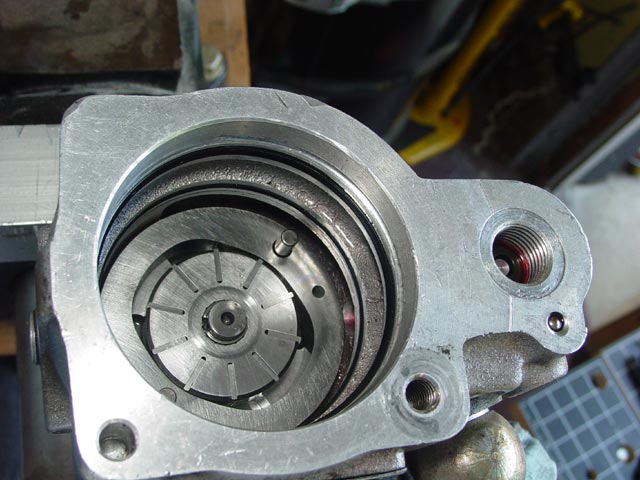
Next step is to make a note of which grooves have teflon seals or o-rings(that's what this pic was for) then remove all seals and o-rings and clean out any debris. I gave the assembly a good rinse with carb cleaner and let it dry before proceeding.
The next step is to remove the old front seal and install the new one. You can get the old one out with a screwdriver easily enough, just be careful not to nick the bore that it presses into. Some sort of lube is needed, at the very least a bit of ATF so the shaft can be installed through the seal without damage. I chose to put a decent amount of grease between the inner and outer seal lips to keep the front lip of the seal from eventually running dry on the shaft.
Next press in the front seal with the part number facing outward. A socket and a small deadblow hammer did the trick. If the seal is not going in straight, carefully tap one side until it is lined up before driving it in further.
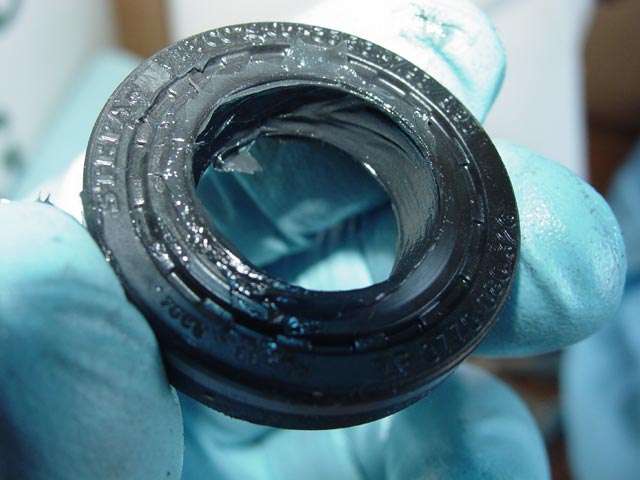
Note that the rear cover seal for the PS pump only goes in one way. This is not an o-ring like the seal that came out; it is specifically designed to seal in one direction. Because of its profile, the teflon backing ring that would help support an o-ring is not needed.
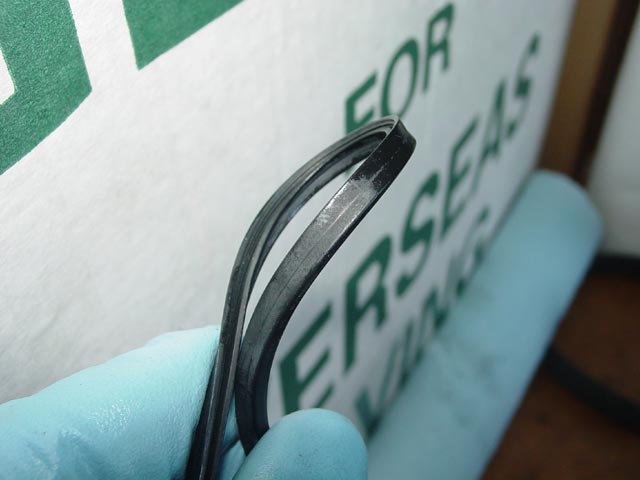
A cross-section of the seal. The "V" faces toward the pressure so that the pressure will expand the "V" and press the seal lip against the sealing surfaces.
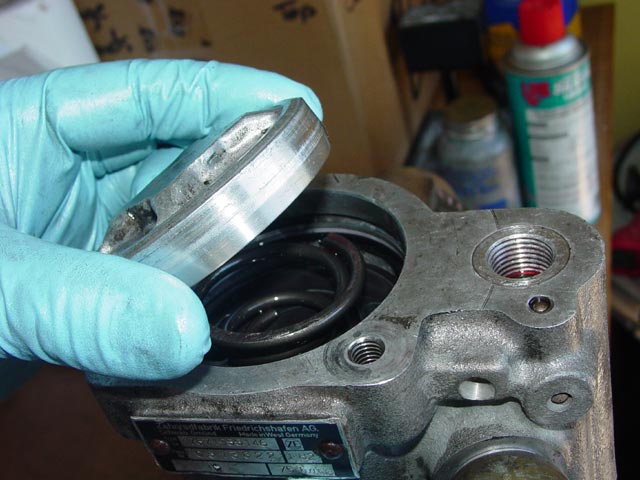
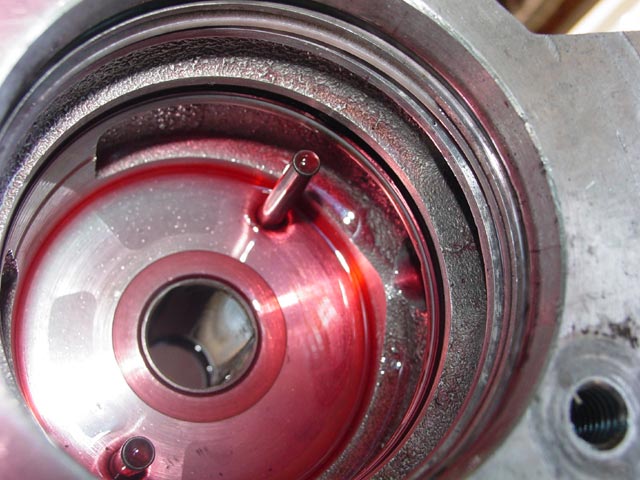
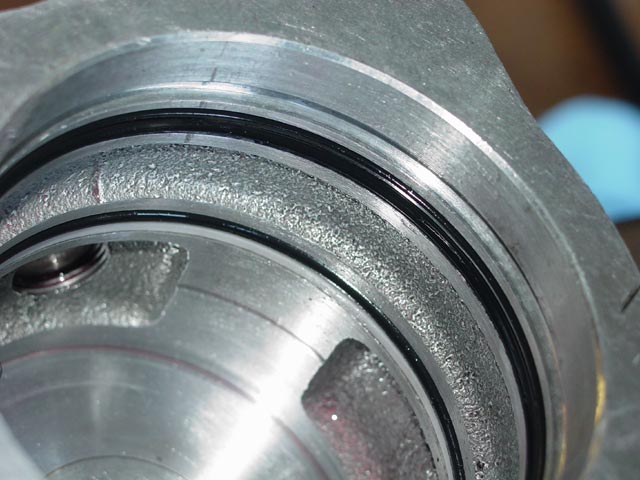
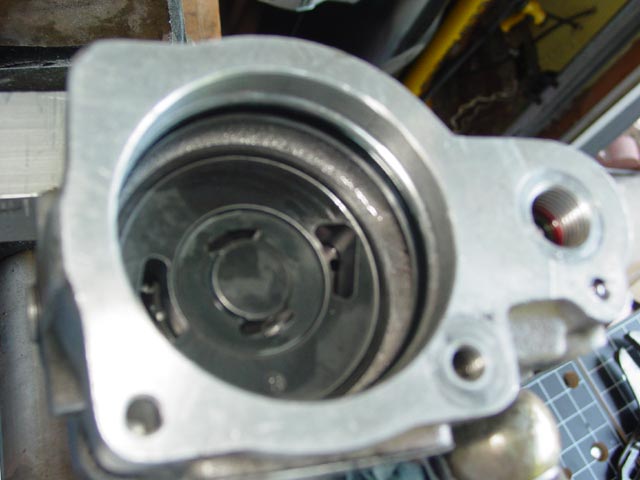
This pic shows the rear cover seal, the inner o-ring and the teflon backing ring installed in their correct positions. All seals and o-rings should be well-lubricated with ATF. Note that the front cavity on the pump is the intake; this is where the fitting for the reservoir enters. The center cavity between the o-ring and rear seal is where the pressurized fluid flows. This is why the backing ring goes to the front, to help support the o-ring against the pressure. If 75 bar doesn't sound like a lot of pressure to you, it might be better to think of it as just shy of 1100psi.
Next I carefully installed the shaft and impeller/vane assembly. Be sure to have the pump housing well secured, since the pump vanes will want to get away from you if you tilt it. I had to cut the tail off of the tie-wrap to get it in there, then carefully slipped the tie-wrap off once the assembly was properly seated in the housing. I'm not sure it matters which of two possible orientations you choose at this stage; I was careful to put it back together the same way it came apart anyway.
What I think is important is that the impeller front, mid and rear plate have the same orientation to one another as before, especially since the extra hole in the mid plate appears to be an important flow path.
Next step was to put the rear inner plate over the mid plate...
...and position the spring on the rear inner plate.
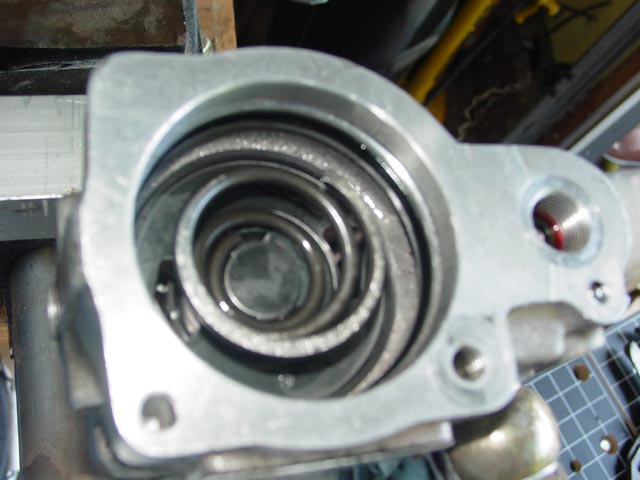
It's often a bit tougher putting things back together than taking them apart, and the rear cover plate was no exception. I simply could not get the rear cover plate held in position and install the snap ring with only two hands, so I used some C-clamps to compress the spring. I had to take care to not bugger up any of the critical surfaces while doing so -- in the pic you can see the tendency of the C-clamp pads to work their way into the snap ring groove. Eventually I succeeded... patience is key at this stage. BTW, sorry about the fuzziness of the last few pics -- I jostled my camera out of close-up mode.
With the hard part over with, I put a dab of anti-seize in the keyway...
...then installed the key and wiped a thin film of anti-seize on the threads and taper.
Next I installed the bracket, finger tightening the bolts for now.
Time to install the pulley. Note that it is impossible to install the mounting bolts with the pulley in place. While counter-holding the pulley, I torqued it to 36 ft-lbs.
Before reinstalling, I placed a rubber plug in the PS pressure hose and cleaned up all traces of PS fluid with simple green and a good rinse.
At this point, "Assembly is the reverse of disassembly".


With that, I have ended my problems with keeping ATF in the car and off the ground -- for now. The next thing is to reward myself with a nice long test drive.
