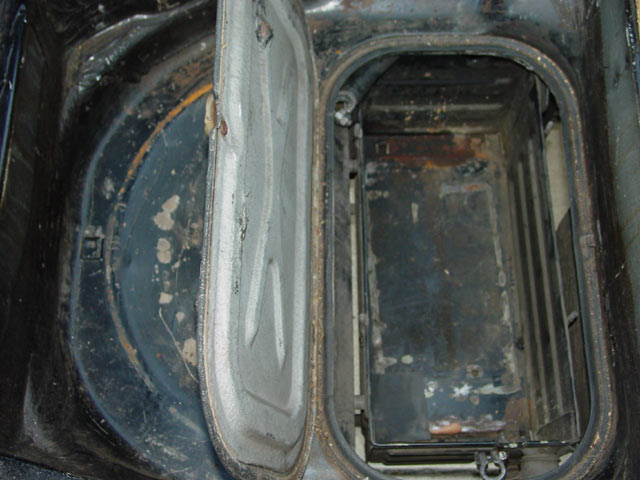
Well, back for another installment. This weekend's agenda... stop the rust on my battery box before any structural damage is done. I know that at this point there is only surface rust, but I also know that it has a very firm foothold. My assessment is that for many years & miles a smaller battery was installed, but that it was mounted loosely. Perhaps it was held in position with some rags stuffed into the battery box around it. I base this on the battery-shaped wear mark in the bottom of the box; it looks to me like that battery didn't move much, but it moved enough to wear away the paint. You can see where it wore through to metal, in the third pic below. Later, the PO that I bought it from installed the correct, huge battery. Rather, a local shop installed it; I have the paperwork. Whoever it was smashed the two prongs in the front of the battery box that are supposed to hold the edge of the battery. In addition, apparently this joker never heard of vent lines. The battery has a vent at each end, and it has been releasing the occasional drops of acid into the battery box under hard braking and acceleration(OK, more when braking... whattaya want, it's an Ol Bugger...). As a result there was some corrosion underway.

I knew about the issue, and I planned to do this project long ago. First, it took me several weeks to track down the correct lid for the battery box. I started looking in early April 2004, and posted a thread on Rennlist on April 21 2004 asking for help tracking this elusive part down. In fact, it took several weeks for me to track down a vendor that offered me even a small hope of finding the lid. The guys at Zim's told me to go ahead and place the order and they would track it down. I kept looking, trying to find someone that had the part in their hand, on their shelf... whatever... but I ended up going back to Zim's. Then it took several weeks to actually get the lid, apparently special ordered from Germany. But they did get it, so kudos to Zim's for finding the unobtanium part for me. It finally arrived June 8, 2004.

The next step in the saga was to find the stainless metric thumbnuts that I wanted to hold the battery box lid on. I found those at MSC Direct after weeks of searching... more info below. Then, even after I had all of the parts together, it took me a while to fit this project in among several higher priority issues, as you can tell if you've been reading along.
Also, while I had my car up on jackstands, I torqued the pinch collar on the trans input shaft to 66 ft-lbs. There had been some red paint on the bolt but it had obviously loosened. I was getting a strange noise and after torquing it down the noise went away. Now there is no more strange grumbling sound idling in neutral! The bolt turned about 1/4 turn before the torque wrench clicked. The most time consuming parts of the job were having a helper turn the motor until I could get to the bolt, and getting the rubber plug back on. Oh, I put some paint on the bolt so I can see if it's moved at my next inspection.
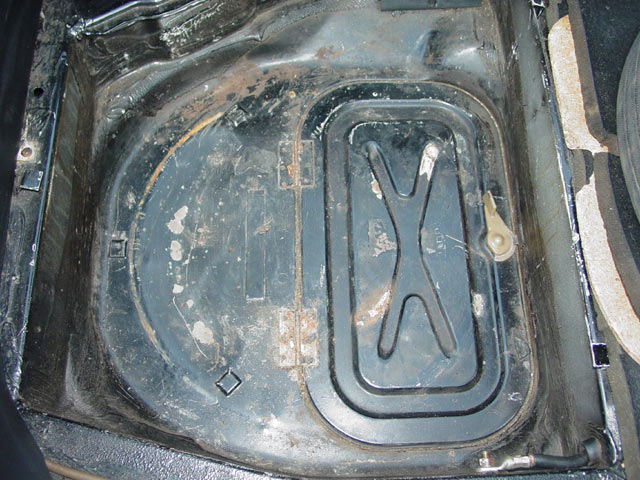
To start off, here is a picture of my spare tire well. Many folks have been surprised and bemused when I told them that there was no fastener of any kind holding the spare tire down, and it looked as though there never had been one. Well, here's what it looks like, having a tire well that seems to only hold the spare tire in place by the dubious virtue of being just a bit too small to accommodate the spare tire. It takes a lot of pushing and prodding to get the spare in place, and once it's there it doesn't seem to move at all laterally, though I think it clunks a bit on bumps. I've put some towels in there to damp out some of the clunking, but the real fix will most likely involve welding or otherwise mounting some sort of bracket, nut, etc. in there so I can bolt the damn thing down. That's one of the reasons why I made no real effort to do much about the way the tirewell looks. My mission this weekend is focused on the battery box only, and since I had lots of other things to do this weekend I had to stay focused.

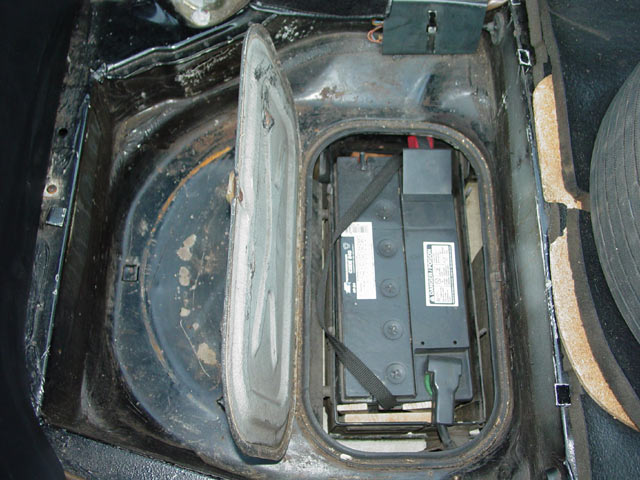
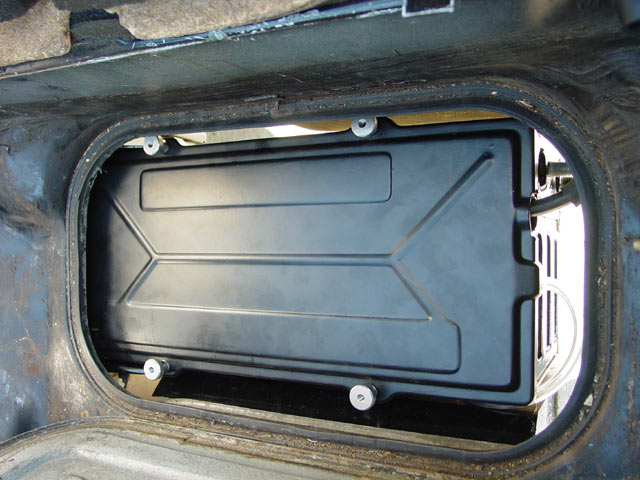
It doesn't look any better open; here you can see my "Ghetto Tech" battery mounting system, which consists of pieces of 2x4 and pieces of roofing shingles to lightly wedge the battery in place. Not optimal, but it didn't move around much if at all. One big drawback is that the battery was not restrained vertically.
I couldn't tell the pic was this blurry when I looked at the tiny display on my camera... but you can still see the beginnings of rust.
Now, I hadn't really looked that close at how the battery box is mounted. But it turns out, the battery box mounts straight to the transaxle on one end, and has no other support bracket. Plenty of folks already know this, but as usual I'm putting the information out there to help make up for the apparent lack of info on these "Ol' Buggers" on the web. I had expected to find another bolt toward the rear of the car. It turns out that not only is there no support on the rear end of the battery box, but the rear end of the battery box has a support bracket... that supports the boat-anchor rear muffler! There is another exhaust hanger that mounts to the driver side(US) of the battery box as well. That is one strong mutha!

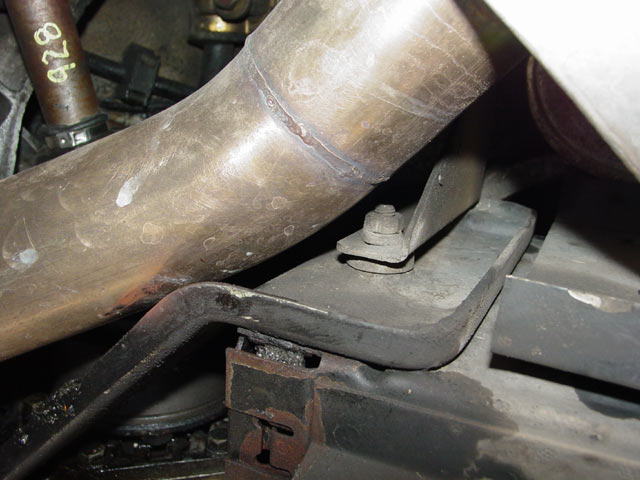
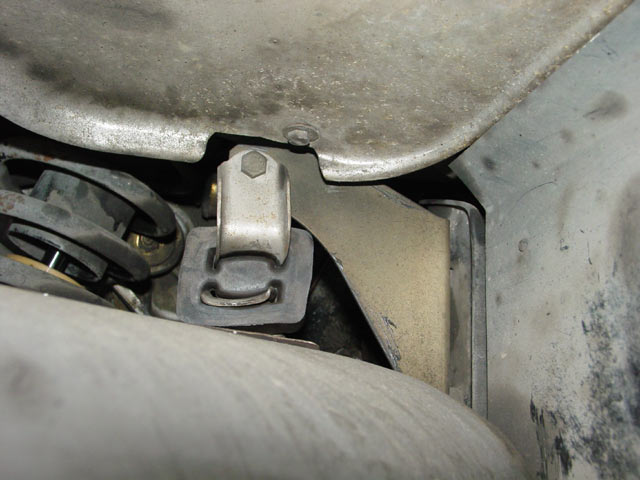
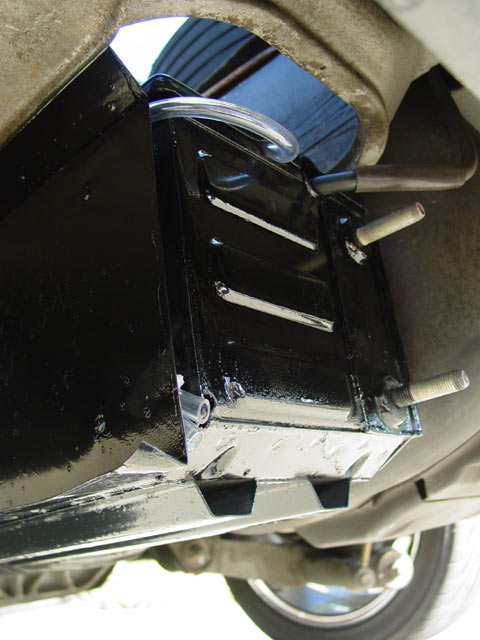
To remove the battery box, first remove the battery(DUH), then remove all attachments to the exhaust system. In my case the rear muffler bracket was not being used so I simply removed it. I then removed the exhaust hanger that attached at the forward exhaust flange on the original muffler. My setup is a bit different, but you should be able to do the same. Worst case -- drop the muffler. The pic below shows one of the two nuts that must be removed to get the exhaust hanger off. Also, near the bottom center of the pic, you can see where the rust is beginning to gain a disturbingly firm foothold... Given the way this item is engineered, it would be a baaaad thing to let the rust get out of hand on the end that bears the greatest load...
And here is the exhaust hanger, ready to be worked free of the rubber piece. This view is from the rear looking forward over the muffler and along the outside edge of the battery box.
Next up, I removed the two bolts at the end of the forked bracket straddling the halfshaft. The top one was the biggest %&#@&!?&% of the whole project; I highly recommend you remove it first and replace it last(of the 5 fasteners on the transaxle), with other fasteners just engaged a few threads so you can wiggle it into place. The bottom one is visible in the center of this pic.
I then removed the three nuts attaching the battery box to the rear cover of the transaxle, moving from bottom to top. Be ready to catch the battery box when that last nut comes off! BTW, the oil everywhere is from one of the output shaft seals. I'm not going to bother to clean it up until I fix the seal. It's just slow seepage at this point, as verified by checking the level. I never see drips, so I assume that it only comes out when the car is in motion.
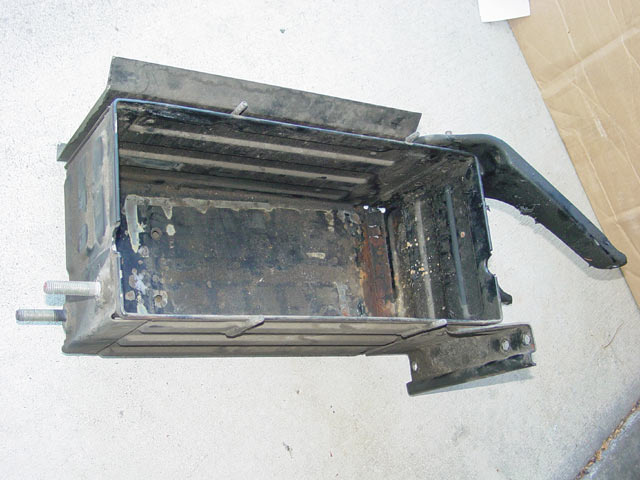
So here is the battery box... at last! the large studs at the lower left of the pic are for the original rear muffler mount; now defunct. The heat shield on the side facing away from the camera looks like it's riveted in place. Even though it's really unnecessary at this point, it doesn't rattle so I left it. I did my best to prep the paint surfaces that I could reach, but obviously I couldn't do much under the heat shield except tie a piece of cord to a sponge with scotchbrite on one side and keep pulling it back and forth under the heat shield. There was also some excess grease that spun out of a small pinhole in the CV joint, which can be seen glopped onto the fork-shaped side bracket.
I thoroughly cleaned and degreased the whole battery box inside and out with Simple Green. I bent the retaining tabs back into what I thought was the right shape, so that the front edge of the battery is against them when the rear edge of the battery is at the bottom of the sloped floor of the battery box. Essentially what I wanted was for the battery to have nowhere to go laterally, so long as it is flat against the floor of the box. I then used some Jasco metal etch and a wire brush to remove all of the rust. I didn't make any real effort to sand out surface imperfections; I just roughed everything up real thoroughly and if the paint was pitted I didn't bother to blend it. I figured, the paint is adhered so well, I'll leave it as an extra layer of rust protection. After the metal etch I rinsed thoroughly with tap water, then Simple Green, then water with baking soda, then tap water, followed by de ionized water. I then dried it by getting it REAL hot with my space heater. I wanted to make every effort to get rid of any etchant that may have seeped into the spotwelded seams, and to drive out the last of the water as well.
I was a bit pressed for time, as I needed to prime the bare metal, let it dry for an hour, then spray the whole unit with Rust-Oleum... and leave for Santa Cruz at noon. I knew I would be returning after dark, so I wanted to give the paint time to cure so I could put things back together on Sunday. OK, so I left for S.C. at 12:15. Mission accomplished... or close enough.
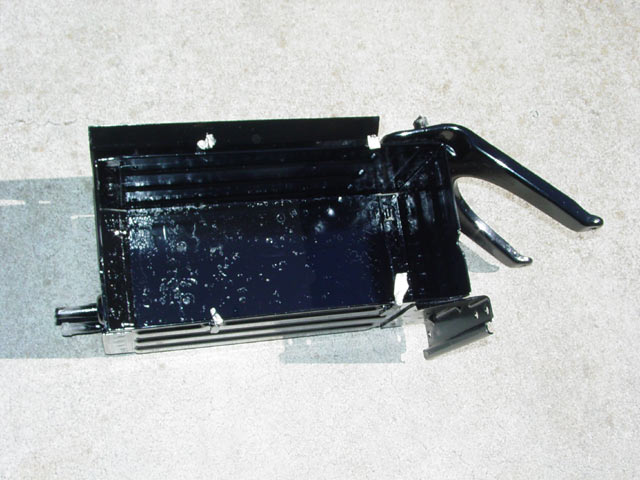
So here it is the next day... paint dry and ready to go. It's really obvious in this pic that I didn't make any effort to smooth the inside of the box during paint prep. That's OK, this paint doesn't have to look pretty, it just has to prevent rust.
The outside of the box, the part you would see looking up at the car on a rack, turned out looking pretty good. The pic below shows it with the cover in place.
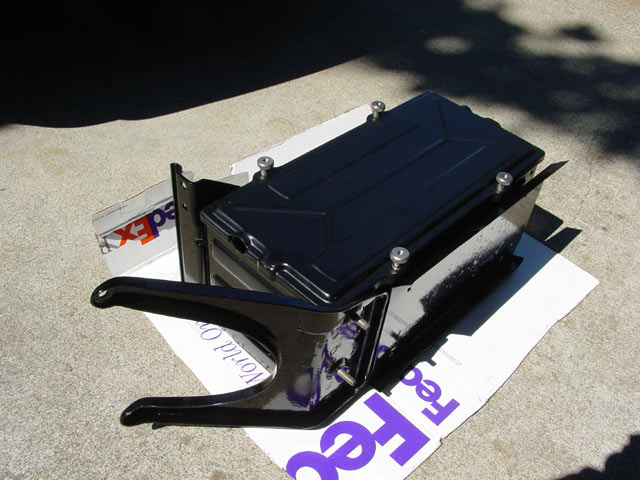
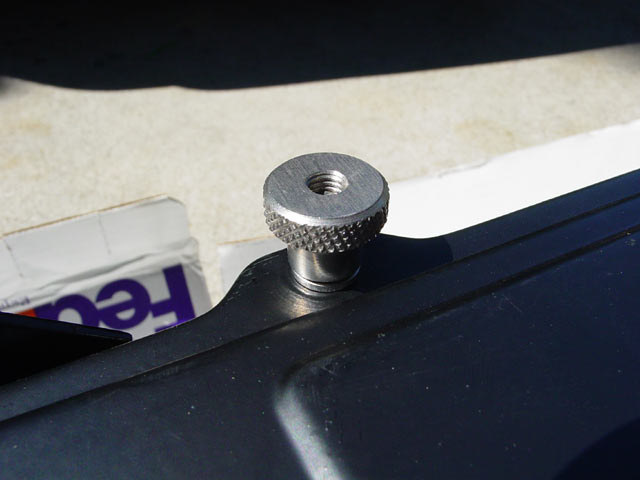
I put these stainless thumbnuts and washers on so I won't need tools to get to the battery. Stainless because... well, it's durable. But it was a major pain in the ass finding just the right one; it's relatively easy finding this sort of thing in US thread, but Metric... even this common M6x1.0 size... what a pain. I finally found them at MSC Industrial supply. Follow that link, enter part number 01230242 in the quick search field, and hit "GO". They were $4.92 USD each.
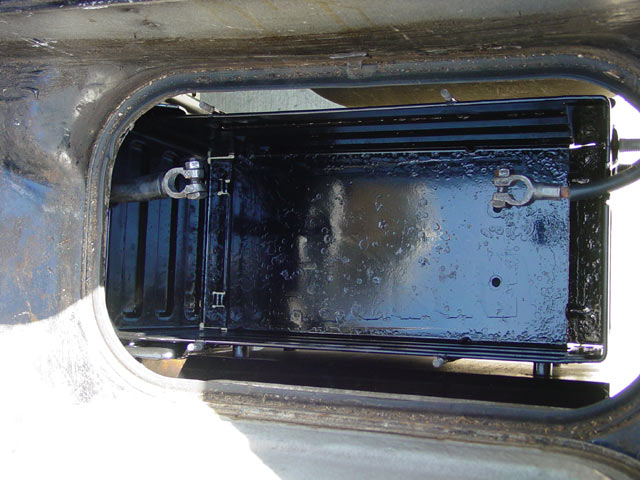
So, here's the battery box mounted up and ready for the battery.
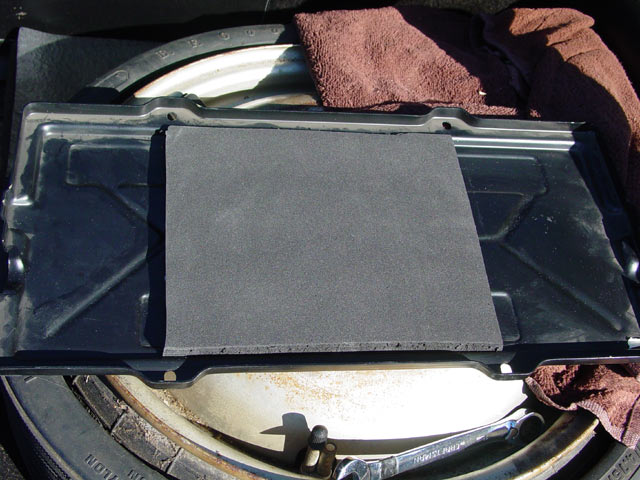
I bought this piece of 1/2" thick closed-cell neoprene foam at Orchard Supply Hardware, and glued it in place with some rubber cement. There was really no point trying to make it any longer than this IMHO. If you look at the top features on the battery relative to the hold-down studs, you can see that with the dimensions that I am using the foam will clamp on the flat area on top of the battery without impinging on the terminals at all.
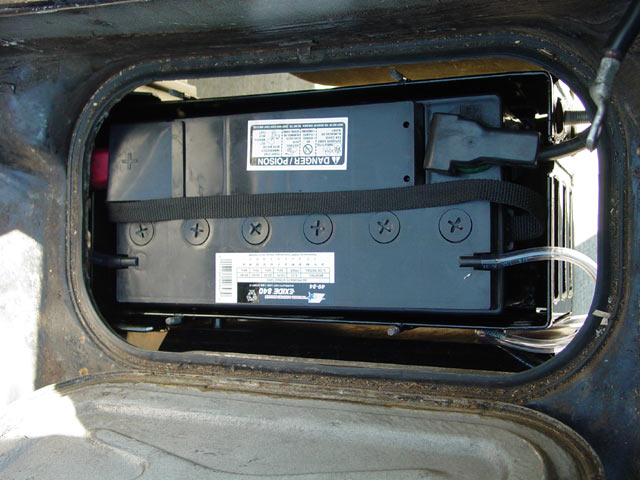
Here I have the vent lines, terminals, and terminal covers installed. Of course, I cleaned the terminals while I was in here. I used 1/4" ID vinyl hose for the vent lines, also from OSH. Because I had been spilling acid, I checked the electrolyte level in the battery. I had to add a tablespoon or so of distilled water to the end cells; I didn't worry about dilution because the amount was so tiny.
Here she is, battery box all buttoned up. I had to get under the car and work the front vent line into position as I positioned the cover. After the vinyl has been in position for a while and takes a set I probably won't have to do that anymore. Word of caution here... When installing or removing the cover, make sure the ground is disconnected. In my case there is lots of protection over the positive terminal, but once during the "fitting" phase, removing the cover, the edge of the lid hooked on the rubber + terminal cover and pulled it up enough it almost touched the positive terminal itself. No hard lessons here, as I had the ground disconnected... just be careful! I used a pliers handle to compress the foam while I tightened the thumbnuts. That sucker's not going anywhere!
This is probably as much as anyone will ever see of my handiwork. I routed both vent lines behind the heat shield and brought them together at the lower rear corner, and tie-wrapped them together. This should keep any battery acid from getting on any part of the car in the future.
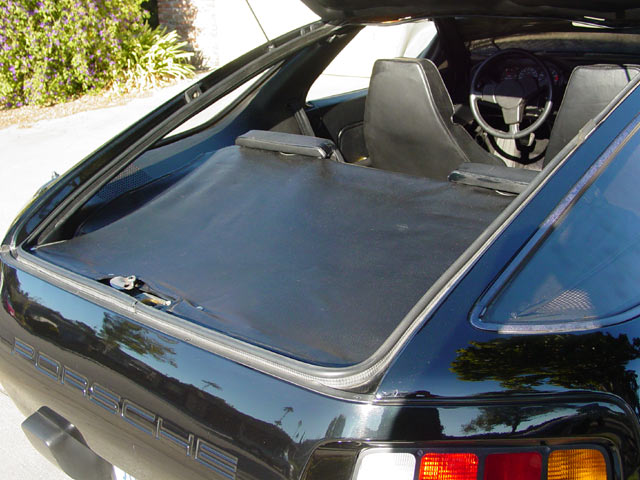
BTW, I did this a week or two ago but didn't bother to take a pic... but I put the cargo cover on after a thorough reconditioning with Leatherique. Looks cool, and it's very functional too. It doesn't lift with the hatch like the later ones, but it's good enough for me.
All in all it was a very productive weekend. This effort really paid off, in that I did away with most of the clunking from the rear over stutter bumps, and I managed to quiet my driveline down significantly. Plus I don't have that patch of rust in the battery box nagging away at the back of my mind...