Well, I had grand plans for getting a number of things done this weekend. I was going to try to get to as many items on the following list as possible, but the parts gods were not smiling on me and I didn't have the gaskets, bumpers, etc that I needed for some projects. Also some of the plans led to more repairs... the "Knacker Job" as it were. Other things came up as well that affected the amount of time I had to focus on the car, but that's another story. Suffice to say I only accomplished the first two things on the list below, though I made attempts at the first five.

The "List":
- Smog Pump Check Valve
- Heater Valve
- Fix All 3 washer systems
- Install Battery clamp(probably fix one clunk in the process)
- Locate some clunking noises the car makes on small bumps
- Passenger door lock, install link to tumbler & new gasket
- Driver door lock, new gasket
- Fix Rear defroster
- Fix Cruise Control
- Mount fire extinguisher
- Check torque on pinch bolts F&R
- Fix dome light so it doesn't keep popping out
- Do something about stripped screws in mounting system for rear visors
- Clean up dash light dimmer pot

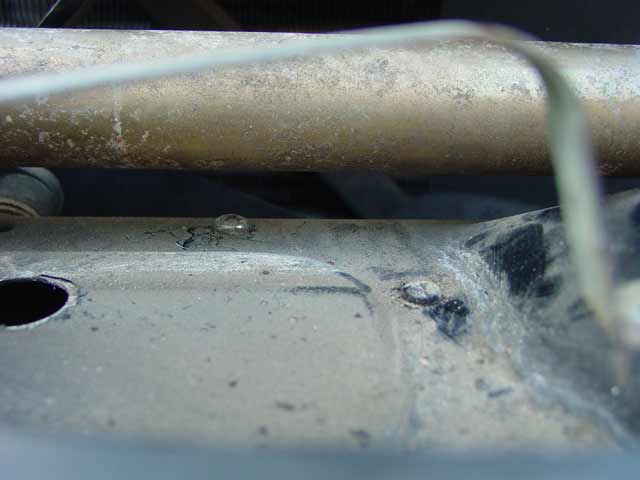
Well, making the best of it I grabbed a 5.5mm socket and disassembled the pump from around the bracket, figuring I might as well take a look since I damn sure wasn't going to take the headlight pivot arm off for THIS. Below is a pic of the bracket, where some cruel German wanted it to remain until the end of time. There is a pic of the pump in place later, after reassembly if you want to see what it looked like in place.

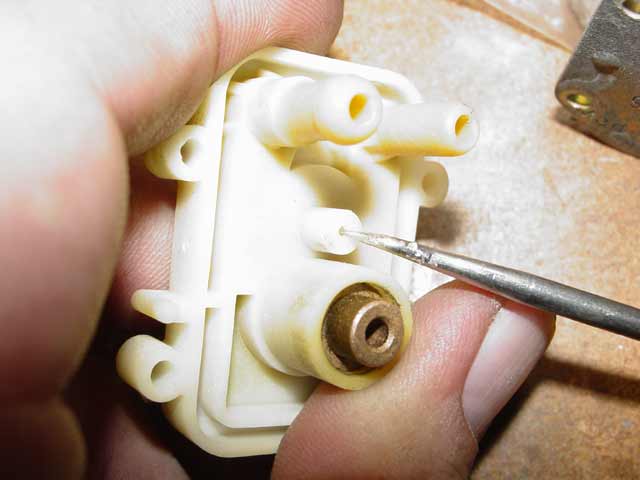
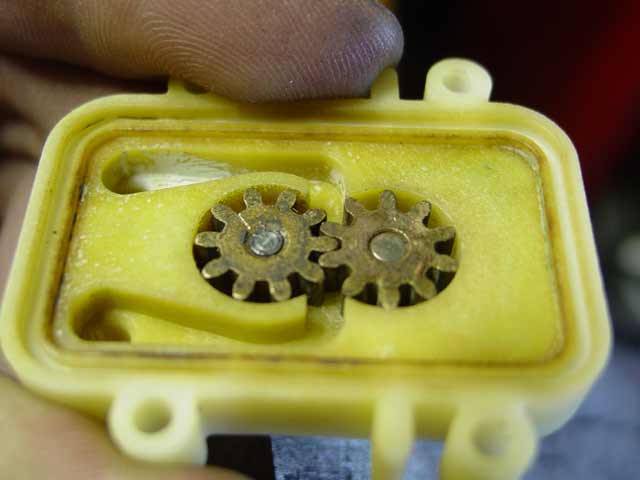
With the pump in pieces, I connected the motor straight to 12V and it spun like a champ... surprisingly torquey. I became very hopeful after seeing the inside of the pump, since I could see that while it was jammed solid with debris and gunk, it was of a very easily serviceable type; a gear pump. The main gear pushed right out with a bit of pressure from the motor end but the driven gear needed a little persuasion. I pushed it out from the backside with a probe tool:
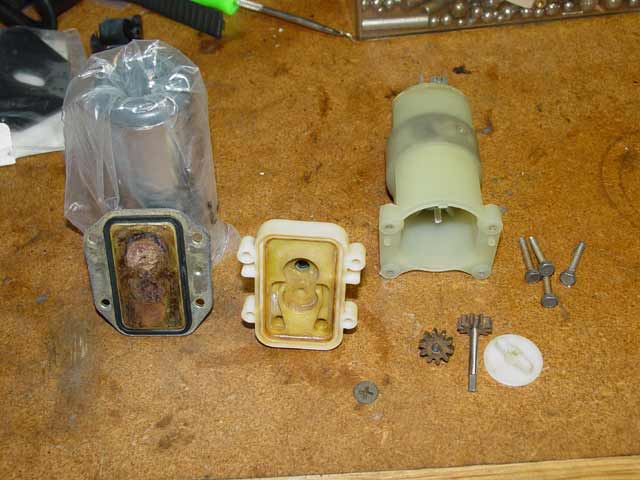
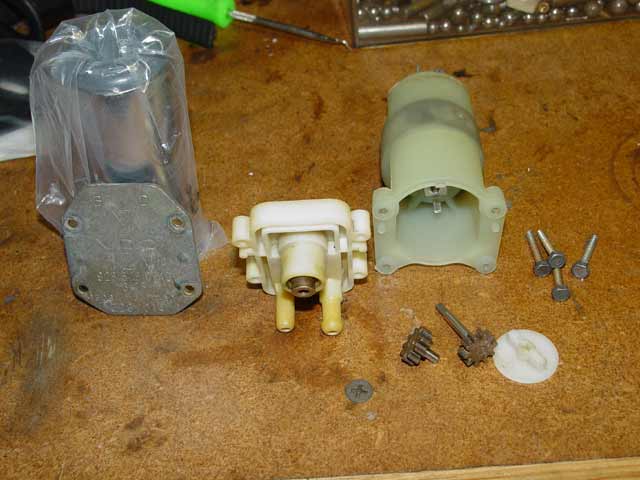
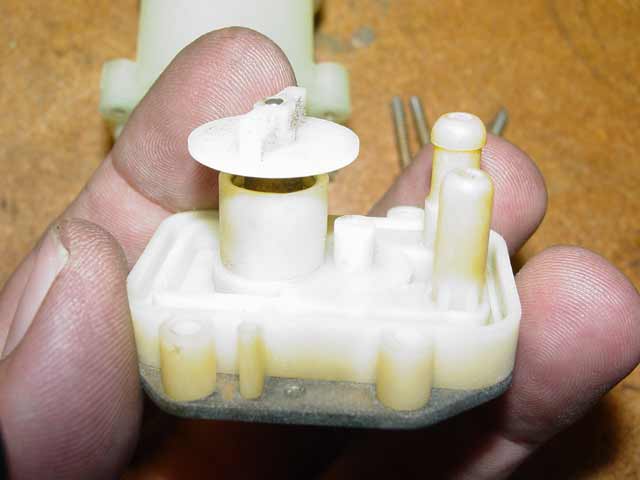
So here are a couple of pictures showing all of the assorted pieces of the pump after I cleaned everything up(except that damn bracket). The side of the pump body with the inlet/outlet nipples has tiny plastic nubs that engage in holes in the bracket to align it. The motor housing has matching nubs that engage the bracket from the other side. Getting these aligned while you are lying on your back reaching up through the grill is the most fiddly part of the whole process. Oh, the plastic-wrapped chrome thing is my "soft" lugnut socket from Pelican Parts... it also doubles as a nifty support to prop up washer pump endplates for picture-taking...
At this point I have placed the cleaned gears back in the pump body. The driven gear was a press fit in the plastic, and wouldn't turn. I found a number drill that was 0.01mm larger than the shaft and cleaned out its bushing area. After that it spun free with very little play. This is a very simple but effective design; the liquid flows around the outside of the gears, between the teeth and the pump housing.
The next step is to clean the gasket that in my case stuck to the pump endplate, then put the endplate on the pump body and the drive dog on the motor side of the pump. Be very careful at this point, as there is nothing to hold the pump together at this point except your fingers!
So, fiddling the pump back together around the bracket while reaching through the grill was a real picnic.... but it beat the alternative. I don't know what they were thinking when they put the pump mounting screw there, but I got lucky and it worked out OK. I'd like to have a word with whoever was responsible for that mounting location though...
 So the pump works, providing lots of pressure and flow at the fitting at the base of the hood, but there is some blockage inside the hood. I more or less expected that I would need to replace or clean check valves and nozzles. This should help motivate me to get it done.
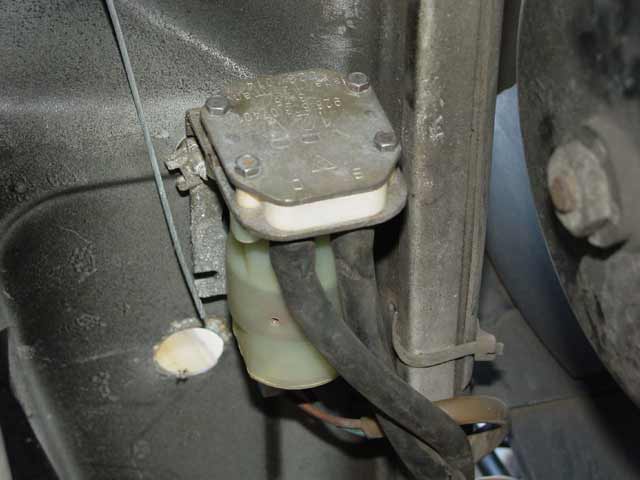
Next, I put the car up on ramps so I could reach the main washer pump and ran straight 12V to it. It was frozen solid, and mounted with little rubber standoffs that snapped as soon as I attempted to remove them. So I removed the pump, and in this case I decided to replace it with a new unit because it's such a teufel to get to.
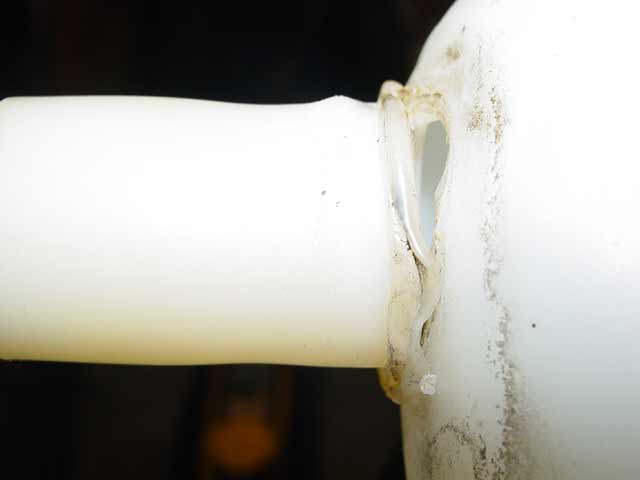
So, my next fun task was to pull the washer components out of the fenderwell. I won't go into that here, since the procedure has been documented repeatedly on member websites here. Basically what I found was that the headlight washer pump is very strong, but something forward of the fenderwell is clogged. I chopped the hose off for now, as the portion that lived in the rear part of the fenderwell had a couple of kinks in it and the plastic had hardened. The harness connector for the level sensor was corroded to the point that the terminal fell off the wire. Also, the filler fitting didn't have the steel collar in it, and it was cracked where it joins to the tank.. This could easily have been caused by me during disassembly... more knacker work perhaps. I'm going to see if I can find a piece of PVC to replace the steel collar. Anyway, the fitting appeared to be melted on or welded on ultrasonically. My attempts to melt it back into place were a waste of time, as you can see from the pic below. Parts on order...
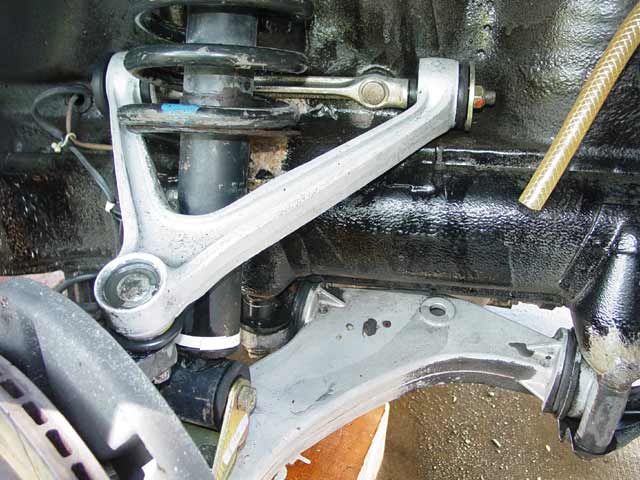
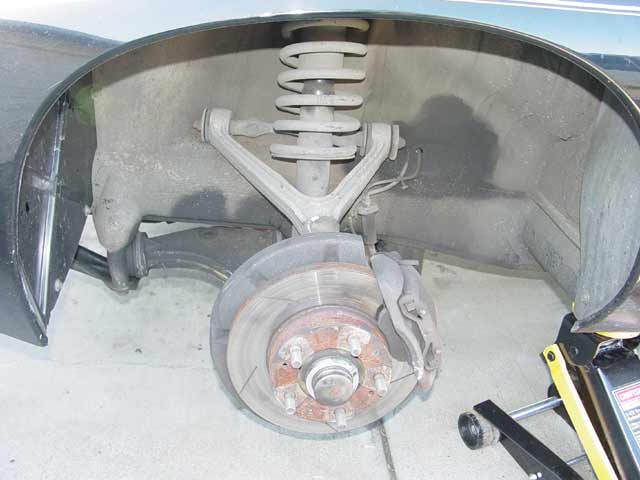
While I was in there with the wheel off, I gave everything a quick scrub with Simple Green. I used the cheap household stuff, not the stuff that's for automotive use. The automotive stuff smells like it has some strong solvents in it and I like to use that sort of stuff sparingly. The hose hanging down in the first two pics is the headlight washer line. It's plugged somewhere downstream of this; when I cut the line here and ran the pump it sprayed better than any 5 super-soakers. Anyway, I just sprayed on undiluted S.G., gave it all a quick scrub with a parts brush, repeated after it had soaked for 15 minutes or so, then hosed it off. Great stuff.

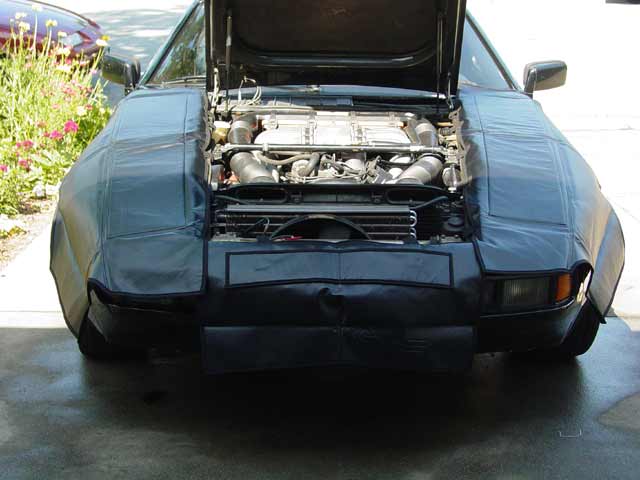
OK, now for the real knacker job. It was time to replace the air injection check valve and the heater valve. I had just received my work covers which arrived off backorder from 928 Specialists. So first I rinsed and dried the front clip to avoid scratches...
Then I put on the work covers, center section first. The center section has hooks that hold onto the headlight pivot bar and it just hangs down from there. The side sections have several hooks that engage along the fender lip. Shortly after I put them on, I noticed an immediate difference. I didn't have to walk(well, lean) on eggshells anymore, and OMG! I could rest tools on the FENDER!!! The pouches up front were great too... the perfect place for long screwdrivers that you might need on either side of the car, etc. When I was using the work covers, it was incredible... I felt so... safe! Better than any condom!

So I proceeded on with my plans. For both tasks, I needed to remove the intake tubes and upper and lower airbox. Replacing the heater valve was so bone-simple it doesn't even rate explaining. If you can't figure this out you should take your car to a shop. You can see the heater valve on the right side of the last pic on this page if you perhaps didn't have one and want to check orientation. I'll give one n00b hint; the 8mm bolt with the 13mm hex head on the back of the plenum is the only thing holding the airbox in that might not be obvious to the greenest of n00bs. The other fastening points/hoses should be obvious.
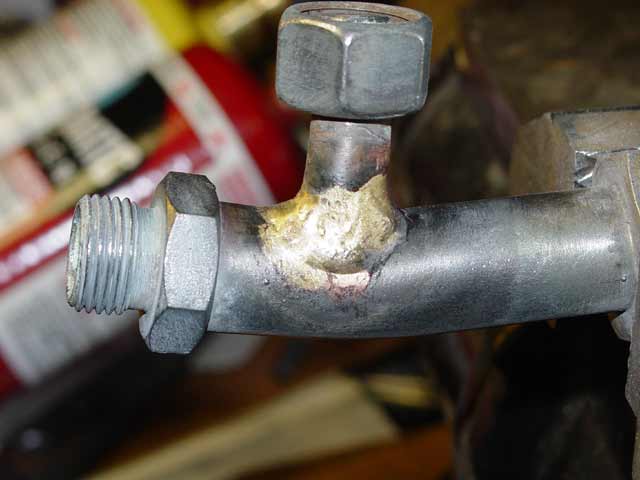
With the heater valve out of the way I went after the check valve. I already knew that I didn't have wrenches that could turn the check valve and counter-hold the air tube. Oh, I have wrenches that fit, I simply couldn't get them on the fitting down in that tight space to turn it. So I tried removing the smaller fitting further down the air tube, past where it tees off to go into the right side head. I was able to break the fitting loose after letting it soak in a generous portion of Liquid Wrench, but it took a lot of effort and when it broke free I slipped and twisted the wrench that I was counter-holding with. I didn't take the following pic until after I had started cleaning up the area to be mended, but you get the idea. I was not a happy camper, having this in my hand on a Sunday, standing between me and BWAAAAHHHH on Monday.


OK, so here's where it gets really ghetto. First, no way was I going to get anyone to weld that piece on a Sunday. I knew I could safely braze the piece, because I could tell by the color of the plating on the air tube that it never got hot enough to melt bronze at 1600�F. Now, I grew up with a full Victor oxy-acetylene cutting/welding rig with shop-sized tanks in my dad's garage. That's what I really want, what I really would have loved to have for this job, but which I promised myself(and my girlfriend) that I wouldn't get until we had a full-sized garage/workshop to put it in.
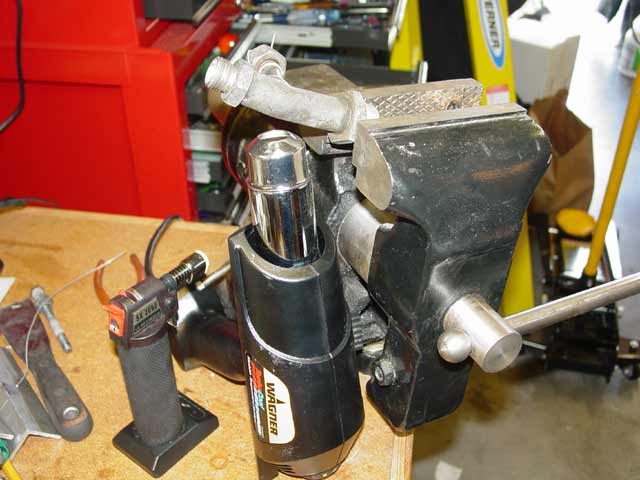
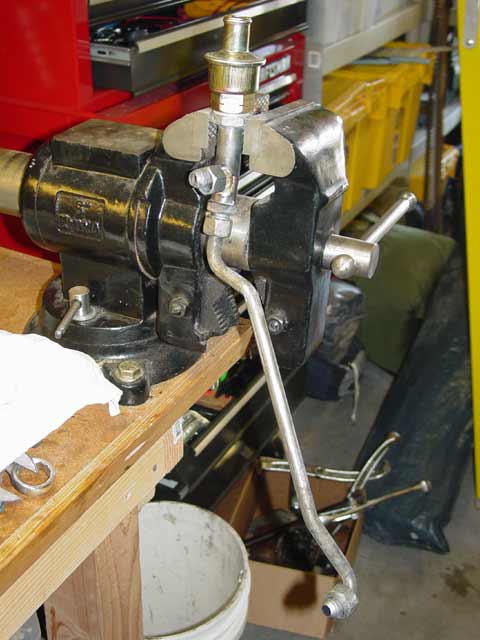
So, for the longest time, I've had the welding done wherever I could, body shops, muffler shops, etc. and I've been able to get by soldering up to 1" water pipe with this micro-torch pictured below. I knew I was pushing it, even though the packaging claimed a 2500�F flame. The problem is not temperature, but heat. I wasn't sure that this torch could dump enough heat into the metal to braze it, because I expected the heat to dissipate quickly through the mass of the metal. So, you can't really see it here, but the threads on the large end of the tube are clamped in place with some small pieces of bakelite. The idea was to minimize heat transfer to the vise by minimizing the surface area in contact, and making that contact with a thermal insulator. Also, I decided to use a heat gun supposedly rated at 1100�F to pre-heat the piece, figuring that reducing the Delta� between the braze location and the rest of the piece would slow heat migration.
OK, OK, quit laughing. It failed miserably. I gave up when I discovered that the torch was not even producing enough heat to melt the brazing rod even while it was not in contact with the workpiece. I borrowed the torch below from a neighbor, which also failed miserably. This unit has a truly idiotic design, with a 4-sided "swirl" chamber just inside the tip. Sorry I didn't get a pic, but if you're shopping for a torch, look inside the tip. If it has that little 4-vane swirly thing inside, DITCH IT. It will not focus the heat worth a damn. What you want to see inside the tip is a symmetrical, circular pattern of holes perhaps with a gap around the outside and more holes or a single hole at the center. Don't believe the hype about that swirl flame garbage.

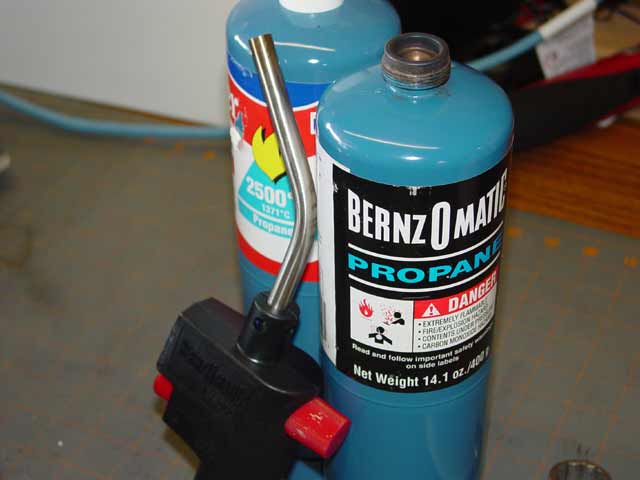
Well, what's a guy to do? Fed up, I went to OSH, determined to get at least a MAPP torch. I paused a moment over the oxy-acetylene rigs, but they were $400 and they weren't Victor, they were Lincoln. Ugh. I didn't look past the plumbing to see if the tanks were filled, but I seriously doubt that they were. They had a MAPP torch that looked similar to my neighbor's torch, but it too had that stupid BS nozzle that sprays flame out in 4 different directions. Garbage, and they wanted $40. But... it took me a minute to see it because I didn't know what I was looking for... they had the oxy-MAPP setup below for $50. "cutting/welding/brazing torch kit" was what caught my eye. Flipping it over, it said it had enough oxygen to "braze 1/2" steel for 18-20 minutes". "Well damn," I thought. "If this little torch puts out enough heat to braze 1/2" steel AT ALL, I can probably fix up my air pipe in 5 minutes, and I bet it cost $50 to replace..." So I dropped the $50 and headed home with the scent of victory on the breeze.

So it turned out that it took me 5 minutes to get the package open, set up the torch, and finish the brazing job. I added bronze all the way around the weld area, since I was afraid that I had weakened the tube when it flexed after cracking. The gas controls were very touchy and required a bit of fiddling to get the right flame. Probably because they are not true regulators. But, they got the job done. It was really $50 well spent. I will probably garage sale it when I do get my Victor rig, but for now it has definitely upped the bar as far as how I look at tackling projects. On this very page is a perfect example. If I had this torch when I set out to remove the intensive washer pump, I would have cut one of my driver bits off 1/4" from the tip and welded that to a thin steel scrap to use as a 90� handle. Would probably have taken the same amount of time, but I would have another new tool...


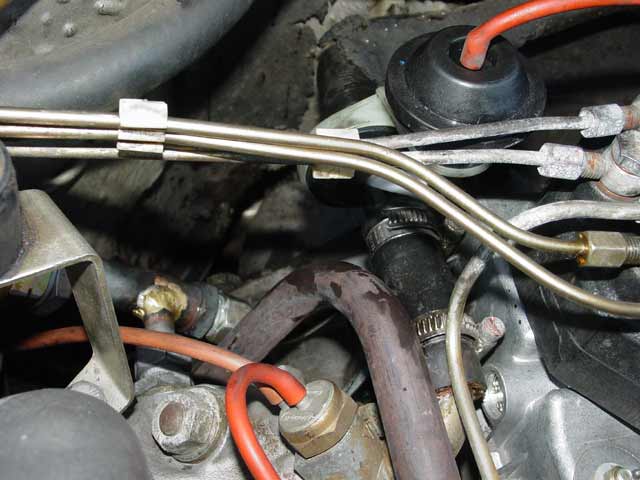
So at this point, I did what I really should have done in the first place... I removed the rest of the air tube from the other head... counter-holding the fittings of course. I wire-brushed all threads, on the fittings at the rear of the heads and on the tube itself. I threaded the check valve on the end, after sanding both sides of the aluminum gasket lightly with #400 paper and putting anti-seize on the threads. I also put anti-seize on the threads on the tee fitting opposite the check valve, and the fittings in the heads. This stuff is going to be easy to get off next time, which will hopefully be far in the future. The two fittings that are facing toward the camera go into the back of the heads; I tightened the fitting between the two pieces of pipe until I could just turn the pipes relative to one another with medium effort, but the joint wouldn't move with casual handling. I jockeyed it into position and hand threaded the fittings onto the heads finger tight. I had to adjust a bit as I did this, which was the whole idea. I then removed the assembly, torqued that center fitting, and put the assembly back in the car, torquing it to the heads tight enough to stay put.
I started the car and found no leakage at any RPM from the check valve, and no apparent leakage from any of the plumbing that I touched. So, I put the air hose back onto the check valve, reinstalled the airbox and intake tubes, and took it for a test BWWWWAAAHHHHHH with a big, satisfied grin on my face.

70 miles later, the braze is still holding tight. The heater valve is working properly too, so it's time to schedule an AC appointment. Next weekend, the weekend of May 1, I'm going to finish what I can of the washer system and go after the driver side wheelwell, looking for rattle/clunk issues and possibly the cause of my cruise control not working. At the very least I'll get it cleaned out, de-clunked as necessary, and clean up the suspension and wheelwell. I'll try to knock some more stuff off of that list, too. Happy trails, and keep the shiny side up!

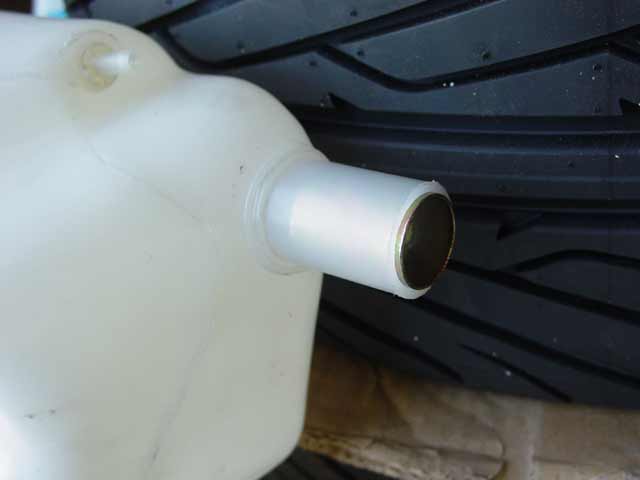
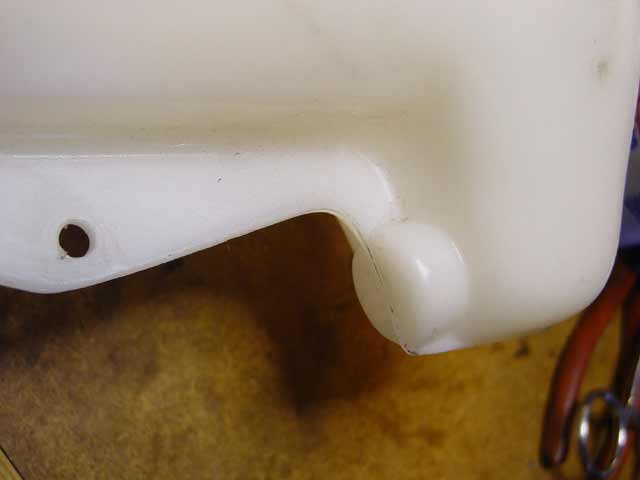
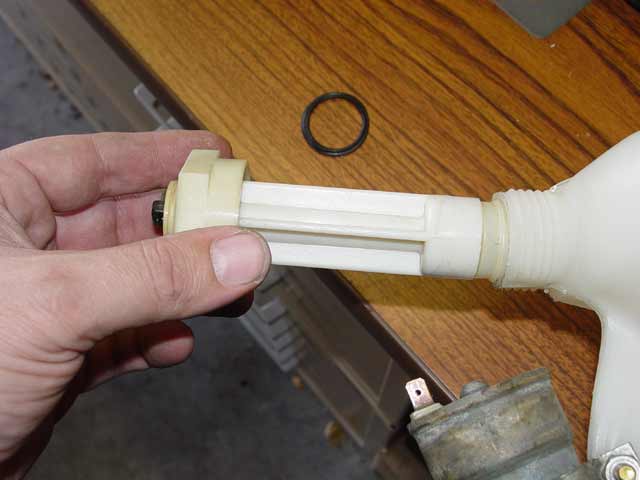
OK, update... the following weekend I set out to finish what I had started. I had received a new washer tank from 928 International. I have heard that a piece of PVC can be used to replace the steel sleeve in the filler neck shown below, but I couldn't find one that would fit without forcing it and potentially breaking the fitting off the tank in the process. I've seen pics of this area after corrosion has set in, and I decided to remove it. I think it's unnecessary, and I don't think the hose that goes on here needs to be very tight in the first place.
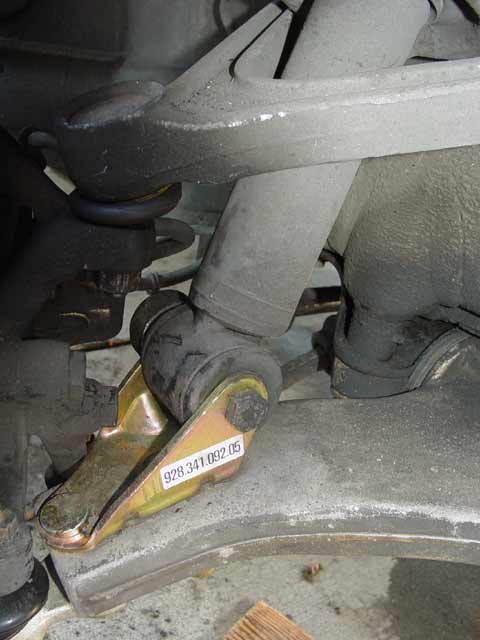
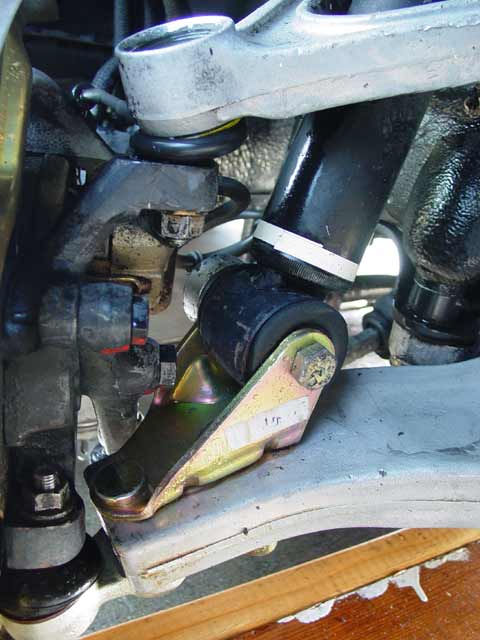
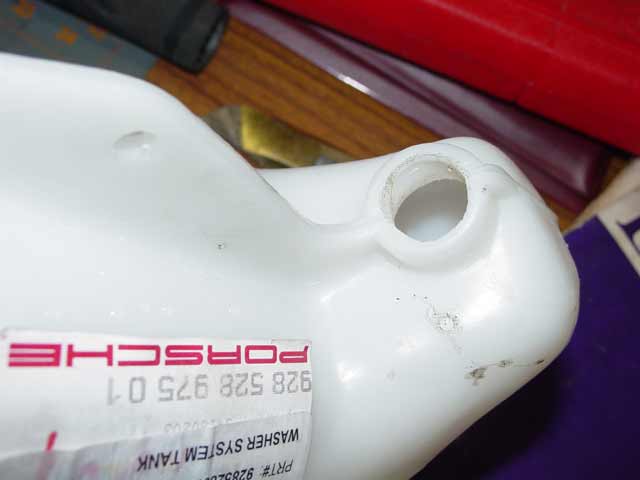
The washer tank that I received had a boss for the headlight washer pump, but it needed to be drilled out. You can see the part number in the second pic:
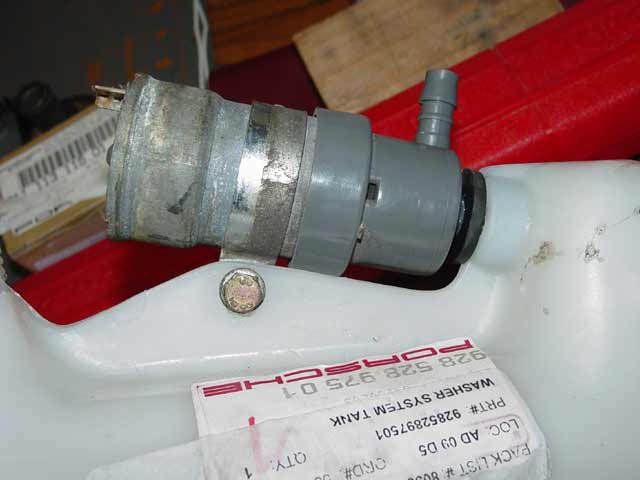
With that, I was ready to mount the headlight washer pump. It looks a bit crusty, but it runs very strong, so back in it goes. The rubber grommet that seals it to the tank was in excellent shape so I re-used it:
The O-ring that seals the level sensor was shot. I matched it up at the local hardware store. The one I used is specced as `15/16" X 11/16" X 1/8"'. Clearly not a Porsche spec, but it works.
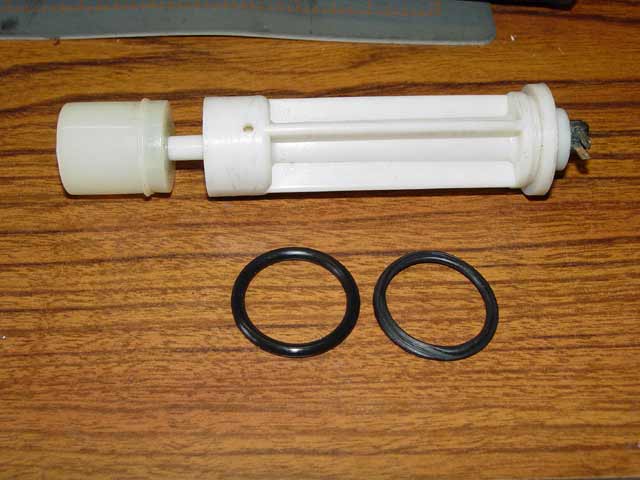
To avoid the kind of folding-over and smashing of the O-ring that was evident on the old part, I started by lightly greasing the O-ring with petroleum jelly then pressing it down into the sensor assembly:
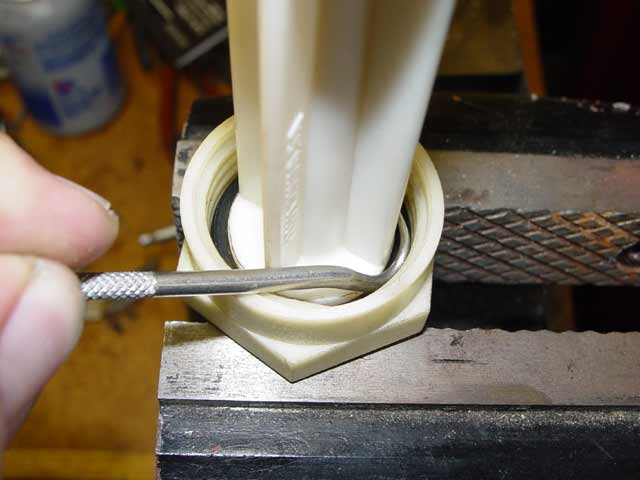
I then installed the sensor onto the tank. It took me a couple of tries to get it to tighten down with the sensor leads pointing in the right direction. Because there's nothing on the outside to hang onto, I had to completely unscrew it and pull it out to adjust the orientation.
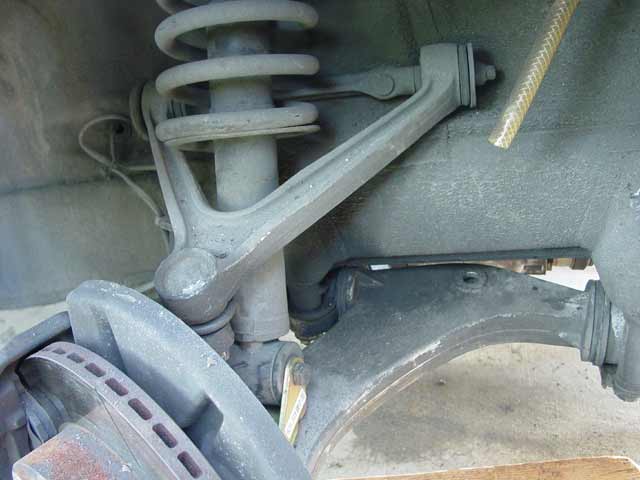
Then, because I had upset the weight balance of the car by cleaning one wheel well and not the other, I went ahead and did the same thing on the drivers side. I'm kidding about the weight... I just wanted it clean.
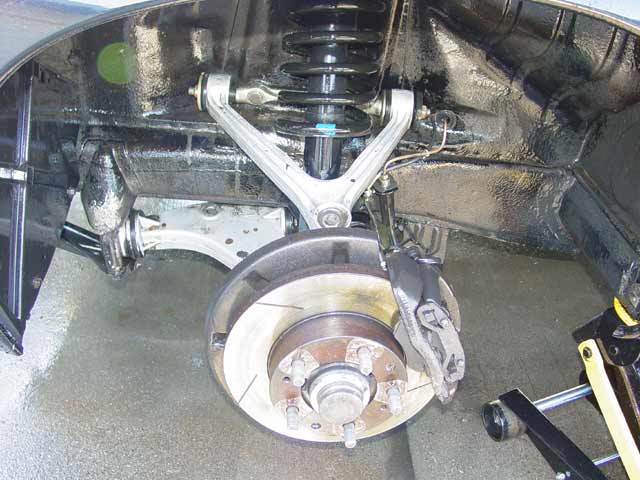
So that's about it for now. I'll add before & after pics of the rear wheel wells when I get around to cleaning them.