When I received the car back from Reitmeir, it was pointed out to me that the power steering hose was seeping at the crimp where the rubber hose meets the metal. Didn't seem like too big of a deal at first; just a slight bit of wetness around the ferrule. 1,000 miles later it was leaving a quarter-sized puddle when parked. By the time I had the parts to fix it 1 week and a hundred miles after that, it was still leaving the same size puddle, but of course it would only be a matter of time before I had a huge mess. So, here I go again... with the shark "Assuming the position" on the ramps, I started the job by emptying the fluid reservoir:
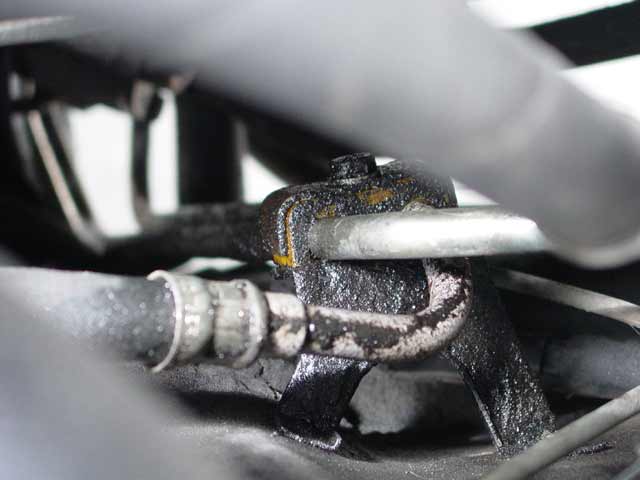
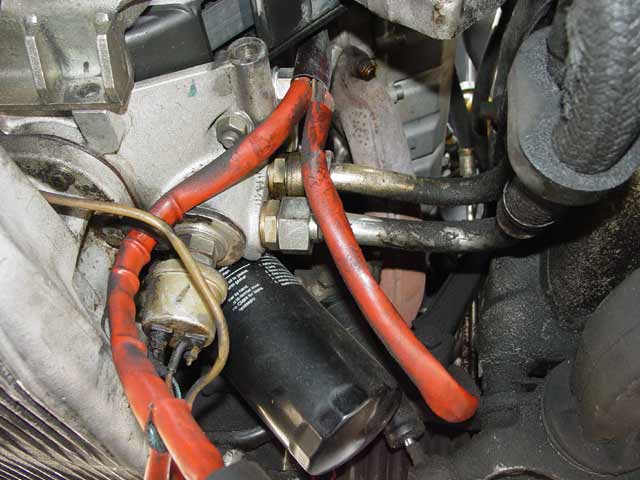
Here you can see the bracket on the driver's side fenderwell where the hoses mount. I was advised to get a replacement for the yellowed plastic piece by another Rennlister, but not until it was too late to get the part for the weekend. Mine turned out to be extremely stiff(and brittle, I'm guessing) and by being careful I was able to re-use it. I have another on order though. Order yours along with the hoses! Part numbers below...

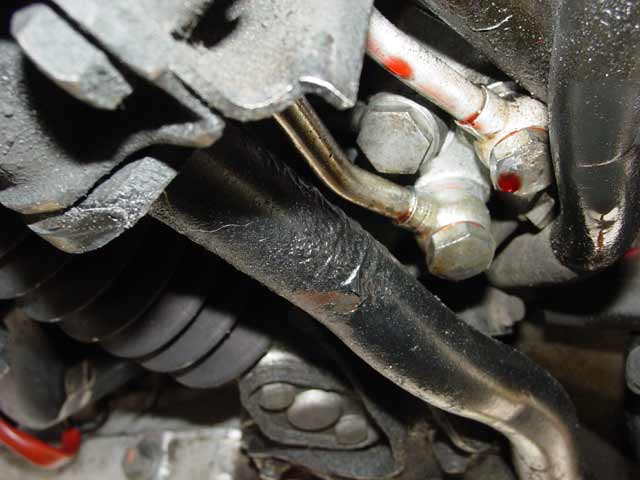
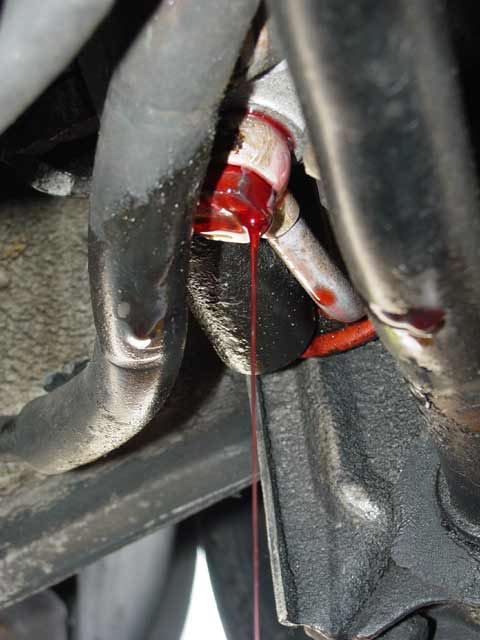
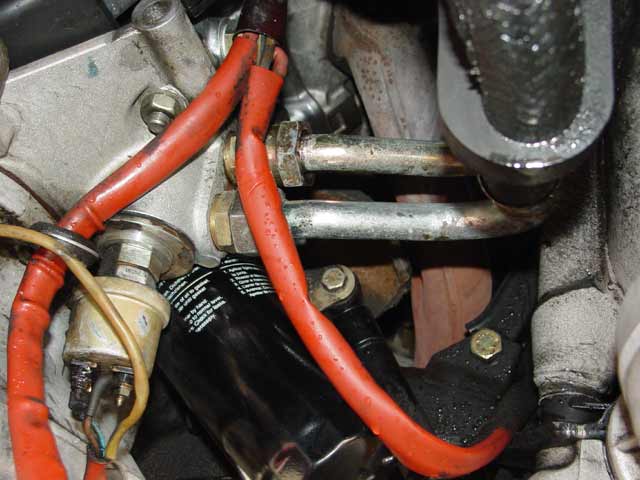
This is where the fluid was dripping from. If these fittings are wet on your car, don't just automatically start tightening them especially if it's wet at the bracket shown at the previous pic. If in doubt, clean everything up with Simple Green and rinse it down. Do it again if it doesn't dry up completely with no wet oily spots. When it's clean, run the car briefly(do this BEFORE you empty the reservoir!) and see if you can see where it's leaking. You may only need one hose but being the kinda guy I am, I replaced both. Also in this pic, you can see the bottom of the rack better than in some of the other pics. Compare the two-bolt flange at the bottom of this pic with the later view of the same area(from the other side) after I cleaned it. One thing I'll say for oil-leak-gunge... it does a great job of preventing rust! This area cleaned up real nice.
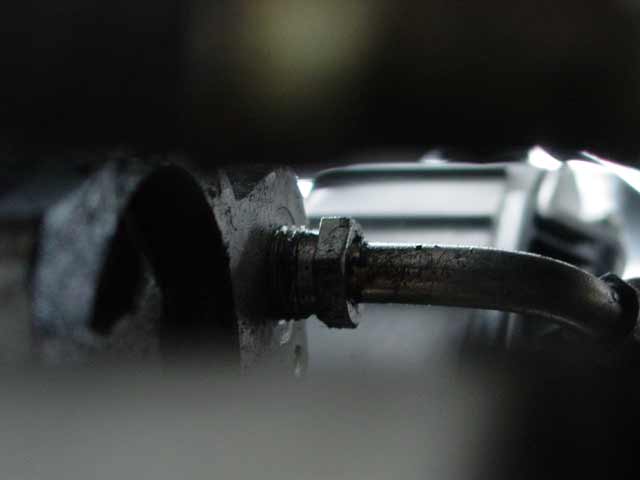
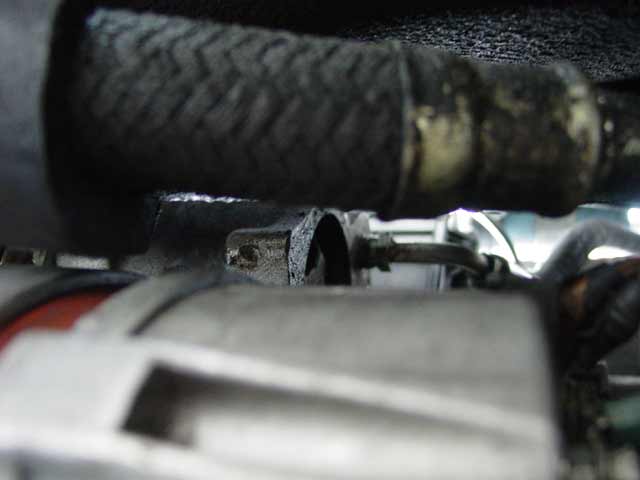
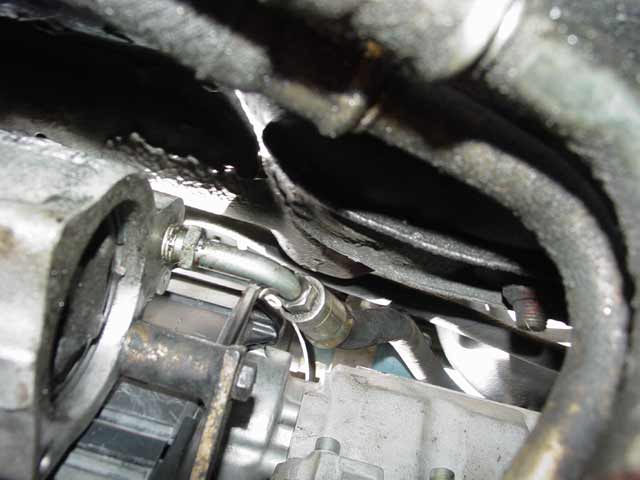
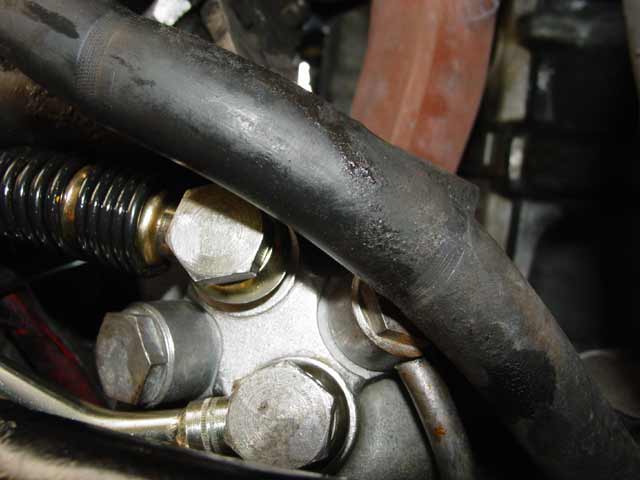
OK, enough of that. My plan was to replace both hoses, so that's what I was doing. So I climbed underneath and quickly determined that there was no way I was going to be able to get a flare nut wrench or even a stubby open end wrench on the high pressure fitting on the back of the pump. The alternator was going to have to come off. Below are two views of the fitting, taken from under the car looking straight up. The front of the car is to the left in the pics. The first shows the fitting itself, and the second gives a little more context; the way the oil cooler lines curve around the alternator, there was just no way to get in there. Oh, I'm sure somebody somewhere has made a special tool to make this easy. I've got a pretty fair collection of tools, but not that one.
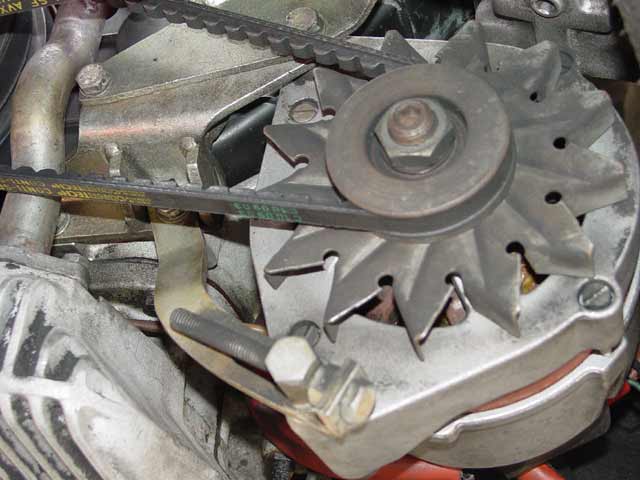
So this little gadget with the belt thingy on it was in the way. There was a spade connector and a ring terminal with a nut on the back. If you can't tell what it is and how it comes out from looking at this pic, you should probably just grab a beer now and call a tow truck. I can recommend a couple of good shops on the peninsula here in the SF Bay Area.

So now, with that bit of dead weight out of the way, it's very easy to get to the fitting on the back of the pump. I didn't loosen it yet though. As you can see in this pic, and the next one, it was quite a mess in there. The pictures just don't express how thick the gunk was or the degree to which it coated everything. In the first pic, you can really tell the difference in gunge factor between the cam tower which was refurbed by Reitmeir's and the rest of the stuff that wouldn't necessarily get cleaned during that procedure. In the next pic you can see some of the buildup around the pan gasket, on the oil cooler lines, the engine damper, the A-arm, etc. Also you can barely see the power steering metal lines running vertically just past the bend in the metal part of the oil hoses.
So, the next obvious step was to drain the system. I started by putting a wide drain pan under the car, then I loosened the return line fitting on the rack. I'm sure it doesn't matter which one you remove first, except that in my case the return line was easier to get to than the pressure line. I found that with this fitting loose, I was able to go have a beer and when I came back the system was almost completely drained. When I removed the pressure line maybe another tablespoonful came out. I loosened the power steering belt and turned the pump by hand several revolutions to try to push the last of the fluid out; this yielded maybe half a cup in the pan. I then removed the fitting from the pump with a flare wrench, catching the few minor drips in a rag, and disconnected the return line from the reservoir, which didn't drip at all. YMMV.
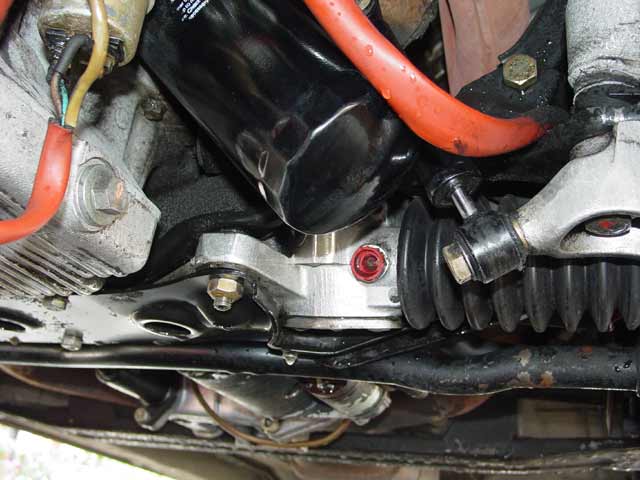
With the hoses out, I sealed the ports in the rack and the pump with rubber plugs, put a piece of duct tape over the return fitting on the reservoir, and put the cover back on the reservoir. The next step I had planned ahead a little on. You may have noticed if you read my other "Shark Attack" pages that I have been going after leaks and potential leaks one by one. By the time I made it to the PS hoses I was pretty sure that the PS hoses represented the last of the leaks. So, I prepared myself to make a big mess... or rather, to transfer the mess on the car to a mess on the ground. Then I laid back on my creeper, wearing coveralls and safety glasses, and armed with a parts brush and a sprayer full of Simple Green. I sprayed and brushed everything I could reach, hosed it down with water, and in some areas did it again. My original intent was not to get everything perfect, but to clean it up enough that I could trace any further leaks. I did go a bit beyond that goal, as you can see in the pics below... but that will only make the job easier later, when I'm satisfied that the leaks are under control and I begin cleaning in earnest. you can see the difference on the damper mount, the A-Arm(barely visible at right) and the steering rack and its mounting hardware. The oil cooler hoses are a lot cleaner, but I'm pretty sure I need to think about replacing those soon. I did put a wrench to the radiator ends of the lines since they had been seeping slightly, and I gave them each about 1/8 turn. The force required to turn them increased dramatically at that point so I figured that was as good as they were going to seal without replacing o-rings. I'll keep an eye on them.
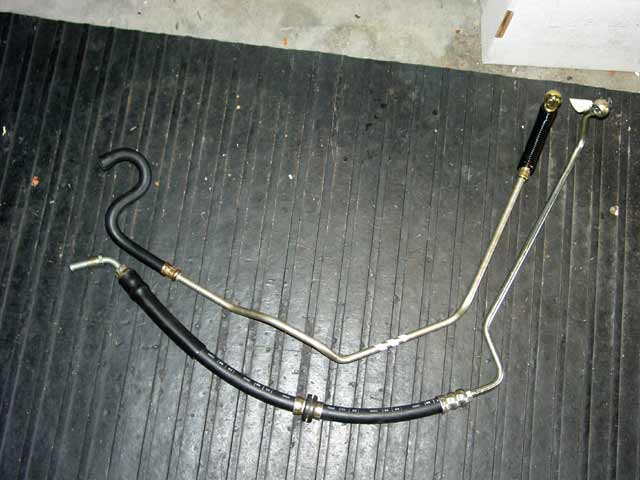
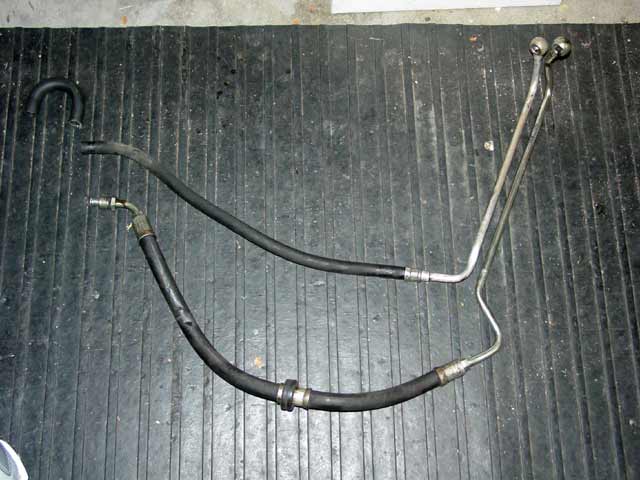
So here are the replacement hoses(First Pic) and the original hoses(second pic). The return hose for my car was no longer available; I ended up getting the one pictured, cutting the U-bend off(top left of second pic) and just bending the hose into place. Turned out fine, no kinks. Part Numbers were:
- Pressure Hose: 928.347.447.02
- Return Hose: 928.347.449.06
- Sealing Ring(4ea.): 900.123.042.20
- Plastic clip: 999.511.121.40
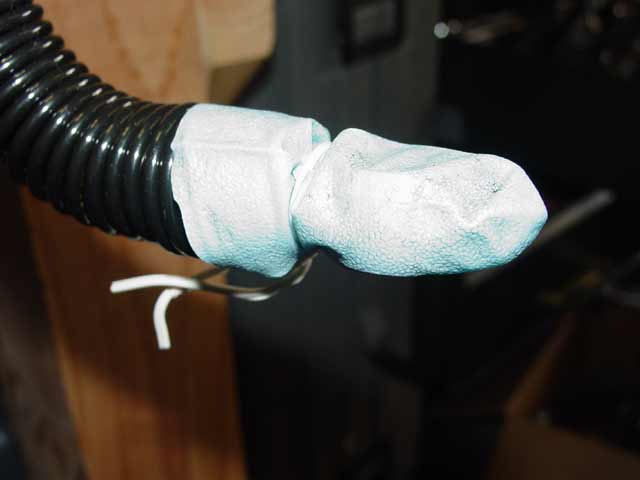
Even though I felt I had done a pretty decent job of cleaning up, I tend to be paranoid about grit in any sort of hydraulic system, so for each hose I took a finger from an old glove and made a little "Hose condom" to keep the banjo fitting clean as I threaded them down to the rack:
So at this point it was all pretty basic stuff. Torqued the fittings with new sealing rings to the WSM recommended 22 ft/lbs. Tightened the pressure fitting on the back of the pump to "about there". Re-connected the reservoir, and filled it to the line. Spun the pump about a dozen turns by hand, topped up the reservoir, and reconnected the belt. Re-mounted the alternator after cleaning up the connections on the back. Re-assembled connections with a dose of Stabilant. Attached and tensioned belt. I then started the car and cycled the steering back and forth and topped up the fluid again. After a few miles' worth of test drive the level hadn't moved, and the fittings were all dry. Mission accomplished:
I also tie-wrapped a thermocouple to the top hose and blocked the airflow through the radiator by sliding a piece of cardboard between it and the AC condensor. I ran the engine this way and determined the following:
- Dash Gauge begins to move at about 115°F.
- Gauge is in normal straight-up position with top hose at about 165°F.
- Fan comes on at ~208°F, close enough to the rated 95°C. Case closed.
- Also, on my car at least, the very beginning of the red zone on the gauge is 95°C