Well, the shark decided to bite back. During the week, the car started making a squeal/scrape sound on the short drive home. It was RPM dependant, right up at the front of the engine. I opened the hood while it was running and saw little metal shavings flying around on the front passenger side. Not a whole lot, just a scraping noise and the occasional metal chip. The noise didn't change when I engaged and disengaged the AC clutch, so I guessed it was the air pump. So, I put the shark up on ramps at the front, then I pulled the belt off and sure enough, the air pump sounded like a box of rocks when I turned it by hand.

I checked around and found a rebuilt smog pump locally, in stock for $125(update... the pump was $50, Core was $75). This was a quickie evening job once I had all of the parts. If you are changing your air pump, you may not have to touch the AC compressor at all, and don't worry about getting to the hoses on the back of the pump. In fact, I never touched the hose clamps where the hoses connect to the back of the pump. Read on!
First, I removed the large intake tube from the air cleaner and fan shroud, setting it aside. Next I disconnected the red air tube at the front of the right cam cover and the one at the air pump filter housing. I could see that I would need some room to work the pump out so I loosened the air pump filter housing. In the image below one bolt is out. The forward bolt is a REAL pain in the butt to get to with the AC lines in the way. I have a Craftsman ratcheting combination wrench that is supposed to ratchet in 5 degree increments, and that wasn't enough. I couldn't get a socket on it either. I found that with the ratcheting combo wrench I could turn the bolt a little, then I had to remove the wrench and manually move it back two clicks of the ratchet, then I could get another grip on it and repeat the process. Seemed to take forever to get that bolt out a couple of turns so I could contort my way in there and turn it with my fingers. I seriously considered slotting the mounting bracket so I would have an easier time installing it, but in the end I decided not to hack anything if it could be helped at all.
The next step was to remove the tensioner hardware and the long bolt at the top of the pump. I also disconnected the red air hose from the top and removed the clamp.

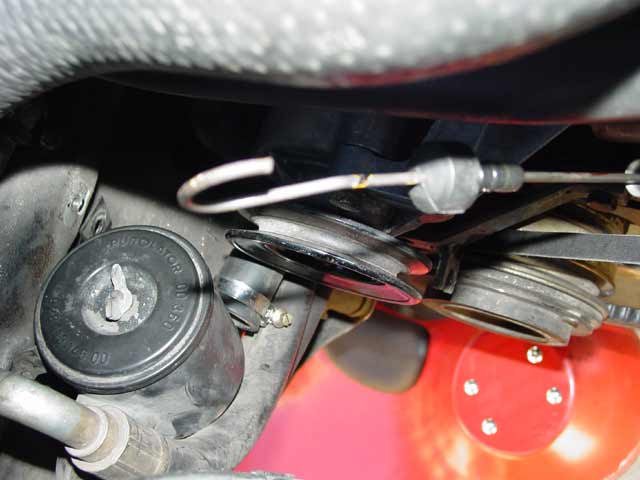
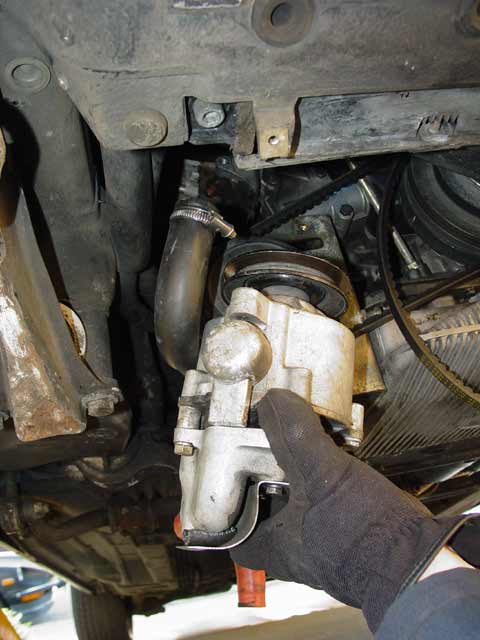
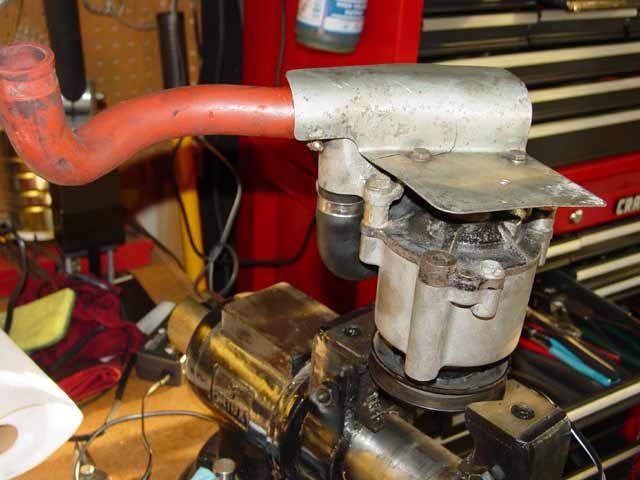
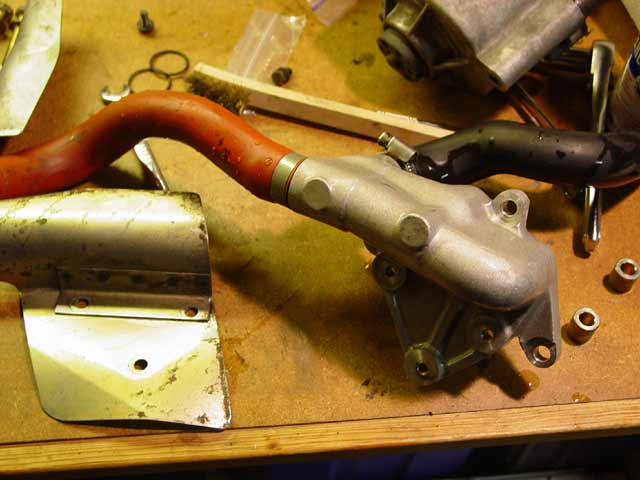
At this point the air pump can be tilted up. You want to tilt it straight up, allowing it to come forward as you move it so the pump shaft is in a vertical orientation, pulley facing up. You will have to guide the top end of the red hose down around the cam tower, but once that's done you can do the rest from under the car, as shown in this view. The big pulley near the bottom of the frame is the AC.
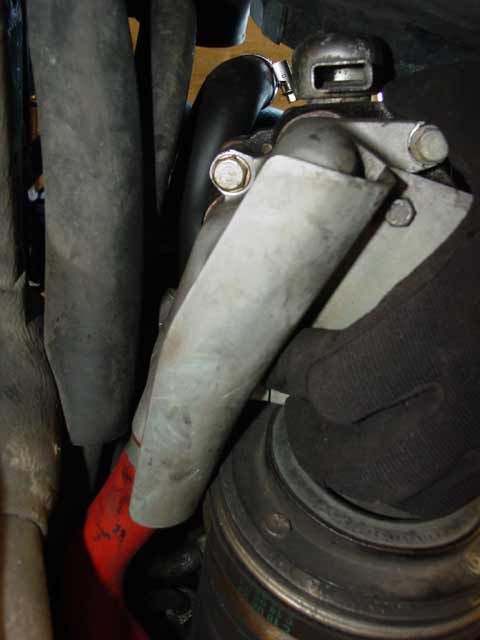
Same camera angle, here I am working the red outlet hose and heat shield down around the AC compressor and lines. All it took was a little patience; once I had it oriented right it came right down:
Once you have worked past the AC compressor, the air pump drops right out. Don't drop it! You don't want to break the manifold(back side of pump) or bend the pulley.
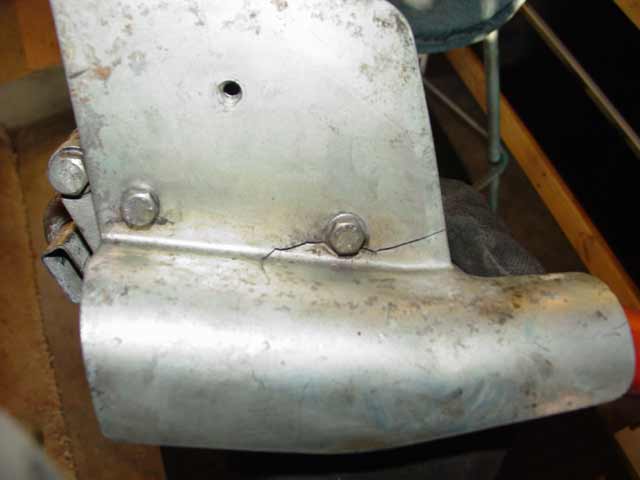
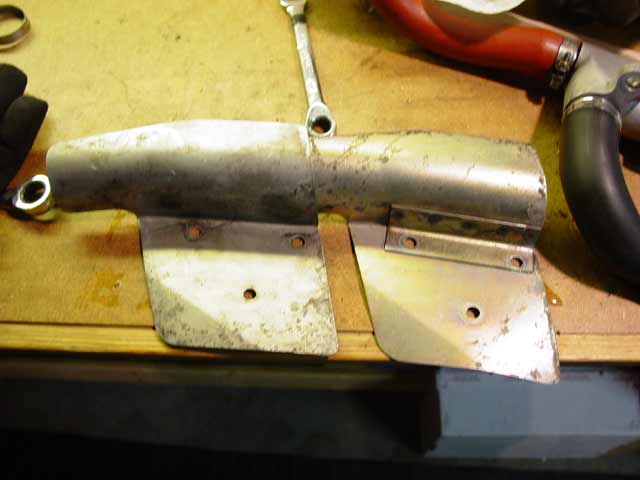
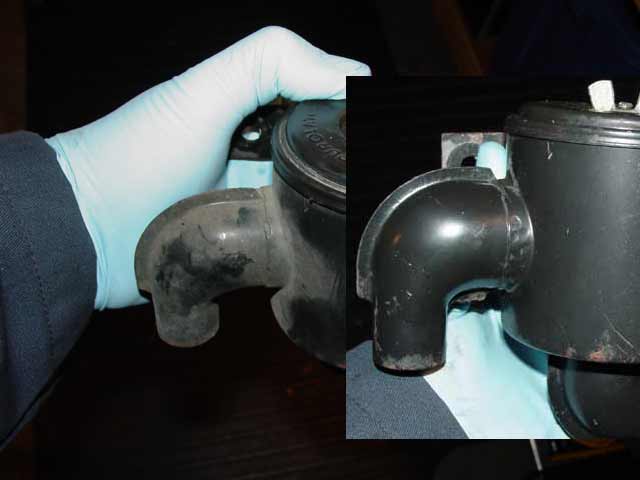
Here you can see the original, cracked heat shield. There was also a bolt missing; I happened to have a matching bolt in my hardware bin. In the previous pic, you can see where I put a piece of split fuel line between the heat shield and manifold to shut the damn thing up... it was ringing like a bell with engine vibration. I had put this band-aid in there when I received the car back from the shop, and I knew it needed to be done. Now I'm glad I waited, or I would have had to R&R the air pump twice!

So, I mounted up the air pump in my trusty vise... Don't attempt this in a conventional vise, or you will almost certainly bend the pulley! The gripper on my vise held the pulley securely with very light pressure; it only chipped the paint on it a little bit.
So, off with the heat shield...

And off with the manifold. Don't lose any of the three standoffs, you will definitely need them. I was fortunate that the o-rings were re-usable. They stuck to both pieces at first and I thought they were going to tear, but it worked out OK.
Next I loosened the bolts on the pulley. After breaking them free, I removed the assembly from the vise and finished removing the pulley. I then transferred the pulley to the new pump, applying Anti-Seize to the bolts.
Here is the old manifold and the replacement heat shield after a Simple Green session:
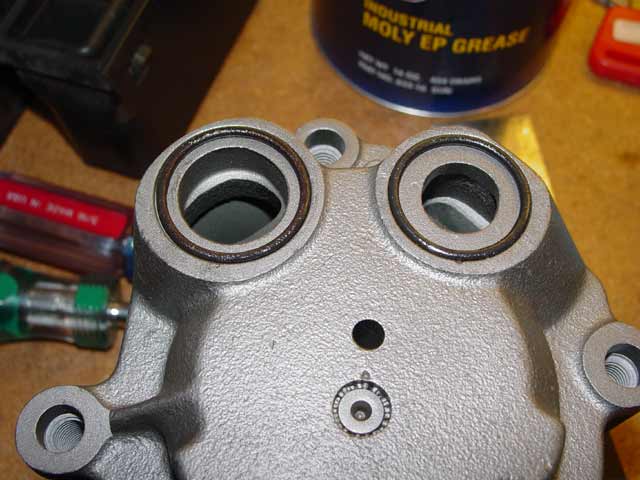
The O-rings were fine, I just cleaned them up and put a thin layer of grease on them. I also measured them. If you need replacements, get the closest standard size to:
- Intake: 29mm O.D. X 1.75mm x-section
- Exhaust: 27mm O.D. X 1.75mm x-section
The replacement heat shield seems much tougher than the original, with an extra layer of sheet metal attached in the bend with 10 big spot-welds. I'm guessing that mine wasn't the first one to crack like this. Archeological evidence of the evolution of the breed...

So next I position the three standoffs...
And mount the manifold. Of course I cleaned up the sealing surface on the manifold, just didn't get a pic this time.

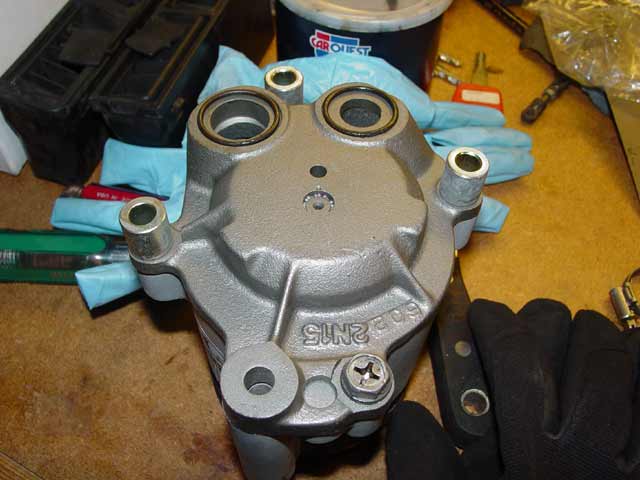
And here it is on the bench, ready to go in... almost. The problem that I ran into is visible in this pic... can you guess what it is? No, the Anti-Seize tube isn't empty yet.
 Just read the next paragraph if you want to avoid a lot of hassle.
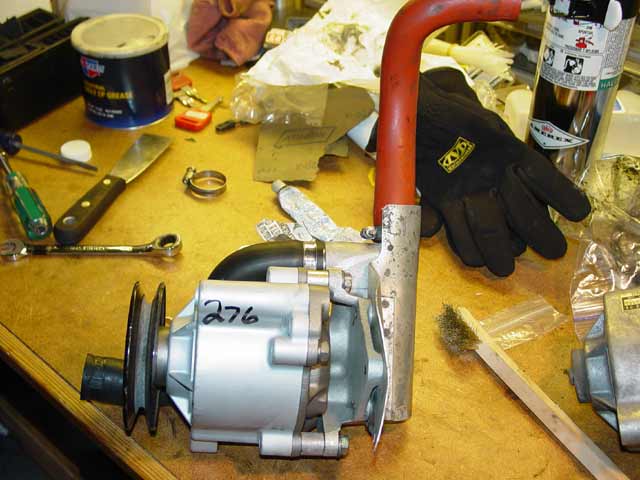
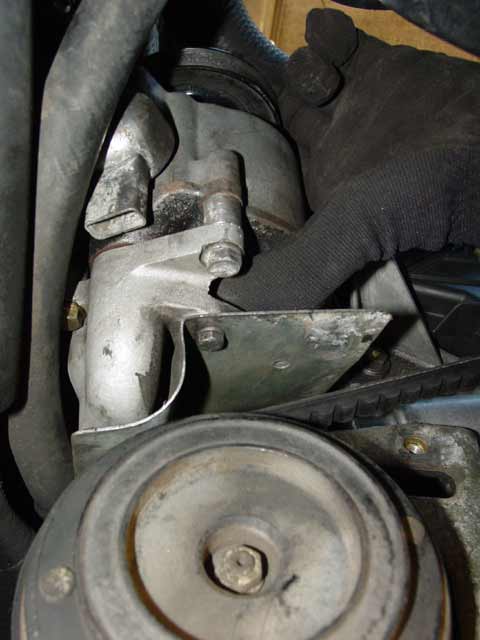
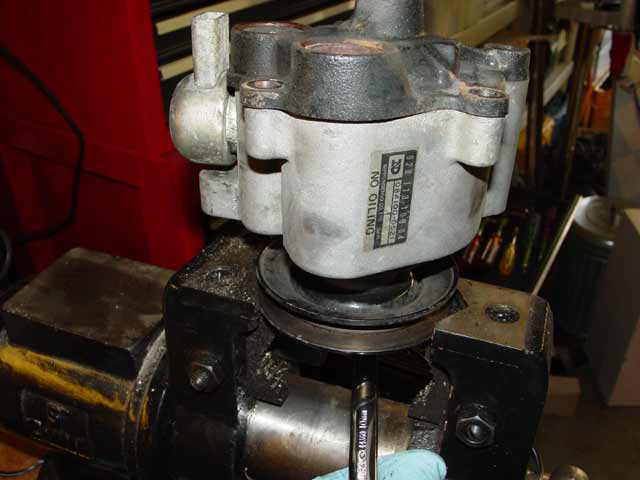
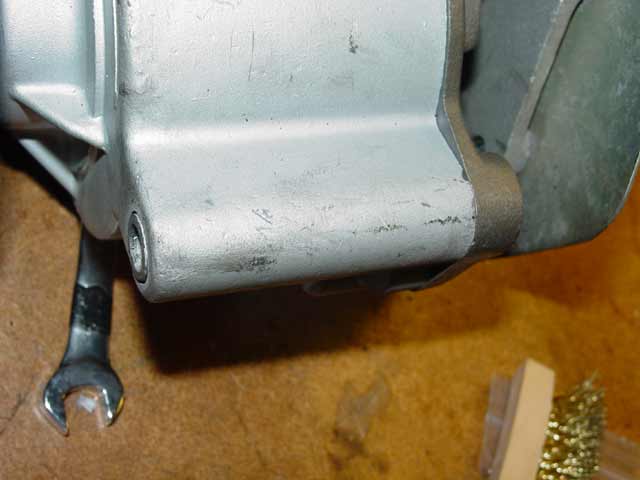
OK, this is the mounting ear on the pump that the long bolt goes through. In the pic below, see just above the wrench where that bushing is, flush with the mounting ear? Well, if you look carefully at the previous picture you'll see that the bushing was initially sticking out a couple of millimeters. I measured the tension roller housing on the motor and the length of the mounting ear on the pump, and found that the bushing had to be pressed in flush to fit in my case. I had worked the pump into place, patiently and relatively easily, but I just could not get it to fit where it needed to go to install the long bolt. I had to pull it back out and take a couple of measurements before I figured that out. So, I suggest you take a quick couple of measurements and make sure the damn thing will fit before you first attempt to install the pump.
Simple Green... wonderful stuff!
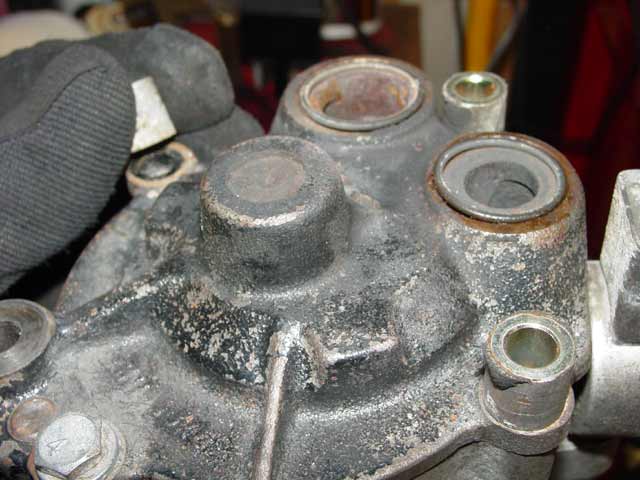
Initially, I put the pump back on with the original hardware, but it needed replacing. The nut closest to the bolt head(upper half of pic below) was frozen in place. It is shown after I reassembled it with a washer that wasn't there when I started, but you get the idea. It wasn't "right" IMO. I did this as a temporary measure until I could find time to get replacement hardware. I'm sure that the guys at Reitmeir's deemed this a nonessential part that did the job well enough, especially since they were up against a deadline. That's OK, easy enough to get to. So I put things extra-right, as it were. Engineering 101, where a fastener meets a slot, always ALWAYS use a washer.
So I straightened and cleaned up the "U" on the bracket a little and installed new nuts and washers on a longer bolt, which is held in place at the end with a washer and nylock nut. This allows me to adjust the tension without having to counter-hold the bolt. All the above-mentioned hardware was purchased in stainless steel including the nylock nut. This reflects my philosophy of striving to always replace any part that fails with a superior part if it makes sense to do so. Sometimes it doesn't make sense; an air pump from Porsche would have cost twice as much. Would it last twice as long? I think not. In this case though I could feel the improvement as I tensioned the belt and snugged down the nuts and the hardware cost me less than $4 at Olander, which is about 21/2 miles from me. Well worth it. They are a great resource for all sorts of obscure hardware, metric or english in practically any material from nylon to stainless. Of course I didn't neglect to apply Anti-Seize to the threads, even when it was a "temporary" install.

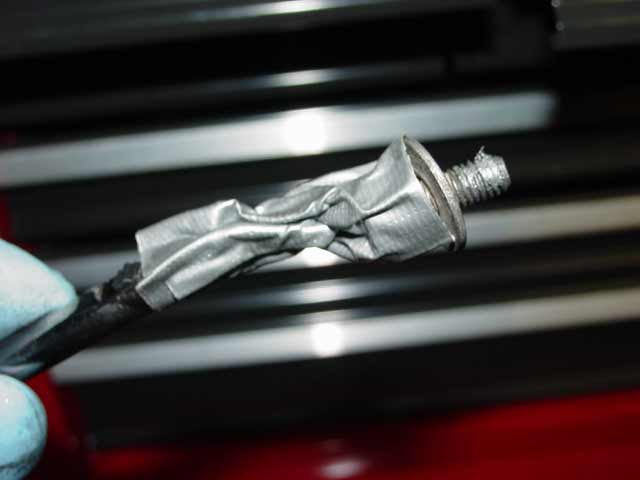
With the pump bolted firmly in place, Anti-Seize on all fasteners, I proceeded to mount the pump's air filter. The rear bolt was easy enough to get started, but after a few minutes of contorting, grunting, and cussing, I still didn't have the forward bolt started in its threads. I just couldn't reach the damn thing; I could hold it against the bracket, just barely, and I could line it up, but I couldn't both guide it and turn it simultaneously. I didn't have anything fancier than wobble extensions and universal sockets, and I couldn't even get close with them. So I fell back on one of the dumb tricks I learned a long time ago, and twisted some duct tape around the washer and bolt head. In the pic below the washer has popped slightly out of the tape. The idea is to press the washer back against the bolt head and wrap the tape about 1 mm around the edge of the washer to hold it in place. This makes it easier to guide the fastener in. Using the tape to both guide and twist the bolt, I had the bolt started in 30 seconds. Then I spun it down by twisting the tape just until it bottomed with the bracket flat against the panel, backed off a quarter turn to release the pressure from the tape, and pulled the tape off. Then it was back to the tedium with the ratcheting combo wrench, as described above...
 BTW, note extra Anti-Seize on bolt... I don't want this one to EVER be hard to turn...
I re-attached the intake hose to the filter and started the car with the red pressure hose from the air pump disconnected. I checked for pressure from the exhaust end by holding a thin scrap of cloth near it and found that there was some gas blowing back through the diverter valve, indicating a leaking check valve. It wouldn't be good for the pump, having hot exhaust gas blowing back through it. It seemed to be blowing harder out the air pump than from the diverter valve, judging by the same method. While I was fooling around, at one point I was holding the cloth in front of the metal tube leading to the diverter valve, and it was puffing outward. Then, I brought the air pump outlet hose near, and even with a 5mm gap between the hose and the tube the air pump output is stronger than the leakage... the air pump was blowing my scrap of cloth into the metal tube leading to the diverter valve. If you try this, be sure you don't let go of the cloth! I had my neighbor goose the pedal and the air pump seemed to be stronger at all RPMs than the leak... for now. I feel it's better to accept the slight risk of blowing exhaust back to the pump than to risk plugging the cat. I will have the check valve replaced within a week unless it's made of unobtanium.

So, the shark attacked back... It really took me by surprise, going from quiet to failure so quickly, but I only had the shark beached for a couple of days because of it. So.... score one for the shark.
