Reconditioning Fuse/Relay panel
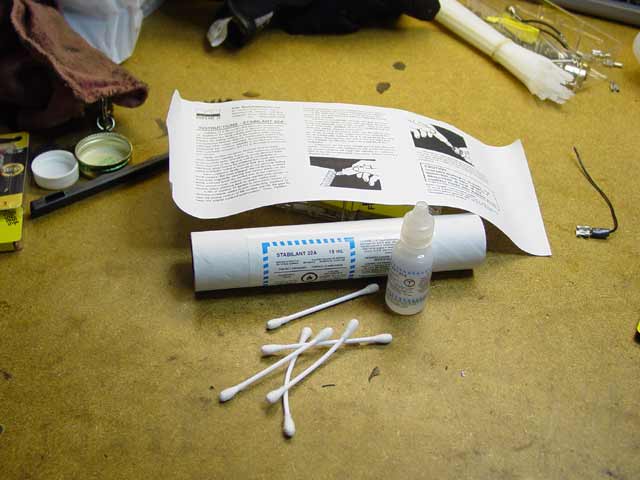
I decided that rather than chase down individual electrical gremlins, I would start by reconditioning the fuse/relay panel and hope that some of the gremlins would go away. I made this decision after inspecting the fuses and finding that many of the fuses and fuse holders had corrosion on them. There are many contact cleaner products and protective treatments that can be applied to this type of assembly. After doing considerable research, I settled on Stabilant, a material used in aerospace/avionics and marine applications. They have a large number of tech notes on their site; this one in particular discusses automotive applications. It's not exactly a cleaner, it's a "Contact Enhancer". I chose to rely on elbow grease for the actual cleaning. Wire brush on the dremel, fine steel brush, and needle files for the female connectors.
I ordered the Stabilant from NAPA auto parts; $65 for a 15ml container of the "22A" product, which is thinned somewhat from concentrate using isopropyl alcohol. Since purchasing this, I have found a 50mL bottle for $75 -- it's 10mL of concentrate, to which you would add 40mL of alcohol to make 50mL of ready-to-apply product: R.A.L. Audio Another update: Hacker-Pschorr(Erik) found an even cheaper source, 30 ml for $38(and better prices for larger quantities): Micro-Tools Here is what the 15ml kit of Stabilant 22A looks like:
So, Sunday around noon, I started on the project. First, I disconnected the ground wire in the tire well, then I removed the carpet from the passenger footwell:
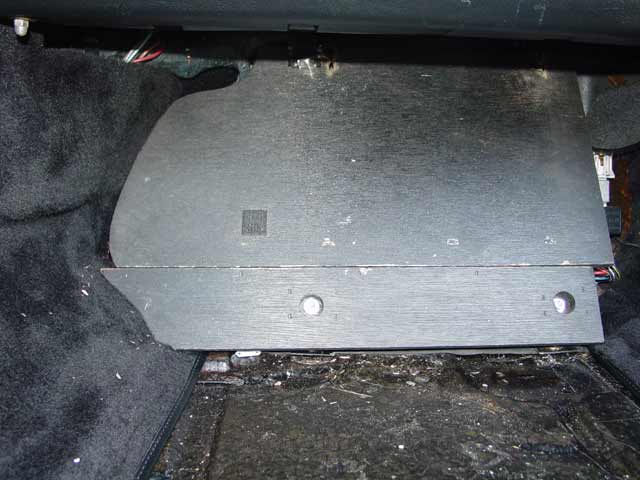
Next, the large wood cover lifts off:
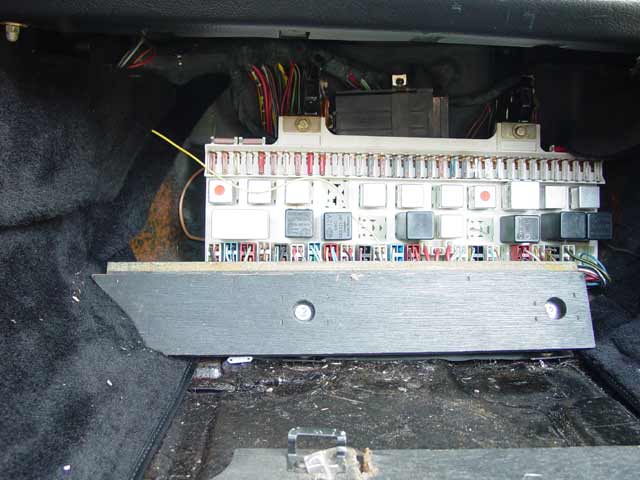
Two bolts later, all is exposed... the yellow wire is a constant power source for the radio. I'll figure out whether it's really necessary when I dig into the console at a later date.
After removing the two 6mm(10mm head) bolts from the top, the whole panel lifts and can be pulled forward. The brown wire at the top left is connected along with several other brown ground wires to a ground point; another 6mm bolt:
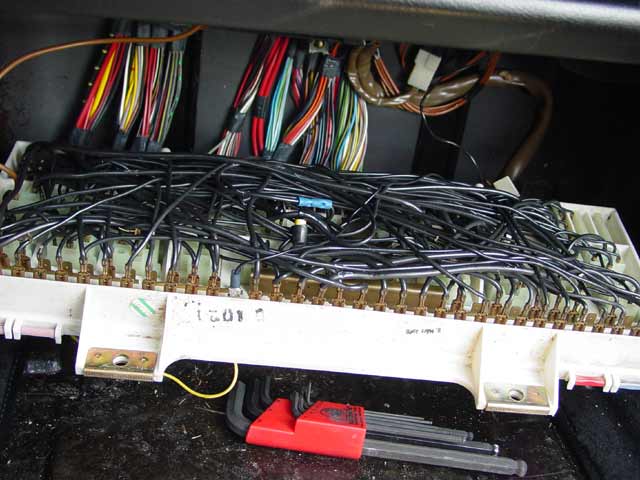
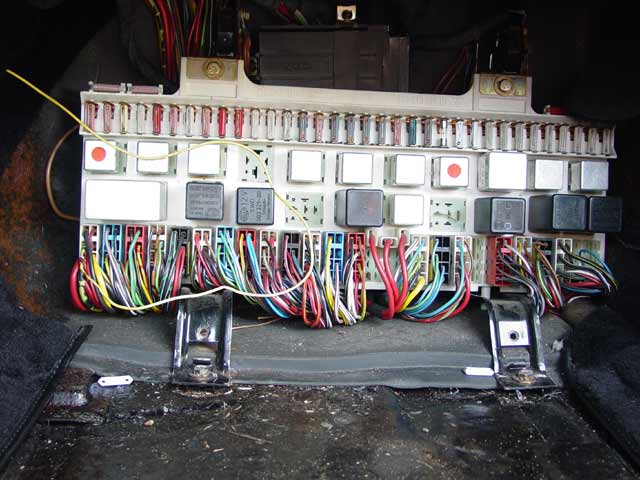
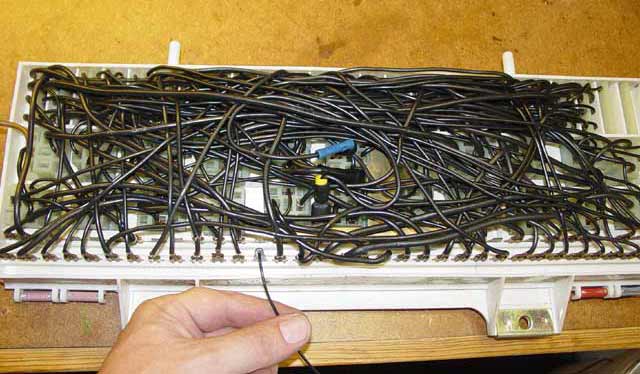
Here is the mess left under the dash after pulling the fuse panel.
 All of the connectors were already labelled. Note that the connectors are designated with letters of the alphabet, skipping the letter "I". I spent a few minutes puzzling over this when I reached a point where half a dozen of the connectors were off, and going alphabetically from the left I could not account for one of the other connectors having the particular letter designation that it had. Don't worry about it; it seems there is no "I" in 928.
  I had to pull the bottom row of relays(after getting pix so I could put them back) in order to get a good grip on the connectors to pull them out. You can see the ground wires here too; there is a second loop on the right that is attached the same way. All of these connectors were cleaned and treated the same way as the rest, but that happened later in the process, during re-assembly. I mention it here because this is the best pic of the grounds...
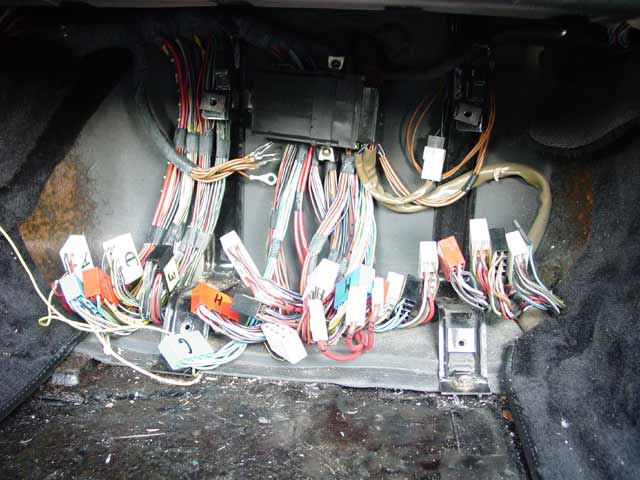
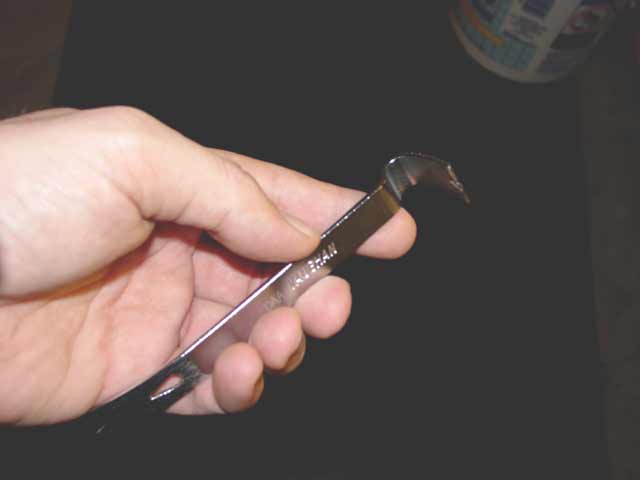
This is what I use as a relay puller, available at most well-stocked hardware stores. I just work the short end in under the relay and gently pry it out. Obviously you don't want to do this with the battery connected. This little flat bar is extremely handy; I end up using it for all kinds of things... it's worth its weight in gold:
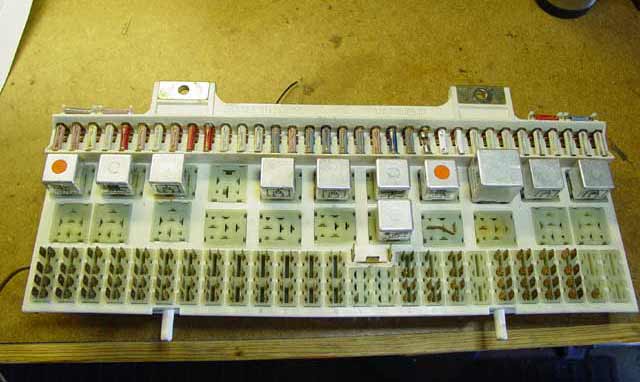
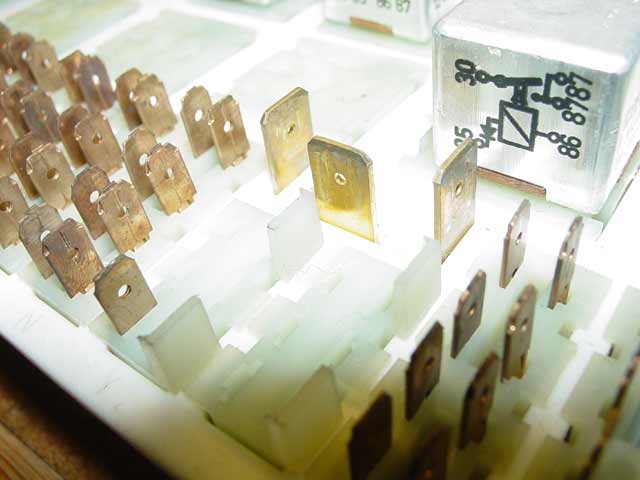
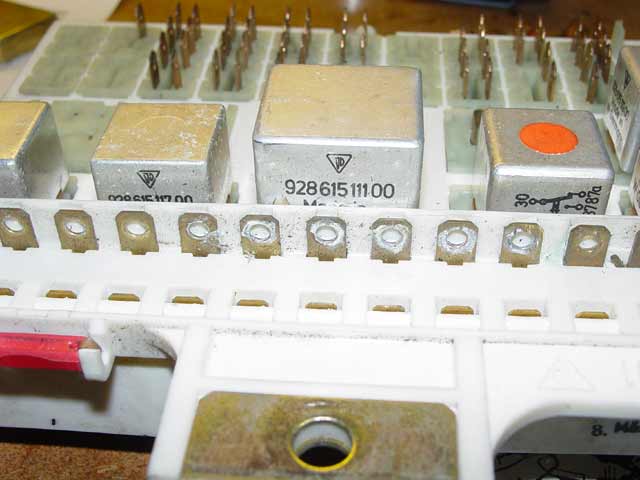
So, here is the fuse panel, ready for surgery... at this point I can see that the corrosion on the fuse holders was worse than I had thought, though you can't tell from this pic:
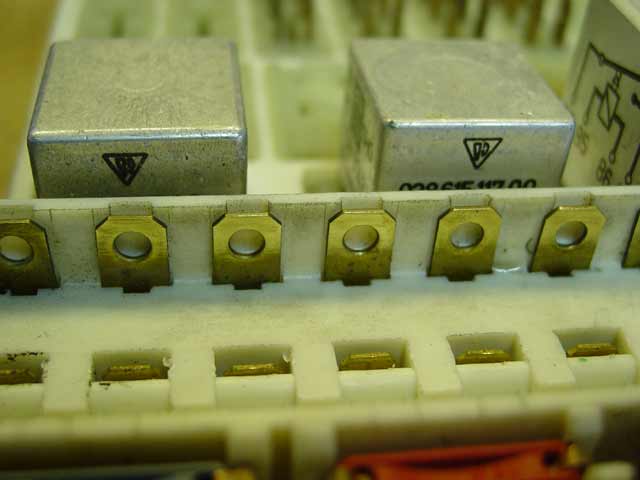
As you can see, the terminals aren't really corroded(a good sign), but they aren't exactly clean either... I cleaned them all anyway and added Stabilant to the connectors. On the backside, I disconnected and cleaned one terminal at a time, giving each a gentle squeeze with pliers to make sure it went back together tightly.

Lucky me, the previous owner(s) only added this one connector to an unused fuse circuit, and put one butt splice in the harness. The butt splice was cut out, after which I soldered the wire together, coated it in dielectric grease, and put a piece of heatshrink on it. The extra terminal I removed. It went to some connector up near the visor that looked like a radar detector or similar power supply:
I removed the upper spring clips using a right-angle probe tool by first working the tip gently under the spring clips, then as the clip began to move I would slide the probe tip under the clip and gently lever it out:
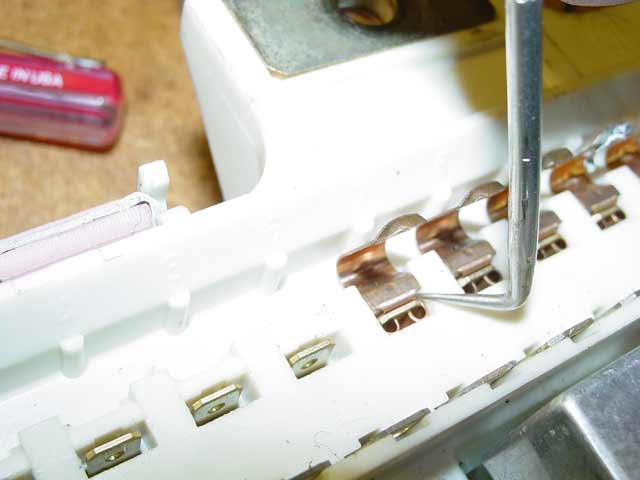
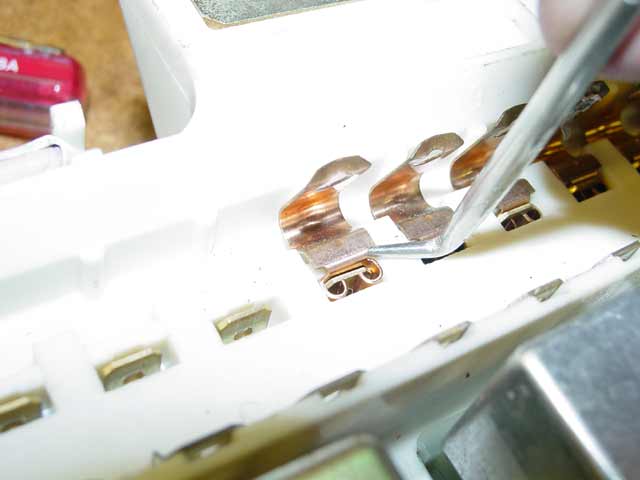
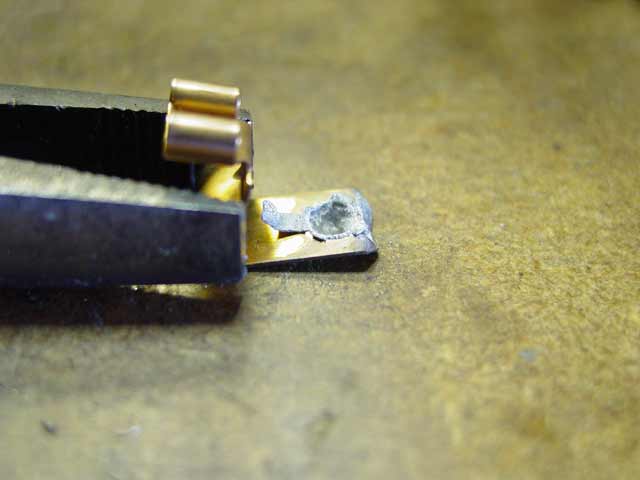
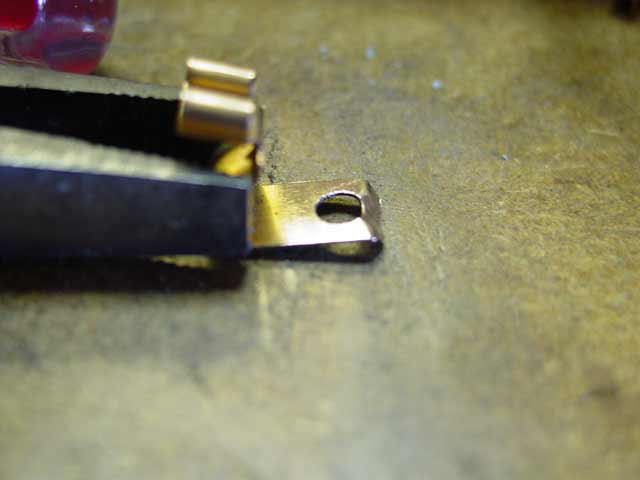
NOW you can see the worst of the corrosion on the fuse holders, followed by what they looked like after a little wire brush action:
Also here is one of the worst spring clips(corroded fuse end still attached) both before and after the wire brush attack... you don't realize how many of these there are until you get to this step. Again, they were squeezed a bit to make better connections and Stabilant was added to the connector on each one:
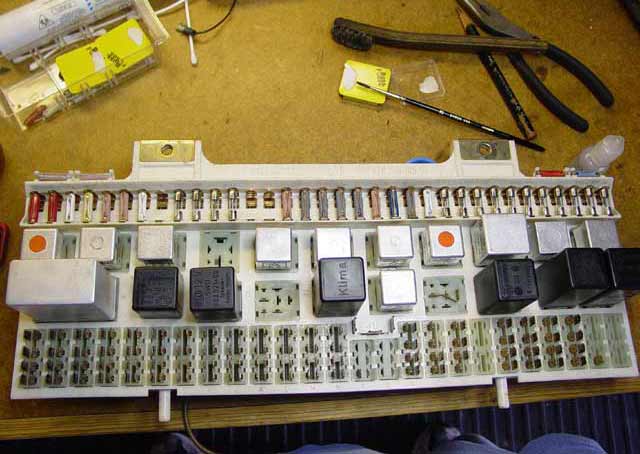
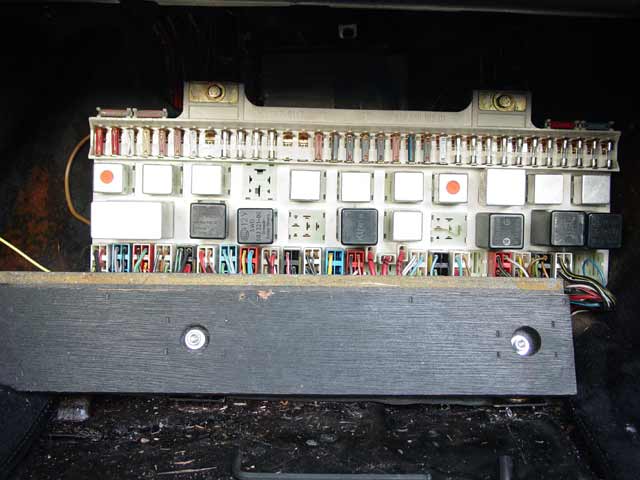
So here it is re-assembled on the bench and in the car. I coated the grounds and grounding bolts with Stabilant after cleaning them thoroughly. So far these are the only two bolts in the car that I didn't assemble with Anti-Seize. I will coat my other grounds with Stabilant as well. The mounting bolts that hold the electrical panel in place got Anti-Seize though.

Overall, the job took me about 41/2 hours of solid work. Your mileage may vary; if you're the type to just pull the panel, hose it with contact cleaner and put it back, you could probably finish in an hour. Every connection including relay pins and sockets as well as fuse ends has been cleaned mechanically, tightened up and Stabilant applied. All in all, I probably used 10ml from the 15ml bottle. I will use it on any electrical connector that I touch in the future, for example taillights, dash pod, console, etc. The panel really doesn't look any different, but it IS different and it works different... read on.
So, really the end result was a bit of an anticlimax. True, my voltmeter reads much closer to true voltage. My lights are all brighter, every one of them. But I didn't magically fix anything. The true benefit of this is, now I KNOW that the panel is OK, and that any electrical glitches that I may encounter are fuses, relays, wiring or subsystems. And with Stabilant in there, I know that it's going to stay OK for a very long time.

Oh, while I had the battery disconnected I also cleaned the 14-pin connector up near the jump terminal and coated the connectors there with Stabilant as well.
...Updates coming as I have time... :)