1972 Porsche 911T - Conversion to 3.6
|
Project Notes |
|||||
|
DIY Notes |
Modification Summary
Contents

Interior
Sparco Evo Seats
Momo Corse 340mm Steering Wheel
RS Lightweight Interior – Original Fit Interiors
Safety Devices Bolt-in Rollcage – Renntech Motorsport
Schroth 6 point Harnesses – Rennsport Systems
AJ USA – Aluminum Pedals
Aluminum Floorboards – Driver and Passenger side – GT Racing
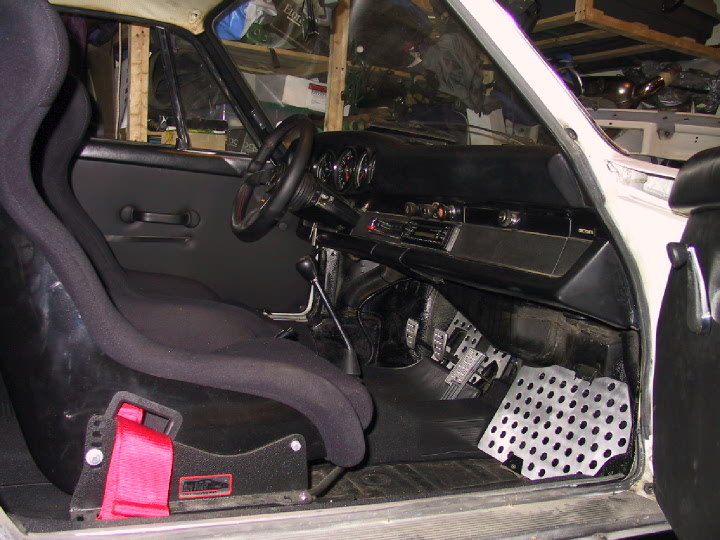
I decided to go with the 1973 RS Lightweight interior for the period-correct look. I also wanted to decrease the weight of the car and offset the added weight of the 3.6-liter engine. You can see the RS Lightweight Door Panel Installation here.
Stripping the interior is fairly straightforward. Start unbolting and unscrewing pieces until you get to the carpet and start ripping from there. The toughest part of the job is the removal of the sound-proofing from the tub. I pried, scraped and ground away as much as I could. I left the old glue where it was and applied the new carpeting as best I could figure out. There are a couple of areas I could have done better but was very happy with the results.
Exterior
1973 RS Flares – Pelican Parts
RS Front Bumper – GT Racing
RS Rear Bumper – GT Racing
Carrera RS Script – GT Racing
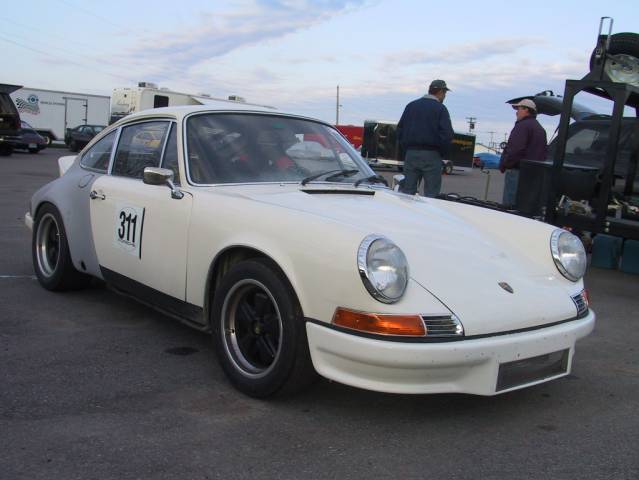
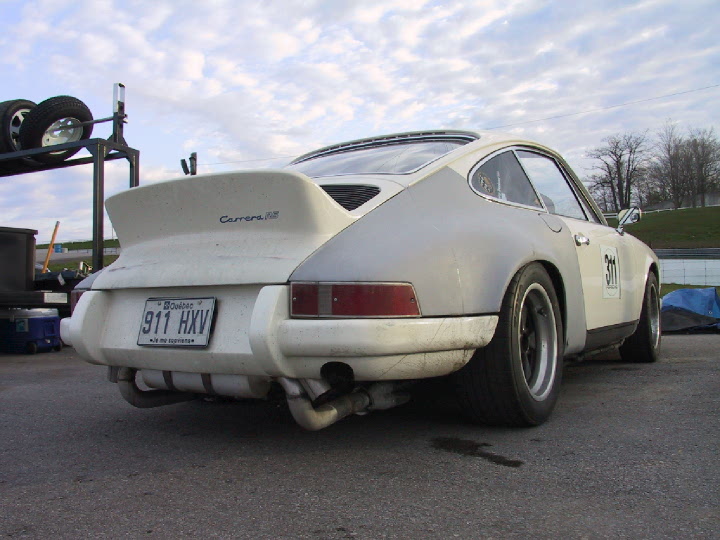
There is some final bodywork, exhaust piping and painting to be done but here is how she looked in early May at her first Driver’s Ed event at Mosport.
I’ve always liked the 1973 RS look. I felt that the flares added to the aggressive look and evoked the response that a “working” Porsche should. Aside from that, my tires didn’t fit. I had planned on running at least an 8” rear tire with either 225 or 245 tread width. These did not fit under the stock fenders of an early 911 and therefore needed to be flared RS-style. I originally purchased a set of 9” fiberglass flares from GT racing along with the bumpers but decided that the flares were too aggressive. I ended up purchasing a pair of steel RS flares from Pelican. Perfect fit out of the box. To bad I can’t weld. RS Flare Installation Pictures Here.
Suspension
Bilstein Sport Shocks – Front and Rear - Pelican
Turbo Tie Rod Upgrade - Pelican
Smart Racing Monoball Inserts – Front and Rear – Rennsport Systems
AJ USA – Strut Brace – AJ USA
Sander Engineering Torsion Bars – 23mm Front / 31mm Rear – Rennsport Systems
The Racer’s Group Sway Bars – 22mm Front / 22mm Rear – The Racer’s Group
Sway-Away – Adjustable Spring Plates – OG Racing
Aluminum Trailing Arms – Rennsport Systems
I’ve seen quite a few different torsion bars but the Sander Engineering bars are clearly very well engineered and fit precisely. Same comments regarding the TRG Sway Bars, well made and very adjustable. My only complaint is the use of SAE fasteners and not metric. Smart Racing has some newer bars that look pretty good.
I had some issues related to using the early 911 hubs with the later trailing arms. There is a difference in the bearings and bearing surface on the stub shaft. This results in a rear track increase of 5mm. This might cause a problem if I want to run 245s in the rear. The 225 fit with no problems. A cure would be to use later stub shafts and hubs.
The Sway-Away Adjustable Spring Plates make corner balancing a breeze. They are difficult to install due to the tight tolerances of their bushings.
This is a fairly aggressive suspensions configuration but is a very rewarding setup on the track. I’m currently running 23.5 inches rear ride height and 24 inches at the front. This is one sweet car on the track. She just grips and grips and grips. The only other possible changes are coil over shocks replacing the torsion bar system. I’m not sure I’ll ever need to go that far. The suspension is perfect for my driving skill set at the moment.
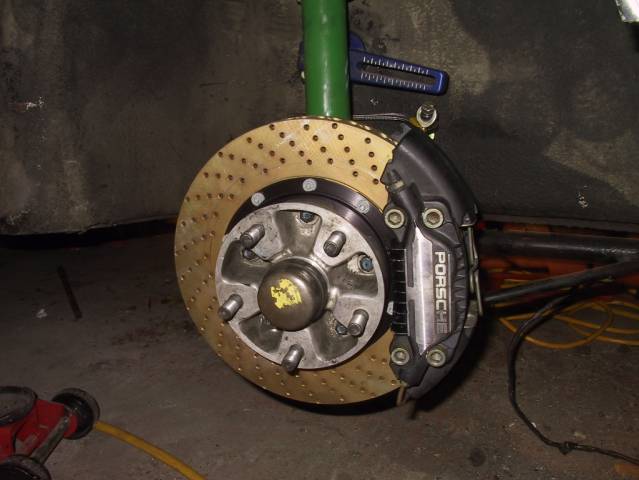
Brakes
930 Conversion Kit – Rennsport Systems
- Modified 930 calipers front and rear
- 23mm Master Cylinder
- Pagid Orange Pads
- Custom 930 Rotor Front
- Stock 930 Rotor Rear
OG Racing – Brake Cooling Kit
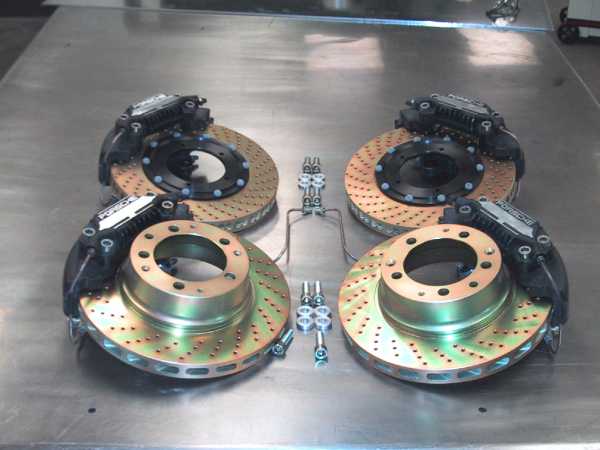
Rennsport Systems – 930 Brake Upgrade Kit
The braking system is one of the critical components in this conversion. I’m sure I could have done it cheaper by using different components but I didn’t have the experience to assemble a custom setup. Although there are a number of brake system experts out there like Bill Verburg who could and have helped setup upgraded braking systems. I went with a packaged 930 conversion setup for peace of mind and ease of installation.
The most difficult part of the conversion for me was the Master Cylinder upgrade. The two issues are the threaded brake pedal-to-cylinder shaft/plunger and the fluid supply lines.
The stock MC had a different plunger configuration and uses a shorter shaft. This shaft or plunger ended up being too short to activate the new MC effectively. I ended up using a long bolt with matching thread to replace the original shaft. The easiest way to connect it is to install the shaft to the brake pedal before you bolt down the MC. It is nearly impossible to install the shaft after the MC is in. Damned German tolerances!
The brake fluid supply lines enter the MC differently on the 23mm MC. Porsche used stiff plastic tubing that would not bend sufficiently without crimping. I cut off about 8 inches of the old line and used flexible PVC tubing as a work around.
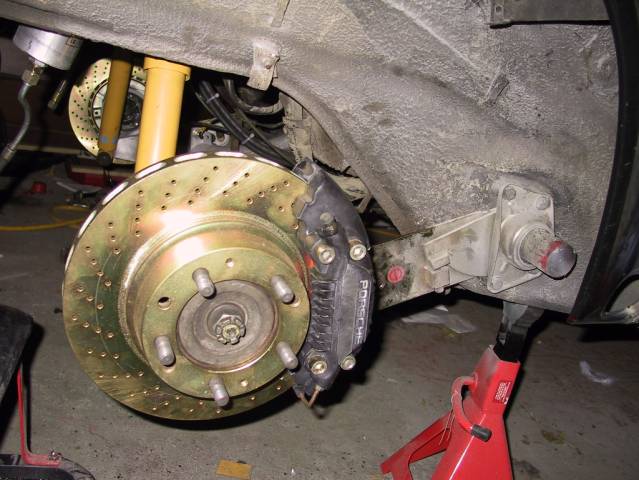
The front brake cooling kit installed fairly easily but was disappointed with the quality. It is holding up fine and have had no trouble with keeping the brakes cool on the track.
If I could do it over I would probably buy a different Brake cooling kit. The OG racing kit is constructed of fiberglass and I felt that the air block-off plate design is flawed and lets too much air through the hub. I ended up buying a more effective replacement pair from Pelican. I believe that others are fabricated out of aluminum and have the correct block-off design. Mine will probably be fine but I would have felt better if they were made of aluminum and designed properly from the beginning. I’ve tested the brakes during a recent DE event Mosport and had no fading issues at all.
Transmission
Re-geared 1,2, 4 and 5 gear. - PowerHausII
ZF-Type 80% Limited Slip Differential - PowerHausII
8:31 Ring and Pinion Upgrade
Billet Differential Side Cover - PowerHausII
Billet Bearing Retainer - PowerHausII
Swepco 201 Transmission Fluid
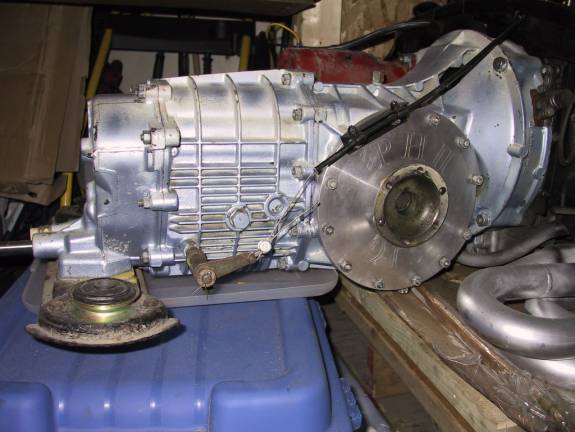
The stock early 915 transmission with the 7:31 ring and pinion was never built for the higher torque of the 3.6 and my version did not have a Limited Slip Differential (LSD). After reading several reports of 7:31 – 915 failures I decided to look for a later 915 with an 8:31 and LSD. In the end I ended up modifying 915 with a later 8:31 and a ZF-type LSD with 80% locking. Another highly recommended mod, but costly, is to re-gear the transmission. Depending on the track, a properly geared transmission will feel like you have an extra 50 horsepower. The new close-ratio 5-speed gearing is always in the heart of the powerband. The G50 might still be a better shifting transmission but having driven a buddy's 964 with a stock G50, I would not take his setup over mine. It is a smoother shift but the stock ratios do not allow you to take advantage of the 3.6. Jack Olsen has posted some great in-car footage of what a properly geared 915 with a 3.6 can do on the Pelican Parts Bulletin board. I plan on adding some cooling as my budget recovers.
Here’s the new gearing for a planned top speed of 140mph at 6750 with a 24 inch tall tire and the 8:31 ring and pinion.
Stock Max Revised Max
Ratio Speed Ratio Speed
1st 11:35 34 16:35 (2.188) 57
2nd 18:33 59 20:32 (1.600) 77
3rd 23:29 86 23:29 (1.261) 98
4th 26:25 112 25:26 (1.040) 119
5th 29:22 143 27:24 (0.889) 139
She’s lost a lot of her standing start grunt but once she gets rolling the shift points are in almost-perfect synchronization with the engine’s power band. I get my money’s worth every time I’m chasing cars down the back straights. If only I could get an extra gear in there….
Engine
1991 3.6 liter 964 engine
Custom Cyntex Chip
TRG 1 5/8 inch Headers
SuperTrapp mufflers – Replaced with a custom Flowmaster setup (May 2002)
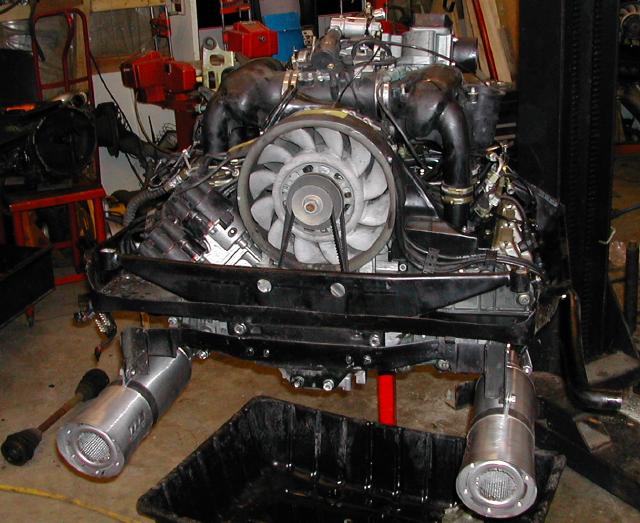
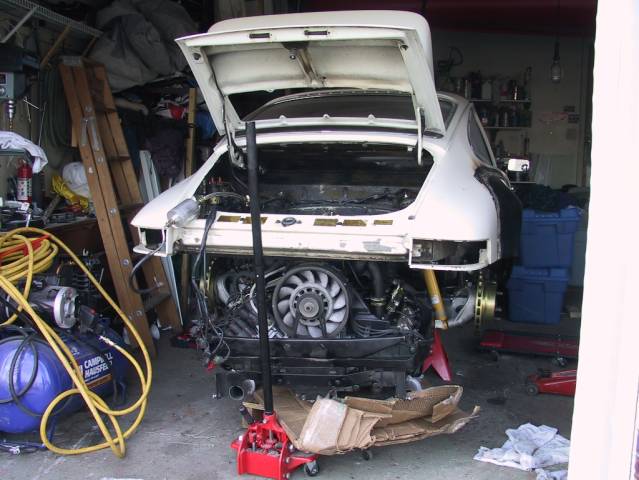
Here’s my engine at Dr. T’s place after some maintenance prep work prior to shipping.
Having decided to go the 3.6 conversion route, there are not that many places to find 3.6 conversion components. Luckily for me there were a couple. I consulted with Dr. Steve Timmins at Instant-G regarding what I’d need to do a 3.6 conversion. He has a great FAQ page and had all the right answers. I ordered the complete kit AND a 3.6 motor as well. Shipping was fairly straightforward and relatively painless. Considering it was crossing the border to Canada, this was even more remarkable.
The engine is stock unit from a 1991 964. I’ve heard about the leaking/weeping cylinder head issues but have not seen any to date. The only mods are the custom Cyntex chip to manage the idle when mated to the light 225mm flywheel (great for throttle response) and The Racer’s Group 1 5/8 inch headers. Future plans include the 3.8 piston and cylinder upgrade and maybe the RS kit (Heads, cams, etc…).
Dr. Steve Timmins’ kits come complete with everything you need to perform a conversion. Anyone with basic mechanical and electrical skills can do this, with the exception of some welding need to provide additional cooling in the early 911 tubs. There were some problems regarding incorrect wiring harness pinout mapping, leaky fuel fittings and missing parts but these were corrected quickly.
The most challenging part of the installation in an early 911 is the installation of an External Oil Cooler. Due to the lack of clearance in the early 911 nose, I had to create a boxed section in the nose of the car to allow enough airflow through the cooler. This was the most time consuming part of the conversion.
The actual engine installation is really no different from the 2.7. There is a one-inch spacer that lowers the engine to maintain the alignment. Engine wiring harness needs to be re-mapped but all fuel, breather and coil(s) wiring is fairly standard.
Rims and Tires
I’m currently running 15x7 and 15x8 Fuchs with Toyo Proxes – RA1 - 205/50/15 front and 225/50/15 rear. These have been very good tires and am getting fairly good wear. Its too early to tell how many weekends they will last. I’ve also got a set of new Kumko Ecsta V70A. These are new and supposedly better than the Kumho Victoracer V700. I’ll be using those after the Proxes wear out.
