">
">
">
">
PORSCHE - THERE IS NO SUBSTITUTE |
993 - THERE IS NO EQUAL |
">
">
">
">
">
">
">
">
">
">
">
">
">
">
">
">
">
">
">
">
">
">
">
">
Garage Door Opener DIY |
">
">
">
">
PORSCHE - THERE IS NO SUBSTITUTE |
993 - AIR-COOLED PERFECTION |
">
">
">
">
">
">
">
">
">
">
">
">
">
">
">
">
">
">
">
">
">
">
">
">
">
">
">
">
">
">
">
">
">
">
">
">
">
">
">
">
Step 1 |
Take your Garage door opener (gdo) apart and determine which leads to solder by using a multi-meter to see voltage across two of the four leads for the button that you use. My two gdo's showed 5 vdc. You will see the leads circled in red. |
Step 2 |
On the back side of the circuit board locate the two points you want to solder that you found with your meter. Here they are circled in red, and solder your two wire leads to them. |
Step 3 |
Here is the sunroof switch as purchased from Suncoast Porsche. Note the part number and asociated wiring diagram. Solder the other leads of the wire according to this diagram. |
Step 4 |
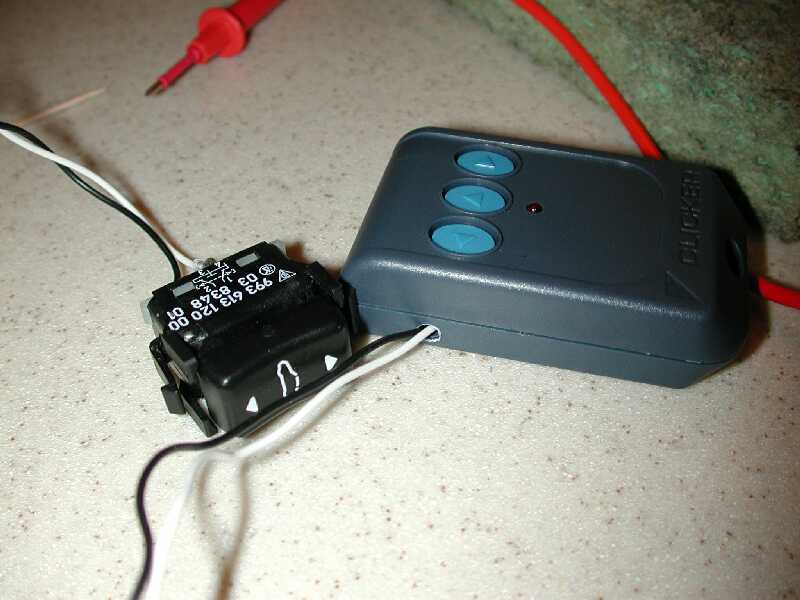
Here is the finished switch and gdo connected with the wire. |
Step 5 |
On your panel inside the car, pull up on the sides of the panel to release it from the frame. I was able to use my fingers, you might need to use a screwdriver. Once removed, snap out the blank cover via the release tabs on the top and bottom. |
Step 6 |
Place the gdo in the space behind the panel. |
Step 7 |
Snap in your sunroof switch using the same tabs from step 5. |
Step 8 |
Replace the metal clips on either side of the panel as shown in the picture. Test the switch at this point. |
Step 9 |
Press the panel back in place and enjoy your new gdo switch! |


