|
The Maintenance Files |
|
The Turbo Tie Rod upgrade is one of the more
common 911 projects. It yields very little improvement in handling according
to most & it adds a bit more road feel (i.e. vibration) for better or worse. My tie
rods were original & the rubber was not bad, but to lock in my
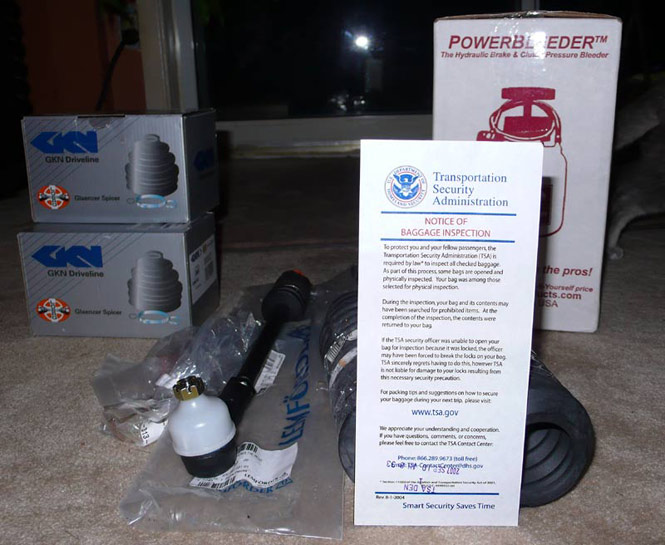
alignment once & for all, I decided to leap to the task. Stage 1 as always, was to place an order with Pelican. I had it delivered to a hotel in Denver where I was ensconced for a show. That saved shipping, brokerage fees & taxes. I was the cross-border mule. TSA in DEN security on the flight home caught me & added a little something. I guess it looked suspicious in a luggage x-ray. |
|
|
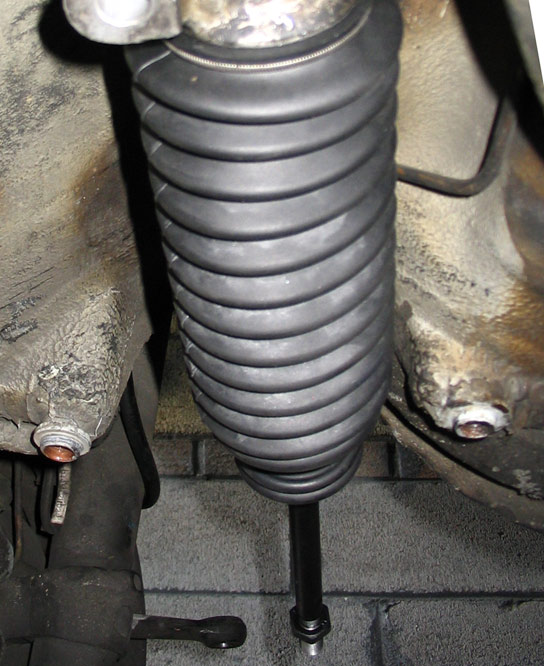
Along with the Lemförder TTRs & some CV boot kits, I broke down & bought a Power Bleeder, as you can see. So, I jacked up the car & got to work. I had read Wayne's 101, the Bentley & numerous posts on Rennlist, Pelican & Impact Bumpers. Now this job is supposed to be relatively easy, but don't believe it. In 101, Wayne says you just twist the old tie rod off. Ha! Just try it. You don't have the room or the leverage. But I'm ahead of myself here . . . With the car in the air & the wheels off, you remove the pan to get access. 2 nuts & 2 bolts & it's off, with the sway bar now hanging down a bit too.. Now attack the spindle arm on the shock tower end. Take out the cotter pin & remove the castellated nut on the old tie rod end & pop the ball joint end out of the shock tower bracket. Sure, it's a breeze. Much has been written about this part. Use a pickle fork. Use the special Porsche tool. Use a spreader & on & on. One post made sense. They said that 90% of garage mechanics just whack it with a hammer. So, I used a bottle jack to support the spindle arm so it wouldn't bend or bounce & whacked it with a hammer. It didn't really require that much force, so no damage ensued. Both sides came off with absolutely no fuss or muss. Roll the clampy thing on the inner bellows. It's reused. Remove the outer one & the old bellows. Then, you take the old tie rod off by unscrewing it from the steering rack. Except you can't unscrew it because you can't get enough leverage, because everything is in the way. The brake lines. The fuel lines. The sway bar. The cross member. You get the point. And a wrench won't fit up in that tight space & if it does, you can't turn it. The rubber just twists. So the fun begins:
After all of this, I could finally get a
wrench on the tie rod to remove it. Now, I'm a normal size &
my hands are a normal size so I just don't know how people get them off
without all of this hassle. A lift would certainly help for access.
This was a huge pita. |
|
|
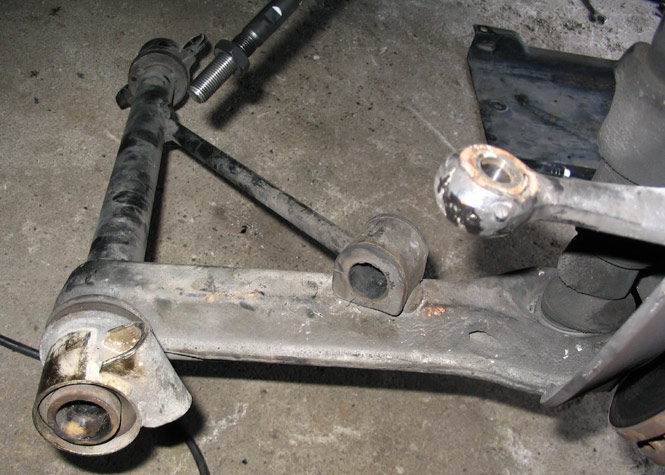
Here is the A-arm swinging free with the tie rod in the back & the shock tower spindle hole to the right. |
|
With the old bastard off, it was a simple
task to put the new one on. With Blue Locktite on the threads as
recommended, it screwed right
on. The boot springs were a breeze with the rack partially dropped
too. Use some lithium grease on the outer hole of the boot so it
won't bind as you twist the tie rod to align. |
|
|
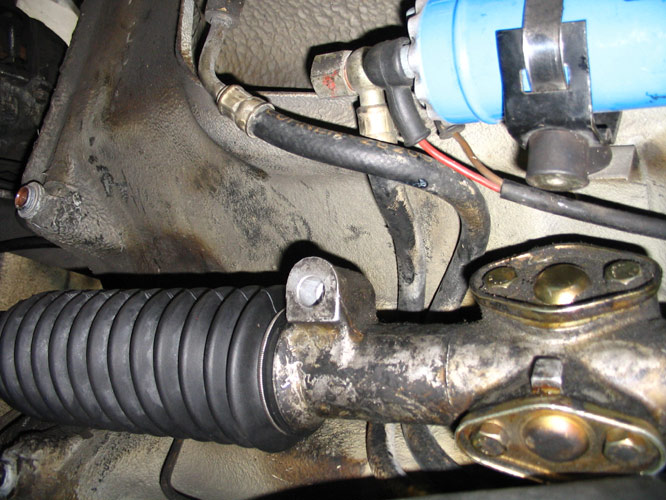
Here you can see the steering rack, the fuel pump with its bracket The brand spankin' new boot is in place.
|
|
|
|
This photo is looking
towards the passenger side with the front on the left. On the
left, you can
clearly see the circular ridge on the bolt hole that slots into the aluminum
cross member. The one to the right is the sway bar
bracket hole & where the pan fastens. |
|
Re-assembly of this whole mess went very well. The sway was the only mild hassle. Make sure you have it bedded in both brackets - particularly the A-arm one - before you start bolting down the A-arm. And use some lithium grease on the inside of the rubber sway bushings. Then just assemble in the reverse order of your disassembly. Grease the torsion bar & clean the sponge gasket. Observe all of the different torques required, of course. And you may have to beat the sway bar into place to get its rear bracket to align. I did. To read more & see more pretty pictures since I didn't take many, see the threads below: Rennlist - Turbo tie rod installation questions. Pelican - Turbo Tie Rod Install Pelican - Installing Turbo Tie Rods Tomorrow And there are more links on my Links page
|
|
|
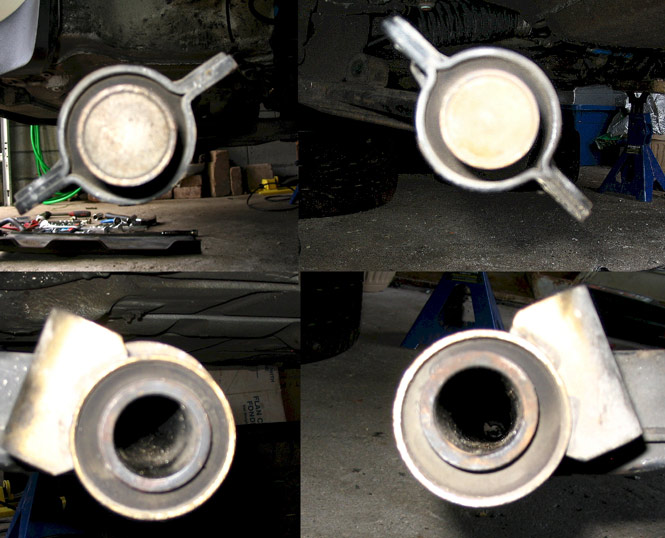
And btw, here's what my 70K mile front bushings look like. Only the passenger rear bushing is showing some real drift. |