|
The Maintenance Files |
|
1987 - Manual Passenger Seat – Position Lock Repair Problem: Passenger
seat moves slightly on right-side rail. It slides ¼” forward &
backward during cornering, |
|
|
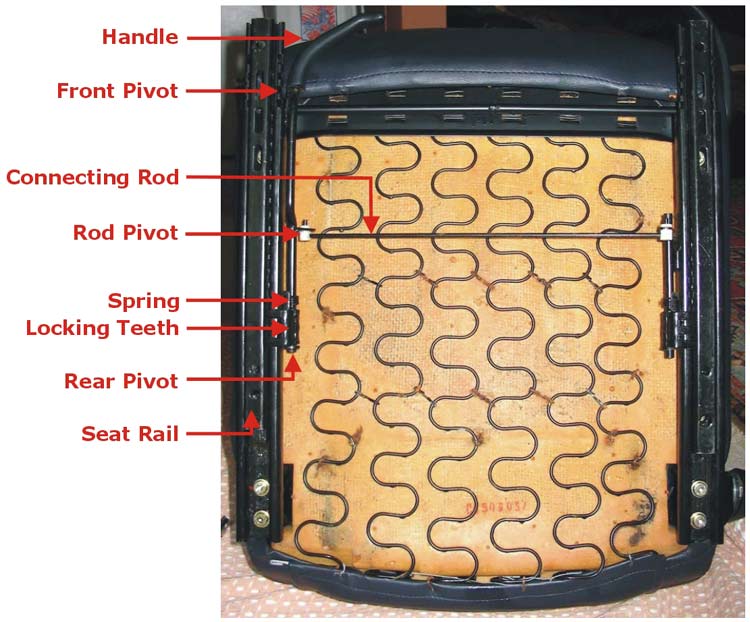
You pull up on the handle.
The main rod it is attached to is slightly ‘S’ shaped & turns in
the front & rear pivots. This swings the teeth out of notches in the
seat rail. The connecting rod is pulled at the same time by the ‘rod
pivots’ & swings the teeth out on the other rail. The teeth are
spring-loaded to return to the rail, which has a continuous row of
notches to engage the teeth. The rails are attached to the seat via 3
Allen bolts – visible above – well, the front one’s kind of hiding
. . . |
|
|
|
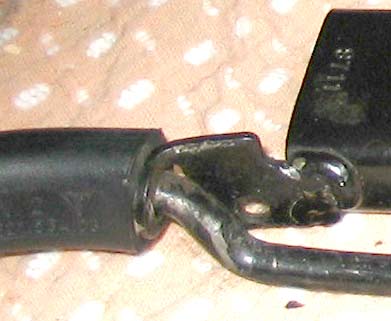
The front pivot is a
‘loosey’ pivot to allow some give in the rod. This was twisted on
mine, which allowed the rear pivot to pop out of its socket, so the
teeth weren’t engaging on this seat rail. It’s simple to bend back
to its original L shape but then you have to reassemble the whole
contraption. |
|
|
|
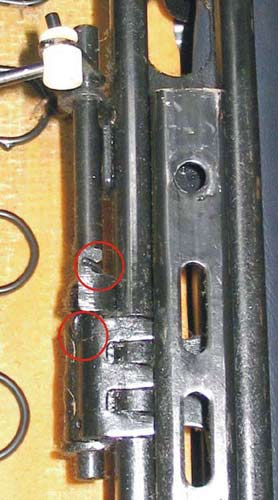
Here you can see the
bottom pivot socket – center bottom. The teeth guides are slightly up
& to the left & the notches on the rail are clearly visible. The
tab that sticks out above – center - has a hole at the top for the
longer end of the spring. You can see the teeth on the shaft of the main
rod & the |
|
|
|
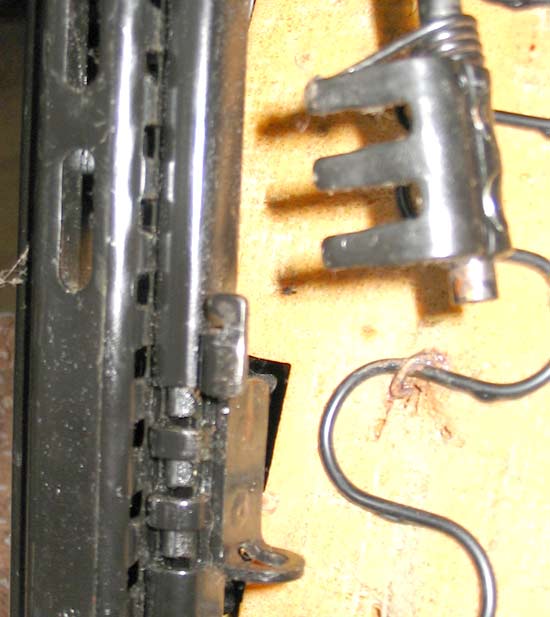
Undo the 3 Allen bolts
that attach the rail to the seat. Remove the white nylon ‘lock’ on
the connecting rod – top left above. It is 2 pieces that just slide
together & easily pull apart & twist & pull respectively off
the connecting rod. You’ll get the drift. Insert the main rod into the
rear pivot while twisting & engaging the teeth. Some help from
needle nose pliers helps to pull the hollow into the socket. The small
end of the spring goes in the hole on the tooth bracket & the long
end goes to the notch on the bracket above it. See the red circles in
the picture above. Then re-attach the rail & re-attach the |