| Problem | ||
| No Heat | ||
| The main blower is not working | ||
|
Check
fuses in engine area fuse panel.:
Fuse 1(relay 16A) |
 |
|
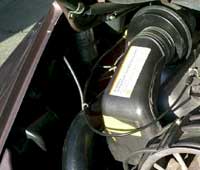
| Check wiring to blower & grd point G407 (on intake runner) |
 |
|
| Blower motors fail. Run 12V line directly to motor & test function. | ||
|
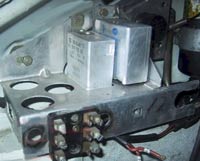
Check main blower relay on rear fuse
panel. It's the small square box in the middle of the photo at
right. The bigger relay is for the rear window defogger (absent in
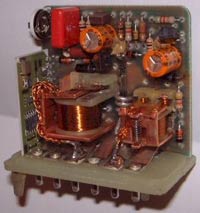
cabs). Also a view of its innards below. Not much
user-serviceable in there. To check relay, key in run position: "Check power to term 12 from the front fuse panel (black/red wire). check power at terms 7 and 8, from the center fuse on the engine room panel. (red/white wires). check power on term 3, from the bottom fuse, (red/black wire). one of these is "key on" power as i recall. for power out of the relay to the engine blower, check terms 5 and 6. (yellow/red wires). term 2 is grounded. " John Walker (Pelican) Also, with the key on, engine off, pull the heater lever and the relay should click. To Review: Note: Relay is bolted to the housing & relies on this for grounding or maybe it doesn't . . . . My main blower will not work if not bolted securely but your results may be different. For an easy heat controller fix see Engine Compartment Heating Relay |
|
|
|
||
|
Check Heat Exchanger Temperature Sensor.
It is located in the left heat exchanger valve housing. Pelican Brian K. Haggard says: "Again, from the '80 system, the flapper box sensor is an NTC thermistor (resistance varies inversely with temp). The spec is 135 ohms at 100C. For the '84'89, I'll bet the thermistor is the same (maybe a different R-T curve) but the spec is 1.7 k-ohms at 20C. If the flapper sensor is an open circuit, the system commands full heat. If the sensor is shorted, it commands zero heat. Maybe your sensor is "almost shorted"? My flapper box sensor was "almost shorted" years ago -- a build-up had created a bridge across the sensor, reducing the resistance to the point that the autoheat never came on. I cleaned the sensor and the autoheat began to work better. Later, it shorted internally and the autoheat simply quit. I recently replaced the sensor with a new NTC thermistor with specs close to the factory spec. $2 for the sensor vs $229 for the factory part. Autoheat now works." see the post here |
||
| The main blower is working. | ||
|
Check actuator rod in console. The
ends might be broken. Very, very common. Open door on passenger side of console. Inside a metal rod connects the servo motor with the heat lever. The plastic ends on this rod often break due to the surprising stiffness of the lever. The ends are easily replaced but hard to access. Some guys have managed this fix without removing the passenger seat but it sure makes it easier. Make sure you dial it in for the right length. For a picture see Ball Socket on the Pelican Parts site. |
Described in detail in the Bentley. |
|
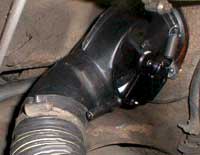
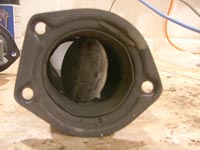
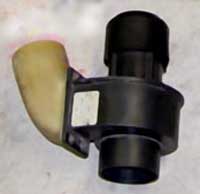
| Check cable to heat exchange valves. From lever near parking brake, one line goes through tunnel and pulls or releases a line that connects both spring-tensioned heat exchanger valves. See Enlarged Picture - HE Valve and Naked Flapper Box (pic from Impact Bumper's Jezhill). |
 |
|
| Check the heat exchanger valves & lubricate - they should seem very stiff. They are probably rusted closed & the cable can't open them. See Enlarged Picture - HE Valve and Naked Flapper Box (pic from Impact Bumper's Jezhill). | ||
| Inside the HE valve there is also a flapper to stop airflow. This pivots with the visible one. Its rubber seal get can dislodge & jamb the mechanism. (pic from Impact Bumper's Jezhill). |
 |
|
| Heat but low air volume | ||
| Footwell Blowers do not work. | ||
|
Note: If the footwells are not working, they
can be damaged by heated air. The housings won't turn into a blob
of plastic but the squirrel cage is known to fuse itself to the housing.
I think the factory's work around for this was to have the motor
spinning at a slow speed even when the speed switch was in the off
position and to prevent an electrical fire they also added inline fuses.
I once measured the heated air temperature at the dash and was amazed to
find it over 250 degrees! |
||
|
Check fuses at footwell blowers. One
10A per side from mid 1987 or earlier it would seem since some '86s have
them too. (Pelican's porschenut's
1986 for example).
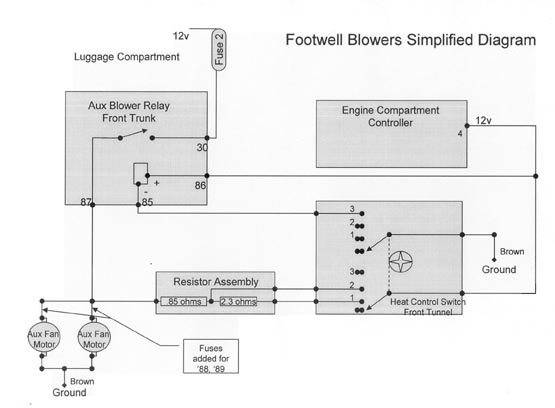
Simplified Footwell Wiring (Posted on Pelican - see flintstone)
|
 |
|
| Check fuse 2 in fuse panel 3 in trunk fuse panel. Also check Relay 1 (counting from windshield side). On the relay, 85 is the 12V from the heater controller, 86 is coil output. 30 is 12V in and 87 is 12V out to footwell blowers & resistor. This means that if 85 ain't getting juice, your problem is upstream - the main blower relay being an obvious (but expensive) culprit. | ||
| Footwell blowers fail. Run 12V line directly to motor & test function. | ||
|
Check main blower relay on rear fuse
panel. See above. Terminal 4 should be 12V when Automatic Heating
Control is on & engine has a bit of heat.
For an easy heat controller fix see Engine Compartment Heating Relay |
|
|
| Footwell Blowers do work. | ||
| If your footwell blowers work, but only on one speed (probably high), than the resistor would be suspect. Check wiring & output. | ||
| Too much heat | ||
| Heater never seems to stop. | ||
| Check the heat exchanger valves & lubricate - they should seem very stiff. They are probably rusted open & the cable doesn't release them as it should. See Enlarged Picture - HE Valve and Naked Flapper Box (pic from Impact Bumper's Jezhill). |
|
|
| Inside the valve there is also a flapper to stop airflow. This pivots with the visible one. Its rubber seal get can dislodge & jamb the mechanism. (pic from Impact Bumper's Jezhill). |
|
|