|
The Maintenance Files |
|
|
|
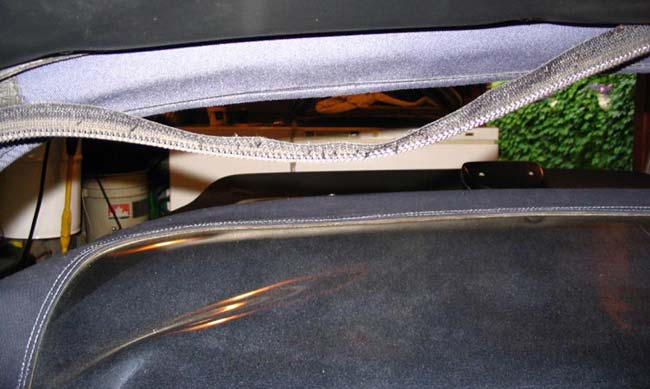
I do believe that the picture above is pretty self explanatory. You are looking back with the window unzippered & folded down. That is the fastening zipper on the top drooping down. During the 1st SW Ontario Fun Run in May 2005, we were cruising top down & hit a cloudburst. I went to the shoulder & dove in the back to put the top up. My hasty yank on the zipper pulled some thread & the zipper started to lose it's stitch. (Oh & the group waited for me btw) Of course, I didn't fix it right away because I didn't know how and there was other stuff anyway. I started asking around & reading net posts about tops. To my horror, everyone was saying the same thing. "The top has to come off to sew that." How much? "Well . . . it's all labor really. Maybe 8 - 10 hours." At $85 per hour or whatever? Hmmmm. So I left it. And the thread continued to disintegrate. As did a small section of the zipper stitching on the window side. So it was time for some action. What you'll need:
|
|
|
|
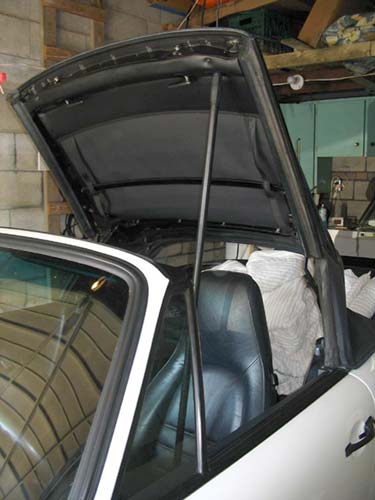
The broom handle in action. Use it as a prop from your seat to one of the handles on the front of the top beside the latch. This is a manual top. After experimentation, I figured out that top partway up was the best means of attacking the zipper. In this position, the back 'hood' of the top (visible in picture at top) was in a relaxed state & the zipper wasn't either too stretched or too folded yet. Just don't push down on the back of the top when you're sewing or it will cantilever back - as I found out several times.
|
|
|
|
|
|
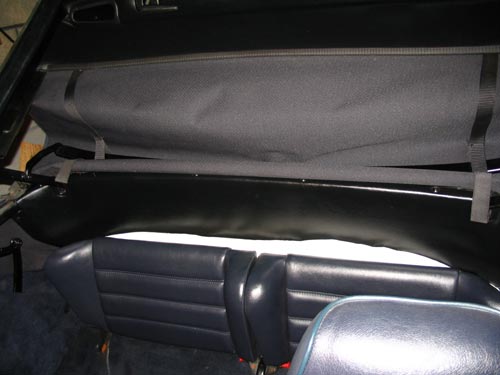
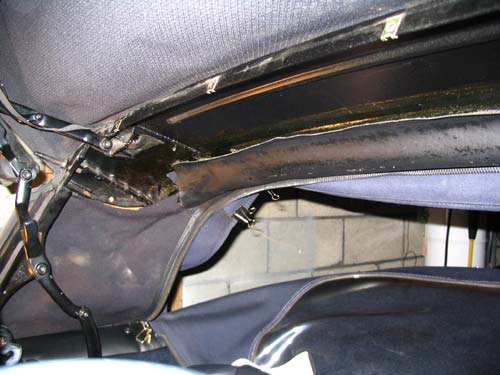
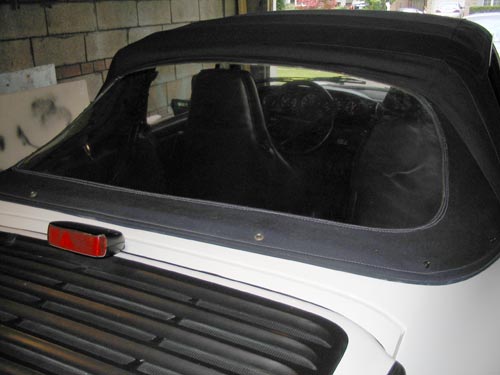
Remove the vinyl covered molding that covers the back of the top inside. Just ten (?) screws hold it in & nothing will spring out at you. Above are pictures with it on & with the exposed goodness. Not pretty but functional. I think this is original, but I'm not sure because the rear window had been replaced at some point.
|
|
|
|
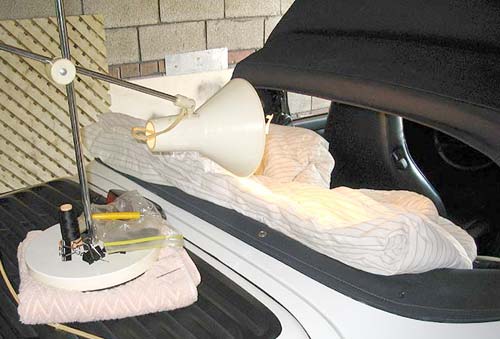
Here you can see my inventive light source. Yes, an old Ikea desk light which rested very nicely on the Whale Tail. Tails are not just for pretty looks y'know. They reduce lift AND act as good tables, too. The comforter is used to protect the window as you lean & lay on it. And you will.
|
|
|
|
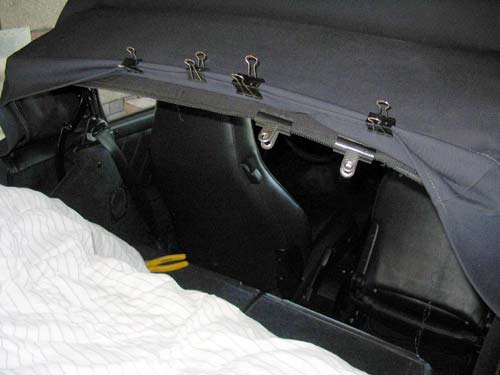
Here are the big mouth paper clamps doing their job. The better clamps on the top row are the ones to scrounge. Fold & clamp back the 'hood' of the top to expose the zipper. You can use other clamps to keep the zipper in place to sew. To Action . . . Yes, sew. There I said it. You have to sew that s.o.b. & it is not a fun job. Ole granny - who loved sewing - would have run away screaming from this one. The zipper is sandwiched between a slightly stretchy top piece of fabric & a leather piece on the inside. You have to line them all up & sew through them. And that's the easy part. On the side, substitute a folded canvas rock for the slightly stretchy fabric. And you have to go through it with needle & thread. On that part, get the pliers ready because you need to force it through bit by bit & not lose the damn thread. But you will still lose the thread out of the needle's eye 637 times. The zipper on the window side has TWO folds of rock hard canvas. It was a serious PITA. But just take your time & drink a lot. Demerol would be best, but it's hard to get a good home IV kit of the stuff. And we won't even talk about stabbing your hand with an upholstery needle that you're using in anger. Did you know that the bigger the needle the more it hurts? After a while, however, you'll only care if it's bleeding enough to take a break to have another beer. Sewing is sewing & you will get through it. The hardest part, is positioning your body so you can see where to stab the needle. Leaning in from the side for some parts & laying on your back with your head stuck out the back window (don't forget the guillotine action of the cantilevered top . ..) for others. Or just scrunched into the pigmy back seat with your foot falling asleep & a month on a heating pad to look forward to. Take your pick. I'd sew for about 5 inches, then double back & tie off. Then repeat with a slight overlap. If you try to do more, your thread will be too long & will get hopelessly tangled or knotted. And then you have to call your wife to solve the knot. And then she will walk around crowing that she had to help you fix the Porsche. After two incidents in ten minutes, I shortened the thread. So, do a small section at a time & go slowly. Then at the end of this fun, I suggest another run through the whole re-sewn area as insurance. The whole job took about 2 days of futzing. But it only cost my time. And blood.
|
|
|