|
The Maintenance Files |
|
|
|
|
|
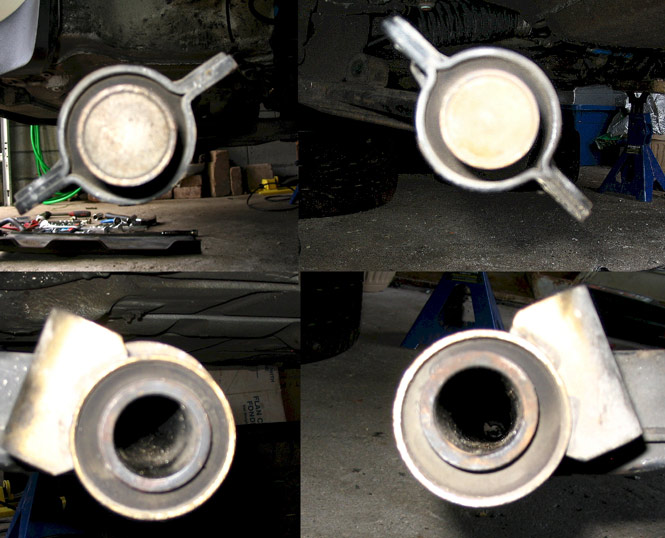
Last fall when I did the
Turbo Tierod upgrade, I realized that the front suspension bushings had
reached their useable lifespan. The rear passenger bushing was
shot, with the torsion bar tube way off-center (see below). This
was contributing to ride height imbalance & I suspected it was also
effecting alignment issues with the subsequent tire wear that I have
been experiencing. I had also noticed a slight settling of the car
after a slow stop. |
|
|
|
|
|
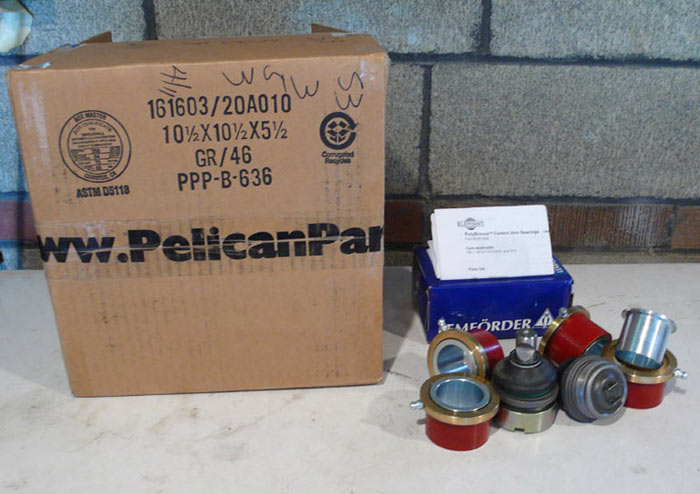
Add it all up & it pointed to the
bushings. As a 'while you're in there', I decided that the 21 year
old ball joints should be replaced at the same time. An order
slowly (their problem) made it's way to me from Pelican, but by the time
it arrived my early spring work window had evaporated. I finally
dived into the project when time allowed at the end of May. |
|
|
|
|
|
|
|
|
|
|
|
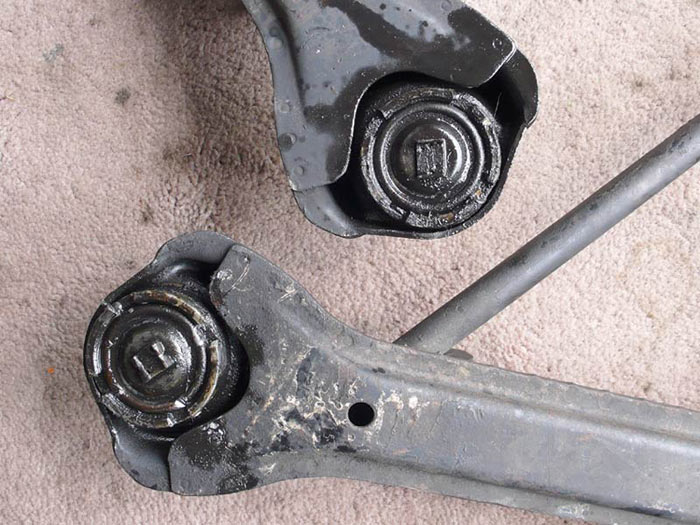
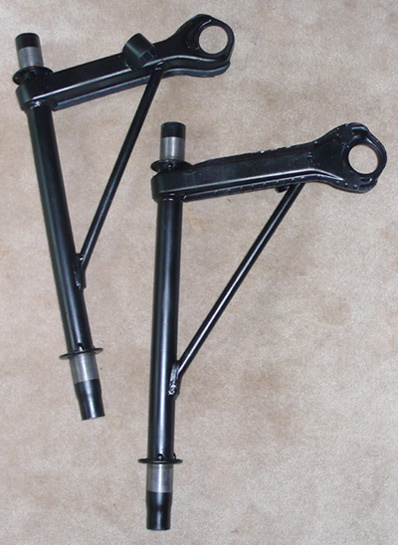
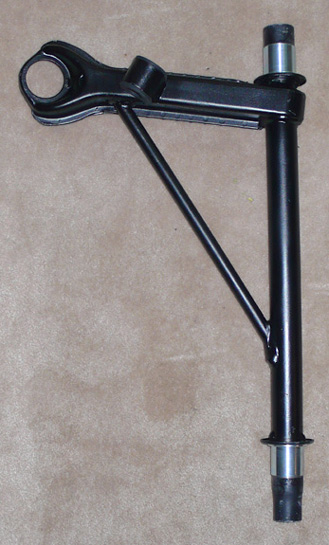
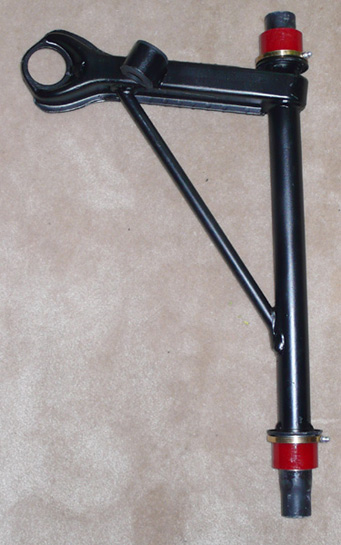
(above) The A arms with
ball joints & stock bushings attached. |
|
|
|
|
|
These bastards - the lower ball joint locknut - will give you grief unless
you listen to me. Well, not really me but gunlovero5's Pelican post:
Easy
ball joint removal method . His method is: Spray liberally with PB
Blaster or similar, heat with a propane torch until it bubbles &
repeat 2 or 3 times. Then smack it with a hammer & chisel & it will
give. A pipe wrench might work too but you'll need a 20 or 24"
to fit them & strong arms to turn them. The smacking worked for me & they loosened
without huge difficulty or special tools. |
|
|
|
|
|
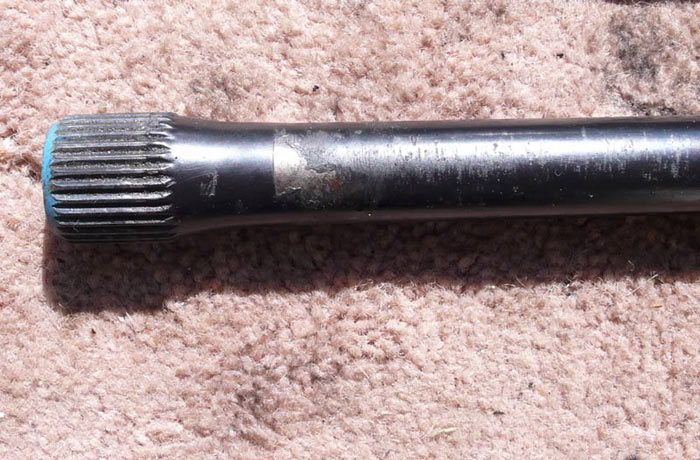
Bad news. This is what a declining torsion bar looks like. It
is in excellent shape except for the scraped area. This is were it
has been chafing due to the sagging rubber bushing. This is where
& why torsion bars break. I picked up a very good used right bar
for the time being until I decide where I am going with the
suspension. I know, I know you are supposed to install pairs etc
etc. I will probably stay stock but I'll have to think on it before
I bite for a new pair. |
|
|
|
|
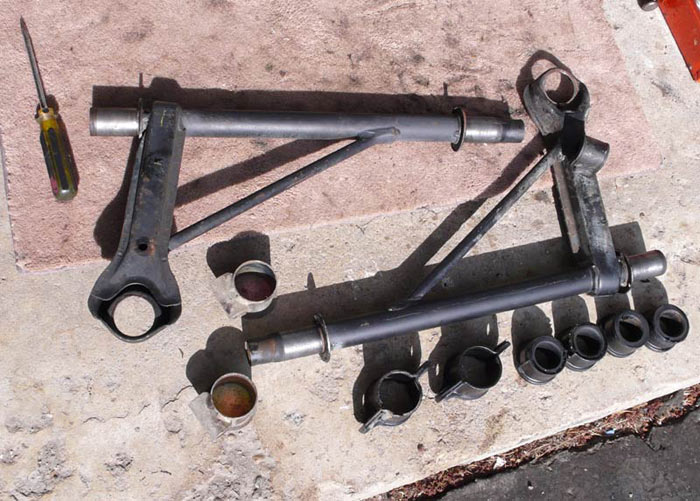
The unassembled A-arm
(above). To get to this state, follow the directions from Chuck @
Elephant. Heat the ends with a propane torch until they start
smoking. Then twist the end off with a large screwdriver. You
may have to heat it up twice before it comes off. Then you can
easily push the hot rubber bushing off the A-arm. |
|
|
|
|
|
I attacked the A-arm with my
Dremel. There was some surface rust here & there as well as some
blobs inside the sway bar bushing bracket. Check those brackets
guys, cause water gets trapped in there & never dries. |
|
|
|
|
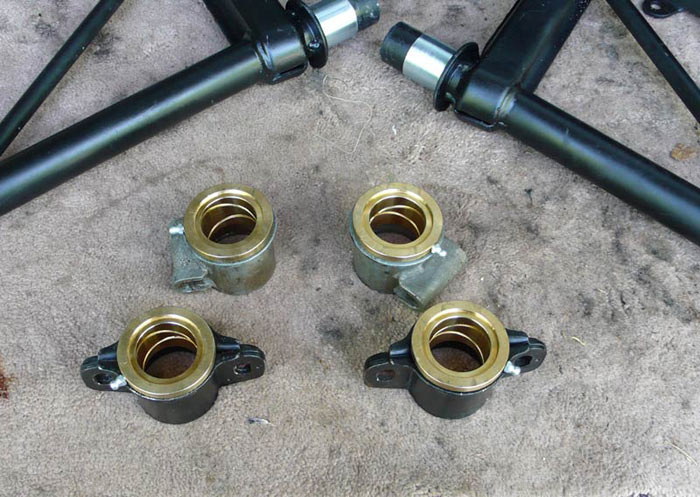
I have to say that the
Elephant bushings are truly Porsche jewelry. They feel good.
Installation is a breeze. You JB weld (or equivalent) the sleeves to
the arm. A test fit with the outer bearing reveals true precision. |
|
|
|
|
|
With a little bit of work, I
persuaded the Poly part of the bushing into the suspension sleeves.
I have a vise, but it wouldn't open far enough for the bushing after the
initial soap & water insert. I resorted to a C clamp that I kept
rotating around the outside. Press & rotate. They
eventually worked into position. |
|
|
Addendum I thought I was coasting
after the assembly but my dumbass gene kicked in & I stripped a Front
Torsion Bar Ride Height Adjustment Bolt & its associated adjustment
lever. I quickly & shamefully bought a perfect used replacement
at a local Porsche garage. Thanks Brent! |
|
|
Initial Impressions Since PolyBronze are not
OEM, many have wondered about vibration & noise. No change from
what I can tell. The car seems more precise when doing the 'tire
warmup' routine. Cornering just feels smoother - no other way to
describe it. And no, no more vibration than before. |
|