Torque Tube
Replacement
(and Rebuild)
Well, yet another chapter is about to begin. When I bought my car ('87 S4 Auto) and drove it home from Florida, one of the things I noticed was a whirring/growling sound coming from the what appeared to be the Center Console area.
After numerous discussions on one of my favorite places for info - the rennlist - I was just about convinced that the noise was associated with the Torque Tube. I decided at some point during the Carpet Replacement (that I opted for first) that this would have to wait until after the SITM event. While we were there, I got the chance to meet Tony from Vega$. He came up to me while I was idling and confirmed my suspicions - the bearings in the Torque Tube were on their way South of the Border (which isn't bad - if you like Spicy Mexican food :) ).
So here we are. After reading through the Shop Manuals several times and reading Tony's page on his experience with this monster of a task - I feel confident now that I can muck my way thru this. I also talked with some other list members concerning the bearings and such in the Torque Tube since this is what is most likely the faulty component. I got alot of good info, so this is my way of repaying those who provided the insight, and hopefully help another Shark owner out in the future.
My Standard Disclaimer - Should you, the reader, attempt to perform this activity on your car, please be advised that I am not a Porsche mechanic. I cannot guarantee that all of the information contained here will work for you. Use this page as a guideline only - it is not the 'Gospel'.
Day -1
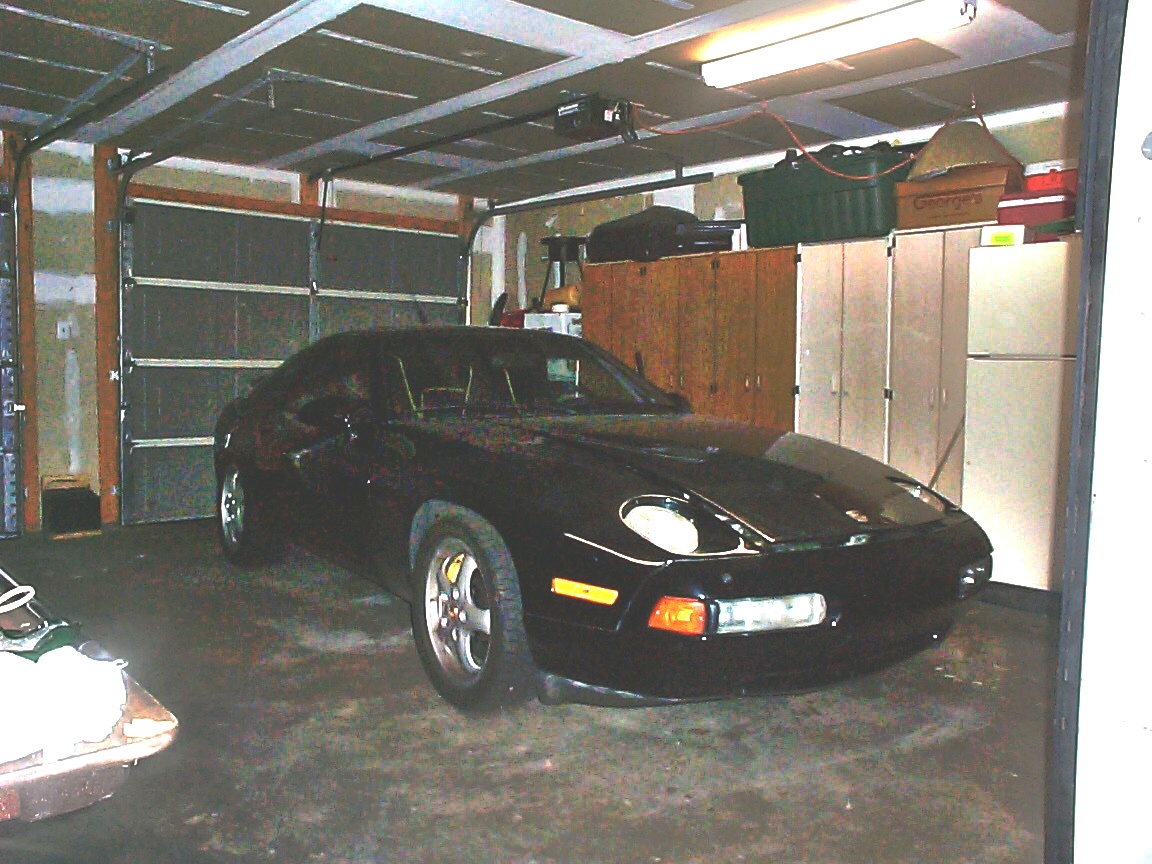
Day -1??? WTF you might be thinking. Well, before I started, had to get a few things in order first. I just got off of working the Night Shift for the last week, and 'rolling my body' back to Days can some times be painful for me. I chose to clean out the Garage for the big day (which begins tommorow - yeah!!!). Also, thanks to Tony, now I can build the pages as I do the work. It's the night before Surgery begins......
The un-suspecting patient above...this is good, no clue that full-blown surgey is about to begin in the morning - >:-)
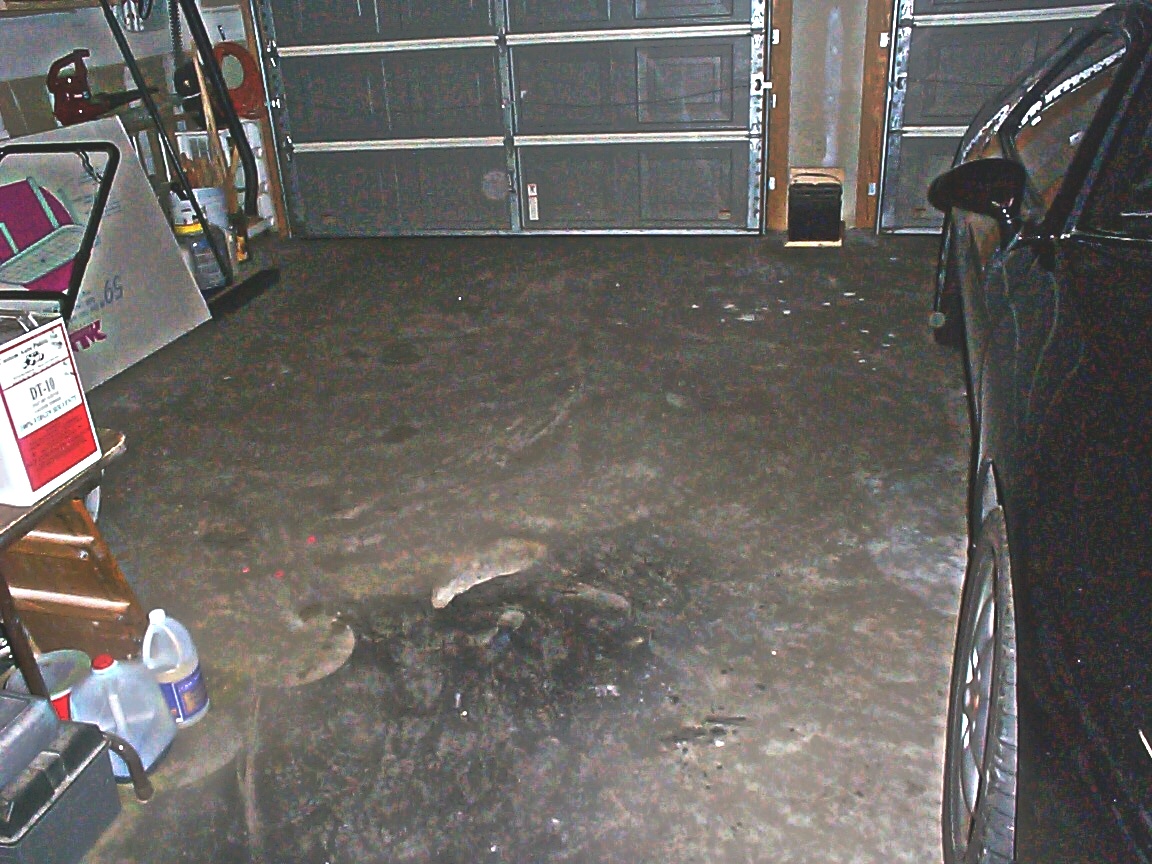
Ahhh yes, and the Operating Room below......
Well, it's time to check the list for some more ramblin'/info...tommorow the journey begins.
Day 1
Here we are. Ready for the big first day. What a day it was too!!! The rear suspension is out, and the transmission is suspended. Overall (not counting the construction of the lifting blocks which took about 2 hours) it took me about 7 hours to get to this point. Let me show you how it went.
First, as I started out to Lowe's to get materials for the blocks - I found the battery dead. As I have found out with the newer vehicles, there is no warning. So, I was delayed a bit at first (guess when one vehicle smells $$$ they all do!).
Finally get the new battery installed, so it's off to Lowe's I go. Looking at Tony's pages earlier, I had tried to estimate the size of the wood used for the blocks. I guessed that they were 4x6, so that's what I got. Figuring that I would need to raise the Shark about 15-18 inches, I concluded that I needed at least 5 layers of blocking material - so I purchased 8 4x6 timbers, 8 feet long each. I planned to cut them in 16 inch lengths, 2 pieces side by side for each layer. Total cost thus far (not including the new battery) = $79.00.

Since the front wheels may decide to roll, I used some garden stakes I already had for the chocks. Just nailed those rascals to the timbers.

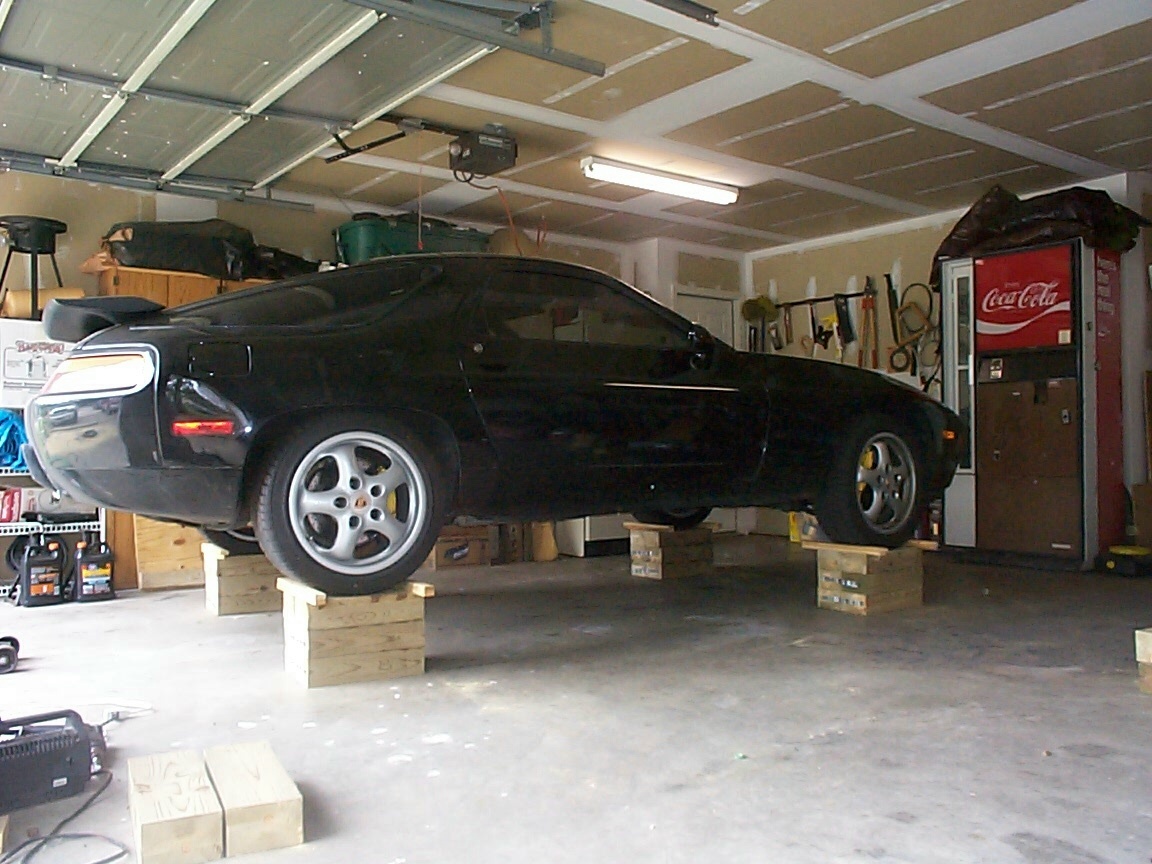
After the first layers were made, up she goes....
When I went to raise the Shark up the last bit, I noticed that since the car is soooooo tight (suspension wise that is), that I was experiencing a shifting in the blocks as I went up. The combat this, I screwed some plumber's tape that I had handy - no more shifting allowed!

The car's all up, time for lunch!!! By the way, this took about 2 hours to do - from unloading the material, cutting, and finally raising the car up to this point.
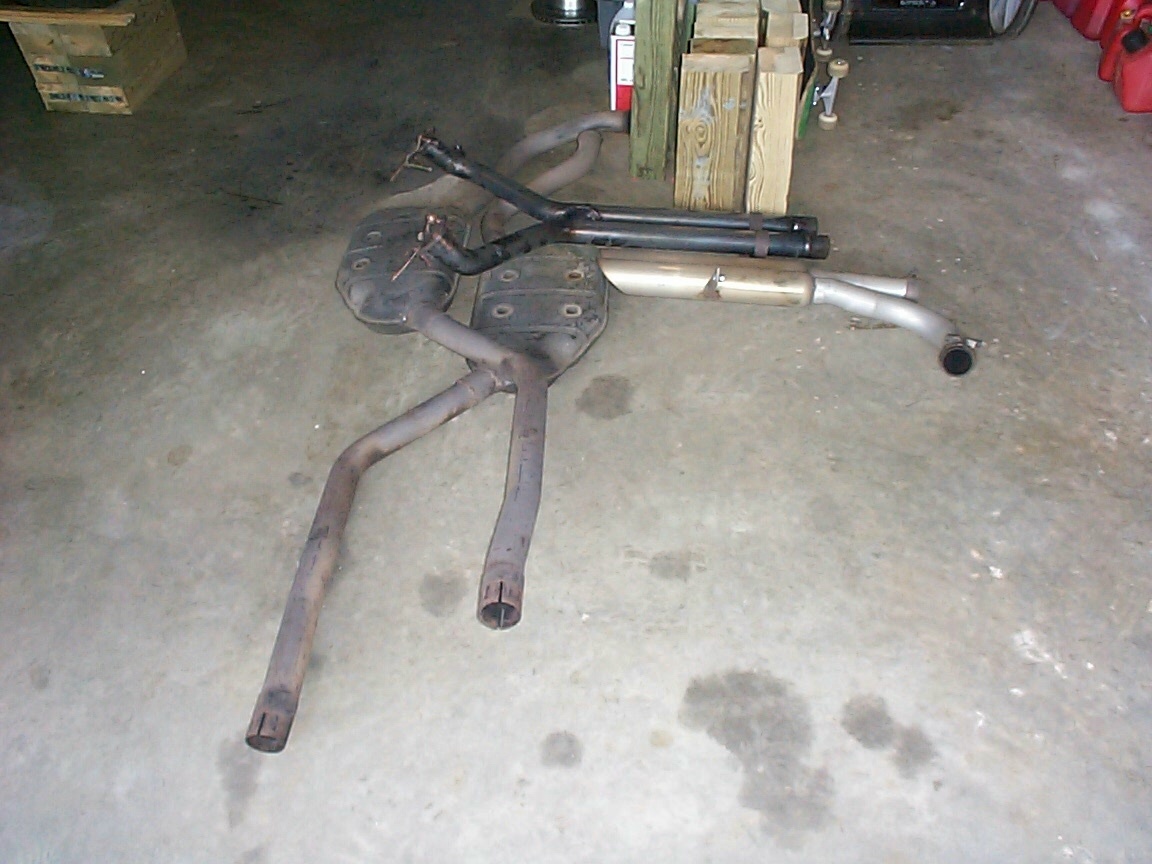
Afte lunch, I started by removing the exhaust system. when i got my car, it had some really weird exhast system on it. Basically, the Cats were there, then they were connected to a 2 into 1 collector which ran aft to a single muffler and 2 outlet tips. The muffler had long since worn out, and had some cracks/broken welds. I replaced the old system last winter with a Cat Bypass Tube from Dave and Jeannie, original mufflers and the RMB from Mark, Jim & Tom. Getiing to it wasn't bad with the car up 20 inches from the floor - it took me ~ 30 minutes to undue it all. The RMB came off first (held on by 2 bolts to the aft and 2 bolt/nut combo's forward - both 13mm I think). Then the mufflers themselves came off - again 13 mm bolt/nut combos along with a couple of bolts to the mufflers themselves.

After the mufflers, then the Cat Bypass (legal for off-road use only - yeah, right). There are a couple of braces - one on each side you have to remove - I used a 3/4 inch socket to get them off. These are tough monkeys to get out.

Exhaust all removed....
Now for the heat shields. I had to remove 3 running fore to aft. Each was held in by a series of 9 mm bolts. All except one that is, it was held in by a square head bolt.....hmmmm, who's been sitting in my chair....Anyway, once all the heat shields were removed, I removed the cross braces for the heat shields...here's one of the two that you'll find. The bolts in the center top portion are the heat shield bolts (9 mm) - the mounting bolts are 14 mm I think.
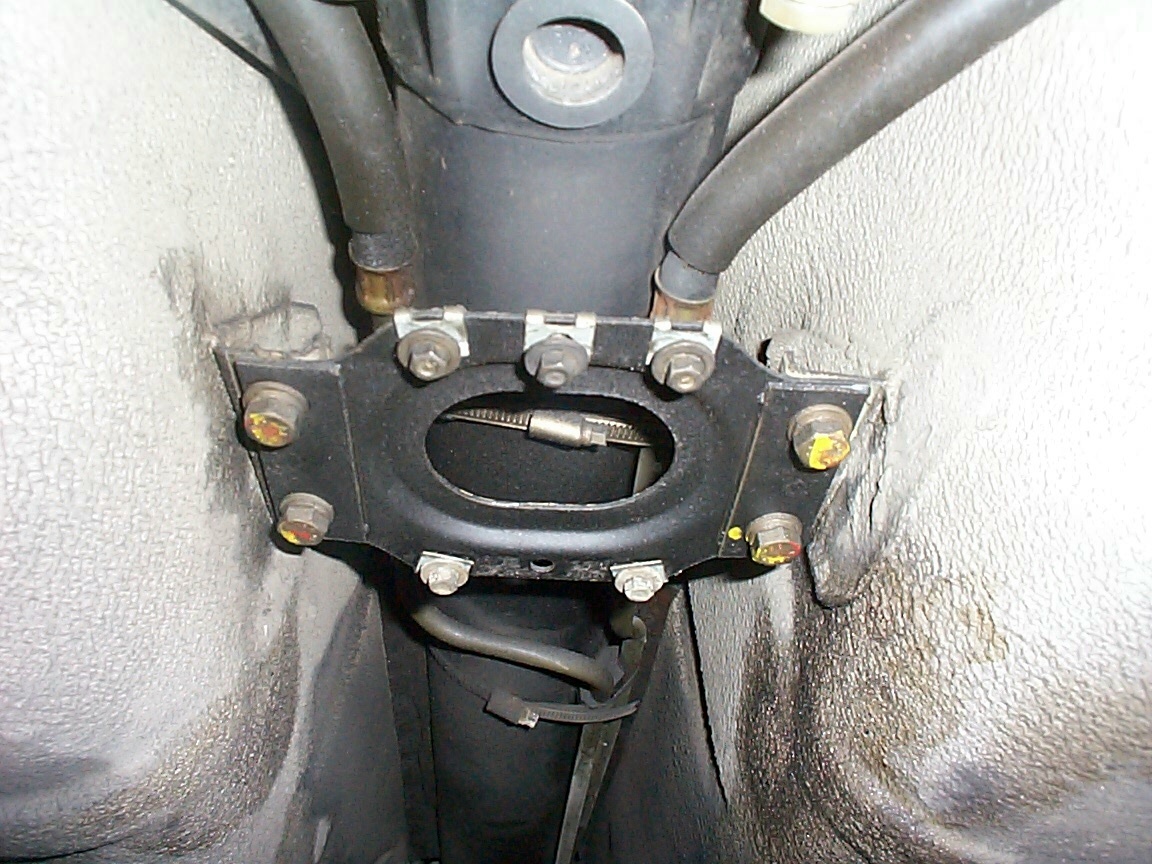
After the braces, I drained the transmission and started breaking free some of the lines for draining. Getting forward, I noticed the tranny cooler lines were soaked - looks like I be replacing those as well.
Next I focused on the rear suspension. I sahifted my lifting blocks to under the rear jacking points. Then I removed the tires and brake calipers (held in by 2 bolts) and wired the calipers up out of the way. Then using a small standard screw driver, I disconnected all of the small clips holding the wiring for the brake pad sensor and the Anti-Lock brake whell speed sensor. I disconnected the parking brake next and pulled it back.
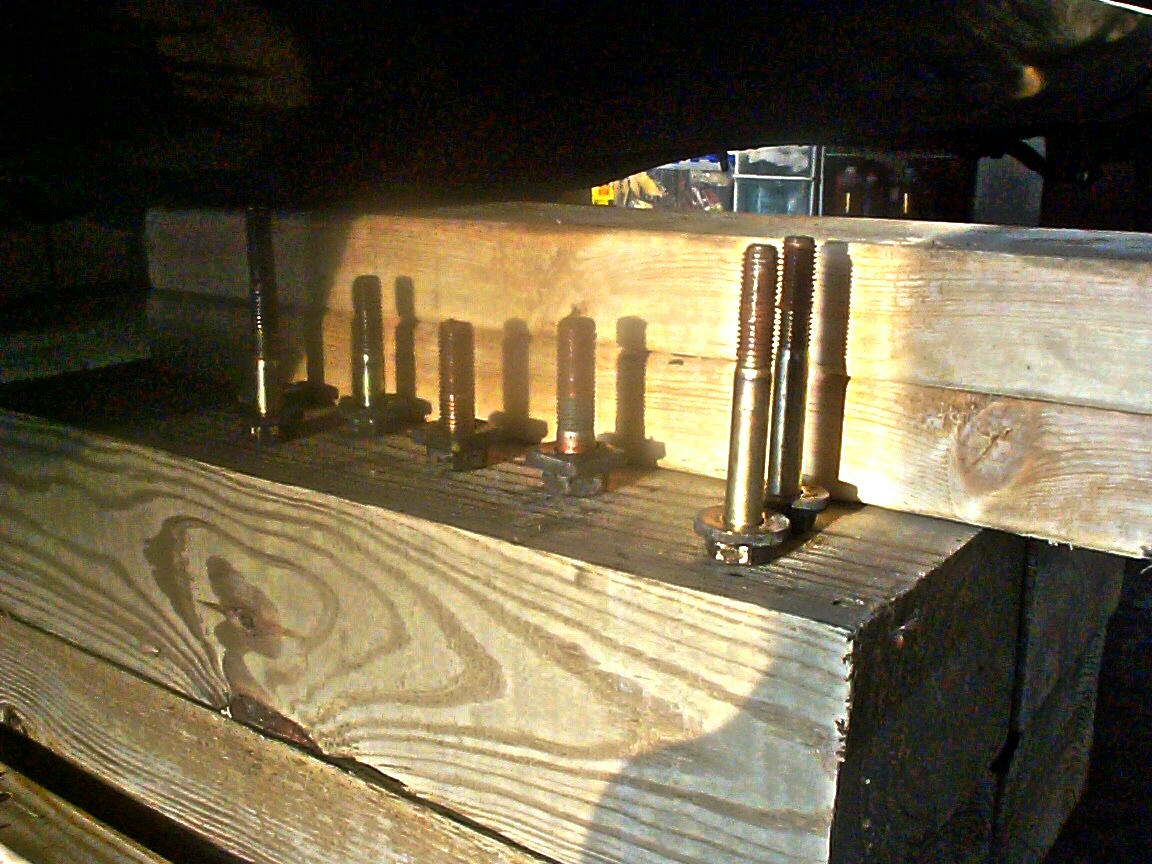
The rear suspension is held in by 14 bolts below the car - 7 each side, and 10 are 17 mm while I used a 3/4 inch socket on the remaining 4. This is what they all look like removed and placed in removal order.
In the hatch area, there are 6 nuts (3 each side) that bolt down the rear shock towers - they are also 17 mm, remove them as well. After all the bolts were removed, I used a clamping strap that I already had from another project. When I was at SITM, Jay K. suggested this method of holding the tranny up when you remove the rear suspension - it worked great (thanks Jay!). I wrapped the clamp around the rear anti-sway bar as shown in the Shop Manuals. lowered the rear suspension down and tilting slightly, removed it from under the car. I can tell you that 20 inches is probably just right with little to no tilting, wiggling - etc. The tranny clamp below...

And now the rear suspension all removed....

And another view...

Tommorow....the tranny will be removed as well as the Torque Tube.
All in all, a very good day. I had hoped to get the Tranny out today, but the building of the lift blocks (and the new battery) proved to be too time consuming.
We'll see how it goes Monday evening....Oh Marge....BEER ME!!!