External Oil Cooler
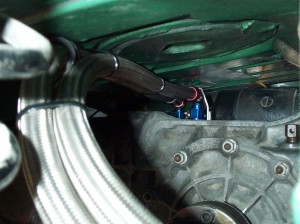
I had installed a simple external oil cooler years ago, but I was not happy with it for several reasons. First, there was no thermostat, so oil passed through the cooler at all times and temperatures. This was not TOO much of a problem in Texas. Besides, I mostly drive the car in the warm times of the year. Next, I mounted the cooler upside down, that is, with the fittings on the bottom. I did this because it was easier and it mounted higher with the fittings on the bottom. But theoretically, mounting it that way can cause an air bubble to form at the top and never get oil to the entire cooler. SO I decided to revise the installation and solve these issues.

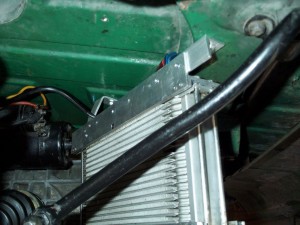
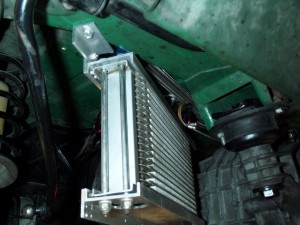
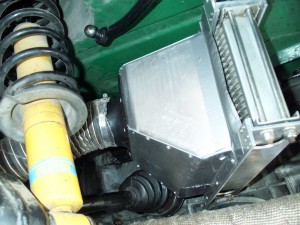
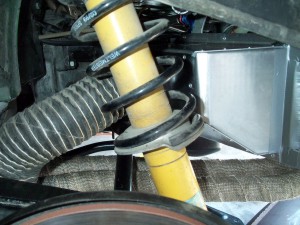
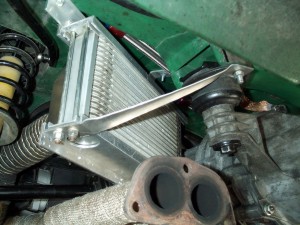
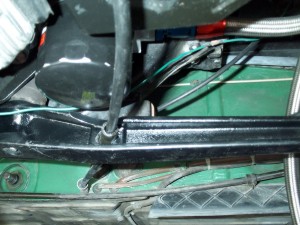
The cooler is an Earls 8" x 12" cooler, which I mounted by means of 2 Aluminum brackets. One bracket mounts the left side to the chassis just inboard of the rear sway bar clamp. It is attached to the top flange of the cooler mount with two flat head screws and two Nylock nuts. This bracket is fabricated from a short piece of Aluminum angle (about 1.25" x 1.25" x .125"). I used flat head screws here because the shroud will mount on this face. The attachment to the chassis is via a big (about 5/16" dia) sheet metal screw, since it's a "blind" hole. 
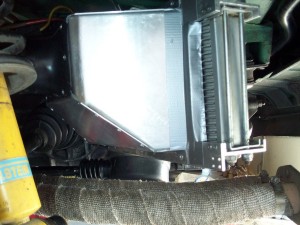
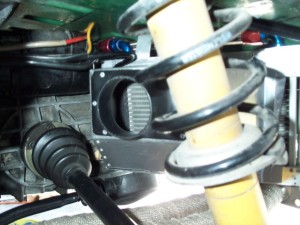
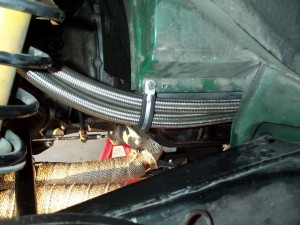
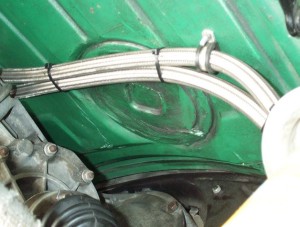
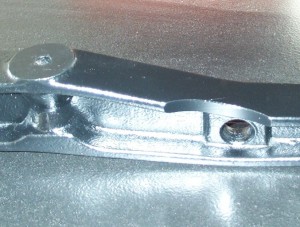
On the inboard end, I bent a piece of 1" x .125" aluminum into a funny shape to connect to the bottom of the trunk. I attached it in one of the many "low" spots, so that the screw head would not be obvious. Again, I used two flat head screws to attach the bracket to the flange of the cooler mount.

The original shroud was a vacuum-formed plastic piece, that was too big to use in this new orientation, so I cut the "back" end off (the part that connected to the 3" diameter hose). I then formed an Aluminum shroud. It took a couple of tries before the shroud cleared everything. The problems were the starter (and the wires), the drive shaft, the coil spring, and the anti-sway bar. When I had it built, I attached the plastic end from the old shroud, caulked all the seams, and mounted it to the cooler flange via pop rivets. The ends of the shroud have pieces of soft foam rubber strips to seal there. I put silver duct tape over the foam to protect it.

The hoses connected to the top of the cooler and traveled over the transmission. I attached one of them to the trunk floor and tie-wrapped the other one to it in several places to keep them from sagging and moving. I bent up a "double" hose clamp and connected both hoses to the back of the sheetmetal around the right side of the engine. From there, the two hoses went between the engine sheetmetal and the back of the suspension console, above the big inside suspension mount nut.

I connected 3" flex hose to the shroud and routed it over the axle and down to a "soup can", that is attached to the trailing arm. This holds it up, so that it doesn't fall down and hit something. The flex hose will have a tie-wrap added to keep it up, out of the axle later (it's not in the pictures). From the "soup can" a short piece of flex hose goes forward to the scoop on the rocker cover.

The back of the cooler is braced with an Aluminum strut, connected from the bottom, rear connecting bolt for the cooler to the back, rear transmission mount bolt. This strut was probably not necessary, as the other two mounts held it rather well, but it keeps the cooler from vibrating.

I originally used a "sandwich" adapter, which attaches between the engine and the oil filter. The original adapter was a simple affair, with only a bypass valve to limit pressures when the oil was very cold and thick. I had intended to continue using it and add an external thermostat, but when I checked I found a neat adapter (by Earls) with a thermostat included. It had several advantages, the primary one being that it required no more expensive AN-10 fittings. Adding an external thermostat would have required a total of 8 female fittings. This is about $160 worth of hardware. With the thermostat built into the "sandwich' adapter, only 4 fittings are required, and I already had them. Also, fewer fittings translated to fewer leaks, although I have had no leakage problems.

One problem with the new adapter is that it is thicker than the old one. This moved the oil filter down and made it difficult to install, as it hit the engine mount bar. My temporary solution was to loosen the nuts on the mounts on the motor, lift the engine up with a floor jack to install the filter, then sit it back down and tighten the nuts on the mounts. I use the Bosch oil filter, as it is shorter than the others I have tried. It cleared the bar when installed, but slightly hit when screwed down to remove (or install). With the old "sandwich" adapter, the Bosch filter would install with no problem. But the new "sandwich" adapter is 1/4" thicker and this causes the problem. My permanent solution was to machine a relief section on the top of the bar. The bottom part of the bar is not a problem. so I left it intact.