Ever since I bought my '87 911 Cabriolet I have been unimpressed with the performance...
As I looked around for answers I stumbled onto an interesting web page called Stern Lighting. The site outlines the deficiencies in most lighting systems and debunks a lot of the gimmick products using sound logic. The upgrade the site does recommend involves replacing the wireing with 10 or 12 gauge wire and improving / shortening the overall circuit by adding relays and directly attaching to the battery. (Jim Pasha gave similar information in an article that was published in Excellence in February 2000.)
Upon investigating my own situation, I found that my battery is putting out 11.99 volts. When I probed the socket terminals I found 11.45 volts, which is a 5% voltage drop. Resistance in the lightweight wire and the light switch in the dashboard cause the voltage reduction. This fits the example on Stern's website to a T.
Up-front: I did the modification (obviously), and there was a substantial gain in overall illumination. It's very difficult to try to measure or describe the gain, but I was unhappy before and now it's decent. Stern also recommends Sylvania eXtraVision (pink package) bulbs, which cost $10 each, but I haven't done this yet.
The remainder of this page describes the specifics of doing this to a 911 (SCs and Carreras at least). You will need some soldering and wiring skills to duplicate this.
I was able to get most of the parts I needed from Pep Boys, and the total cost was just over $50:
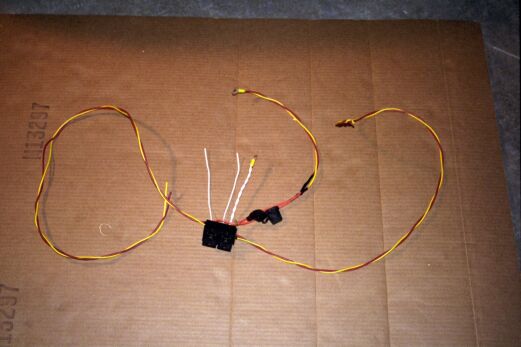
Building the lighting harness
The relay sockets actually clip together to form a block, which I will mount inside the trunk between the jack windshield washer fluid pump. For a clean installation, I decided to remove the wire from the relay sockets power taps and directly replace it with the 12-gauge wire. I used red for the high beam relay and yellow for the normal beams. I installed the fuse holders directly onto the 30 terminals and extended the connection to battery, terminating in a single large eyelet. I then measured out 54 inches for the passenger side (terminals 87) and used the remainder to attach the driver side (also terminals 87). I actually spliced the driver side wire to the passenger side wire by sectioning the insulation on the passenger side, soldering the driver side to the exposed wire, and sealing the joint with shrink tubing. The lightweight white wire will also be attached to terminal 87 of the HIGH-BEAM relay. This should be long enough to reach the fuse box. I twisted the two relay ground leads (terminal 85) together and put a small electrical connector on the end for easy grounding.
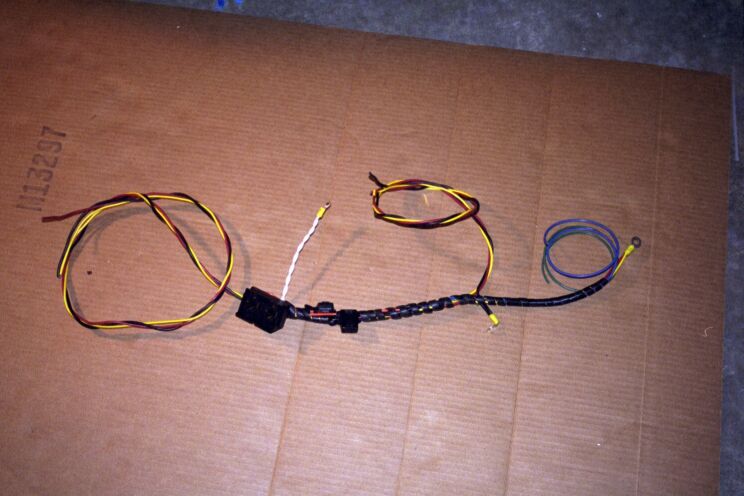
I attached the 16-gauge wire to the 86 terminals (I used blue and green) and cut off enough length to reach the fuse box. I then laid out the 12-gauge ground wire from the negative battery terminal eyelet to the headlight baskets. I then took the spiral loom to bind this supplemental wiring harness together and protect it.
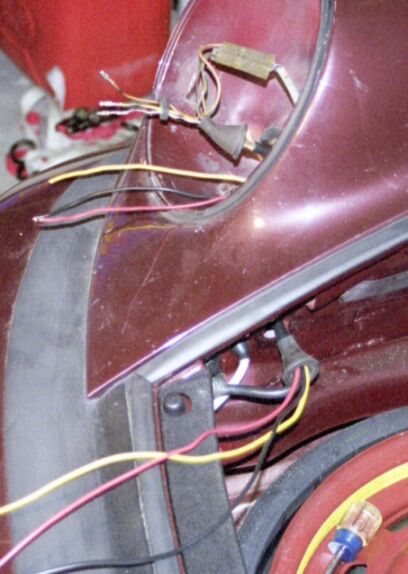
Installing the lighting harness
I decided to affix the sockets to the front of the trunk with sheet metal screws. Here it gets good: I removed the headlights and pried out the wire seals; the 'inner' seal in each basket and one on each side of the trunk. A little bit of grease allowed the three new wires to pass through the seals with a bit of effort.
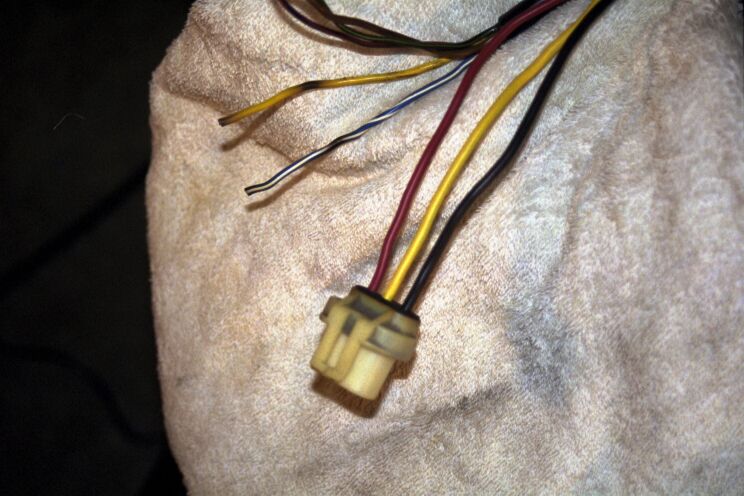
The best part: O.K., time to take apart the stock headlight plugs. There are two things that must be undone to get the terminals out of the plugs. Each terminal has a barb, which can be bent with a jeweler's screwdriver from the front of the plug, pretty standard fare. The second is a little more unusual. The plug is sectioned into two pieces; gently pulling the smaller piece away from the main body will release the terminals. Take a good look at how this works, because when you solder the new heavier wire it cannot interfere with this clip. I cut the terminals off the factory harness, leaving 1/4 of an inch of bare wire to supplement my solder joint.

To prepare the new wire I stripped back the new wire a little longer than 1/4 inch. I then crimped the terminals onto the very tip of the new wires using the insulation prongs. This was then soldered together along with the original terminal wire, which I left on the terminal. When this is done, the plugs were reassembled and the headlights went back in.

Fuse box connections
The final connections are made in the fuse box. Locate the four headlight and high-beam fuses in the block. Remove the wires from the bottom and note that there is a pair of small wires attached to one of the high-beam fuses. The white with a blue stripe goes to the high-beam indicator on the dash, while the white and red cuts off the fog lights when the high-beams come on. All of the old headlight wires are disconnected and the white and red wire is cut away from the white and blue. The two leads from the 86 terminals are then attached to the respective connectors on the fuse block. The white and blue wire should be mounted to the same terminal as the high beam relay, while the white and red wire should be attached to the white wire extended from the high-beam 87 relay terminal. This wire will cut ground to the fog lights when the high-beams come on and allow the ground to return through the high beam bulb filament.
Best of luck to you if you pursue this modification. I can say that after all is said and done I feel that it was worth both the time involved and money spent.