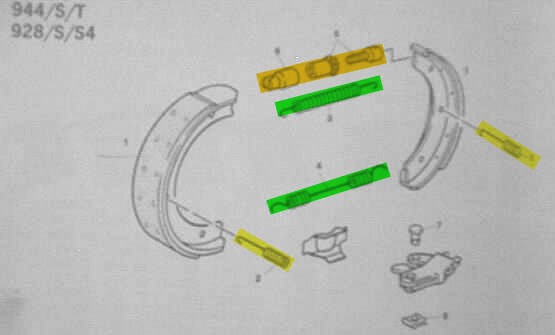
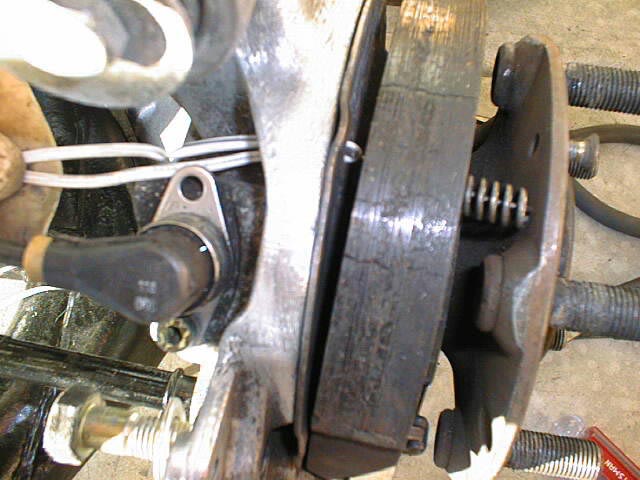
 this shows
the basic components of the parking brake(MINUS THE CABLE)
this shows
the basic components of the parking brake(MINUS THE CABLE)PARKING BRAKE
This page just gives you a run down on the location of the parking brake mechanism,what it looks like and the steps i took to service/clean it.
The parking brake is mechanically operated by a cable system. It is independent of the "regular" brakes except in one aspect, the parking brake uses the inside of the hub assembly on the rear rotors as the braking surface. To access the parking brake pads/assembly you have to remove the brake callipers as well as the 2 Phillips head screws on the rotors (the rotors come off as well). The best tool for this job may be an impact driver as many times the screws get frozen in place by corrosion. Once the rotors are removed you will see the assembly snuggly arranged around the wheel hub. The whole assembly is held in place by 2 springs (YELLOW...picture below). Once these two springs are removed as well as the LOWER GREEN SPRING you will be able to manipulate the shoes from the wheel hub. Replace the shoes if you have to. (Parking Brake Shoes).The cable is removed from the car by gaining access under the cover around the parking brake handle. Once this is removed the cable can be separated from the handle by removing the bolt that is threaded along the end of the cable. Next you have to separate the cable from the car at the right rear wheel well area so it can be pulled through..
this shows
the basic components of the parking brake(MINUS THE CABLE)


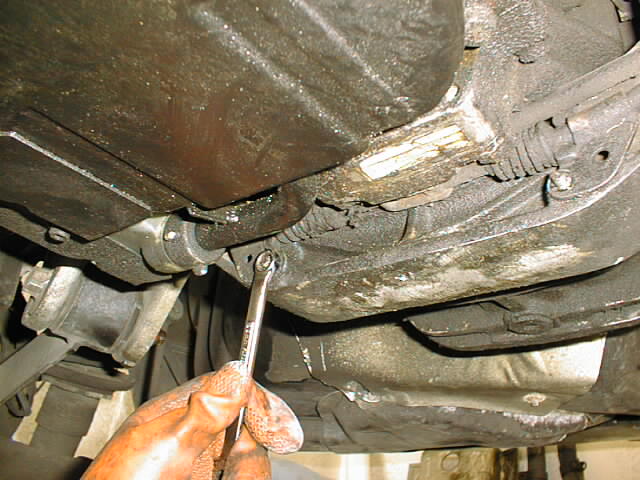
above...the rear drivers side wheel well and how to pull the cable fitting free. You may have to remove a bit of undercoating to get a good shot at it. (this is AFTER the cable was separated from the handle inside the car)
 this shows
where the parking brake cable attaches to the rear crossmember.
If you want to service/replce the cable you need to remove it
from this point as well.
this shows
where the parking brake cable attaches to the rear crossmember.
If you want to service/replce the cable you need to remove it
from this point as well.
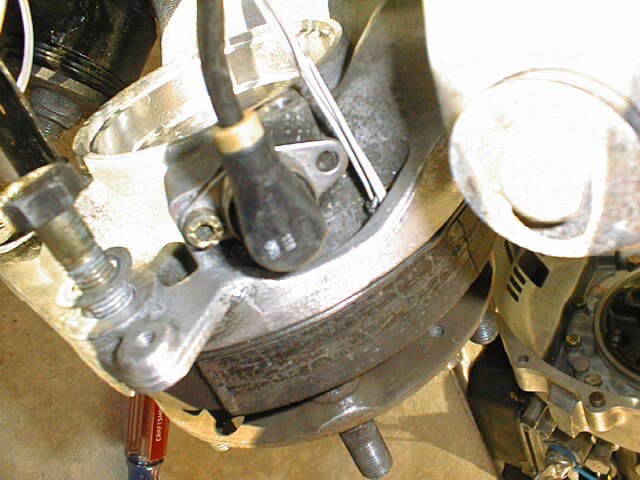
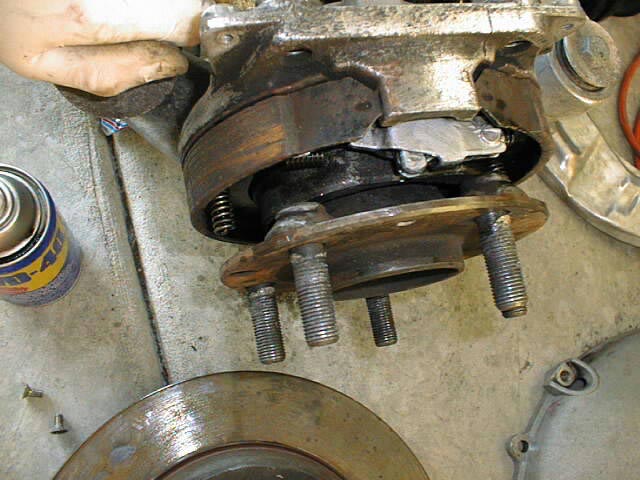 this is what
the assembly looks like after the rotor is removed. You can see
one of the springs(left) that hold the parking brake assembly
onto the wheel assembly. Using a pair of needle nose pliers,
remove the 2 springs (note how they sit on the HUB for
reassembly..there is a service bulleten on this ..you need to
make sure the end of the springs are postioned correctly in the
wheel hub)
this is what
the assembly looks like after the rotor is removed. You can see
one of the springs(left) that hold the parking brake assembly
onto the wheel assembly. Using a pair of needle nose pliers,
remove the 2 springs (note how they sit on the HUB for
reassembly..there is a service bulleten on this ..you need to
make sure the end of the springs are postioned correctly in the
wheel hub)
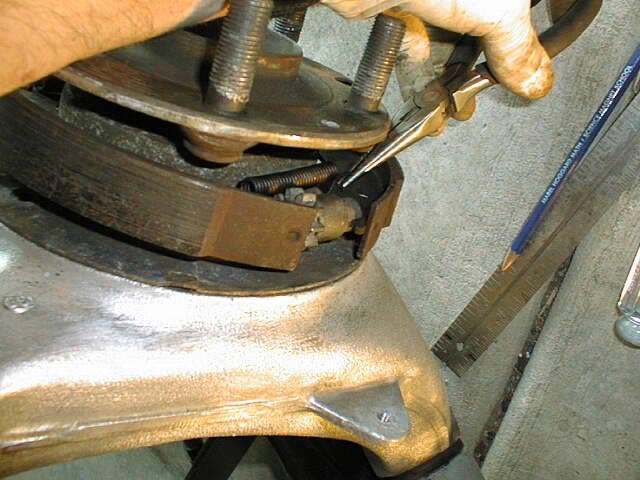
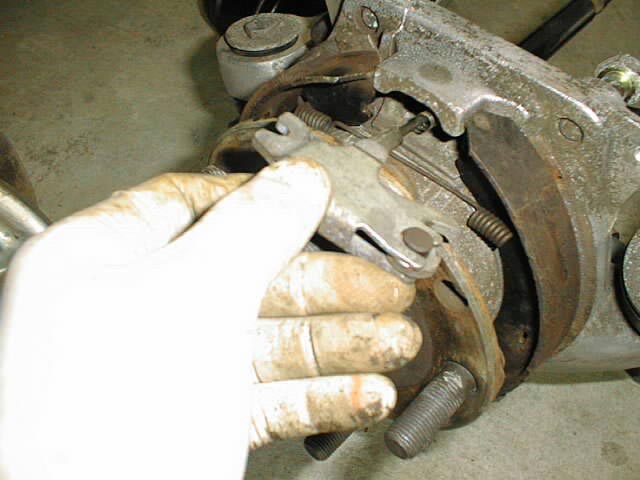 After i
pulled the cable from the car and removed the 2 springs, I was
able able to remove the return springs, the adjustment barrel and
the spreader assembly you see in this picture. I spread the shoes
by hand and pulled the "spreading" mechansim out. I
removed the pin in this assembley and cleaned everything up with
a wire brush as it was quite rusty. There was a tremendous amount
of dirt and rust present.. If your parking brake doesnt release
or operate correctly you may want to take it all apart and just
clean it and lubricate it. While your at it...check the brake
shoes for wear.
After i
pulled the cable from the car and removed the 2 springs, I was
able able to remove the return springs, the adjustment barrel and
the spreader assembly you see in this picture. I spread the shoes
by hand and pulled the "spreading" mechansim out. I
removed the pin in this assembley and cleaned everything up with
a wire brush as it was quite rusty. There was a tremendous amount
of dirt and rust present.. If your parking brake doesnt release
or operate correctly you may want to take it all apart and just
clean it and lubricate it. While your at it...check the brake
shoes for wear.
below is a little trick i used to reassemble the parking brake to the wheel hub
 using a
STRONG piece of wire to pull the mounting springs back through
the wheel hub assembly.
using a
STRONG piece of wire to pull the mounting springs back through
the wheel hub assembly.
 BE SURE
THE SPRING IS SECURED PROPERLY !! There is a small lip that the
end of the spring passes over to help secure it. (NOTE HOW IT IS
SET UP BEFORE YOU TAKE IT APART)
BE SURE
THE SPRING IS SECURED PROPERLY !! There is a small lip that the
end of the spring passes over to help secure it. (NOTE HOW IT IS
SET UP BEFORE YOU TAKE IT APART)
 this
picture shows the parking brake adjustment barrel. Once again,
mine was covered in dirt and rust. I took it all apart, cleaned
it and placed some grease inside it. The adjustment barrel is
accessible with out removing the rotor but this is for ADJUSTMENT
ONLY. To clean it, the rotors will have to come off.
this
picture shows the parking brake adjustment barrel. Once again,
mine was covered in dirt and rust. I took it all apart, cleaned
it and placed some grease inside it. The adjustment barrel is
accessible with out removing the rotor but this is for ADJUSTMENT
ONLY. To clean it, the rotors will have to come off.
I also took my brake cable and cleaned it up as well. I held the cable up by one end and sprayed some lubricant down the cable sleeve. This made a noticable difference in the operation of the cable.
Putting the cable back in the car was basically the reverse procces. Once it was in, I adjusted the cable so the brake was fully applied when the handle was BELOW the level of the seat. This way it doesnt hinder you getting in and out of the car...OUCH!! : ) Also be sure to check the PARKING BRAKE LIGHT SWITCH...you may have knocked it off in all this work. The switch is located near the base of the handle mechanism....it tells you whether the parking brake is applied or not. After a short drive and smelling HOT BRAKES i need not tell you why you should check this little but important light : )
Also, you may see in these pictures that I have quite good access to the brakes!! I performed all of this work and cleaning on the car while i was replacing my torque tube. (the whole rear suspension was off when i did this brake job).
Hope the pictures shead some light.......
Click the logo for parts by.....
![]()