
"my future 'lil assistant"
CHECKING YOUR TIMINGBELT and TENSION
The camshaft timing belt on the 928 is probably the achilles heel of the motor. If the belt fails or slips enough teeth, you WILL come to a stop and may be in for A LOT of damage to both your motor and wallet. There has been discussion on which motors are interfence motors and which ones arent, i'm not going to get into that. My car, the pictures and the procedure below are for an 87s4 with 32valves and IT IS AN INTERFERENCE MOTOR (as are ALL 32 valve engines)! If the belt breaks or slips YOU WILL do damage (unless you are extreeeeeeeemmmmmmly lucky). Therefore, routine inspection of the timing belt, its tesnion and running gear are essential in helping you avert a possible disaster!!!
I hadn't intened on doing this page yet , as the recommended retension check is at 1500 miles after the new belt goes in, but during the installation of my timing belt, somehow, the tension warning connector behind the center timing belt cover became unhooked. This situation caused a TENSION WARNING exactly 3mins after EVERY start. In order to reconnect the wire to the sensor I had to remove the passenger side timing belt cover, which is bascially the process you go through to check your tension.....hence this quick page.
The time to remove all the items below took me exactly 25 minutes...install was roughly the same ...so give yourself an easy hour or a bit more. I had the advantage of having just removed all these parts during the installation of my belt, so every thing was clean, the bolts were easy to remove and the procedure was fresh in my mind. YMMV!!
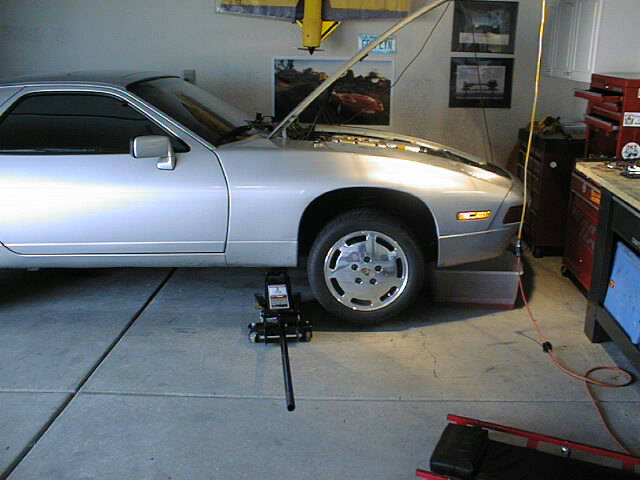 1) jack and
support the car....place catch pan under radiator drain.
1) jack and
support the car....place catch pan under radiator drain.
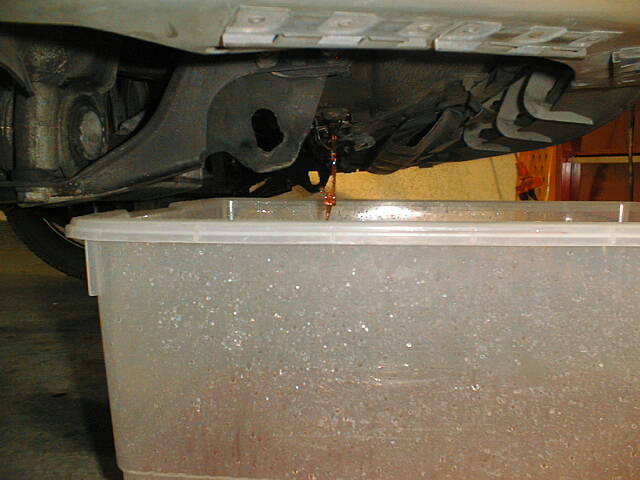 2) remove
coolant tank cap and then remove the BLUE radiator drain plug and
drain the coolant from the radiator. You're doing this so you can
remove the upper rad. hose for easier access to the belt cover. These first 2 steps are optional I believe
as i think the job can be done with out removing the upper rad.
hose.....the more room the better i say!
2) remove
coolant tank cap and then remove the BLUE radiator drain plug and
drain the coolant from the radiator. You're doing this so you can
remove the upper rad. hose for easier access to the belt cover. These first 2 steps are optional I believe
as i think the job can be done with out removing the upper rad.
hose.....the more room the better i say!
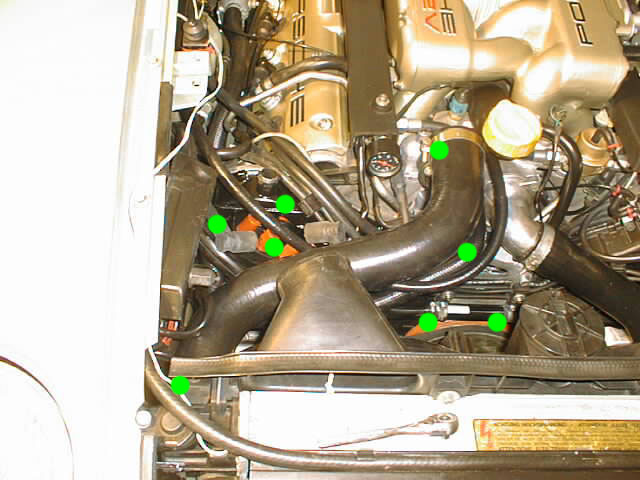 3) this
gives an overview of what I FOUND needs to be removed. (green
dots)....upper radiator hose clamps and hose...coolant fill line
at the engine...wiring harness allen bolts...plug wires from
distributor....distributor...oil dipstick tube....and the belt
cover...YMMV. The wire that leads to the AC will have to be
disconnected also, it makes for easier access and it becomes a
VERY good time to check the connection! The rest of the items
like plug wires ,wiring harness and coolant lines can be moved
and zip tied out of the way. The more room the better in this
engine compartment!! You may be able to get away with removing
less, but as you will see, i had a nice open area to work with
when done.
3) this
gives an overview of what I FOUND needs to be removed. (green
dots)....upper radiator hose clamps and hose...coolant fill line
at the engine...wiring harness allen bolts...plug wires from
distributor....distributor...oil dipstick tube....and the belt
cover...YMMV. The wire that leads to the AC will have to be
disconnected also, it makes for easier access and it becomes a
VERY good time to check the connection! The rest of the items
like plug wires ,wiring harness and coolant lines can be moved
and zip tied out of the way. The more room the better in this
engine compartment!! You may be able to get away with removing
less, but as you will see, i had a nice open area to work with
when done.
 4) removing a
coolant hose.
4) removing a
coolant hose.
 5) loosening
the bolts for the wiring harness. Once removed the harness can be
lifted and zippped tied out of the way. The plug wires at this
location shouldnt have to be removed. YMMV
5) loosening
the bolts for the wiring harness. Once removed the harness can be
lifted and zippped tied out of the way. The plug wires at this
location shouldnt have to be removed. YMMV
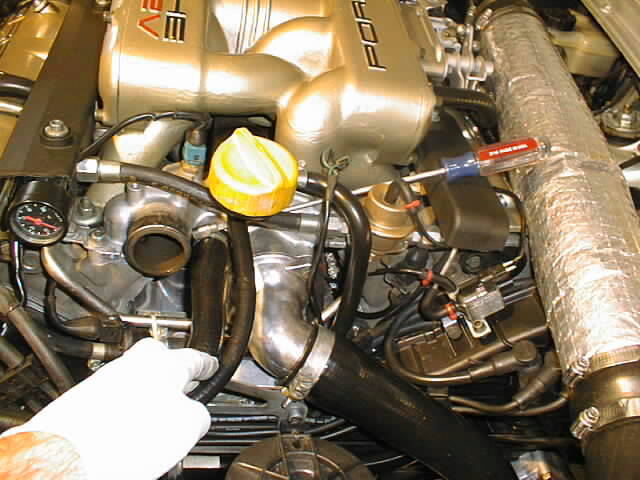
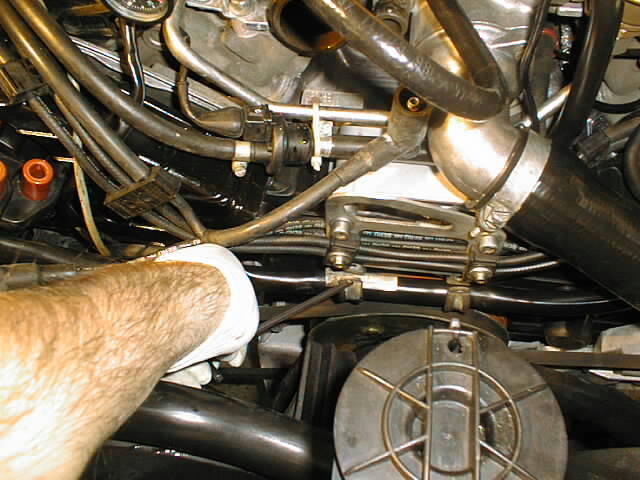
 6) center of
the picture is the wire to the AC clutch (RED connector) which
should be un hooked. (and cleaned!!!) . Also you can see how the
wiring harness can be lifted up and out of the way.
6) center of
the picture is the wire to the AC clutch (RED connector) which
should be un hooked. (and cleaned!!!) . Also you can see how the
wiring harness can be lifted up and out of the way.
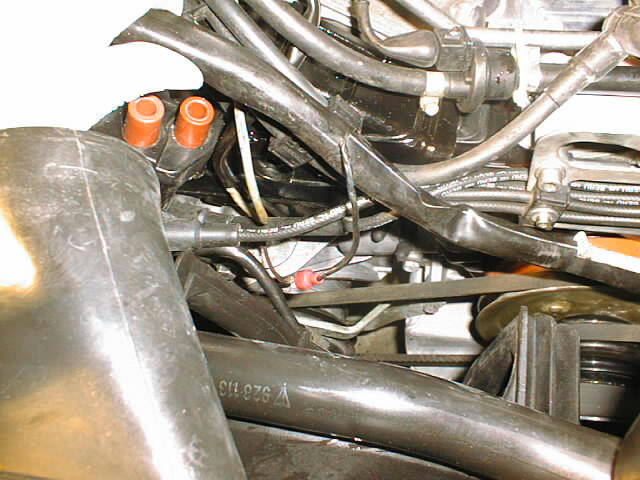
 7) you MAY or
MAY NOT have to remove the distributor. I found the timing belt
cover was just too tight of a squeeze on the radiator cooling fan
housing to come out easily with the distributor attatched.......
3 bolts.....8mm i believe. Note the plug wires etc. ...zip tied
out of the way, one more free hand!.
7) you MAY or
MAY NOT have to remove the distributor. I found the timing belt
cover was just too tight of a squeeze on the radiator cooling fan
housing to come out easily with the distributor attatched.......
3 bolts.....8mm i believe. Note the plug wires etc. ...zip tied
out of the way, one more free hand!.
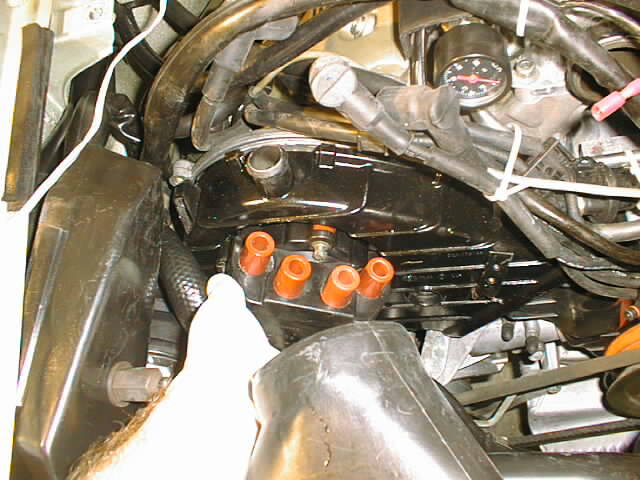
 ...just
a shot of the socket on the dist. bolts. they are some what tough
to access.
...just
a shot of the socket on the dist. bolts. they are some what tough
to access.
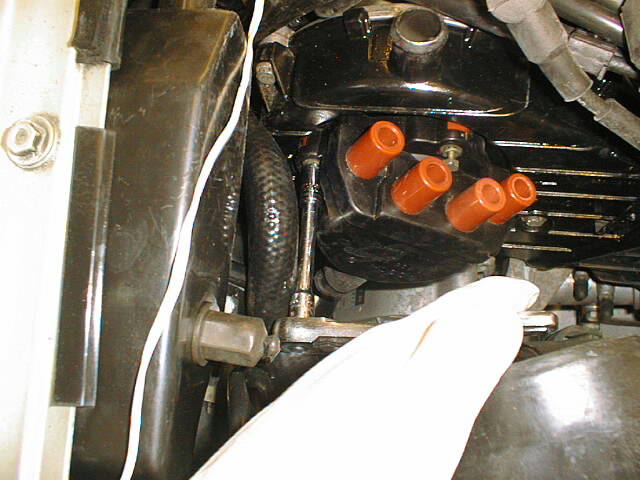
 a shot
of the cover removed and the whole reason i had to do this
job....the timing belt tension warning wire wasn't hooked up
(gold connection in center of picture)! this created an
UN-POWERED condition in the circuit thus triggering the warning
exactly 3 minutes after EVERY start. Removing one bolt on the
center timing belt cover and some manipulation of a few fingers
and i got it back on again...problem solved!!!!!!
a shot
of the cover removed and the whole reason i had to do this
job....the timing belt tension warning wire wasn't hooked up
(gold connection in center of picture)! this created an
UN-POWERED condition in the circuit thus triggering the warning
exactly 3 minutes after EVERY start. Removing one bolt on the
center timing belt cover and some manipulation of a few fingers
and i got it back on again...problem solved!!!!!!
 a nice shot of
the room i had to work with once the items listed above were
removed and secured out of the way.
a nice shot of
the room i had to work with once the items listed above were
removed and secured out of the way.
BELT TESNION IS MEASURED AT 0' TDC ONLY!!!!......................
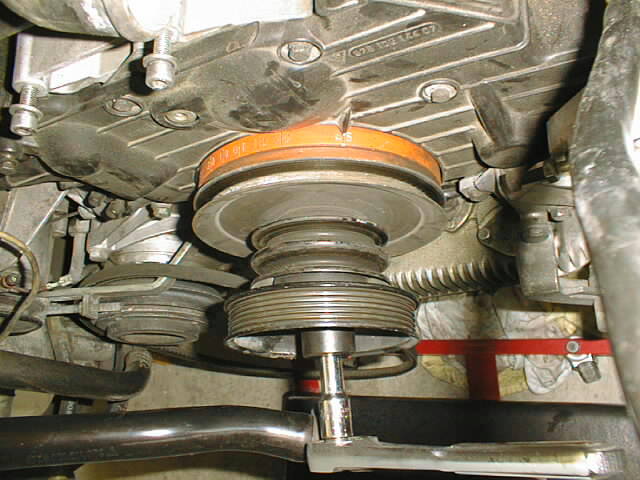 wrench on
crank pulley.........pulling through CW
to 0 'TDC (45' is shown in this
picture)
wrench on
crank pulley.........pulling through CW
to 0 'TDC (45' is shown in this
picture)
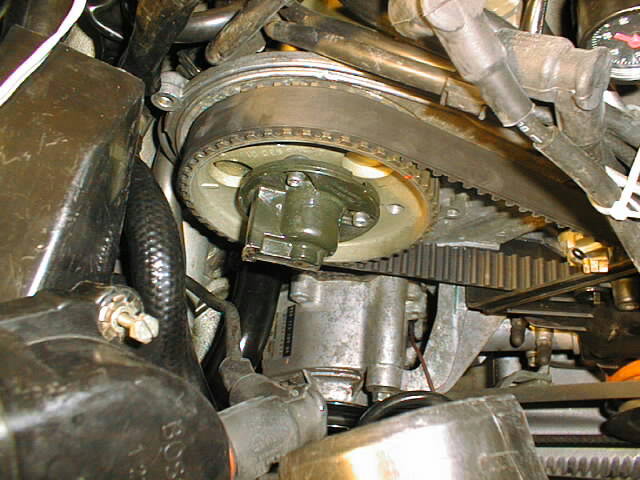
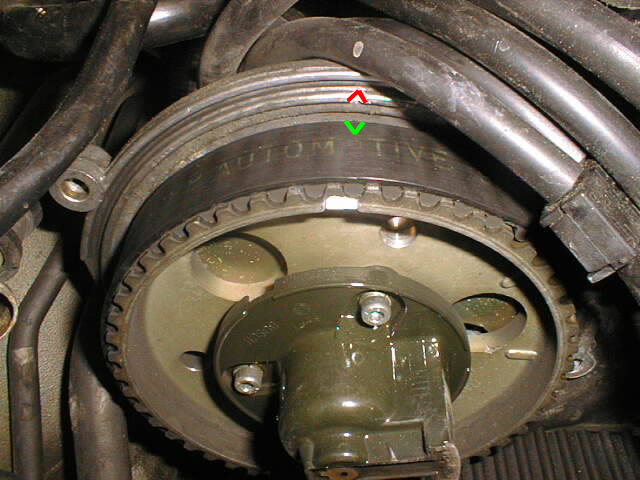 at TDC
on the crank you should be able to see that the timing notch on
the back of your cam sprocket (hidden ,but
GREEN in this picture) and cam backing plate(shown in RED)all line up. ...this is when
you take your belt reading!
at TDC
on the crank you should be able to see that the timing notch on
the back of your cam sprocket (hidden ,but
GREEN in this picture) and cam backing plate(shown in RED)all line up. ...this is when
you take your belt reading!
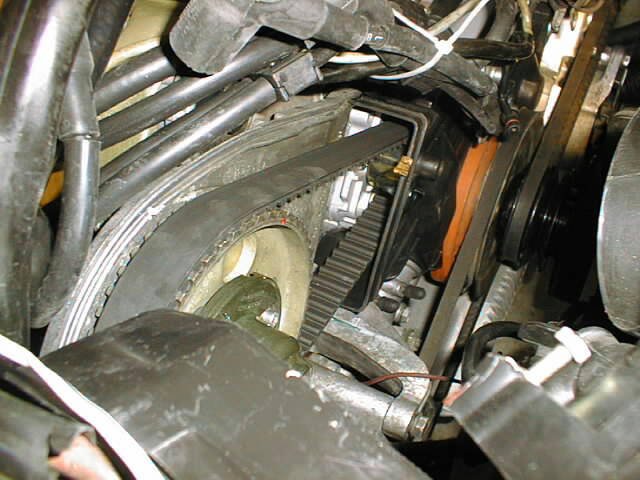
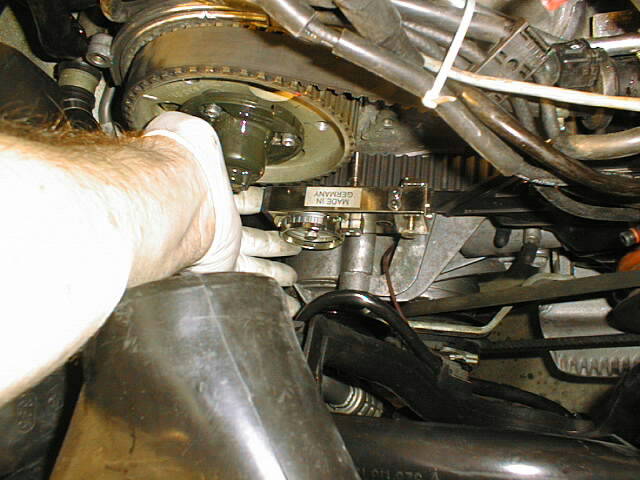 ABOVE:
Placing the "official" timing belt tool on the belt.
There is NOT much room to work with here. (Could you do it with
the radiator hose in the way???)You will find the tool will only
fit on 1 or 2 teeth of the belt because of the space
involved.....the right side of the tool will almost run up
against the center T-Belt cover. (note in this picture the cam
sprockets are NOT at '0 TDC"...it is referencing appx tool
placement only)
ABOVE:
Placing the "official" timing belt tool on the belt.
There is NOT much room to work with here. (Could you do it with
the radiator hose in the way???)You will find the tool will only
fit on 1 or 2 teeth of the belt because of the space
involved.....the right side of the tool will almost run up
against the center T-Belt cover. (note in this picture the cam
sprockets are NOT at '0 TDC"...it is referencing appx tool
placement only)
Wally Plumley of 928 Specialists has a great write up on the 928owners club page on a timing belt change as well as some good details on how to use the official factory tool (click the link above to go)
Some quick tips....
BE SURE TO CALIBRATE THE FACTORY TOOL with the CALIBRATION BAR. (4.0)......
USE A CONSISTANT PROCEDURE WITH THE FACTORY TOOL TO GET A CONSISTANT READING....
THE ENGINE MUST BE AT " 0 TDC" WHEN MAKING BELT TENSION READINGS.....
THE ENGINE MUST ONLY BE ROTATED CW to TDC EACH TIME.......
TURNING THE ADJUSTMENT SCREW ON THE TENSIONER CLOCKWISE TIGHTENS THE BELT....
DONT FORGET TO SET THE LOCKING NUT ON THE TENSIONER ADJUSTMENT BOLT WHEN DONE...
ABOVE ALL!!!! DO NOT....DO NOT , JUST TIGHTEN THE BELT UNTIL THE WARNING DISAPPEARS!!!!!!!!!!
.....after you take a few readings, rotate the engine through 2 revolutions of the crank to TDC again and repeat the measurements (ONLY ROTATE THE ENGINE CW...use a 27mm socket on the crank pulley bolt and a cheater bar to help overcome compression, unless you remove the spark plugs)...you are looking for constistency in the readings you get each time. On my car an 87$4 the values are 5.0-5.3 for a properly tensioned belt.
When using the FACTORY tool, I found it to be VERY sensitive to twisting of the belt. If you twist the tool on the belt when making the measurement it will be slightly different each time. You also dont want to let the tool rest on the air pump direcltly below it. Its is a chore to get a good reading and a consistant one!!! I havent used the Jay Kempf aftermarket belt tool but in this application it would be A LOT easier to use than the factory tool im sure!!! BELOW is a picture of the Jay Kempf aftermarket tension tool in action , the picture is courtesy of John Pirtle's web page (he has a great timing belt write up you should look at also!!) Click the image to get a JAY KEMPF tension tool!!!! You can also rent either timing belt tool from www.928intl.com
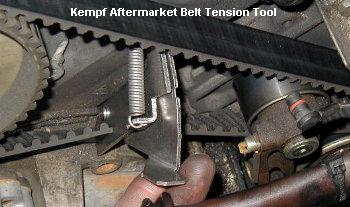 ...great picture John!
After you are satisfied with your belt tension settings you can clean up the front of the motor a bit, double check things and "button" it all back up...basically just a reversal of the procedure. You can now drive around with some peace of mind knowing you have atleast checked the health and the tesnion of your timing belt! FYI...the engine doesnt have to be at redline for a belt to break or slip...it can happen just sitting at a stop sign!!
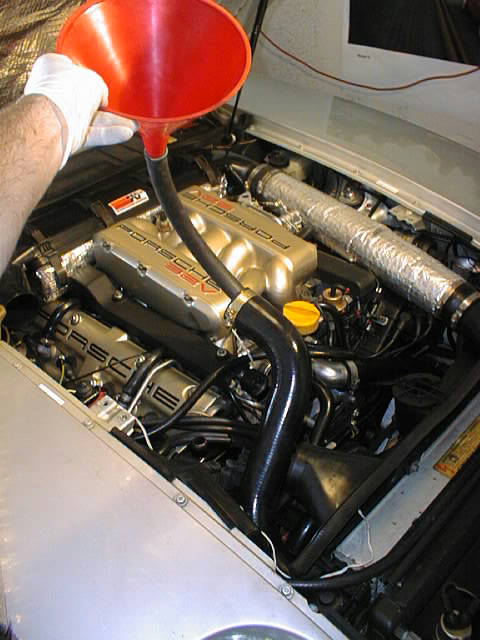 All
back together....this shows how i went about filling the radiator
again. To avoid spills i used a small hose and placed it down in
the larger one. Once full i reconnected the hose and then filled
the coolant tank. If you drain your coolant be sure to monitor
your engine temp and coolant level after start up....it is VERY
easy to get a bubble in the system that can cause you some
probelms.
All
back together....this shows how i went about filling the radiator
again. To avoid spills i used a small hose and placed it down in
the larger one. Once full i reconnected the hose and then filled
the coolant tank. If you drain your coolant be sure to monitor
your engine temp and coolant level after start up....it is VERY
easy to get a bubble in the system that can cause you some
probelms.
Looks clean doesnt it!!! Amazing what you can accomplish when you install a new timing belt and water pump! CLEAN CLEAN CLEAN!!
 Holding it
like some sort of game fish i just caught!!!! Here is a shot of
the old timing belt, SNIPPED in half...I'm 5'10"
Holding it
like some sort of game fish i just caught!!!! Here is a shot of
the old timing belt, SNIPPED in half...I'm 5'10"
Hope the info helps...get out and CHECK IT!!!!
Tony
Click the logo for parts by....
![]()