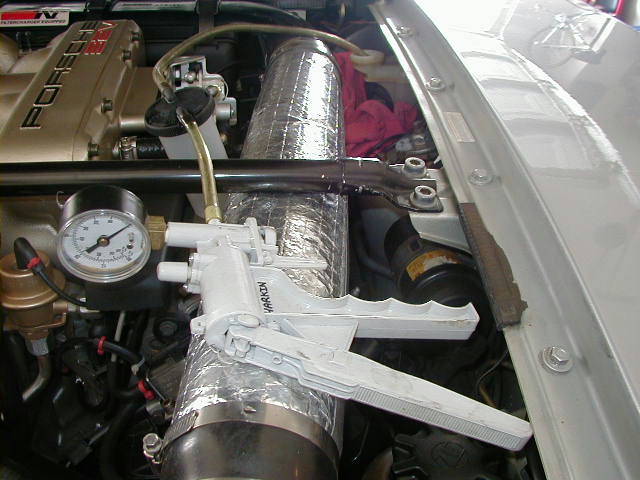
 this shows
the mighty vac, just in case the fluid level got too high. (cool
tubes huh!!!)
this shows
the mighty vac, just in case the fluid level got too high. (cool
tubes huh!!!)BRAKE PAD REPLACEMENT
This page outlines the steps I took to replace my front brake pads. The process is basically the same for the rears.
1)Jack the car, remove the wheel
2) Remove the cap from the brake resivour and place rags around the fill neck. When you push the pistons back into the calipers your fluid level will rise slightly. If it rises too much use a mighty vac to suck some of the access fluid out.
3) spray brake cleaner on the caliper to clean it up a bit before you handle it. Wear a mask and goggles as there may be some brake dust and cleaner flying around.
4) CAREFULLY REMOVE THE BRAKE PAD WEAR SENSORS (if you have them)
5) using a 10mm allen socket i removed the caliper bolts.
6) Since the pads were being replaced i used a wide blade screwdriver and gentley pried the pads off the rotor so that they would clear the rotor lip and could be removed.
7) I gently turned the caliper over and rested it on the wheel hub, being careful to not to stress the brake lines.
8) I removed the pads. Basically you push them in agaisnt the retaining clips and up in one motion and they will pop out. You may find that the dampers will stick to the pistons and the pads.
9) i then took a big C clamp and a scrap of wood and squeezed the pistons back into the calipers. This is when you may spill some brake fluid out of the resivour. (I kept the pads in for this step)
10) with the pistons pushed back i took some brake cleaner and cleaned up the area around them.
11) i took some rubbing alcohol and wiped down the back of the new brake pads, removing any oil and grease. This is in preperation for adding the "anti squeal adhesive" . I used some stuff made by permatex.
12) I followed the directions and placed the adhesive on the BACK (NOT THE PAD SIDE) of the brake pads.
13) Install the pads and then slide the assembly back over the rotor...torque the 2 10mm allen bolts to specs..i then depressed the brake pedal a few times to set the pads on the pistons.
14) reinstall the wheel, cap the fill tank and go for a drive to break them in.
Below are a few pictures I took...
this shows
the mighty vac, just in case the fluid level got too high. (cool
tubes huh!!!)
the pads were
already out in this shot....but, here is a pic of 1 of the 10mm
allen bolts that anchors the caliper. Nasty looking caliper! That
is my next job...a fresh coat of red paint
 since the pads
were being replaced, i left them in and used the c-clamp and a
block of wood on the other side to push the pistons back in the
calipers. This makes room for the new pads.
since the pads
were being replaced, i left them in and used the c-clamp and a
block of wood on the other side to push the pistons back in the
calipers. This makes room for the new pads.
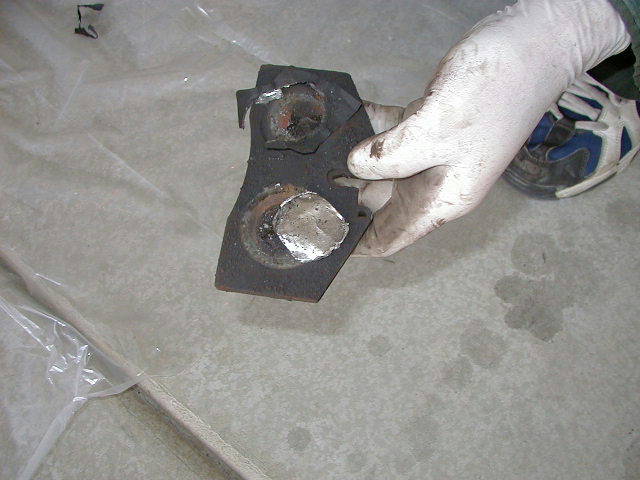
new.....and....old! The PO had by-passed the wear sensors on the front brakes by splicing the two wires together. I knew the pads were due for a change....thats an understatement!!
 this shows
what is left of the old dampers. I used the permatex adehesive,
seen belowas a substitute. So far NO SQUEAKS!!!!
this shows
what is left of the old dampers. I used the permatex adehesive,
seen belowas a substitute. So far NO SQUEAKS!!!!
 this is how
the adhesive "disc brake quiet" was applied..per the
instructions.
this is how
the adhesive "disc brake quiet" was applied..per the
instructions.
So far my brakes are SQUUUUUUUUUUUUEEEEEEEEEEEAAAAAAAALLLLLLLL free!
Click the logo for parts by...
![]()