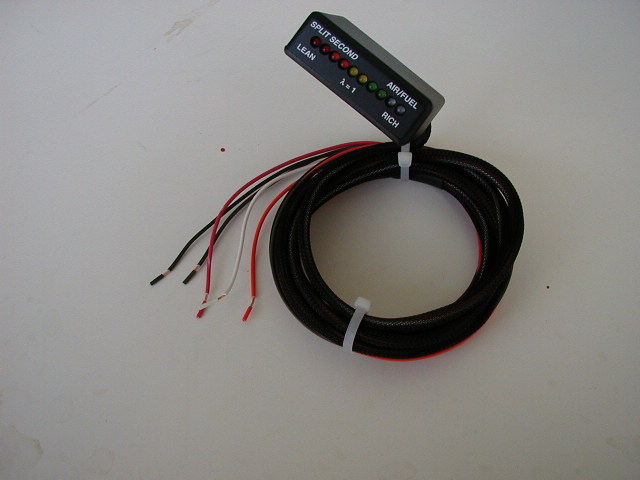
 this is the
meter as it comes out of the box.
this is the
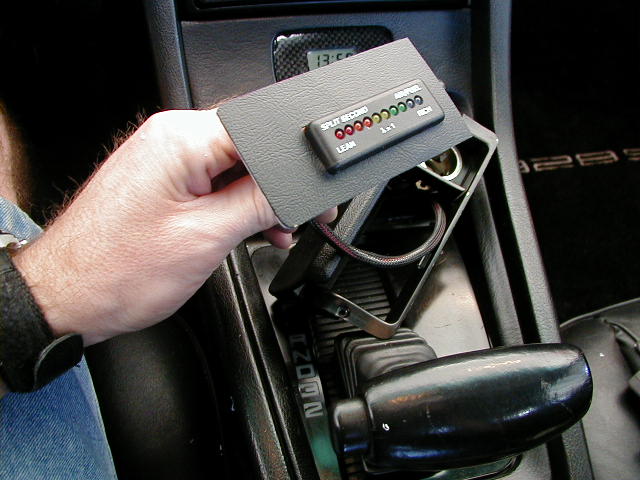
meter as it comes out of the box.ARM 1 Air Fuel Ratio Meter and Installation
I did this installation in conjunction with my fuel pressure gauge on the fuel rail and my adjustable fuel pressure regulator. These 3 items are actually inter-related in the way the work. I adjusted my fuel pressure on the regulator based on ARM indications and by reading the pressure on my gauge!! I got theses parts from www.928gt.com (928specialists) Thanks to Dave R. and Wally P for there input.
Below is the way i did it....actually turned out very clean and stealthy!! Not as "cool" as Dave R's installation behind the "seatbelt warning" in the cener display! (see www.928gt.com under adjustable fuel pressure regulator)
this is the
meter as it comes out of the box.
To wire it, this is what i did as far as connections. I have a 3 wire O2 sensor with a BLACK WHITE WHITE configuration.
#1...... UN HOOK YOUR BATTERY!!!!!!!!!!!!!!
METER ORANGE --------O2 sensor BLACK
METER RED--------------SWITCHED POWER (cig. lighter)
METER BLACK----------GROUND (i used the radios grounding point)
METER BROWN---------CONNECT TO BLACK aka ground (since we dont have a O2 grey wire..per inst.)
METER WHITE-----------I have mine currently un hooked, the light display defaults to BRIGHT in this scenario..to have dimmer control connect it to any of the "light" wires. ie clock..cig lighter?_
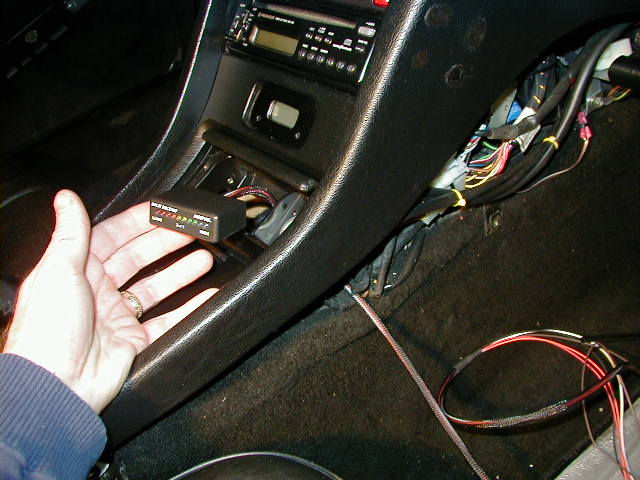 I mounted
mine in the ashtray by using some sheet plastic and epoxy..see
below. Key here is to route the wires so they dont interfere with
the shift plate when it goes to "P". there is plenty of
wire for any type of installation but always CUT LONG!!
I mounted
mine in the ashtray by using some sheet plastic and epoxy..see
below. Key here is to route the wires so they dont interfere with
the shift plate when it goes to "P". there is plenty of
wire for any type of installation but always CUT LONG!!
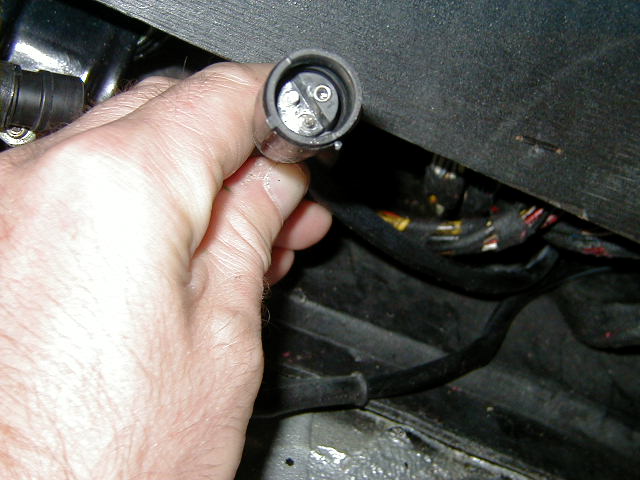
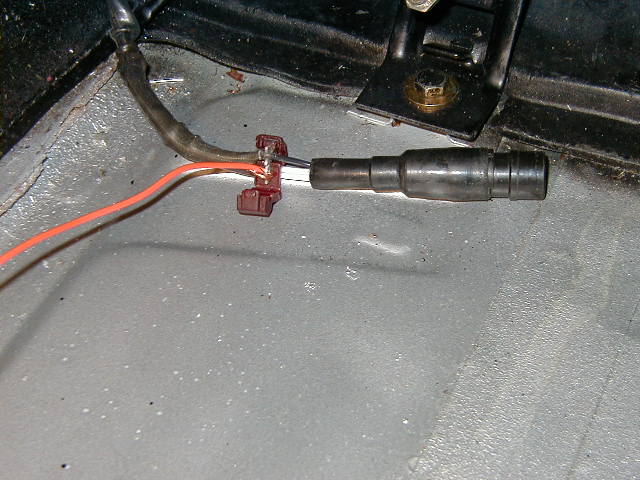
 passenger
footwell...forward left side..behind lower wooden fuse panel
door(need to remove the lower half) you will find the O2 sensor
wire leading from the drive train tunnel. Follow it and unhook it
from the other half. When you do this look at the PIN
connectors...mine were covered completely in a white chalky
substance..CORROSION!!!!!!
passenger
footwell...forward left side..behind lower wooden fuse panel
door(need to remove the lower half) you will find the O2 sensor
wire leading from the drive train tunnel. Follow it and unhook it
from the other half. When you do this look at the PIN
connectors...mine were covered completely in a white chalky
substance..CORROSION!!!!!!
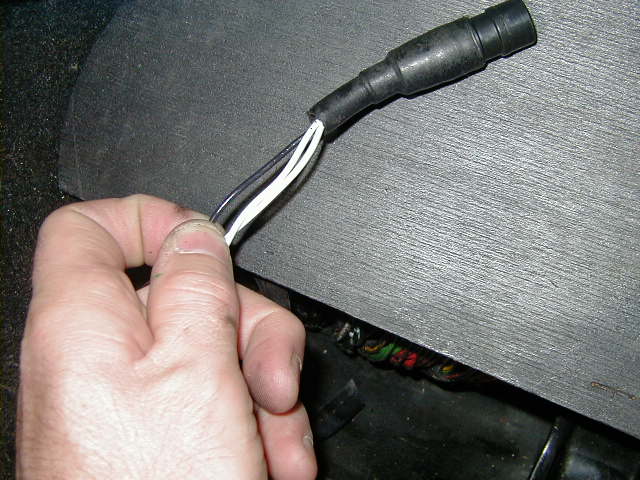
 two
"male" pins corroded!!
two
"male" pins corroded!!
 crimping
METER ORANGE to O2 SENSOR BLACK per instructions...the meter kit
comes with red splicers
crimping
METER ORANGE to O2 SENSOR BLACK per instructions...the meter kit
comes with red splicers
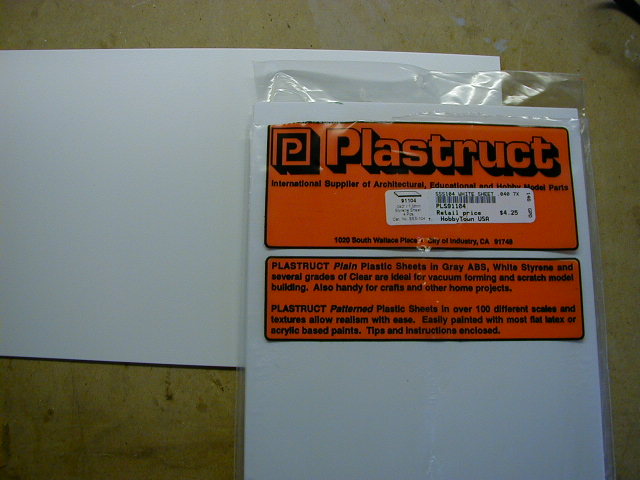 from
HOBBYTOWN...sheet plastic... .040" thick. I used plastic as
it was easier to work with and to "shave" for a snug
fit. I used this to make a face plate to mount the ARM 1 in the
ashtray
from
HOBBYTOWN...sheet plastic... .040" thick. I used plastic as
it was easier to work with and to "shave" for a snug
fit. I used this to make a face plate to mount the ARM 1 in the
ashtray
 tracing
the opening onto the plastic. This will get you a rough
fit...from here cut/sand as needed to get the fit you want.
tracing
the opening onto the plastic. This will get you a rough
fit...from here cut/sand as needed to get the fit you want.
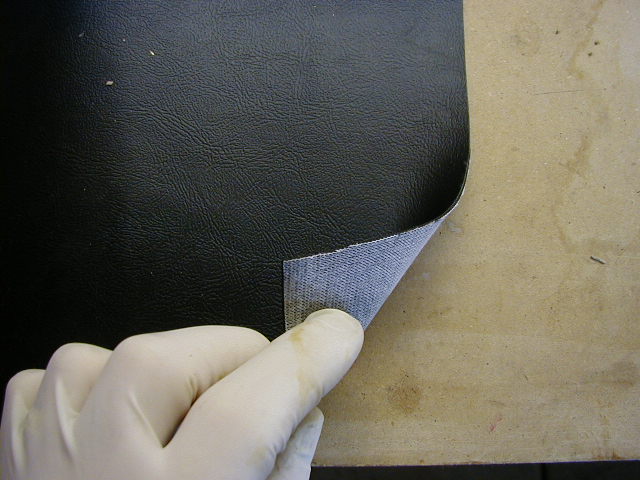 using extra
vinyl that was left over from covering my doors i used epoxy to
stick it to the face of the plastic part i just cut out.
using extra
vinyl that was left over from covering my doors i used epoxy to
stick it to the face of the plastic part i just cut out.
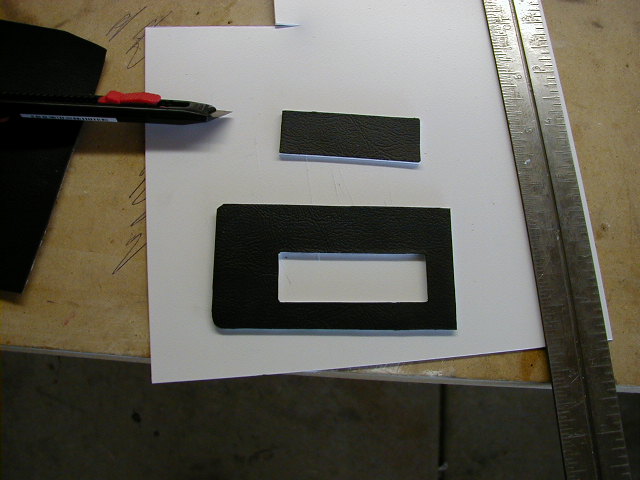 once cured, i
traced the out line of the ARM 1 on the back (measure short..and
cut short) then used a SHARP EXACTO KNIFE to slice through the
plastic and covering, it may take a few passes to cut through the
thick plastic but take your time and WATCH YOUR FINGERS!!!
once cured, i
traced the out line of the ARM 1 on the back (measure short..and
cut short) then used a SHARP EXACTO KNIFE to slice through the
plastic and covering, it may take a few passes to cut through the
thick plastic but take your time and WATCH YOUR FINGERS!!!
 with the
hole cut, slide the ARM in and test for fit. If you cut short, it
wont!! just keep shaving it off until it FIRMLY slides in. The
tight fit is all that holds mine in...works PERFECTLY!!
with the
hole cut, slide the ARM in and test for fit. If you cut short, it
wont!! just keep shaving it off until it FIRMLY slides in. The
tight fit is all that holds mine in...works PERFECTLY!!
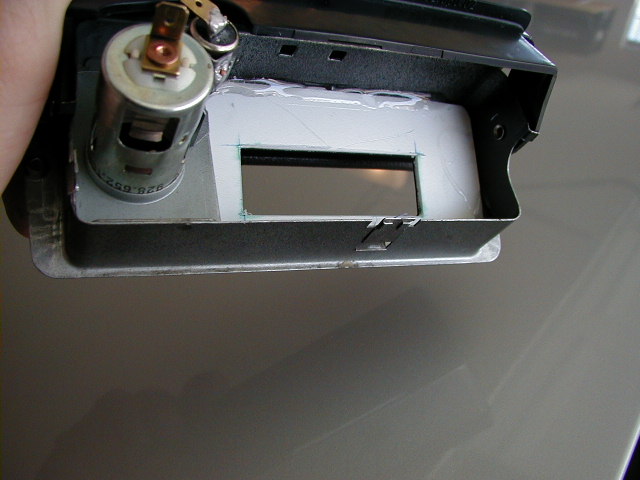 with the
ashtray removed and stored away i used epoxy to secure the
plastic to the ashtray frame. The epoxy is in an area where if i
were to reinstall the ashray you wouldnt see any evidence of it
being there. Allow it to cure. Also note the epoxy was placed on
the BACK side AFTER the plastic was in place!
with the
ashtray removed and stored away i used epoxy to secure the
plastic to the ashtray frame. The epoxy is in an area where if i
were to reinstall the ashray you wouldnt see any evidence of it
being there. Allow it to cure. Also note the epoxy was placed on
the BACK side AFTER the plastic was in place!
 The finished set
up!! Slide the ARM 1 back in the plastic....route the wire
carefully behind...secure the ashtray frame back in the center
console!! Hook up the battery and turn on your key! DONE!!!!
The finished set
up!! Slide the ARM 1 back in the plastic....route the wire
carefully behind...secure the ashtray frame back in the center
console!! Hook up the battery and turn on your key! DONE!!!!
Below, hopefully i can explain the indications i get on my ARM during every day "shark" driving : )
Once again, THIS IS WHAT I SEE ON MY CAR!!! you may be slightly different??
At first turn of the key the meter lights up one bulb in the center. After the car starts it seems to stay there for a little while until the O2 sensor comes up to operating temp. After the car warms up a bit it seems to go lean for a few secs then will start to hunt as the mixture is constantly adjusted. It varies both in the speed and quite often in the range of the band that it hunts. I find that after the motor/ O2 sensor is well warmed up it pretty much hunts in the region seen below....sometimes just stopping on one spot for a second or two.....then hunting again..

The region you see above also represents the general area at which it hunts during a constant cruise like condtion..ie throttle held steady. Every now and then it may go one "bulb" beyond the red lines i have shown, but a good majority of the time it seems to hunt in the region shown. Basically what is happening is the O2 sensor is constantly feeding the LH Brain information about the air fuel mixture and the brain intern alters the fuel delivery as needed...the O2 sensor is "IN THE LOOP" so to speak.
From a constant cruise......letting off the gas will show an almost IMEDIATE jump to rich as the air has been immediately cut off by the throttle...the fuel flow in essence hasnt had time to be adjusted yet. A split second later the O2 sensor tells the brain and it adjusts the mixture again, eventually showing a full lean condtion as you coast down towards a stop light for example.
From a constant cruise....slowly, but firmly accelerating (NOT FOOT TO THE FLOOR...WOT type stuff) the meter will instantly show a lean indication (depending on the rate of throttle application) for the same type of reasons as above. For a split second the throttle is opening and O2 sensor hasnt had the chance to relay what has happened ....thus it hasnt told the LH brain it needs more fuel yet. However, a split second later the fuel is added and then once again is continuously adjusted by the LH Brain. The meter should soon begin to hunt around again as you keep applying the throttle. Eventually it settles in the region shown above. Once again, the O2 sensor is IN THE LOOP.
Now the fun part.....
A FULL..foot to the floor...BWAAAAAAAHHHH producing...WOT (wide open throttle) application will show an instant lean reading....usually MAX!! Now how all this works from here is beyond me, but the LH brain basically says "HEY!!! forget the O2 sensor, im giving you lots of gas..and NOW!!! It takes the O2 sensor out of the loop and resorts to a "MAP" it has in a chip somewhere (how is that for basic terms!!!) After the momentary full lean indication i see it jump to FULL rich, it stays there for a sec...hunts around for a sec on the rich side.....then will begin to settle down on ONE DOT. There it stays for as long as the "pedal is to the metal" ...perhaps flashing a dot on either side now and then.
ASSUMING EVERYTHING ELSE IS WORKING AS ADVERTISED, this is where your fuel pressure comes into play!! Not enough and it will settle on the lean side....to much it will be on the rich side. Per the instuctions with the ARM 1 the best mixture for "driveability and economy as well as emissions" is reached in the middle (yellow). what they call a stoichiometric condition, an AIR FUEL RATIO of 14.7 : 1 . FYI....a fellow 928 owner found on the dyno that the best power in HIS car was made just on the rich side of the middle. YMMV
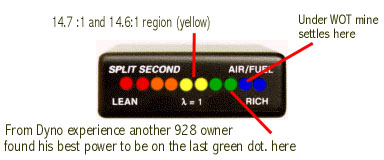
My car currently is running on the rich side, which is safe situation. YOU DONT WANT TO BE LEAN!!!! From here i plan on either doing a few test runs via the "asstech 2000" or getting some dyno time to see which region tends to give me the best power output. If it is anything like an airplane, it should be just on the rich side of the "yellow"...aka..the GREEN DOTS just as the other owner found.
I hope this info gives you a basic idea of what you may see when you install your ARM 1. I noticed recently that a few people have installed them and have asked each other "what did yours show etc etc".
This is what mine shows....BUT...all cars are different so your indications may vary. if you see anything in ERROR..please let me know.
Thanks for looking!
Tony