Tom Tweed's Boatbuilding Pages
Page 5- Interior Coating and Decking
There was much work to be done on the interior, now that the hull was turned right-side up. A couple of "gotcha's" became evident right away. First, I wished I had been much more fastidious in checking the inside of the hull for "runs, drips and errors" while laminating the cedar. Much sanding and grinding could have been saved later by ducking under the hull after each piece was glued and wiping away or at least smoothing over any excess adhesive that squeezed out or dripped down, etc.
Secondly, with the hull upright, it was now necessary to scramble up and over the rail each time you went in or out of it. Forgetting a tool, or needing another batch of glue, anything like that, necessitated another trip up and down a ladder. I would do this about a billion times before this project was through.
Finally, and most importantly, we had only recently realized how caustic the uncured epoxy resin (and especially the catalyst) could be. We had not worked as cleanly as we could have to this point, often not wearing gloves and respirators, ignoring the toxic hazard of the chemicals. My father had become sensitized to it to the point where he would break out in a rash if he even touched the raw resin, or even smelled the catalyst. He was forced to withdraw from working with the glue completely at this point, because of allergic reactions. He busied himself with the metalworking, though, something with which he was much more expert than I, anyway, fabricating the chainplates and water and fuel tanks out of stainless steel.
Meanwhile, I worked on coating the entire interior surface of the hull with three coasts of epoxy, to totally encapsulate the wood and stabilize it from the shrinking and swelling effects of moisture forever. This is a key ingredient for the longevity of this type of wood construction. The epoxy was followed with two coats of white epoxy paint, then I started fabricating the deck beams.
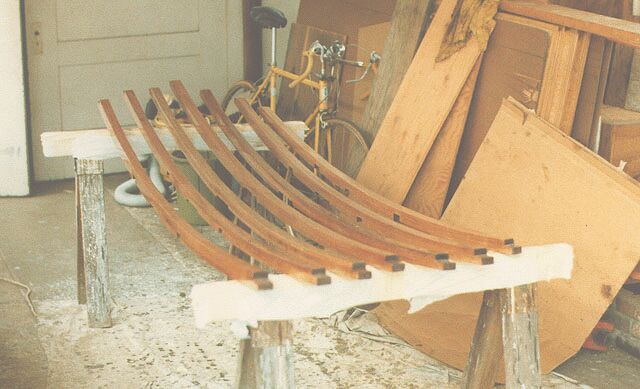
The deck beams were laminated from mahogany in three pieces bent over a jig, and also coated with epoxy. A sheer clamp was fabricated the same way, and attached to the hull railing, then the beams were joined to it with half-lap joints, and the framing topped with two layers of plywood decking, glued and bronze-nailed down to the beams and clamp. The design called for a flush deck in the center section of the hull, with a recessed or dropped deck and 4" bulwarks in the fore and aft sections.
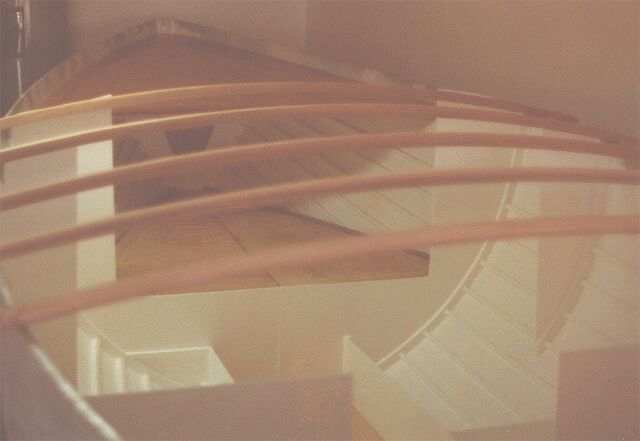
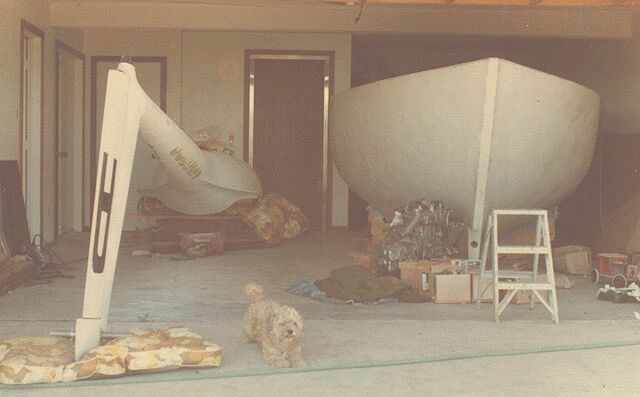
In this photo above, the foredeck section has been framed in and sheeted, and the center deck beams have just been laminated but not yet joined- they are just sitting on the rails. The V-berth bottoms in the forward section of the cabin have been fitted, though. In the picture below, Harmon the dog takes center stage again, and to the left is the fuselage of a sailplane that my Dad was repairing. It was a two-place (side-by-side) Italian fiberglass Caproni that he had picked up cheap from a guy who had landed it gear-up and scared the daylights out of himself. He just wanted to get rid of it. Here it is turned upside-down and the belly damage is being repaired. To the right can be seen the engine for the boat, still on the crate, a 14-hp Yanmar diesel that we had picked up on sale. The deadwood has been bored for the propeller shaft log as well, and you can see the hole just to the left of the ubiquitous ladder.
While you have been whizzing through these pages reading about it and looking at the pics, in reality, to get to this point had taken about two years of part-time work, mostly weekends, evenings and days off, by both my father and I. At about this time, life threw us one of those curveballs that are always coming down the pipe, and my father was recruited by United Technology to a job on the east coast that was too sweet to refuse. He had to relocate for five years, minimum, and I was going to have to finish the project myself, as well as find a different place to work on it, as he was selling the house.
To the NEXT PAGE
Back to HOME