Tom Tweed's Boatbuilding Pages
Page 3- Coating and Keel Mockup
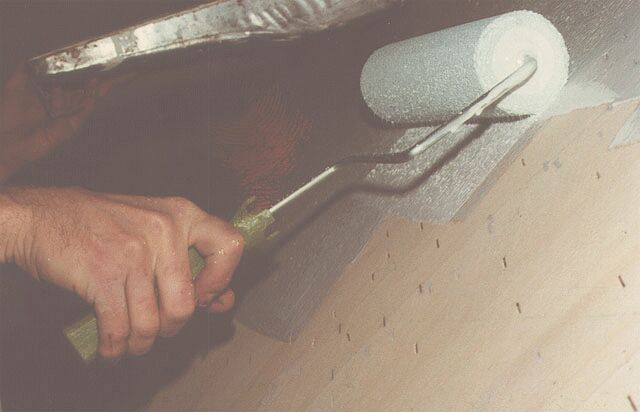
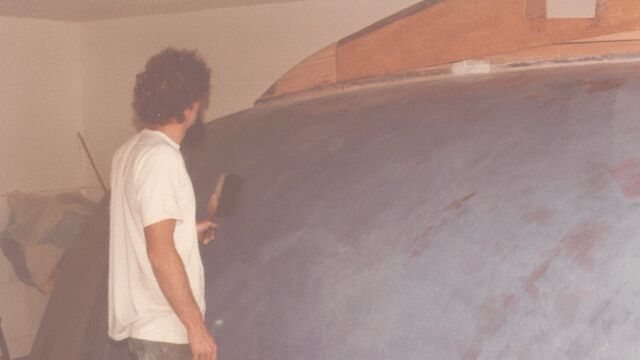
Once the cold-molding was finished, the W.E.S.T. System epoxy which was used as an adhesive (in a thickened state) to bond the layers of the hull together was also used to coat the hull surface. First some sanding and shaping was done to fair the hull surface and take out as many bumps and ridges or waviness as could be found, and then a layer of unthickened but pigmented epoxy was rolled onto the raw wood and allowed to cure. In the interest of saving labor (and future maintenance), I had opted NOT to try to finish the hull bright (or "clear" or "natural" as it is also called) above the waterline, but to go with a painted finish for the hull everywhere.
The staples then did not have to be removed as they were bronze and would not rust, but they did require filling with a thickened epoxy putty mixture where they were sunken into the wood surface slightly. This filling and sanding and recoating went on for quite awhile, using alternating colors of pigment in the layers so that sanding depth would be revealed easily. Putty was colored differently and thickened with light microballoon fillers as well, so that feathering and sanding would be easier.
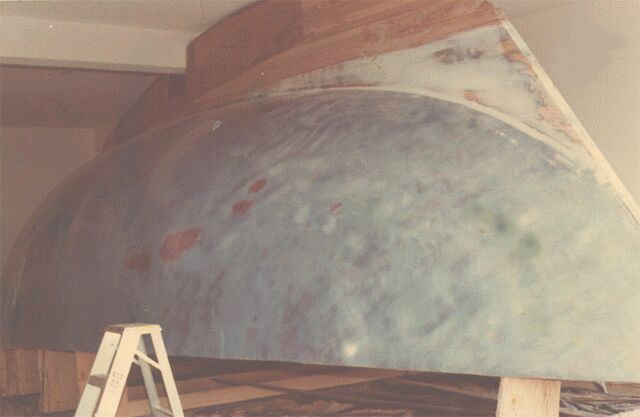
An interesting aspect to the picture above is the accomodation for the large laminated beam in the middle of the garage that was necessary when mocking up the keel and deadwood. A large notch had to be cut in the plug for the lead keel mold so that it could be used to fit the deadwood while the hull was still upside down. After the deadwood was rough shaped, it was removed, since we would never get the hull out of the garage if it was attached! At this point, the second layer of epoxy has been applied (with a blue tint), and a lot of filling and sanding has gone on to prepare for the final epoxy coat. Another view of the front section of the keel mockup is below.
The keel plug (the piece with the big notch in it on the upper right) has already been used at this point to cast a female cement mold to be used in casting the keel out of molten lead later on. Once the cement mold had set up, we pulled the plug out of it and used it for rough-shaping the keelson and deadwood pieces which would ultimately surround the cast lead keel.
To the NEXT PAGE
Back to HOME