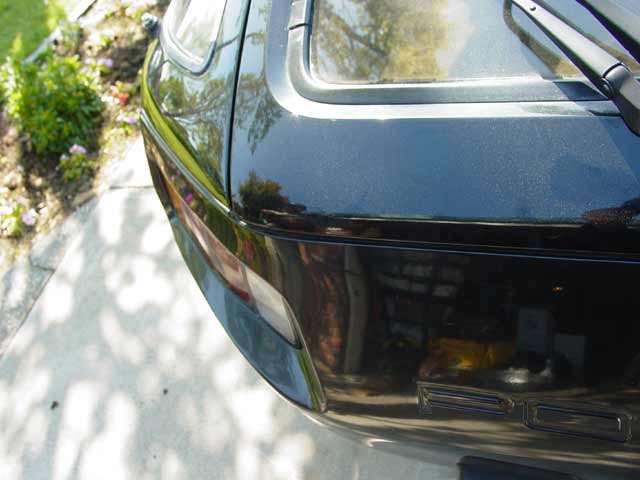
Kind of a light work schedule this weekend. My main priority was to get the hatch aligned properly. If you go back and look at the pics of the rear of the car at Round One - The Battle Of The Drool and examine them closely, you can see where the hatch sticks out a bit to the rear, and looks like it's unlatched even though it's latched. This proved to be two different but related issues. The hinges needed to be adjusted, and the latch was worn on the plastic latch, apparently due to the misalignment. The hatch being too far back prevented the latch from engaging fully, stressing and wearing the plastic. So, with a friend to help keep pressure in the right directions and watch the paint, I loosened the hatch hinges one at a time and moved them as far forward as I could. Simple, 5 minutes, and the hatch now lined up perfectly. It still sat too high when latched, but I could tell that if it just latched a little lower it would line up perfectly.
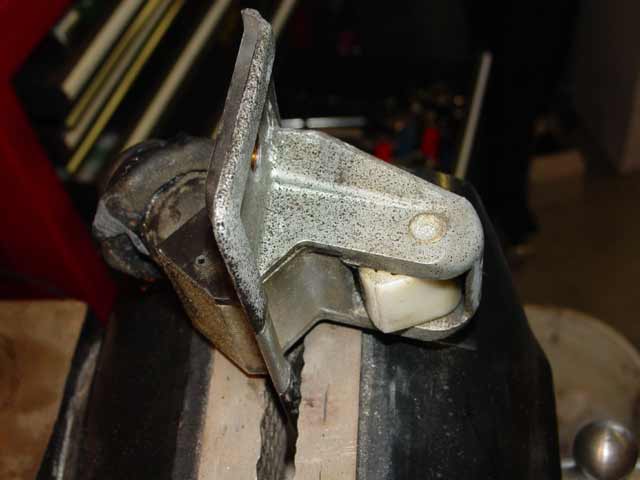
I had picked up a replacement latch, just the inner plastic piece, from Devek at the time the alignment was done, but I had been tied up with higher-priority projects. Below I have the latch assembly loosely in the vise for a beauty shot. The large pin, the one that is at the pivot of the white plastic latch, had to be driven out fron the other side using a drift punch about 2mm diameter to prevent binding and cutting the swaged end of the pin off during the process. On the other side of the mounting flange is a roll pin, visible in the black painted area. There is one on each side, and they must be driven into the assembly or drilled if you can't find a way to grip them and pull them out.
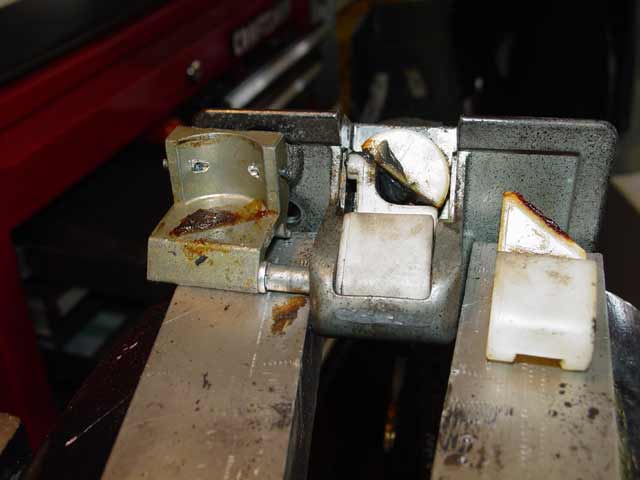
Once the small roll pins are out, the cover plate shown at left in the picture below comes out. In fact, the whole assembly tends to want to fly apart at this point, so be careful! Nothing goes very far, and there are only a couple of pieces, just keep an eye on things. If you drive the roll pins in or drill, don't go too far because the pins or the drill bit will bite into the round plastic piece visible in the center of the pic below. That's what happened with mine, but fortunately there were only some slight gouges in the plastic. You can see where I had to deburr the peice on the left after pushing the roll pins out. In this pic, the new latch piece is installed, and the original piece is at the right. They look a bit different, but the new part works perfectly. I greased it up and proceeded to fight it together.
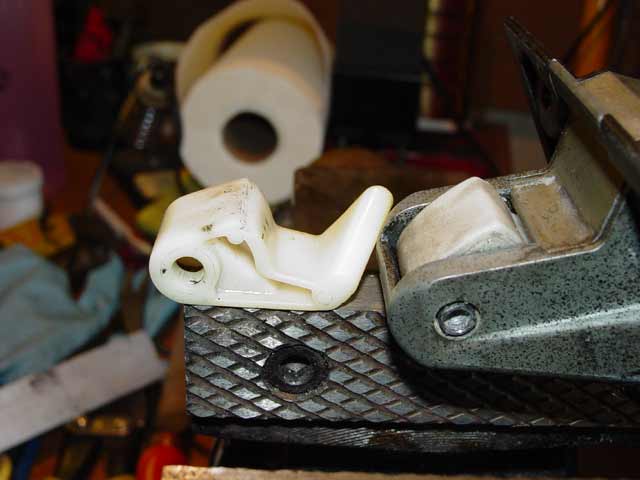
And here is the latch fully assembled, the only step remaining is to swage the end of the large pin back down. This pic gives a somewhat better view of the wear on the old latch:
The results were fabulous. I've never considered myself a pro at aligning body panels, but I got lucky and this job just fell into place. Now the hatch is perfectly centered in the opening, and the gap is exactly as wide as the rubber piping that goes around the edge of the bumper.
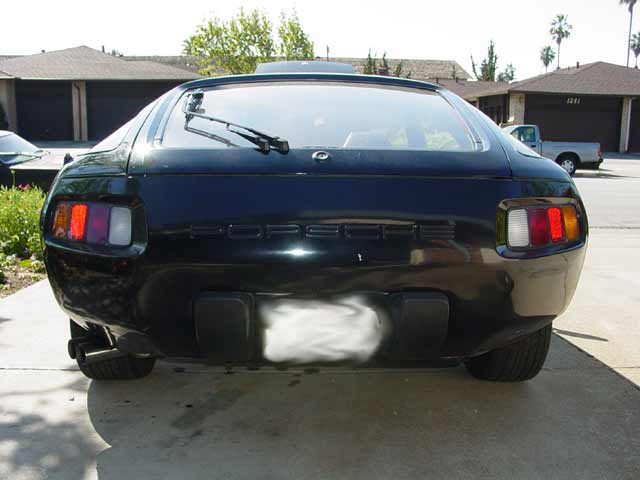
It lines up now regardless of the angle at which you view it. I'm very happy with the way it turned out! Yeah the car is dirty, but I'll get to that soon enough.

I also replaced the inner front fender panels with new parts from Devek. I cleaned out the old foam and installed 11/4" air conditioner weatherstip foam that I picked up at Orchard Supply Hardware for a few bucks. My old ones were cracked, and several bolts had pulled through. With this, I had conquered all but one of the strange clunking noises coming from the front!
I'm pretty sure that the remaining noise is the cruise servo or vac reservoir. I'll dig in there this weekend and find out.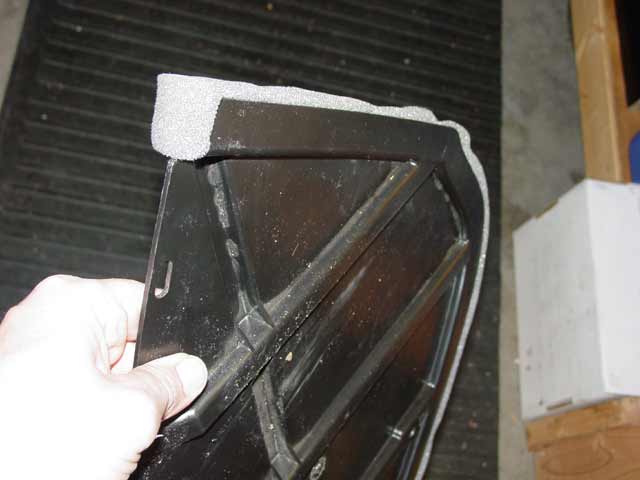
Also during this session:
- Identified parts needed to anchor battery properly
- Replaced missing gasket in RF sidemarker, between plastic and fender
- Installed Jump-Start terminal covers
- Resolved an issue with the alignment of the trim on the hatch
- Tested my fan circuit... the fan never comes on. It comes on if the key is on and I short the temp switch. Either the switch is bad or I'm never getting it hot enough to activate. Will get a thermocouple for my DMM and investigate further. (Done)
- Torqued pan gasket bolts.
- Discovered that my high pressure PS hose is no longer seeping, it's dripping. Parts on order. (Fixed)