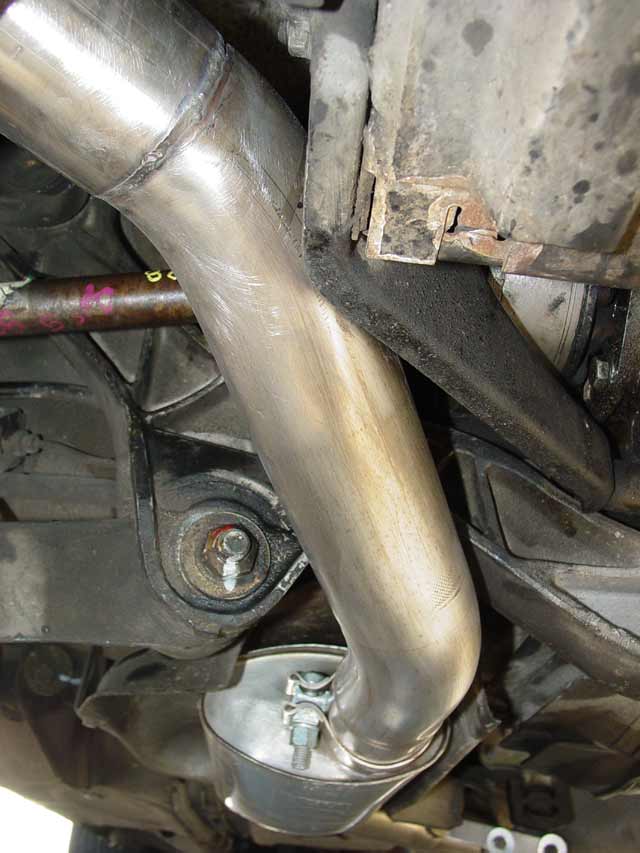
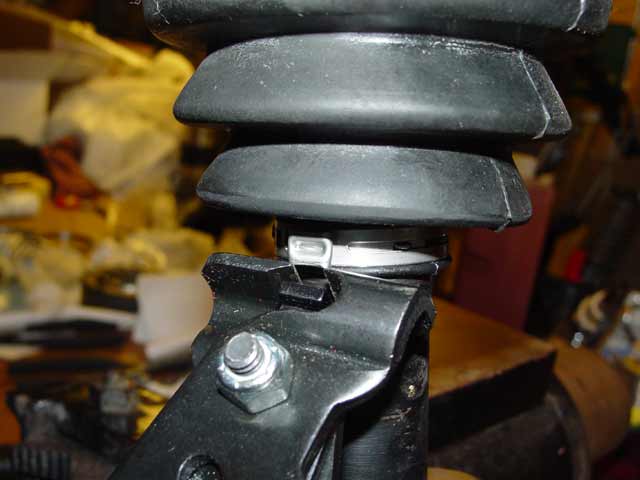
It's been an interesting week. I was able to get the Borla rear muffler welded up; Steve over at Performance Fabrication in Belmont did a fabulous job. I had asked him to use the original hanger with its heat shield and he was able to do so by simply welding a small stainless tab onto the pipe ahead of the muffler. He also did a fabulous job of cross-bracing the tip. As you can see in the first pic, the pipe had to be tucked in above a strengthening rib stamped into the battery box bracket. The original bend as shipped from Borla would have required cutting this rib off and it probably would have rubbed either there, between the corner of the muffler and the battery box further aft, or the droplink would have rubbed on the other side of the muffler. Steve did a great job of making it all fit and look right. I have to say though, it's a good thing the muffler wasn't 1/2" wider.

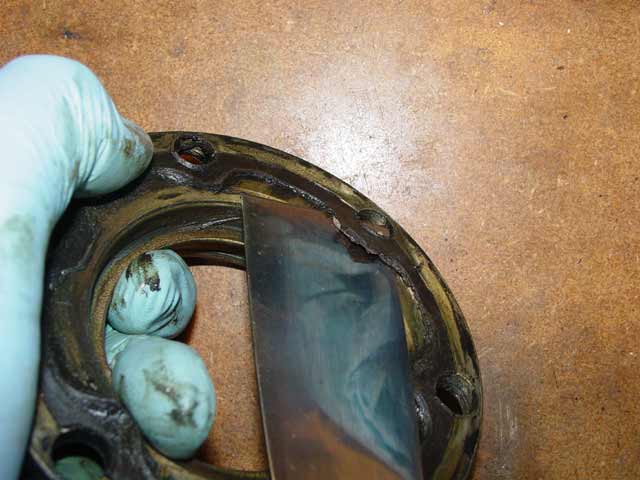
The CV boots that I had ordered showed up and they were the wrong ones. They were ordered over the phone as "for a 5/78 5 speed" which came up part number 928.332.922.01. They were about 55mm on the large end and I could see there was no way they would fit my flanges. A quick caliper around the outside of the old boot indicated 75mm, from which I estimated the flange OD to be 70mm. I returned those and had to go to another source to find the other "correct" part for this car which came up part number 928.332.924.02. I'm not sure how this was arrived at; I see a different part in PET6. They had measured it while I was on the phone and said the ID was around 65mm which sounded like a better match. So, Friday night, home with those after some 80 miles of running around, I began to tear down the halfshaft that I had pulled out of the car 2 weeks prior. As soon as I pulled the clamp and the boot off of one of the flanges I could see that it was the wrong part.
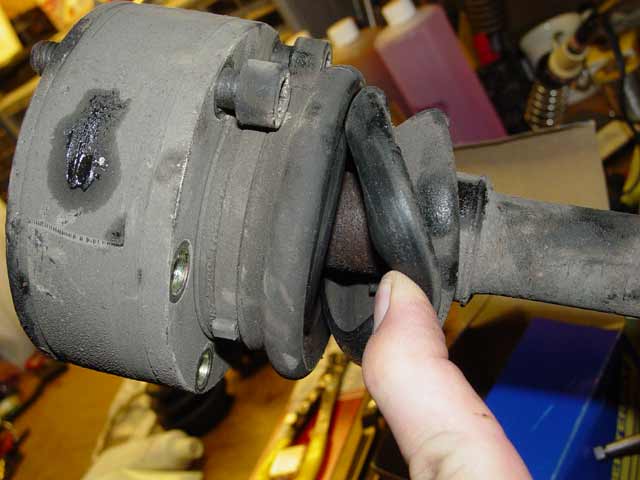
 This larger CV boot had a rib maybe 3-4mm high running around the inside of the large end:
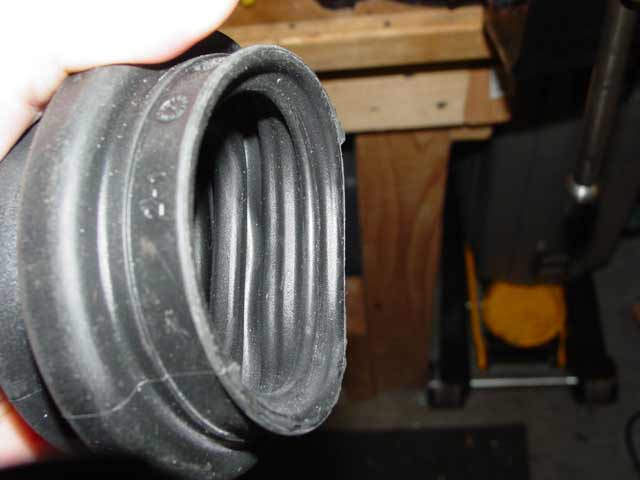
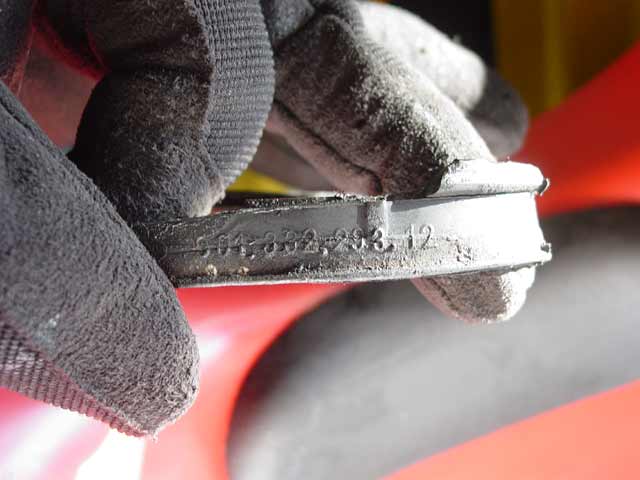
However, I was able to make out the part number on what was left of one of the old boots, 901.332.293.12:
I called PartsHeaven Saturday morning and sure enough, they had them in stock.
 The number is commonly used on 911 cars back as far as 1965, so my best guess is that the flanges must have been replaced... or the "hand assemblers" were grabbing whatever was "at hand". Seems whoever did this did me a favor as these boots seem to be much more readily available.
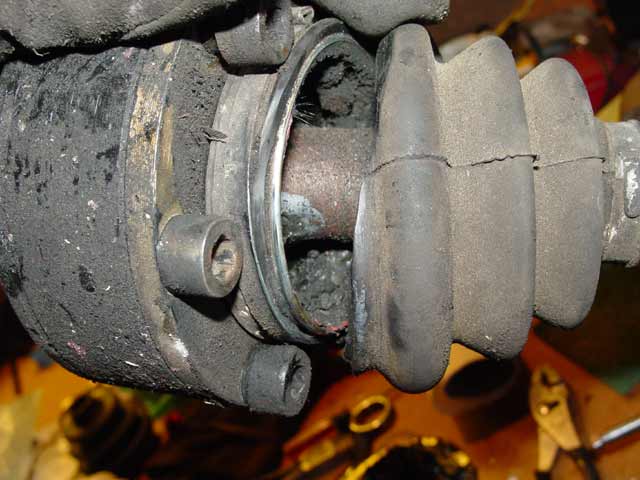
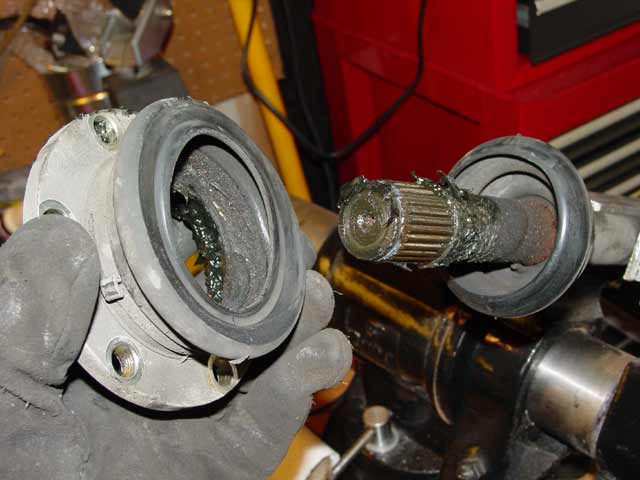
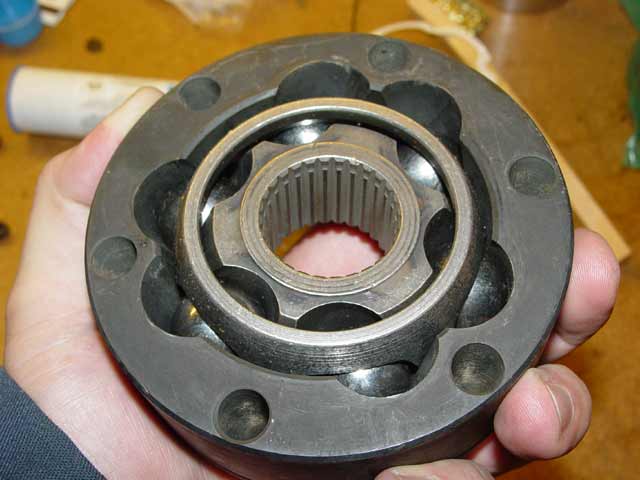
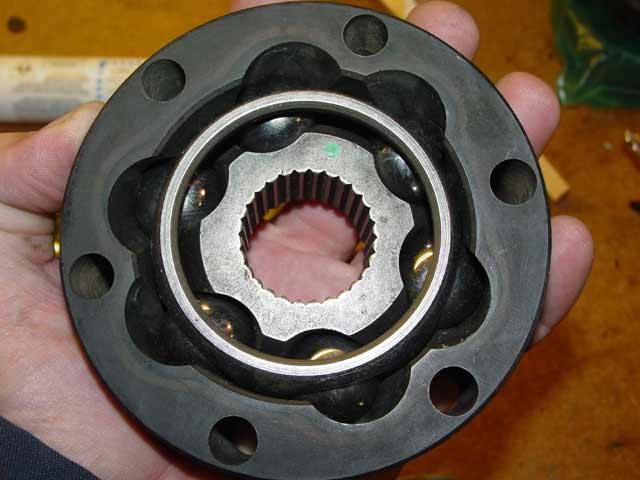
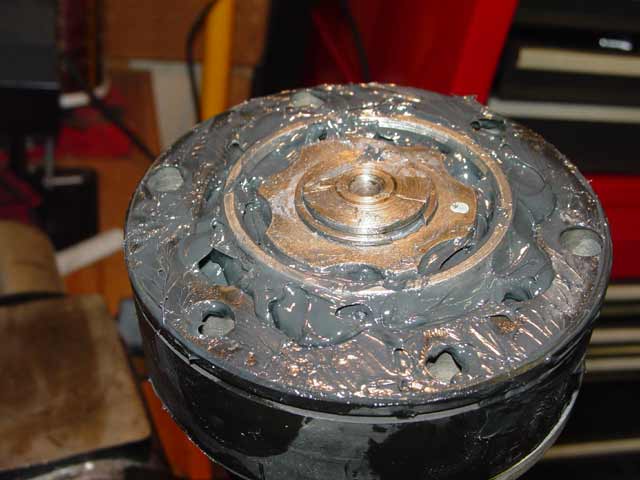
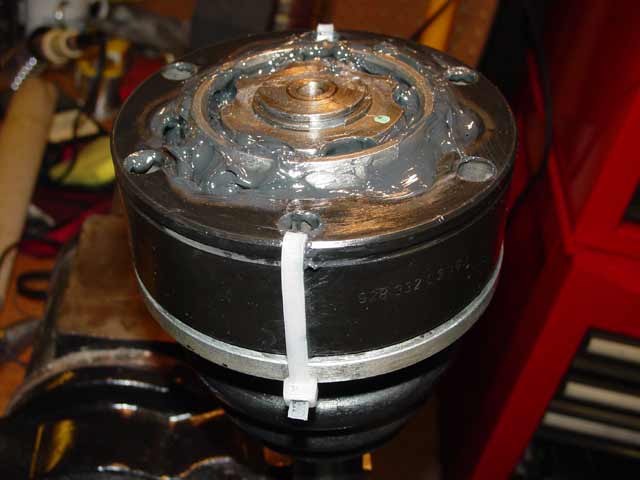
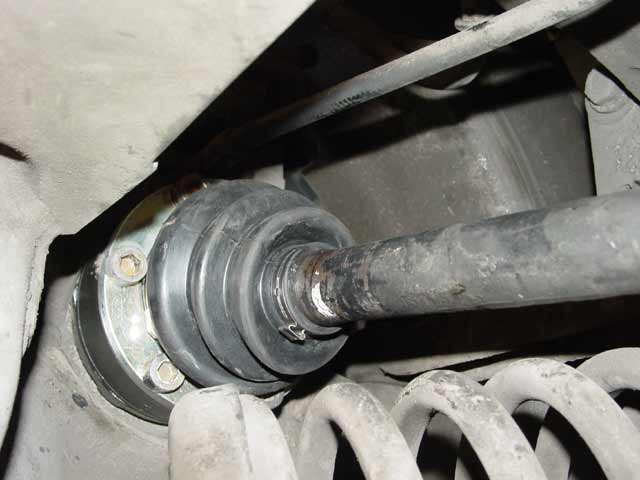
So anyway, after an early Saturday 60-mile round trip, with the correct boots in hand I proceeded to tear down the halfshaft. Here is what the ends looked like on initial, casual inspection:

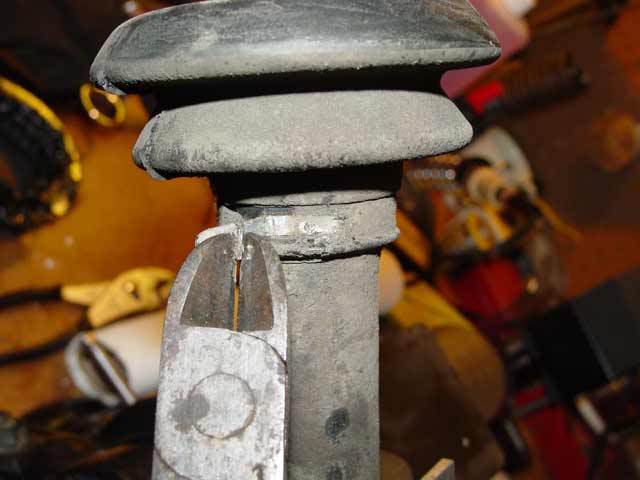
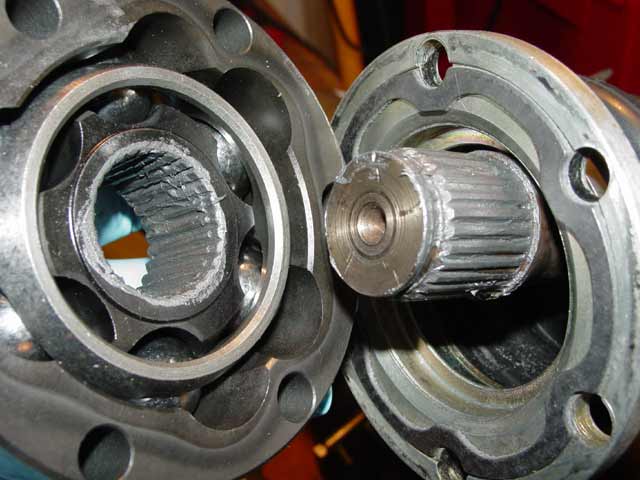
The first step of disassembly is to remove the snap ring that holds the joint on the shaft:

After removing the snap ring, the bearing/joint slides off. One of them came off easily with a couple of light taps from a dead-blow:
The other one required a bit more persuasion. This puller was way overkill; the joint came off very easily with the puller... In retrospect I think I could have pounded it off but I just felt better about doing it this way:

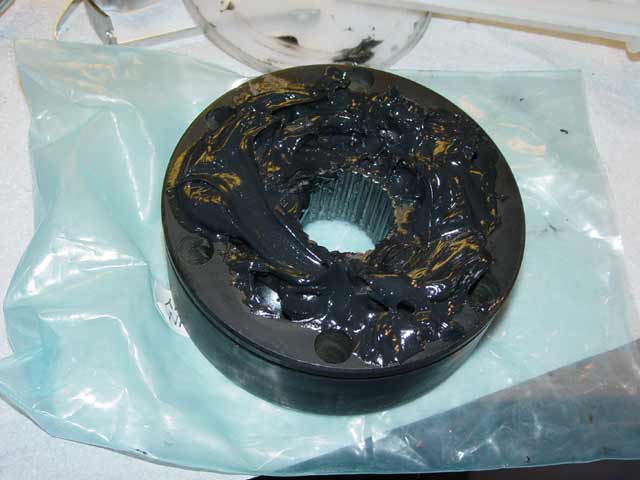
At this point half of the boot came right off because it was toast. The other half came off with an easy tug after I removed the smaller boot clamp:
At this point I had it down to the bare shaft; I gave it a quick wipe and repeated the above steps on the other end.
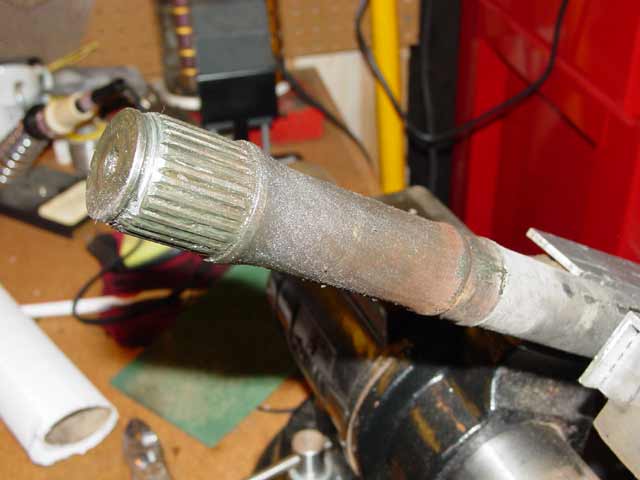
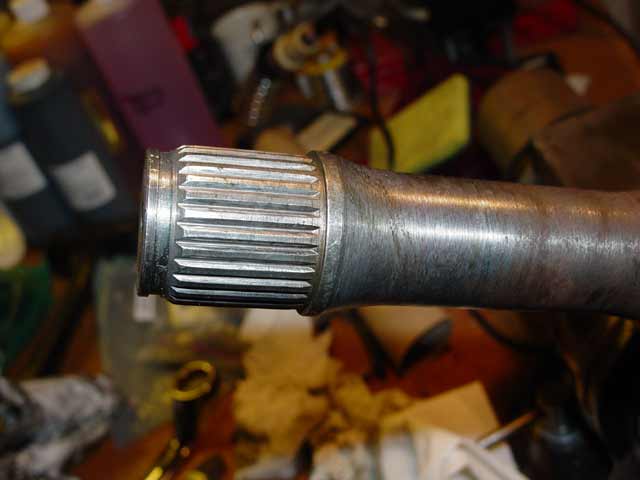
After removing the parts from both ends, I cleaned the shaft within an inch of its life. It's not obvious in this pic but I cleaned it to bare metal all the way to where the small end of the boot clamps on. Simple green, a small wire brush, and gentle use of a dental scraper were all that was required to make it look like this on both ends:
I scraped off the old gaskets from the flanges, wiped up all the grease and misc. crap as best I could and cleaned them in Simple Green. Be careful not to put any gouges or burrs in any surfaces while doing this, and watch your fingers!
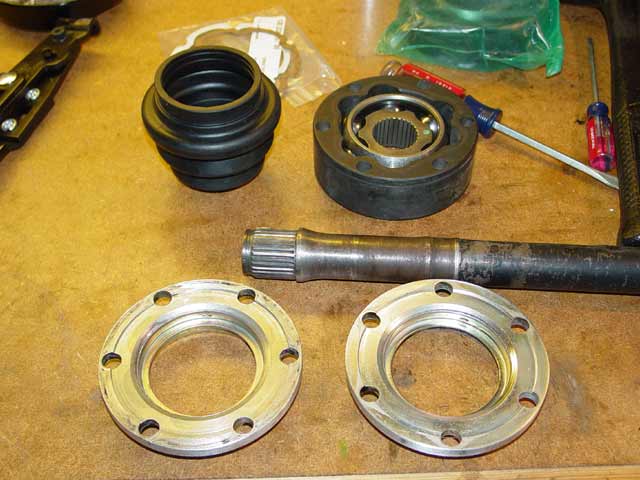
Here is a quick shot of the shaft and flanges after cleaning, and the new parts for one end of the shaft. The flanges have some discoloration on the face; they may look a bit dirty around the edges but that stuff is all below the surface in the low points between the machining marks. I cleaned all residue from the inner step where the gasket adheres using denatured alcohol so they should be fine:
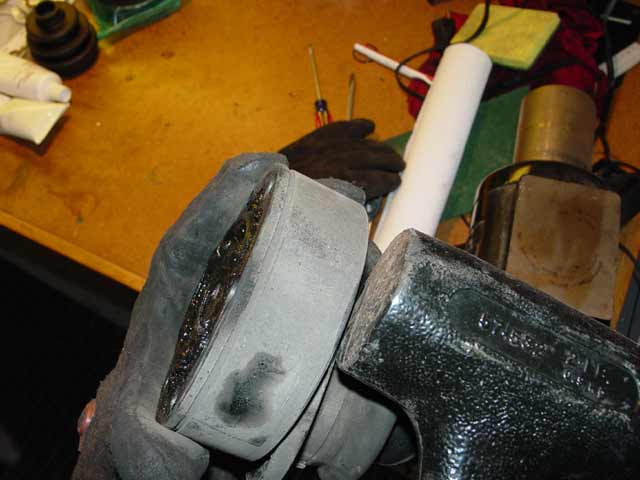
Next I put the flange gaskets in place. You may want to carefully consider how you proceed at this point. In my case, I happen to have a bench vise that can grip a flange like this without marking it up. If you don't have a good way to hold the flange while you wrestle the boot onto it, you may want to apply the gasket after you install the boot, because otherwise you may peel the gasket off while wrestling. I chose to install the gaskets at an earlier stage, because peel-off adhesives of this nature typically take a little while to "set". When you first peel off the backing, the adhesive is exposed to oxygen and a reaction takes place. When you first apply the gasket, it will stick, but the bond strength increases over time. I wanted to give them the maximum possible amount of time to set before assembly. Probably not at all critical, but it made me feel better. I would hate to have the gasket move around after I had everything covered in grease, and have to disassemble, clean, etc.
 Anyway, Install the gasket by first lining it up with one hole on the flange, then line up the opposite hole, then work the rest of the gasket into position:
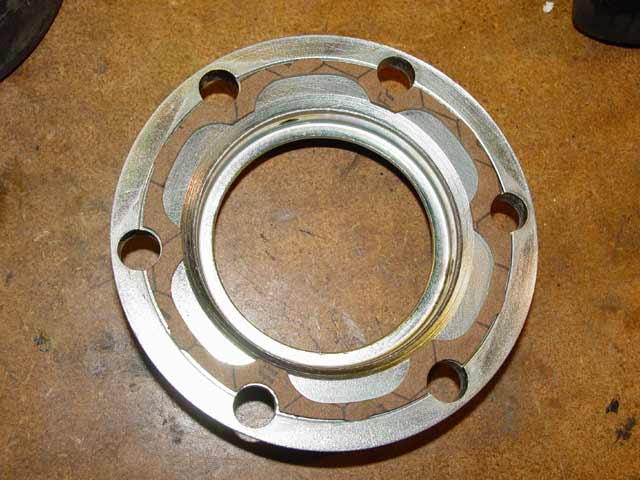
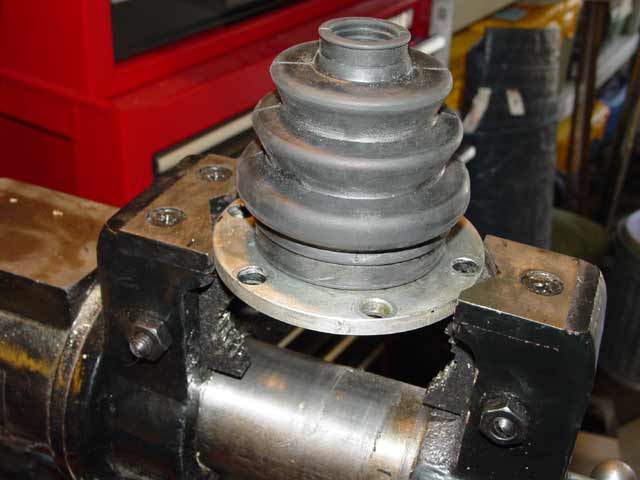
So, the boots take a bit of wrestling to get them on to the flange. I used my trusty mini-flatbar combined with copious amounts of cussing. Pictured below that, a flange with the boot on. Note how I have positioned the special flange-holding jaws of the vise so that I am not clamping near a bolt hole. If I were to rotate the flange slightly and clamp down, I could easily deform a bolt hole. BTW this vise was something like $75 at Harbor Freight. It's not the highest quality, but I have found it to be extremely versatile. As you look through my pages here you will see that it has many useful features.

To clamp the boots in place, I decided to forego the use of the "hose clamp" type of clamp, and elected instead to use one-use bands, pictured below with the tool needed to install them. I doubt that the hose clamps would ever loosen or affect the balance of the system... I just felt more comfortable doing it this way.
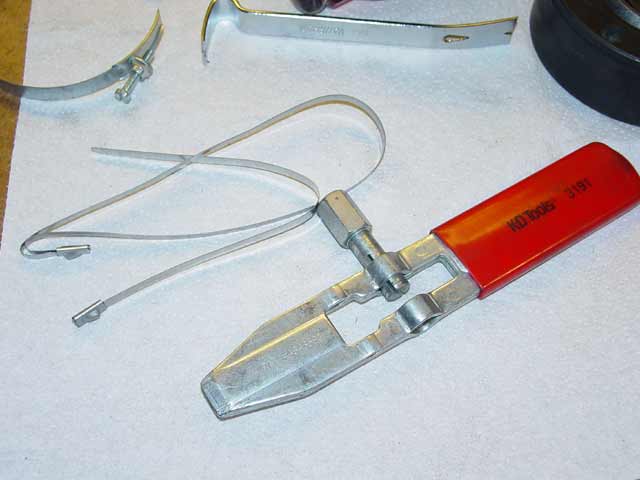
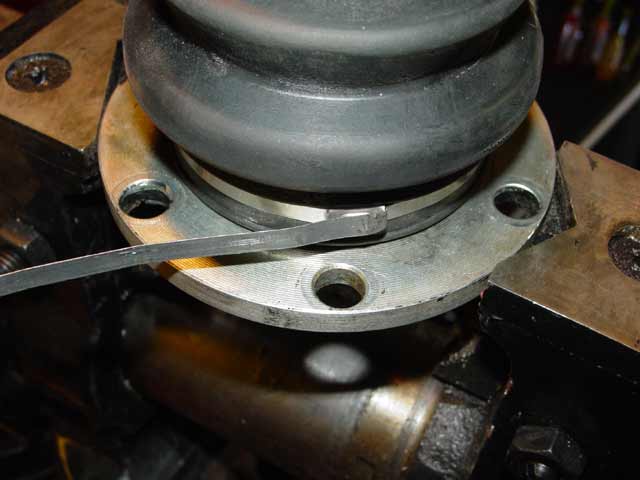
To assemble, position the band and place the free end of the band in the tool. The free end goes through a slot in the nose of the tool, then through a slot in the tensioner. Once you begin turning the tensioner, it bends the end of the band around and begins taking up the slack. Very simple concept; nothing at all fancy about it. Oh, the bulge in the little fitting at the nose of the tool is a ramp-shaped pocket with a ball bearing that allows the band to move through the fitting in one direction but not the other, the idea being that it should prevent the band from loosening. Don't play with it, don't pull the band through this fitting until you have it in position or you'll be sorry!
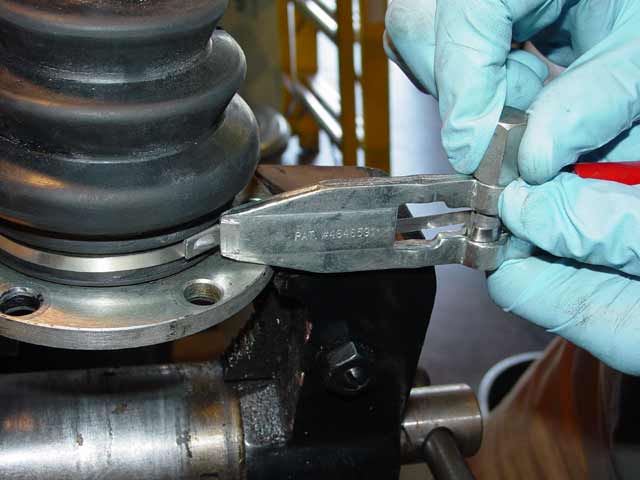
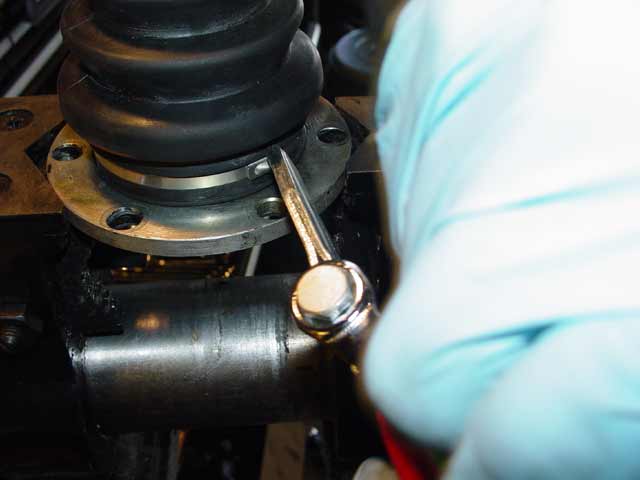
Using a wrench, tighten up the band. It should compress the rubber boot all the way around; you should see it sink into the surface of the rubber. Don't get carried away here; you want it tight enough to hold the rubber securely in place, but not so tight that it cuts into the boot or snaps the band. Once you have enough tension, move the whole tool around to bend the strap. You may have to release tension just a hair as you swing the tool around, otherwise doing this will further tighten the band. Again, tight but not too tight!
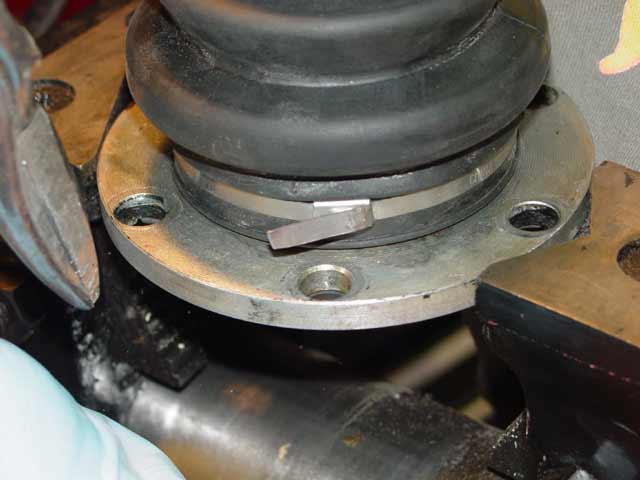
Once you have the band bent around 180� you can remove the tool. The band will hold itself in place:
At this point you want to cut it off:
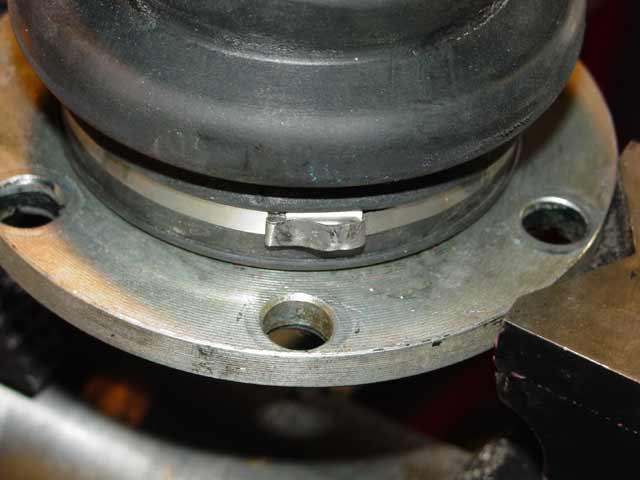
And fold the end back through the fitting, tapping it into place. This ensures that you are not relying entirely on the ball-ramp mentioned above, and if done properly it should never come loose:
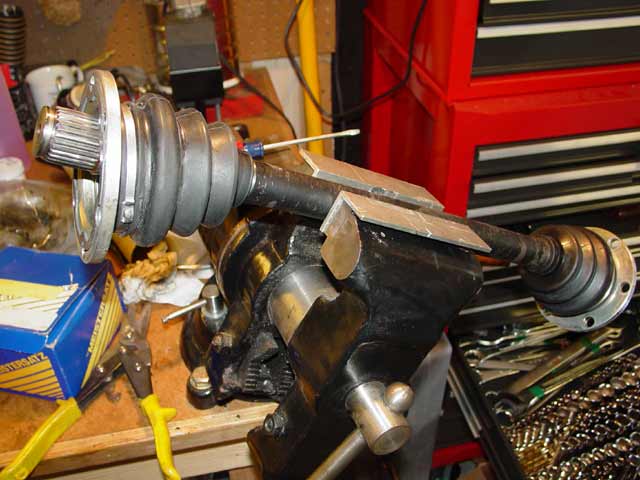
Repeat the above steps for the other boot and slide them over the ends of the shaft. Don't put the smaller bands on the boots yet, because you may have to rotate the boots to line the holes up properly with the holes in the bearing. Here is the shaft ready for the next step. I found it very handy to be able to tip the shaft this way while keeping it firmly gripped in the vise:
The bearings I put in were brand new Lobro units. The next two pictures show the side that faces the shaft(top pic) and the side that faces the snapring(bottom pic). You can tell at a glance which end is which by looking at the outside of the bearing. There is a groove around the circumference that must be positioned away from the shaft. I will mention this groove again later where it is visible in a picture. The puzzling thing about this was the green paint dot. I asked about this on the Rennlist 928 forum and received no answer. My best guess is that the dot indicates which end of the bearing is "heavy", like the paint dots on the double-disc clutch, so I put the bearings on the shaft with the paint dots 180� offset from one another.
OK, time for a product plug. Anti-Sieze... don't turn a wrench without it.
If you have experience with it you can skip this paragraph; you won't need convincing. It's basically graphite in high-temp grease. The packaging states that it is for service from -65�F to 2000�F intermittent, which is more than can be said for most of the parts it is used on. I use it on all straight-threaded fasteners, all tapered-fit shafts(like the 928 PS pulley, ball joints, etc), and any close-fit keyed shafts like the 928 crank pulley. There are many reasons for this. Bolts should be lubricated to torque them properly. If a bolt snaps, you will have a much easier time getting it out if it was installed with Anti-Sieze, especially if it snaps years down the road. I've pulled crank pulleys that required heroic efforts to remove at first... then I reassembled with Anti-Seize. 10 years later, the same pulley came off with just a light tap of a deadblow hammer. OK, OK, I better shut up because I just can't say enough good things about this product. So prior to installing the joints, I put a very thin coat of anti-seize on the splines on the shaft, and slightly more on the splines inside the joint. This way, most of the excess will come out the top of the bearing where I can just wipe it up when I install it, rather than down into the boot.
Sharp-eyed readers may notice that the joint was dry in the above pic. That's because I put the Anti-Seize on before the grease. I knew I wouldn't be able to keep the two completely separate, but at least this way the goop closest to the metal is Anti-Seize. :) Below is a picture of the joint with the first glop of grease put on(you can still see one of the balls). The idea here is to completely fill the bearing area with grease, and it gets pretty messy trying to work the grease in and the air pockets out. Ideally, you don't want any air pockets in there. I highly recommend a pair of nitrile gloves for this.
I put grease in the boot, perhaps about half full. I asked the board about this as well, and had mixed responses. Probably the most crucial issue brought up was that there must be an air space in the boot to allow for expansion as temps rise. Everyone agreed on the obvious, that the joint itself must be packed completely. But as for grease in the boot, I've heard everything from "There should be no air space in the boot, fill it with grease" to "there should be grease only in the joint, not in the boot". I decided to rely on what I've seen myself. I haven't really worked with CV joints much before I got this car. The couple of CV joints I've changed on other cars in the past were "ready to install" and were just slapped in with some Anti-Seize. But when I was shopping for the used halfshaft that I installed in Round 3 - Borla and Halfshafts the only shaft that was tight was loaded up with grease. The boot was packed. In the process of finding it, I must have pawed through 20 or more different halfshafts at PartsHeaven and without exception all of the joints that appeared to just have the waxy grease on the joint only were toast. In general the ones that had lots of grease packed in the boot were in better shape. So I went with lots of grease but took the precaution of leaving a decent sized air pocket.

So now the joint goes on the shaft, and the new snap ring that came with the kit is installed:
Then the flange is aligned with the mounting holes in the bearing, and secured through two holes with tie-wraps. This makes installation cleaner and easier... just be sure to put the heads of the tie-wraps out near the flanges so you can grab onto them later!
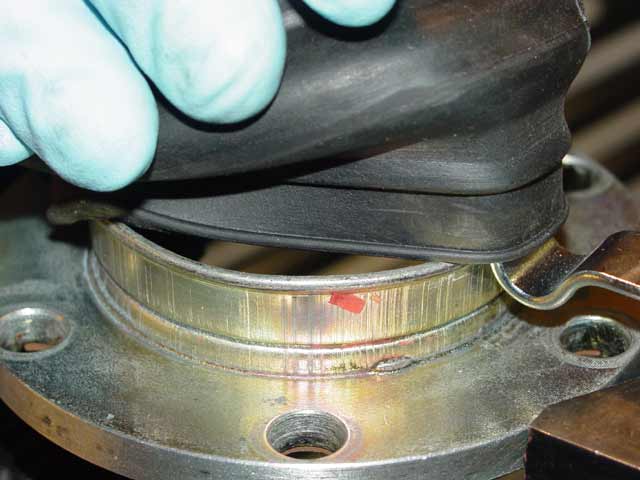
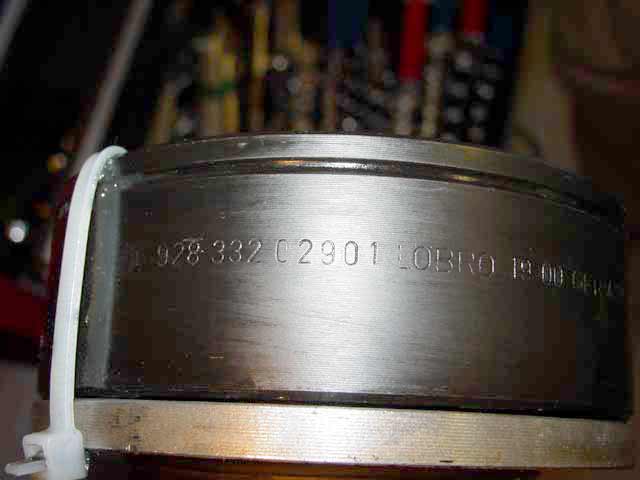
Here you can see the Lobro part number: 928.332.029.01. I said before that I would mention the groove that runs around the circumference of the bearing. It's been visible in the last couple of pics, but here it is again. Remember, the groove goes opposite the flange!
Now, with everything lined up, it's time to get the 2 minutes of use out of the $30 band crimping tool(first two pics).
 After double-checking the alignment of the flange and bearing(it was off a couple of mm, and I didn't want any bias on the boot) I put the band on. This type of band is first snapped into place as tight as you can get it by hand, then the crimping tool is used to crimp it down to the final tightness. As you can see the tool pulls the band in from the sides then presses down on the crimp to flatten it, all in the same motion.
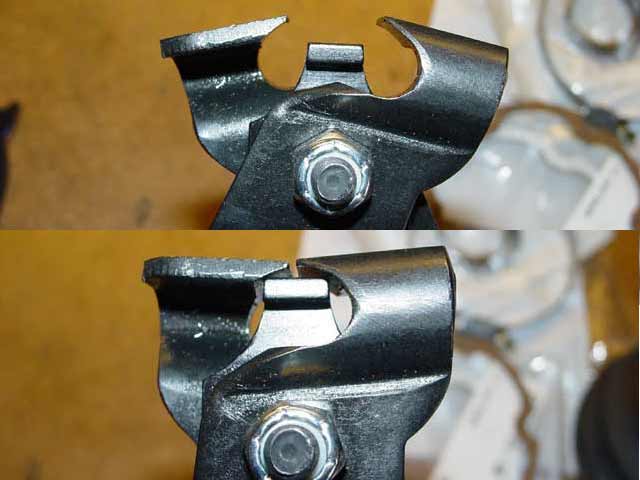
I cleaned up the bolts and picked out 8 undamaged bolts. I coated the threads with Anti-Seize and put them in the holes that didn't have the tie-wraps. One of the other bolts had a big owie on it as if it had been hit with a hammer at about a 45 degree angle and two of them had been damaged inside the hex portion from improper bit size and/or insertion in the past.
 Remember, this assembly came from the other side of the same car. No worries, there's 12 more bolts on the halfshaft I'm replacing and I'll surely have a complete set of good ones. With that I was done for the night. It was early, around 6pm, and I could have finished that evening if pressed, but I wasn't pressed so it was beer and pizza time. I would get an early start on Sunday and finish up.
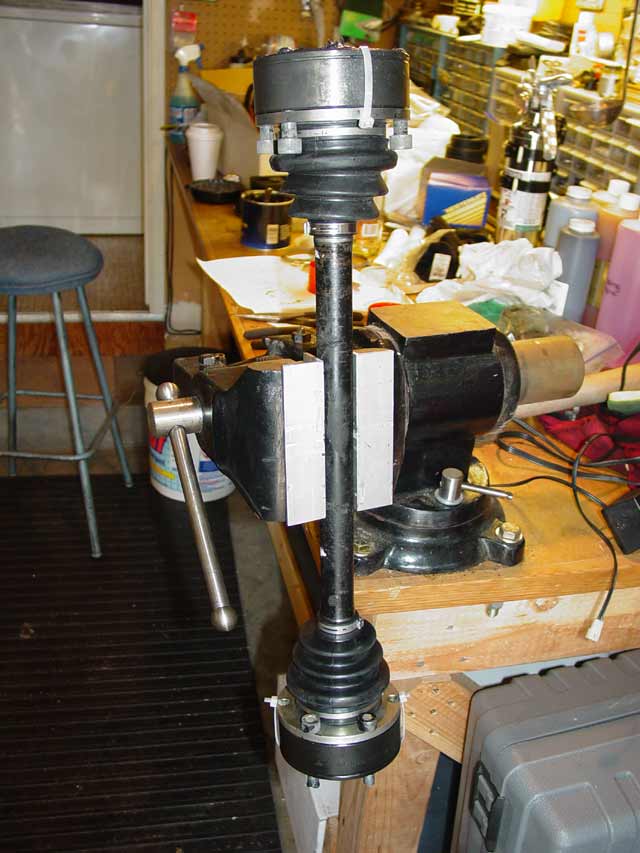
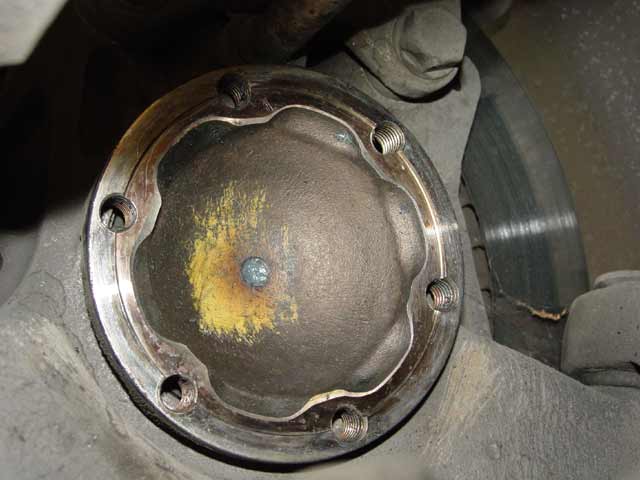
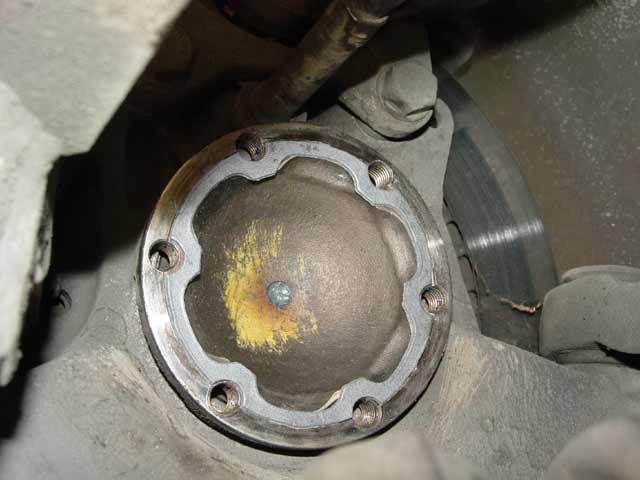
The next morning I had the shark "assume the position" on ramps and went about pulling the passenger side halfshaft. Immediately after I pulled it out I selected the bolts I would need for the replacement halfshaft and started them soaking in Simple Green. I then cleaned the flanges, first with a scraper to get the gaskets and gobs of crud out, then a rag, then some scraping on the gasket surfaces, then a clean rag with carb cleaner, then a clean paper towel with denatured alcohol. You know, I have a lot of faith in Porsche quality... but see, they aren't above using a part that's clearly not correct. In this case I can see that it doesn't really make a difference, it seems that the boss ended up wider than it needed to be and they must have indexed the drilling machine off of one side of the boss. I'll live with it though. What the hell am I rambling about? Look at the second pic below, how the holes are drilled relative to the bosses they are supposed to be centered in.

So then I put the gaskets in, same procedure as above for the boot flanges, and let them "set" while I went about scrubbing the other 4 bolts I planned to use and putting a coat of Anti-Seize on each.
Next I put the halfshaft in place, putting an extra big handful of grease on the hub end of the joint and starting 2 bolts on the hub flange since the trans end had lots of room to swing, then I did the same on the trans end. BTW on this car it doesn't matter which end is which, I only refer to trans or hub end for reference as to the sequence of events. Anyway, on each end, I snugged all 4 bolts down finger tight, snipped and yanked the tie wraps, then put in the last 2 bolts finger tight. Then I tightened all 12 bolts "kinda tight" with a short ratchet, and came back with a torque wrench and torqued them all evenly(star pattern) to 60 ft/lbs. While I was under there I re-checked the torque on the other side... it hadn't moved. Turns out I finished the job with about 7 or 8 perfect bolts left over.
The car already drove smoother after doing one halfshaft. After doing the second one it was amazing how much quieter and smoother the car is! So, chalk up another round for Dave...
