|
The Continuing Porsche Saga:
Putting It On The Road |
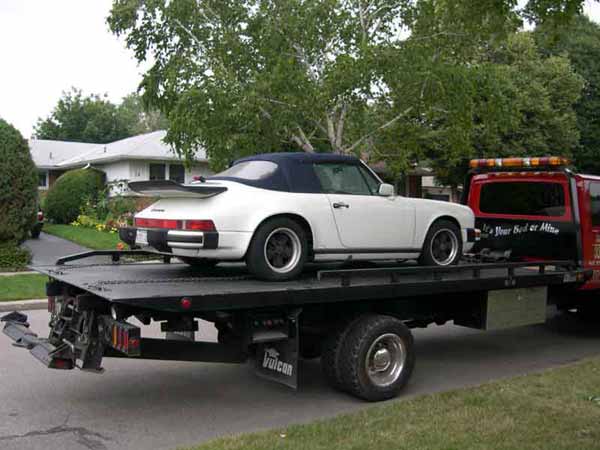
| Yes, it is now a US refugee that has taken
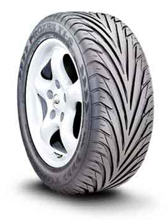
up permanent residence in Canada. One month in & I still ain't driving. _____ The PPI in Florida revealed brakes & tires were needed immediately. Faced with 15" Fuchs rims, I decided to keep them & buy a really good 15" tire. The 'Ultra Performance' Toyo Proxes T1-S got the nod on the recommendation of all who have tried them. Sticky & aggressive they are a slight departure from the widely used (and more expensive) Bridgestone's. Toyo is not sold by TireRack, so it seems to be ignored by many. I have noticed on the forums that guys read the TireRack reviews as if they were chiseled in stone on some monument. Thou shalt buy . . . Hello! Guys! TireRack is a retailer & if they don't sell it it doesn't exist. Over the cliff the lemmings go again. Anyway, the Ti-S is noted to be a great dry tire & an exceptional wet tire. The cheaper Yokohama ES100's were in the running but were out of stock in Canada with no delivery date. So Toyo's were mounted. Pretty cool lookin' tires, right? _____
Meanwhile, the car went up on jack stands in my 1 car garage for the fixes. It is tight, but manageable. A Bentley & Wayne Dempsey's 101 Projects in hand, I began. I installed the rotors & pads. The 1st rotor took a day with numerous Pelican searches along the way: "What the hell do I do with this? How do I get this damn thing off?" The 2nd took 3 hours, the rears were an hour each. I was getting better . . . The hard part here is getting the dust caps off the front wheels. I have read many funny methods people have used to accomplish this task. I whacked at it, wrenched it etc etc & nothing worked until I found 'The Method' in a Pelican post. 2 claw hammers (or one claw & a mallet). Working from the top, put the claw part on the cap seam. Tap the head with the other hammer. Work your way around the cap. Pretty simple, wasn't it? I wasted most of a day on this one. I skipped the bump steer kit for the time being. Maybe in the spring, once I settle on a ride height. The front chin spoiler was an easy & satisfying install. I used Wayne's suggestions & various Pelican posts as a guide. The bar that protects the front AC condenser was my own mild problem but it came off & went back on to facilitate the install. Now the car is spoiler 'correct'. Just to explain, I have not really worked
on a car in 30 years, so I was going to relearn it all along the
way. Kind of like riding a bicycle, you know, you never
forget. This was going 1/2 the fun of owning the car. |
|
The Wallet Vacuum Begins |
|||
|
The Fixes as Identified by the PPI |
|||
|
Front chin spoiler |
$245.00 | 1 | $245.00 |
| Hardware Mounting Kit for above | $65.00 | 1 | $65.00 |
| Front Brake Rotor (sold per each), 911 Carrera (1984-89) | $67.50 | 2 | $135.00 |
| Rear Brake Rotor (sold per each), 911 Carrera (1984-89) | $78.50 | 2 | $157.00 |
| OEM Front Brake Pad Set, 911 Carrera (1984-89) | 69.06 | 1 | 69.06 |
| OEM Rear Brake Pad Set, 911 Carrera (1984-89) | $48.25 | 1 | $48.25 |
| Bentley Repair Manual | $89.75 | 1 | $89.75 |
| Hubcap | $24.50 | 1 | $24.50 |
| Bump Steer Kit | $13.45 | 1 | $13.45 |
| 205/55-15 Toyo Proxes T1-S Front Tires | $165.64 | 2 | $331.28 |
| 225/50-15 Toyo Proxes T1-S Rear Tires | $181.58 | 2 | $363.17 |
| Ontario Safety check: Required to plate it. | $69.55 | 1 | $69.55 |
So, with new tires, rotors & pads, I made my way to GTEK - a Porsche specialist (4 Porsches out front 964, 993, 996 & 944 + a Ferrari) that was recommended by a PCA member. Ontario requires a rudimentary Safety Check & Clean Air Certificate for all used cars before they will plate it. All basic stuff that I thought I was ready for. Well, maybe not.
The safety failed because the window washer was non-functional, as was
the defroster. Hmmmm. I guess they never drove it in the
rain. And in Florida - its last address - they never needed the
defroster. The PPI wrench missed these. And I never checked
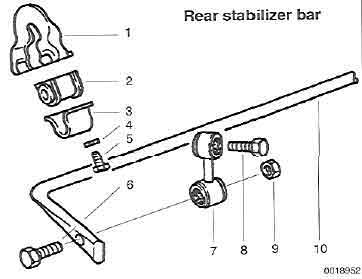
them. The rear sway
brackets were also broken (maybe in transit as it bounced up to Canada?).
The front wheel bearings were suspect. Of course, I had no idea
how much to tighten the bearings after the outer ones came off
(unexpectedly) as I was doing the rotor work. But I only drove it
around the block & to the wrench. Another Hmmmm. |
|
|
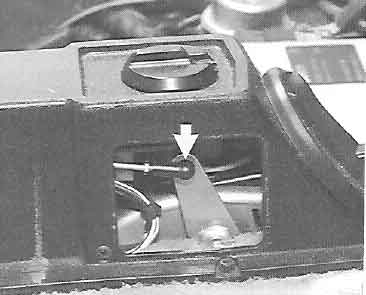
| Back to work . . . The defroster first. So I took out the passenger seat & tore the auto heat control down. The pesky servo control rod ends were the culprit & a really cheap fix. Porsche has released a new one without the silly lock tab that breaks instantly when you touch it. The new one just clips on (see arrow in illustration below). The balls are attached to both ends of the rod. As you adjust the Auto Control, it engages a servo motor which pushes the rod which opens the flaps in the heat exchanger to let out heated air. Simple enough & an easy fix. Gave me a chance to clean the center console properly too. Now, the defroster works! Well, maybe. It works, but without the aid of the foot well blowers. More on that later. _____
The window washers were harder because it
took me a day just to figure out the system & run some tests.
German ingenuity run amuck. Of course, nothing compared to the
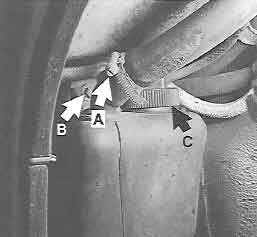
heating system. But I digress. The washer fluid pickup tube was off inside the reservoir
& the L check valve on the passenger side was clogged. The
valve was easy (I did the T too), but the pickup tube had to be fabbed.
On my car, the reservoir (below) is impossible to remove without taking off the front
valence. The bolt on the strap is buried & inaccessible.
So I tie-wrapped a pickup tube I fashioned to get the washer working.
It attaches to the inside of the reservoir cap
Another surprise was the number of light bulbs
that were dead. The interior trunk light wires must have been disconnected
when the lid was resprayed & I decided not to touch that at this
point. Yes, as I looked around, it was becoming evident that this
car needed some love. The car was at a turning point. Fix or
decay. I am going to rescue it. Never concourse (I am no
where near that anal) but really, really nice. And on a non-mechanical note: surprise,
surprise, idiot me went to get a temporary permit to drive it around
& I realized that the woman's husband (the original owner) was still
on the title. I missed this biggie in the shipping/customs
shuffle. The Ministry balked & said I needed his signature or
documents saying she was his executor if he was dead. I suspected
dead but she had never volunteered this info. I thought as a last
resort, I would forge his signature. He was dead, right? A couple of frantic
phone calls & the title was off to New York. He was very much
alive & quite agreeable to sign. He gave the car to her to use
at their (now her) Florida condo. They are amicably divorced.
Breathe major sigh of relief here. |
|
The Surprises |
|||
| Ball Sockets for Heater Servo Control Rod | $1.96 | 2 | $3.92 |
| Bulb - Backup | $4.59 | 1 | $4.59 |
| Bulb - Running Light | $2.30 | 2 | $4.60 |
| Bulb - Interior | $2.30 | 2 | $4.60 |
| Window washer L Check valve | $6.48 | 1 | $6.48 |
| Window washer T Check valve | $10.20 | 1 | $10.20 |
|
|
Now it was off to the local P-car
friendly garage again for the rear
sway brackets, front bearing adjust & the final safety check.
Well, this turned into a little
money pit. $1100 & a day late I picked it up with fixed rear
sway & new front wheel bearings. Yes, the bearings were toasted.
And they were a bitch to get off (so says the wrench as he hands me a
big ass bill). Now I know why I decided to do as much of the
service as possible. Well, no one said they were cheap cars . . . |
|
The Wallet Vacuum Continues |
|||
|
Front wheel bearings, Rear Sway Bar Brackets, labor, safety check |
$1141.00 |
1 |
$1141.00 |
|
|