HOW TO CHANGE TIE RODS
I had been experiencing some disturbing "float" in the suspension every time I hit a bump in the road.
With each bump, the car would shake. I lifted the front end of the car and placed my hands at the 3 and 9 o'clock
positions. There was noticeable movement in the wheel, indicating that my tie rods needed replacing. Sorry for some
of the text in the pictures being hard to read.
1. Block the back wheels so the car won't roll.
2. Loosen the lug nuts on the front wheels.
3. Lift the front end of the car high enough to give ample room to turn wrenches.
4. Place jackstands to hold the car in place.
5. Remove the front wheels.
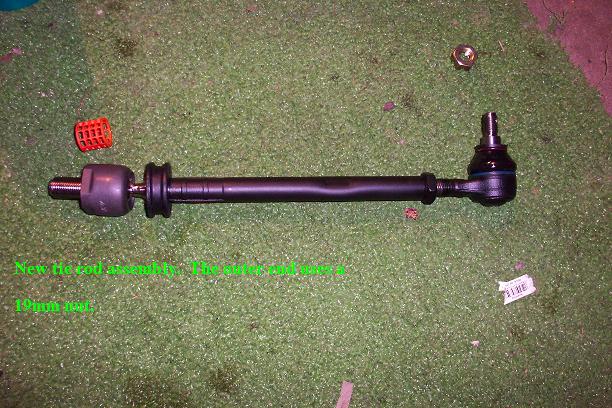
6. Locate the tie rod end (pictured). Remove the 19mm nut holding it in place.

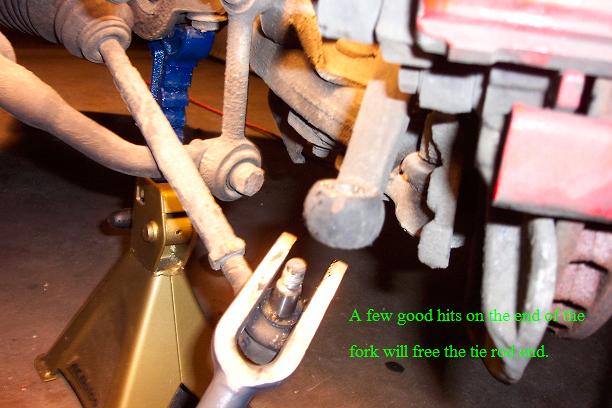
7. Using a ball joint remover (fork), knock the tie rod end out.
8. Get under the car and pull back the rubber boot covering the inner end.
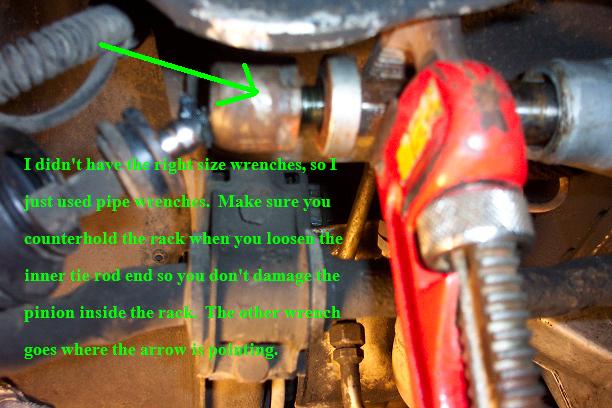
9. I used two pipe wrenches to remove the inner end. Make sure to counter hold the rack.
10. Once the inner end is loose, remove the tie rod assembly.
11. Count the threads exposed on the old tie rod outer end.

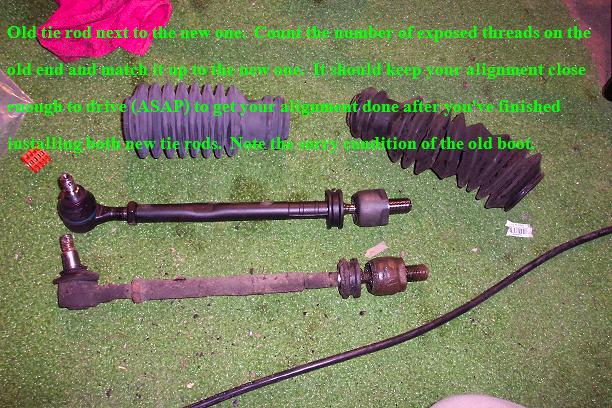
12. Adjust the new tie rod end so that it shows the same number of threads. Tighten the lock nut.
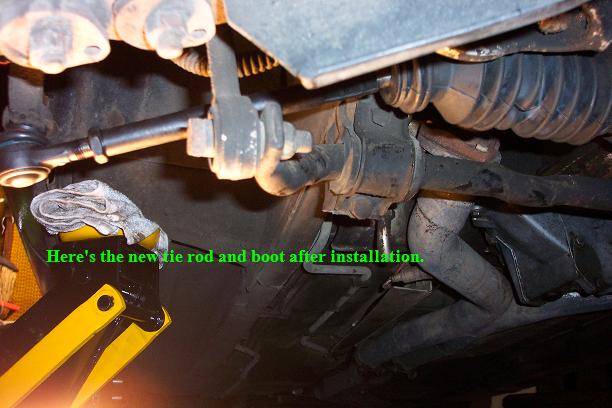
13. Install the new rubber boot over the out end so it's ready to be pulled into place later.
14. Screw the outer end of the tie rod into the rack.
15. Tighten the inner end while counter holding the rack. Check the WSM, but I believe it's over 100 ft/lbs of torque!
16. Slip the outer end's bolt in and tighten it down with the new 19mm nut.
17. Slide the rubber boot over the inner end. It can be tough, so vice grips may help. DON'T TEAR IT!
18. Put the wheel back on.
19. Repeat steps 6-18 for the other side.
20. Remove the jackstands and lower the car.
21. Torque down the lug nuts on the wheels.
22. GET YOUR CAR ALIGNED ASAP!!! You'll destroy your tires quickly if you don't!
23. Pat yourself on the back....You're done!