Rebuilding Fuel Lines
The last year that 928s were sold was 1995, so the youngest (as of 2008) 928 on the road is at least 13 years old, and some are now 30 years
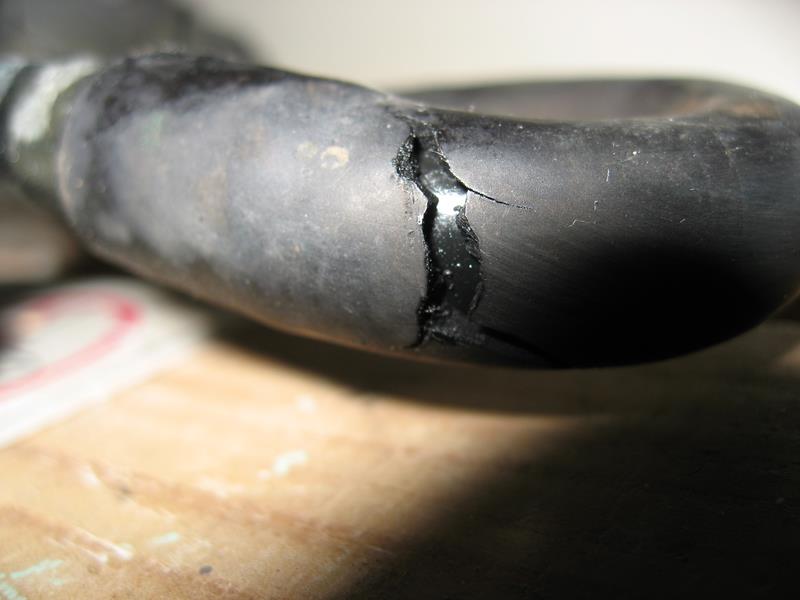
old. Over time, the rubber fuel lines will inevitably deteriorate, become brittle and crack. Leaking fuel lines are a disaster waiting to happen.

Do the fuel lines in your 928 look like this?
It's a good idea for everyone with a 928 to consider rebuilding their fuel lines. It's an easy job, especially since you
can purchase a complete kit from 928s-R-Us for an excellent price.
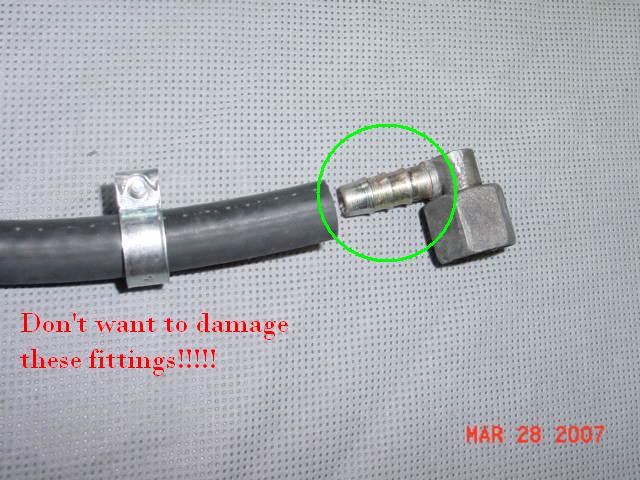
Here are all of the under-hood lines that should be replaced (in red). Note that for my model year (1985) I needed to use the
original clamps instead of those provided in the kit for the connections circled in green. The new clamps were slightly too large. The kit has since been updated, so be
sure to tell Roger at 928s-R-Us if you have an '85 or '86 model to get the right sizes. Note that line #6 comes in the kit complete. No need to rebuild that one.

1. With the car running, pull the fuel pump relay or fuse. This will de-pressurize the fuel system. To find out where each model year's
relay and fuse is locate, look HERE.
2. Turn the car off and disconnect the battery (you don't want a spark with while working with fuel).
3. Remove air intake tubes, airbox and the mass airflow meter (MAF) to provide access to the side and rear fuel lines.
4. Begin removing the fuel lines. Be sure to counterhold the lines with a wrench on each side of the fittings so you don't bend the metal portions
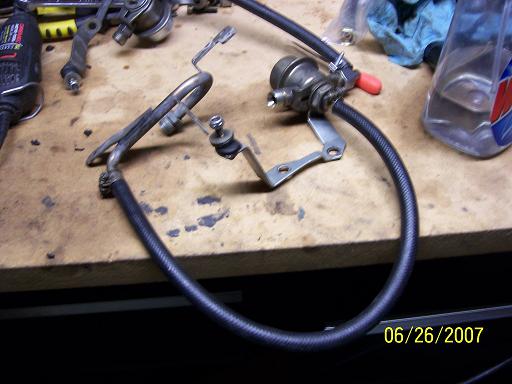
of the fuel lines. Here's a picture of the lines beneath the airbox. It's easiest to work with the lines on a bench.
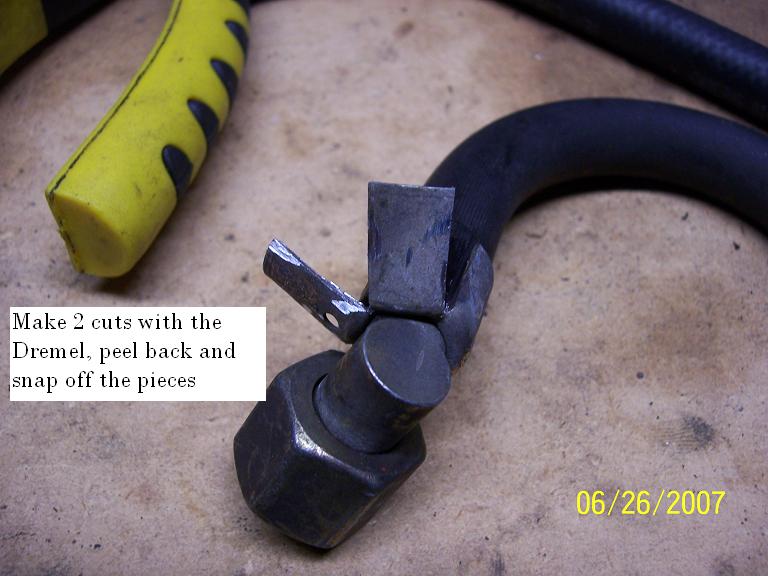
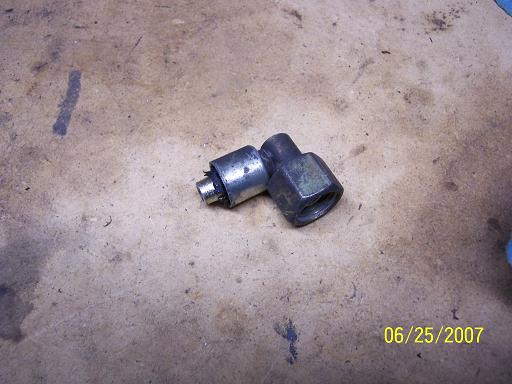
5. You'll need to use the existing fittings for the connections that don't use a clamp (although you'll use clamps to rebuild them). The best way to remove these fittings is with a cutting wheel on a Dremel.
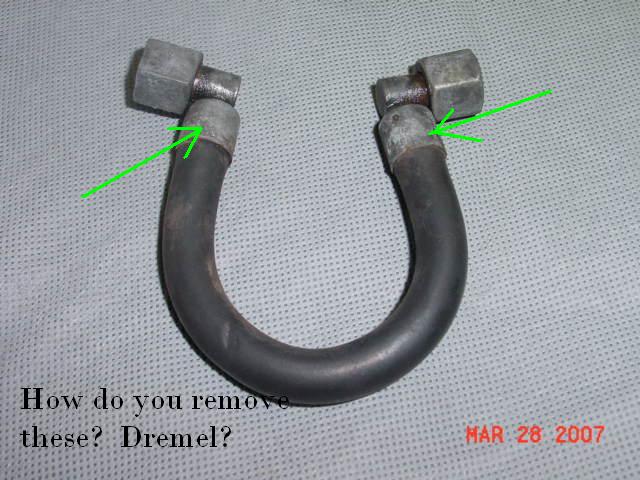
6. You can cut multiple slits in the fittings and then bend them back to expose the rubber hose underneath. Note that the fule lines have 2 layers. The inside layer is becomes hard and brittle over time.
7. With the metal pieces removed, use a razor or sharp knife to slit the end of the hose. This can be difficult, but you need to expose the hard line inside the hose.
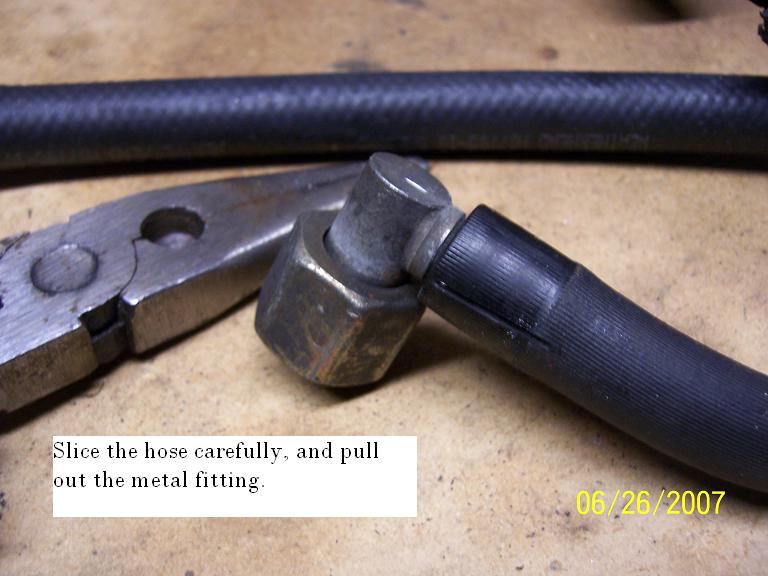
You can cut the fitting off this way, but it makes removing the out cover a bit more difficult to remove since you have less to hold onto.
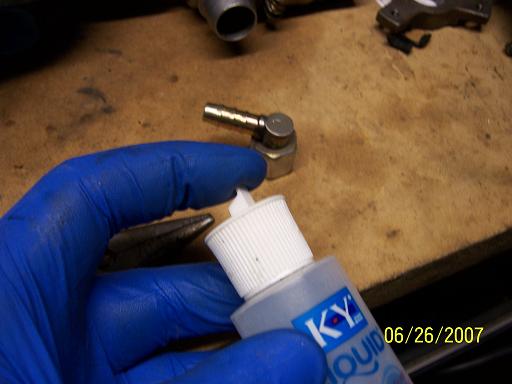
8. Lubricate the metal fitting so that it will slide into the new hose easily. No, you don't HAVE to use KY.
9. Take the old hose and lay it along side the hose that comes with the kit. Cut a length of hose equal to the one you're removing. It's important to use the same length since Roger's kit doesn't provide much extra length and you don't want to run out before you're done rebuilding!
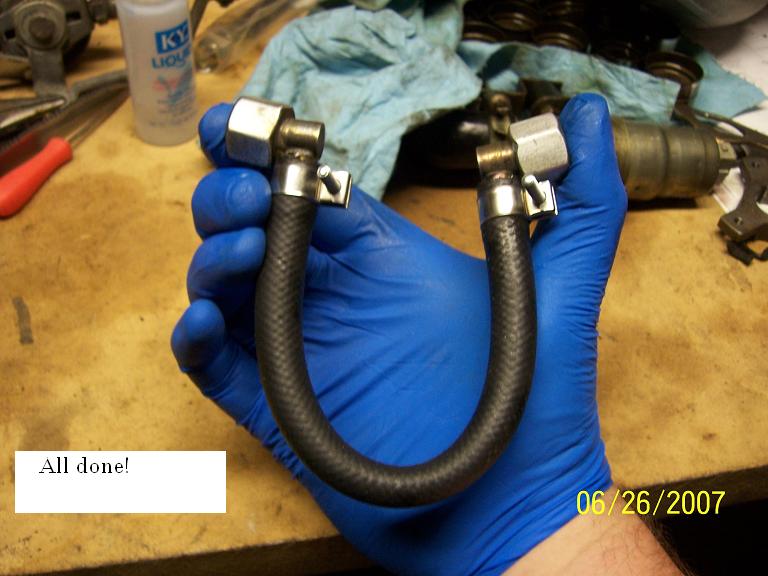
10. Put a new clamp on the new hose and slide the hose onto the old fitting. Push the clamp over the fitting and tighten it.
11. Repeat on the other side of the hose and you're done.